
If you've ever followed an air fryer chickpea recipe to the letter and ended up with chewy, unevenly cooked beans instead of the crunchy snack you were promised, you're not alone. The difference between soggy and crispy almost always comes down to one step that most recipes gloss over: how thoroughly you dry the chickpeas before they hit the basket. Get that right, and you'll have a genuinely addictive high-protein snack in under 20 minutes.
In our research across aggregate user reviews and manufacturer guidelines, the most consistent complaint is that chickpeas turn out soft rather than crunchy. The fix is simple, and it starts before you even turn the machine on. Here's exactly how to nail it every time.
Image source: Bing (Web (fair-use with source credit))
Quick Answer
A good chickpeas in air fryer recipe starts with thoroughly dried canned chickpeas. Toss them with one to two teaspoons of oil and your seasonings. Air fry at 375°F to 400°F for 12 to 20 minutes, shaking the basket every five minutes.
The key to crispiness is removing as much surface moisture as possible before cooking.
Why Your Air Fryer Chickpeas Aren't Getting Crispy (And How to Fix It)
The number one reason air fryer chickpeas fail to crisp is excess moisture on the surface. Canned chickpeas come packed in liquid, and even after rinsing, they hold a thin film of water that steams rather than roasts when heated. That steam is the enemy of crunch.
The solution is straightforward. Drain and rinse your canned chickpeas in a colander, then spread them across a clean kitchen towel or several layers of paper towels. Pat them dry and let them sit for a few minutes while you prep your seasonings.
If you want to go the extra step, roll them gently between two towels to absorb even more moisture. The drier they are going in, the crunchier they'll come out.
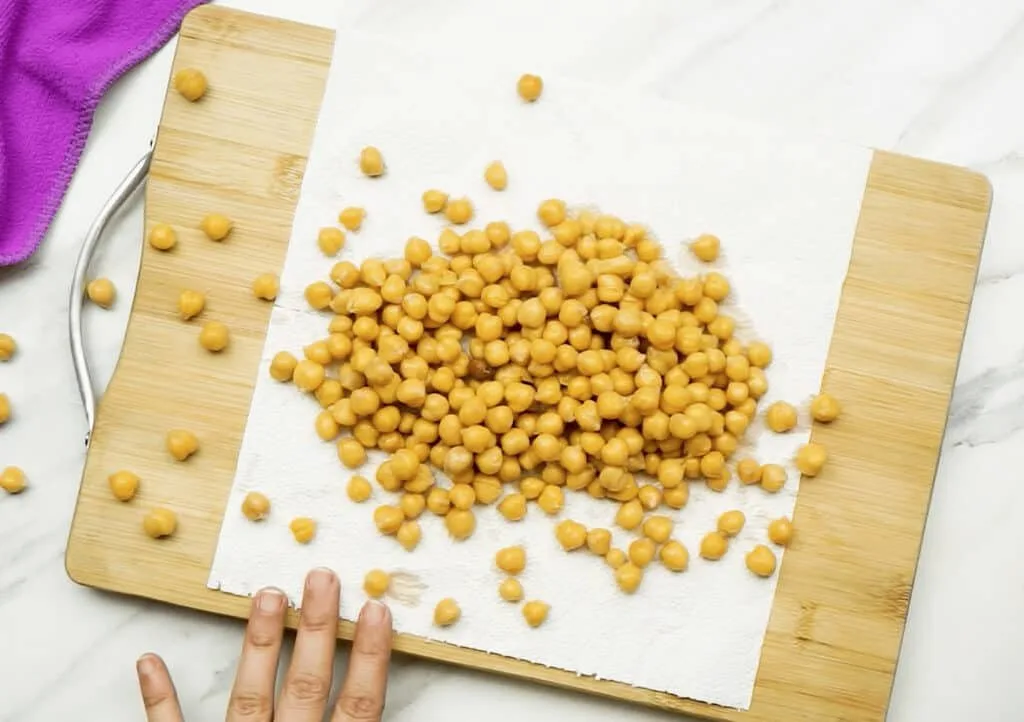
Image source: Bing (Web (fair-use with source credit))
Another common mistake is skipping the oil entirely. You don't need much, just one to two teaspoons per can of chickpeas. The oil conducts heat evenly across the surface of each bean and promotes the Maillard reaction, which is what gives you that golden-brown color and toasty flavor.
Without it, you'll get uneven browning and a dusty, dry texture instead of a satisfying crunch.
If you're starting from dried chickpeas instead of canned, the process takes longer but the results are worth it. Soak them overnight, boil until tender (usually 45 to 60 minutes), then drain and dry them just as thoroughly. Dried chickpeas actually tend to crisp up better because their skin has a slightly different texture after the longer cooking process.
The Foolproof Method for Perfectly Crispy Air Fryer Chickpeas
Once your chickpeas are properly dried, the rest of the process is simple. Toss them in a bowl with your oil and seasonings until every bean is evenly coated. Spread them in a single layer in the air fryer basket.
Don't pile them on top of each other. Overcrowding traps moisture and blocks the airflow that makes an air fryer work in the first place.
Set your air fryer to 375°F to 400°F. The exact temperature depends on your model and how dark you like them. Start at 375°F if you're new to this.
You can always bump it up next time.
Cook for 12 to 20 minutes total, shaking the basket every five minutes. Shaking is important because it repositions the chickpeas so they cook evenly. Some spots in the basket run hotter than others, and without shaking you'll get a mix of burnt and undercooked beans.
You'll know they're done when they're golden brown and hard to the touch. Tap one against the side of the basket. It should sound hollow and feel crunchy, not soft or leathery.
Let them cool in the basket for two to three minutes after turning it off. They'll continue to crisp up from the residual heat.
Step-by-Step: From Can to Crunch
Here's the full process broken down into clear steps you can follow the first time through.
Image source: Bing (Web (fair-use with source credit))
Step 1: Drain and rinse. Open a 15-ounce can of chickpeas and pour them into a colander. Rinse under cold water for about 30 seconds. This removes excess sodium (typically cutting it by roughly 40%) and washes away the starchy canning liquid.
Step 2: Dry thoroughly. Spread the rinsed chickpeas on a clean kitchen towel or paper towels. Pat the tops with another towel. Let them air dry for five to ten minutes while you prep everything else.
The more patient you are here, the better your results.
Step 3: Season and oil. Transfer the dried chickpeas to a bowl. Add one to two teaspoons of oil (avocado oil and olive oil both work well). Add your dry seasonings and toss until everything is evenly coated.
Image source: Wikimedia Commons / CHEFTB2 (CC BY-SA)
Step 4: Preheat the air fryer. Set it to 375°F and let it run for three to five minutes. Not every model requires preheating, but it helps the chickpeas start crisping immediately rather than steaming in a lukewarm basket.
Step 5: Add chickpeas in a single layer. Pour the seasoned chickpeas into the basket. Spread them out so they're not stacked on top of each other. If you're working with more than one can, cook in two batches rather than overloading.
Step 6: Cook and shake. Set the timer for 15 minutes. At the five-minute and ten-minute marks, pull the basket out and shake it vigorously. This flips the chickpeas and ensures even exposure to the circulating air.
Image source: Bing (Web (fair-use with source credit))
Step 7: Check for doneness. After 12 minutes, check a few chickpeas. They should be golden and hard. If they still feel soft or look pale, cook for another three to five minutes.
Every air fryer runs a little differently, so the first batch is your learning round.
Step 8: Cool before eating. Let them sit in the basket for two to three minutes after cooking. They'll firm up as they cool. They're best eaten within a few hours of making them.
Best Seasoning Combinations That Actually Stick
The seasoning step is where you can really make this recipe your own. The key rule is to stick with dry seasonings before cooking. Wet marinades, sauces, and glazes prevent crispiness and can make a sticky mess in your air fryer basket.
Here are some combinations that work well:
- Classic savory: Smoked paprika, garlic powder, onion powder, salt, and black pepper. This is the crowd-pleaser that works on everything.
- Spicy kick: Chili powder, cumin, cayenne pepper, and a pinch of salt. Add the cayenne gradually if you're sensitive to heat.
- Warm and sweet: Cinnamon, nutmeg, and a small amount of brown sugar. The sugar adds a light caramelization but can burn if your air fryer runs hot, so keep the temperature at 375°F.
- Herb garden: Dried rosemary, thyme, garlic powder, and lemon zest. Add the zest after cooking so it stays bright and fresh.
- Everything bagel: Sesame seeds, dried garlic, dried onion, poppy seeds, and coarse salt. Toss the chickpeas in the seasoning after cooking so the seeds don't burn.
If you want to add a sticky glaze like honey, soy sauce, or barbecue sauce, do it after the chickpeas are cooked and crispy. Toss them in the glaze and pop them back in the air fryer for just one to two minutes to set it. Any longer and you'll lose the crunch.
Canned vs. Dried Chickpeas: Which Works Better
Both options work, but they have different trade-offs in terms of time, cost, and texture.
Image source: Bing (Web (fair-use with source credit))
| Factor | Canned Chickpeas | Dried Chickpeas |
|---|---|---|
| Prep time | 5 minutes (drain, rinse, dry) | 8 to 12 hours (soak) plus 45 to 60 minutes boiling |
| Cost per serving | Around $0.50 to $0.75 per can | Around $0.15 to $0.25 per serving when bought in bulk |
| Texture after air frying | Crispy exterior, creamy interior | Crispy exterior, slightly firmer interior |
| Sodium control | Higher sodium unless thoroughly rinsed | No added sodium |
| Convenience | Very convenient, pantry-stable | Requires planning ahead |
| Batch size flexibility | Limited to can sizes | Cook exactly what you need |
For most people, canned chickpeas are the practical choice. They're ready in minutes, available at every grocery store, and produce excellent results when dried properly. Dried chickpeas are worth the effort if you're meal prepping in large quantities or want more control over sodium and texture.
If you're using canned, look for BPA-free cans when possible. Brands like Bush's and 365 by Whole Foods offer options that are widely available. And always rinse them.
Skipping the rinse leaves behind surface starch that can make the chickpeas gummy rather than crispy.
Air Fryer vs. Oven: Is It Worth the Hype
If you already own an air fryer, roasting chickpeas in it is noticeably faster and more efficient than using a full-size oven. A typical oven roast takes 30 to 45 minutes at 400°F, while the air fryer gets the job done in 12 to 20 minutes. That's a real difference when you're hungry and waiting.
The air fryer also uses less energy. Most models draw 1,400 to 1,700 watts, compared to a conventional oven's 2,000 to 5,000 watts. And you're not heating up your entire kitchen in the process, which matters a lot during summer.
The oven does have one advantage: batch size. A sheet pan can hold three to four cans of chickpeas spread in a single layer, while a standard 5-quart air fryer handles about one to one and a half cans per batch. If you're meal prepping for the whole week, the oven might save you time overall despite the longer cook time per batch.
For everyday snacking, the air fryer wins on speed, energy use, and convenience. For big-batch cooking, the oven still holds its ground.
Common Mistakes That Ruin the Batch
Even with a solid recipe, a few missteps can turn your crispy chickpea dreams into a chewy disappointment. Here are the most common pitfalls we found in our research.
- Not drying the chickpeas enough. This is the big one. Surface moisture is the single biggest barrier to crispiness. Take the extra five minutes to pat them thoroughly.
- Overcrowding the basket. Chickpeas need room for hot air to circulate around each bean. If they're piled on top of each other, the ones in the middle will steam instead of roast.
- Skipping the shake. The air fryer's heating element is typically at the top. Without shaking, the chickpeas on the bottom won't get the same direct heat as the ones on top.
- Using wet seasonings or sauces before cooking. Anything with moisture, liquid smoke, soy sauce, or honey added before cooking will prevent crispiness. Save those for after.
- Setting the temperature too high. Going above 400°F often burns the outside before the inside has a chance to dry out and crisp. Stick to 375°F to 400°F.
- Storing them in a sealed container while still warm. Trapped steam will soften them immediately. Let them cool completely before storing.
How to Store Them So They Stay Crunchy
Air fryer chickpeas are at their best within the first few hours after cooking. That's when the exterior is shatteringly crisp and the interior still has a slight creaminess.
If you need to store them, use an open container like a bowl covered with a paper towel or a paper bag left slightly open. The goal is to let any residual moisture escape rather than reabsorb into the beans. A sealed plastic container or zip-top bag will turn them soft within an hour.
For longer storage, keep them in an airtight container at room temperature for up to two days. They won't be as crunchy as fresh, but they'll still have a pleasant firmness. To re-crisp them, pop them back in the air fryer at 350°F for two to four minutes.
Don't refrigerate them. The humidity inside the fridge will soften them faster than anything else.
Creative Ways to Use Air Fryer Chickpeas
Crispy chickpeas are a great snack on their own, but they're also incredibly versatile. Here are some ways to use them beyond the snack bowl.
- Salad topper: Use them instead of croutons on any salad. They add crunch and protein without the refined carbs.
- Soup garnish: Sprinkle them on top of tomato soup, butternut squash soup, or lentil soup for a satisfying contrast.
- Grain bowl addition: Toss them into a rice or quinoa bowl with roasted vegetables and a drizzle of tahini.
- Taco crunch: Use them as a crunchy element in place of fried tortilla strips on tacos or burrito bowls.
- Trail mix component: Mix them with nuts, dried fruit, and dark chocolate chips for a high-protein trail mix.
- Kids' snack: Season them lightly with cinnamon and a touch of sugar for a kid-friendly option that's far more nutritious than chips.
If you're looking for more air fryer snack ideas, our guide to air fryer banana chips recipe covers another easy option that uses the same basic technique.
Quick Reference: Times, Temperatures, and Nutrition
Here's everything you need at a glance.
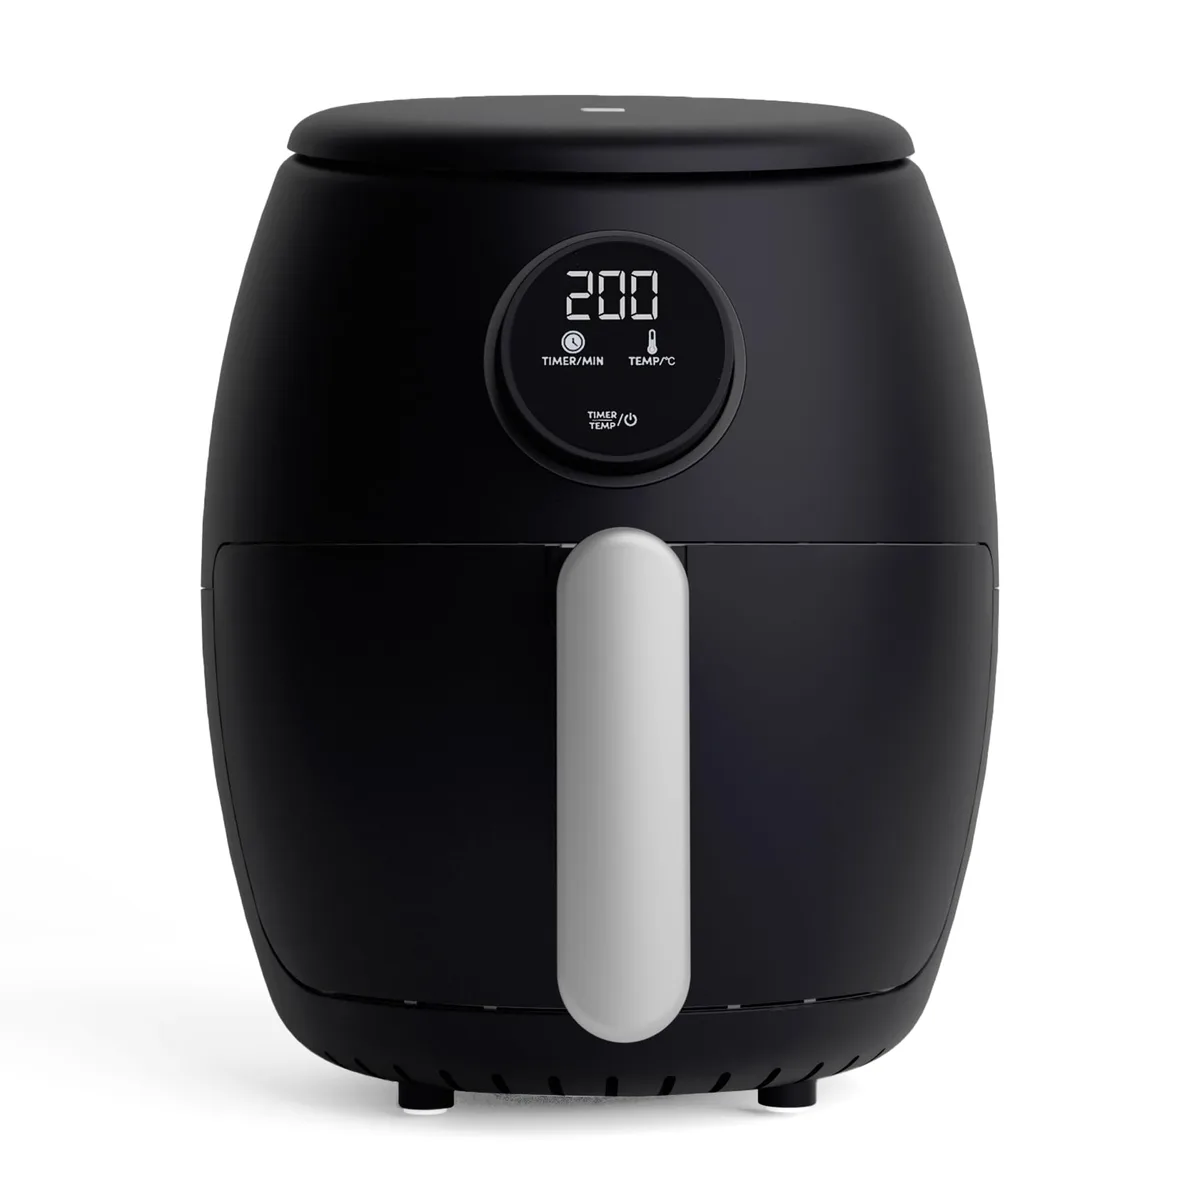
Image source: Bing (Web (fair-use with source credit))
| Detail | Value |
|---|---|
| Temperature | 375°F to 400°F (190°C to 200°C) |
| Cook time | 12 to 20 minutes |
| Shake interval | Every 5 minutes |
| Oil needed | 1 to 2 teaspoons per 15 oz can |
| Serving size | ½ cup (about 125g) |
| Calories per serving | 130 to 160 (varies with oil amount) |
| Protein per serving | ~7g per ½ cup |
| Fiber per serving | ~6g per ½ cup |
| Sodium per serving (rinsed) | ~10 to 15mg |
| Batch size (5 qt air fryer) | 1 to 1.5 cans per load |
| Best eaten within | 1 to 3 hours after cooking |
| Re-crisp time | 2 to 4 minutes at 350°F |
Nutritional values are based on USDA FoodData Central data for chickpeas (garbanzo beans). The calorie range accounts for the small amount of oil added during preparation.
Frequently Asked Questions
How long do air fryer chickpeas take to cook?
Most batches take 12 to 20 minutes at 375°F to 400°F. The exact time depends on your air fryer model, how dry the chickpeas were going in, and how crispy you like them. Start checking at 12 minutes and add time in three-minute increments.
Do I need to soak dried chickpeas before air frying?
Yes. Dried chickpeas need an overnight soak (8 to 12 hours) followed by 45 to 60 minutes of boiling until tender. After that, drain, dry, and season them just like canned chickpeas.
The extra effort pays off with a firmer, crunchier result.
Why are my air fryer chickpeas chewy instead of crispy?
The most common cause is insufficient drying. Canned chickpeas hold moisture on their surface even after rinsing. Pat them thoroughly with paper towels and let them air dry for five to ten minutes.
Also check that you're not overcrowding the basket and that you're shaking every five minutes.
Can I use other beans in the air fryer?
Black beans, cannellini beans, and navy beans all work well using the same method. Smaller beans may cook a bit faster, so check them at the 10-minute mark. Make sure whichever bean you choose is thoroughly dried first.
Are air fryer chickpeas healthy?
Yes. Chickpeas are high in protein (~7g per half-cup) and fiber (~6g per half-cup), according to USDA nutritional data. Air frying requires only a teaspoon or two of oil, making them significantly lower in fat than store-bought roasted chickpea snacks or chips.
They're a solid plant-based snack option.
Can I make a big batch and store them for the week?
You can, but they lose their crunch within a few hours. For the best texture, cook only what you'll eat that day. If you need to store them, keep them in an open container at room temperature and re-crisp in the air fryer for two to four minutes before serving.