Air fryer stuffing recipes offer a game-changing approach to a classic side dish, promising faster cooking times and that highly coveted crispy texture. If you’re aiming for perfectly browned edges and a moist interior without dedicating your oven for hours, bringing your stuffing into the air fryer’s quick circulation is the way to go. This method transforms stale bread into a holiday hero.
This efficient cooking technique is perfect for busy cooks, especially around the holidays. When you need to free up oven space, the air fryer can handle your stuffing in about half the time of traditional methods, often between 10-20 minutes compared to 30-45 minutes in the oven, as confirmed by multiple recipe analyses. Prepare for a side dish that’s both impressive and incredibly easy.
Why Air Fryer Stuffing is Your New Holiday MVP
The holidays are a whirlwind of cooking, and anything that simplifies prep and delivers fantastic results deserves a spotlight. An air fryer stuffing recipe is exactly that kind of kitchen wizard. It takes a beloved comfort food and elevates it with speed and a textural magic that many of us crave, especially for Thanksgiving and Christmas dinners.
Instead of the long bake times in a conventional oven, an air fryer uses rapid, circulating hot air to crisp up your stuffing beautifully. This means you can achieve that irresistible crunchy exterior and a tender, flavorful inside in a fraction of the time. It's a true game-changer for holiday meal planning.
The Magic of Crispy Air Fryer Stuffing: What Makes It So Good?
The allure of air fryer stuffing lies in its ability to deliver a superior texture. Traditional oven baking can sometimes result in a stuffing that’s a bit too uniformly soft or even slightly gummy, especially if it’s baked in a covered dish. The air fryer, however, excels at creating contrast.
Achieving That Perfect Golden-Brown Look
This is where the air fryer truly shines. Its circulating hot air hits every surface of the stuffing mixture, encouraging a delightful browning and crisping that’s hard to replicate in a standard oven without broiling or taking extra steps. The result is those sought-after golden, toasted edges that add so much satisfaction to each bite.
The Flavor Boost from Even Air Circulation
Beyond just texture, the even cooking of an air fryer helps to meld the flavors more intensely. When every piece of bread and every vegetable is exposed to consistent heat, the herbs, aromatics, and broth work together harmoniously. This leads to a more robust and satisfying flavor profile that makes your stuffing unforgettable.
Stuffing Essentials: What You Need for Air Fryer Success
Creating a delicious air fryer stuffing relies on a few key ingredients and components. Having the right foundation ensures you get the best results, whether you’re using a classic bread base or a flavorful cornbread. Our research into various stuffing recipes highlights consistent needs.
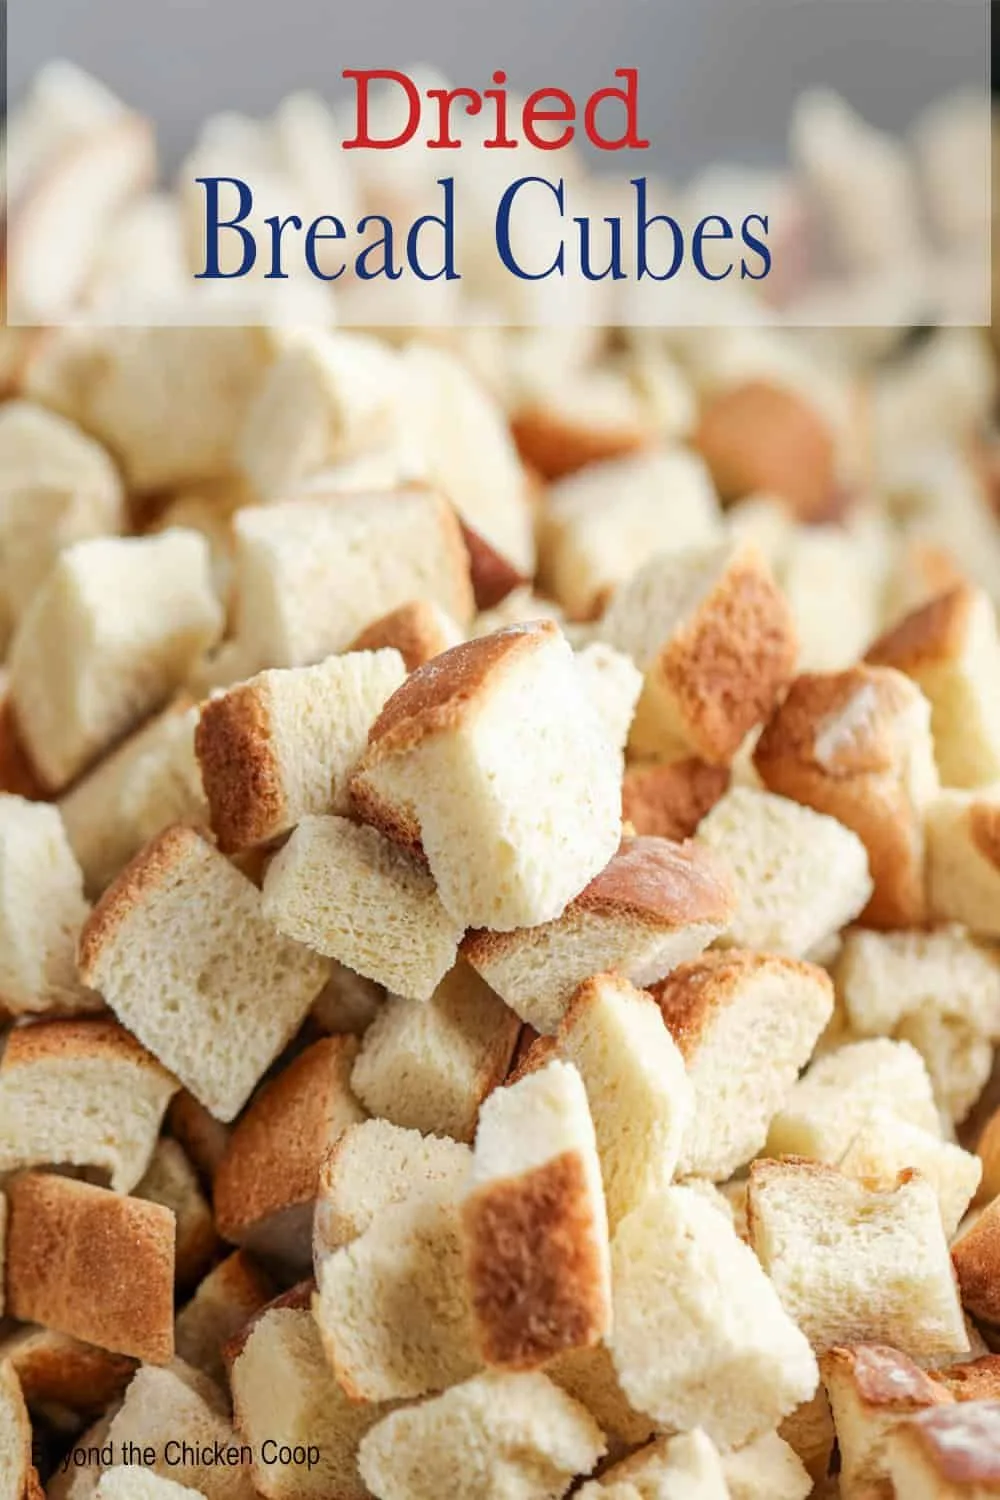
Breads That Crisp Up Beautifully
The star of any stuffing is bread, and for air frying, you want bread that will dry out nicely. Stale or day-old bread cubes are ideal because they absorb liquid without becoming completely mushy. Classic white bread, sourdough, or even French bread work wonderfully. For a richer flavor, consider cornbread as your base.
Favorite Veggie & Herb Combos
Onion and celery form the aromatic backbone of most stuffing recipes, providing a savory depth of flavor. Garlic is also a common addition. For herbs, sage is practically non-negotiable for that classic holiday taste, but thyme and rosemary add beautiful complementary notes. A common ratio, per aggregate recipes, is about 1 cup of chopped onion and celery to 1-2 cups of bread cubes.
Broth, Butter, and Binders
Broth, whether chicken or vegetable, is crucial for moistening the bread and carrying flavors throughout. You'll typically need about 1 to 2 cups of broth per 6-8 cups of bread cubes, depending on how moist you prefer your stuffing. Butter adds richness and helps sauté the vegetables, while an optional egg can act as a binder to help hold the stuffing together.
Your Air Fryer Stuffing Recipe Blueprint
Building a great air fryer stuffing recipe is all about balancing moisture, flavor, and texture. The air fryer’s speed means you need to be mindful of the ratio of wet to dry ingredients to avoid it becoming too dry or too soggy. Our recipe blueprint focuses on giving you that perfect balance.
Quick Prep: Bread and Veggies
Start by cubing your chosen bread and letting it sit out for a few hours to dry, or toast it lightly in your oven or air fryer basket. Chop your onion, celery, and any other vegetables you're using. Mince your garlic. If you're adding sausage, cook and crumble it now.
Building the Flavor Base
In a skillet (or in the air fryer basket itself if you're careful), melt your butter. Sauté the onions and celery until they begin to soften, usually about 5-7 minutes. Add the minced garlic and cook for another minute until fragrant. This step is key to developing a rich flavor foundation before mixing everything together.
Mixing and Moistening
In a large bowl, combine your bread cubes, sautéed vegetables, herbs, and any cooked protein. Gradually add your broth, tossing gently until the bread is evenly moistened but not soaked. You want the mixture to hold together loosely, not be swimming in liquid. This ensures your stuffing will crisp up nicely rather than steaming.
Step-by-Step: Cooking Your Stuffing in the Air Fryer
Cooking stuffing in an air fryer is straightforward, but a few key steps ensure you achieve that perfect crispy texture. It’s all about proper preparation and managing the cooking environment of your air fryer. We’ve broken down the process to make it as simple as possible.
Preheating for Perfection
Just like with most air fryer recipes, preheating is crucial. Aim to preheat your air fryer to around 375°F (190°C) for at least 3-5 minutes. This ensures that when you add your stuffing, it starts cooking and crisping immediately, rather than beginning in a lukewarm basket. It’s a small step that makes a big difference.
Arranging for Evenness
Avoid overcrowding the air fryer basket. Stuffing cooks best when there’s space for the hot air to circulate freely around all the ingredients. Depending on the size of your air fryer and the amount of stuffing you’re making, you might need to cook it in batches. A single layer, or a lightly puffed mound, is ideal for even browning.
- For a standard 5-6 quart air fryer, aim for about 2-3 cups of stuffing mixture per batch.
- If your basket is larger, you might be able to fit 4-5 cups comfortably.
- If you have a toaster-oven style air fryer, you may be able to use a small oven-safe dish filled with stuffing, but this can sometimes impact crispiness compared to direct basket cooking. Check is glass air fryer safe for more on material safety.
The "Shake and Crisp" Method
After about 8-10 minutes, it’s time to check on your stuffing. Gently shake the air fryer basket or carefully use a spatula to stir and flip the stuffing. This exposes different sides to the hot air, promoting uniform crisping. Continue cooking for another 5-10 minutes, or until the stuffing reaches your desired level of golden-brown crispness.
How Long Does Air Fryer Stuffing Actually Take?
Most air fryer stuffing recipes clock in at around 10 to 20 minutes of total cooking time. This is significantly faster than the 30-45 minutes, or even longer, that traditional oven-baked stuffing often requires. The exact time will depend on a few factors, including your specific air fryer model, the temperature you use, and how densely you pack the basket.
If you’re making a smaller batch or the stuffing is already fairly dry, it might lean towards the shorter end of that range. On the other hand, if you've used a good amount of moist ingredients or a larger volume, it may take closer to 20 minutes. Our research indicates that aiming for 15 minutes, with a mid-cook shake, is a solid starting point. You’ll visually confirm doneness rather than relying solely on time.
Spotting Perfect Stuffing: Visual Cues and Doneness Tests
Knowing when your air fryer stuffing is ready goes beyond just watching the clock. It’s about reading the visual signals your food is giving you. The goal is that beautiful balance of tender insides and crunchy, golden-brown exteriors.
What "Golden Brown" Really Looks Like
You're aiming for a rich, toasted caramel color across the top and edges of your stuffing. It shouldn't be pale or blonde, nor should it be a deep, burnt brown. Think of the color of perfectly toasted bread or a golden-baked cookie.
The Toothpick Test: Beyond Dryness
While a toothpick test signals doneness in many baked goods, for stuffing, it’s more about checking the texture and moisture. Insert a toothpick into the center. It should come out clean or with just a few moist crumbs clinging to it. If it’s covered in wet batter, it needs more time.
Stuffing Troubleshooting: Fixing Common Air Fryer Fails
Even with the best intentions, sometimes stuffing in the air fryer doesn't turn out quite right. Don't let a few hiccups discourage you; these common issues are usually easy to fix with a few adjustments. Let’s tackle them.
My Stuffing is Too Dry!
If your stuffing ends up drier than you’d like, it often means there wasn't enough liquid initially or it cooked too long. Next time, try adding an extra tablespoon or two of broth per cup of bread. Alternatively, if it's already cooked and dry, you can try drizzling a little extra warm broth or melted butter over it before serving.
Help, It's Soggy!
Soggy stuffing is usually a result of too much liquid or insufficient air circulation during cooking. Ensure you’re not overcrowding the air fryer basket; this is critical for crisping. If it’s already soggy, try spreading it into a single layer on a baking sheet and popping it back into a preheated air fryer at a slightly higher temperature (like 400°F or 200°C) for a few minutes to help it dry out.
Preventing the Stick-to-the-Basket Blues
To avoid stuffing sticking to your air fryer basket, make sure you lightly grease the basket with oil or butter before adding the mixture. A perforated parchment liner designed for air fryers can also be a lifesaver, preventing most sticking issues altogether. If you’re making a recipe like air fryer potato balls recipe, greasing is especially important.
Air Fryer Stuffing vs. Oven-Baked Stuffing: Which Wins?
The eternal debate: air fryer versus oven for stuffing. Both methods can produce delicious results, but they offer different benefits. If speed and maximum crispiness are your top priorities, the air fryer often takes the crown.
The air fryer's rapid convection heating means less time in the kitchen and a more reliably crispy exterior. Many home cooks find it’s the quickest way to get that beloved crunchy texture. This makes it ideal for busy holiday schedules where oven space is at a premium.
However, oven-baked stuffing, particularly when cooked in a covered dish or casserole, can yield an incredibly moist, steam-infused interior. If ultra-moistness is your absolute priority and you have the oven time to spare, the oven might be your preferred method. It’s also a more traditional choice for some families, preserving cherished memories. Both are great, but the air fryer offers a modern, faster, and crispier take.
Beyond the Bird: Other Delicious Ways to Use Air Fryer Stuffing
Stuffing isn't just for holidays or as a side dish to turkey. Its savory, herb-infused, bread-based goodness can be repurposed into other tasty dishes. Think of it as a versatile base for some creative culinary applications.
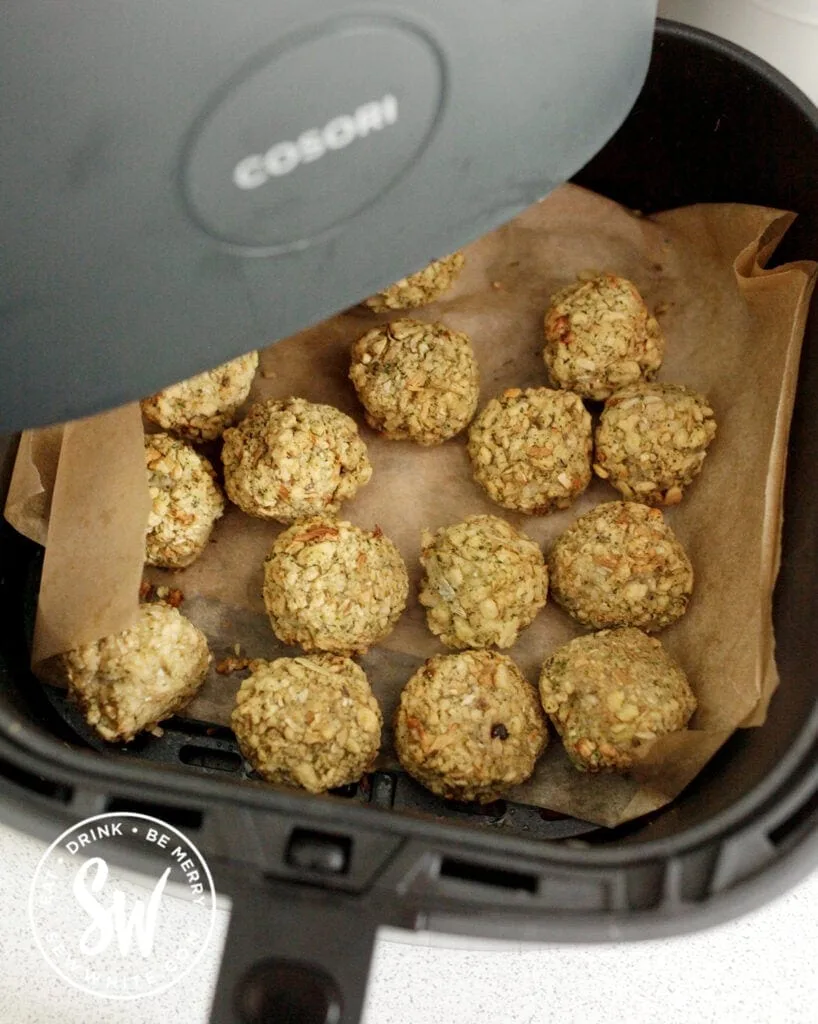
Crispy Appetizer Bites
Portion your stuffing mixture into small, bite-sized balls or patties. You can even add a little binder like an egg or a dollop of cream cheese to help them hold their shape. Air fry these in a single layer until they're golden brown and crispy, about 8-12 minutes at 375°F (190°C). Serve them with a cranberry-based dipping sauce for a delightful party appetizer.
Savory Bread Pudding Twist
Think of your stuffing as a savory bread pudding waiting to happen. You can bake it in a small oven-safe dish in the air fryer, similar to how you would bake it in a conventional oven. Use a custard mixture of eggs, milk or cream, and herbs. This creates a richer, more cohesive dish that’s perfect as a heartier side or even a light lunch when paired with a salad.
Expert Air Fryer Stuffing Tips for the Holidays and Beyond
Even with a fantastic recipe and a well-preheated air fryer, a few expert tips can elevate your stuffing from good to absolutely unforgettable. These are the little details that seasoned cooks use to ensure perfect results every time, whether it's a holiday feast or a weeknight treat.
Consider aging your bread for at least 24 hours. This helps it absorb liquid without turning to mush. If you forget, you can quickly dry out cubed bread by spreading it on a baking sheet and toasting it in a 300°F (150°C) oven for 10-15 minutes. Fresh bread just won't give you that desired crispy texture.
Tip 1: Toast Your Aromatics
Before adding your onions, celery, and garlic to the main stuffing mix, take a moment to really sauté them. You want them to soften and become fragrant, releasing their beautiful flavors. This process also slightly caramelizes them, adding a depth that raw vegetables won’t provide.
Tip 2: Don't Fear the Fat
Fat is flavor, and stuffing is no exception. Ensure you're using enough butter or oil to sauté your vegetables and to add richness to the bread mixture. If you're adding sausage, its rendered fat also contributes significantly. This is key to a rich, satisfying, and well-moistened stuffing.
Tip 3: Season Generously at Each Stage
Don't just salt and pepper the final mixture. Season your sautéed vegetables lightly, and then season your bread mixture before adding the broth. Taste your broth before adding it; some are saltier than others. This multi-stage seasoning ensures flavor is distributed evenly throughout the dish.
Tip 4: Let It Rest (Briefly)
After your stuffing is cooked and has reached that perfect golden crisp, let it rest for about 5 minutes before serving. This allows the internal temperatures to even out and the flavors to meld seamlessly. It also helps the stuffing set up slightly, making it easier to serve.
Tip 5: Embrace Customization
While classic sage and thyme are fantastic, don't be afraid to experiment with other herbs and additions. A pinch of nutmeg, a dash of cayenne pepper for warmth, or even some chopped nuts like pecans or walnuts can add wonderful complexity. Consider this a base for your own culinary creativity.