A good turkey tenderloin recipe air fryer method gives you juicy, evenly cooked poultry in under 25 minutes without heating up your whole kitchen. The tenderloin is the most forgiving cut of turkey because it's small, uniform in shape, and cooks fast, which makes it practically built for air fryer cooking. The catch is that this lean cut dries out quickly if you overcook it by even a few minutes.
In our research, the difference between perfect and overcooked came down to using a meat thermometer and pulling the tenderloin at 165°F internal temperature, per USDA Food Safety and Inspection Service guidelines.
Here's everything you need to nail it every time, from prep to plate.
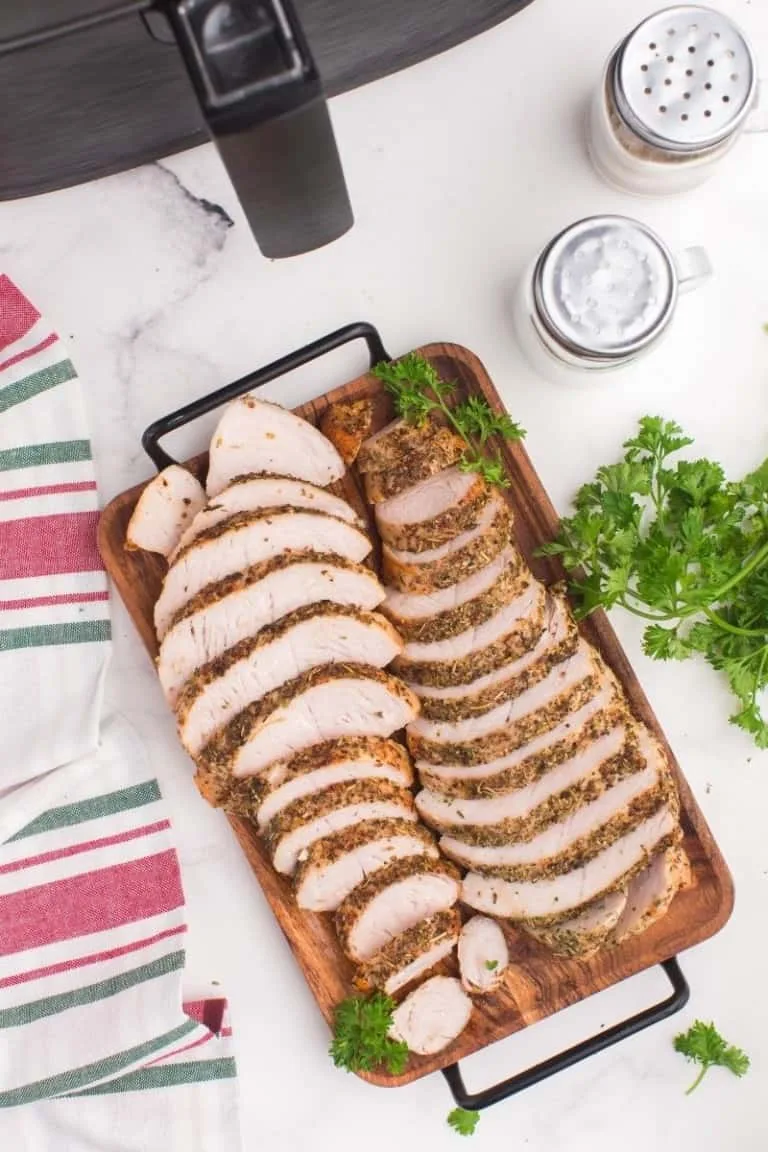
Image source: Bing (Web (fair-use with source credit))
The Quick Answer: Perfect Turkey Tenderloin in the Air Fryer
A turkey tenderloin recipe air fryer method takes about 18 minutes at 375°F for a thawed, one-pound tenderloin in a standard 1400W-plus air fryer. Pat the meat dry, coat it lightly with oil, season generously, and cook it in a single layer. Flip it halfway through.
Pull it when an instant-read thermometer hits 165°F at the thickest point. Let it rest five to ten minutes before slicing against the grain.
Why Turkey Tenderloin Is the Ideal Air Fryer Cut
Turkey tenderloin and air fryers are a natural match. The tenderloin is a long, thin muscle pulled from the inside of the breast, and it typically weighs between 0.75 and 1.5 pounds. That compact size means hot air circulates around it evenly, cooking it through without the hot and cold spots you get with a full turkey breast in a conventional oven.
Here's what makes it work so well:
- Fast cook time. You're looking at 15 to 25 minutes depending on thickness and wattage, compared to 45 to 90 minutes in a standard oven.
- Even browning. The air fryer's convection system hits the tenderloin from all sides, giving you a lightly crispy exterior without constant flipping.
- Minimal oil needed. A light coat of olive or avocado oil is all it takes. You get browning without the calories of pan-frying.
- Small batch friendly. If you're cooking for one or two people, there's no reason to fire up a full oven.
The one thing to watch is moisture. Turkey tenderloin is extremely lean, with roughly 1 to 2 grams of fat per 4-ounce serving according to USDA FoodData Central. That's great for protein content, but it means the meat has very little fat to keep it juicy.
Temperature control is everything.
If you're working with a larger air fryer, like a 9 qt model for big batches, you can cook two tenderloins at once as long as they're not touching the basket walls or each other.
What You'll Need: Ingredients, Tools, and Equipment
You don't need much to pull this off. Here's the full list.
Ingredients:
- 1 turkey breast tenderloin (about 1 to 1.5 pounds)
- 1 tablespoon olive oil or avocado oil
- 1 teaspoon kosher salt
- 1/2 teaspoon black pepper
- 1 teaspoon garlic powder
- 1 teaspoon smoked paprika
- 1/2 teaspoon dried thyme or rosemary (optional)
Tools and Equipment:
- Air fryer (any standard countertop model)
- Instant-read meat thermometer
- Paper towels
- Small bowl for mixing seasonings
- Cutting board and sharp knife
- Tongs for flipping
That's it. No special marinades, no brining setup, no complicated equipment. If you want to level up the flavor, a simple brine or a longer marination time helps, but the basic seasoning above works perfectly for a weeknight dinner.
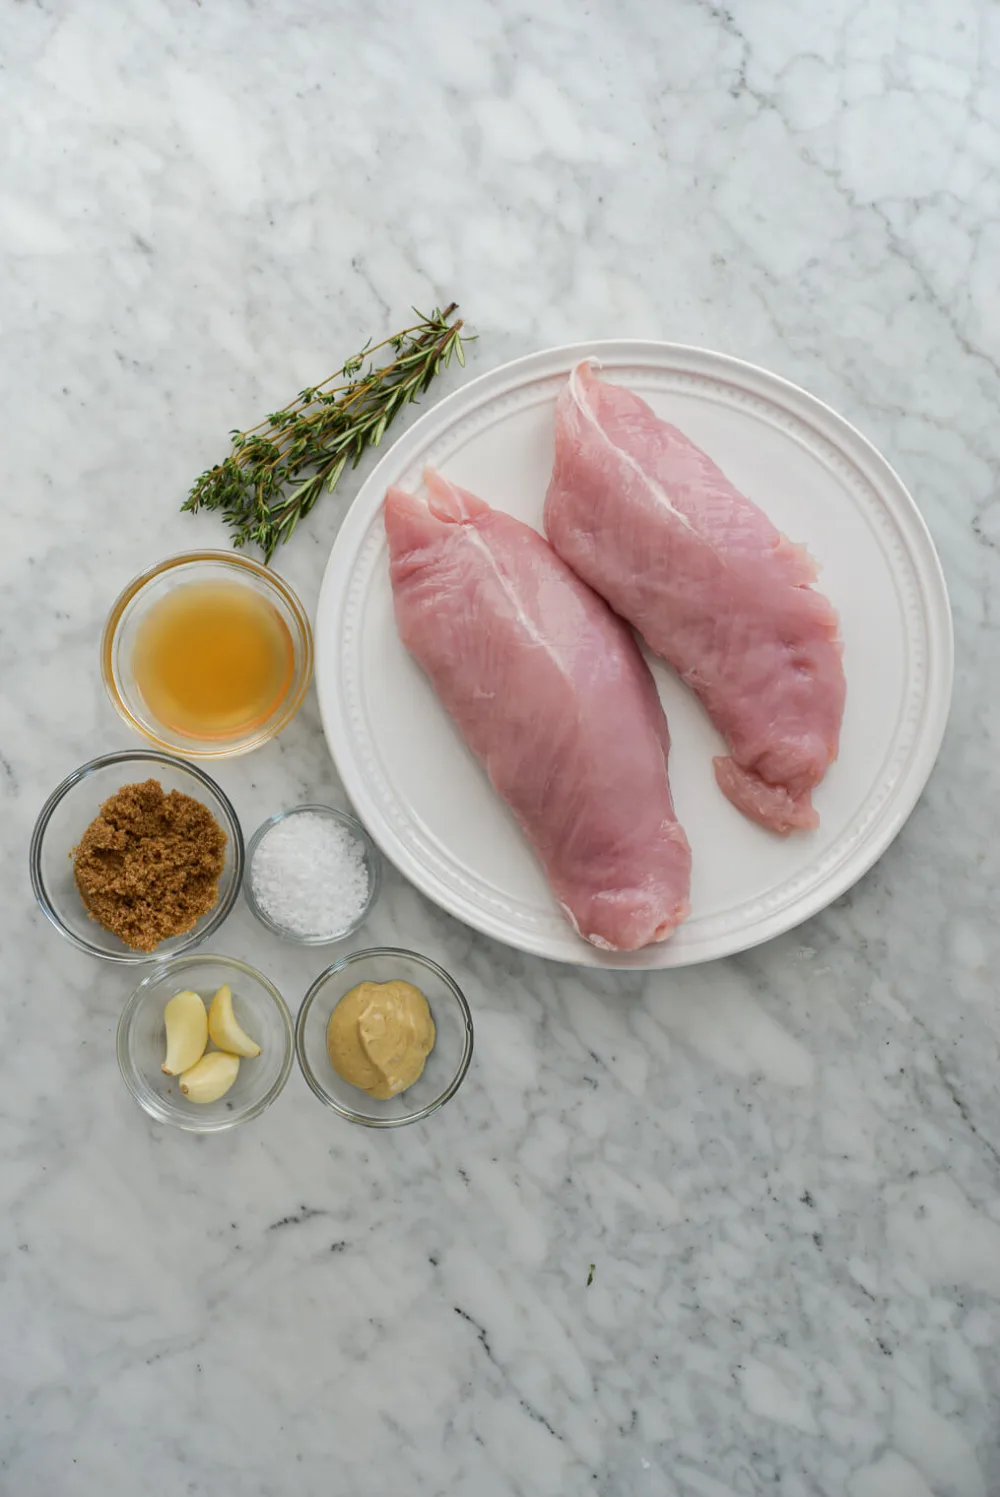
Image source: Bing (Web (fair-use with source credit))
One thing worth noting: make sure you're buying actual tenderloins, not turkey cutlets. Cutlets are sliced thin from the breast and cook much faster. Tenderloins are thicker, cylindrical, and hold up better to the air fryer's heat.
If you accidentally grab cutlets, drop the cook time to 8 to 10 minutes and watch them closely.
How to Prep Turkey Tenderloin for the Air Fryer
Prep is where most people either set themselves up for success or sabotage the whole thing before the air fryer even turns on.
Step 1: Pat it dry. Remove the tenderloin from the packaging and blot it thoroughly with paper towels. Surface moisture is the enemy of browning. The drier the surface, the better the seasoning sticks and the better the exterior crisps up.
Step 2: Season or brine. At minimum, coat the tenderloin with oil and apply your dry rub. For better results, brine it first. A basic brine is 1/4 cup kosher salt and 1/4 cup sugar dissolved in 4 cups of cold water.
Submerge the tenderloin for 30 minutes to 4 hours in the refrigerator, then rinse and pat dry before seasoning. Brining adds moisture at the cellular level, which is your best defense against dryness.
Step 3: Bring it closer to room temperature. If you have 15 to 20 minutes, let the seasoned tenderloin sit on the counter. Cold meat straight from the fridge cooks unevenly, with the outside overcooking before the center catches up.
Step 4: Preheat the air fryer. If your model has a preheat function, run it at 375°F for 3 to 5 minutes. Not all air fryers have this feature, and that's fine, but preheating gives you more consistent results.
Step-by-Step: Air Fryer Turkey Tenderloin Recipe
This is the full process from seasoned raw tenderloin to sliced medallions on your plate.
1. Preheat the air fryer to 375°F for 3 to 5 minutes if your model allows it.
2. Place the tenderloin in the basket in a single layer. Don't let it touch the sides.
Air needs to circulate on all sides for even cooking. If you're cooking two tenderloins, leave at least an inch of space between them.
3. Cook for 9 to 10 minutes, then flip the tenderloin using tongs. This halfway flip is important.
The bottom of the basket tends to run hotter than the top in most air fryer models.
4. Cook for another 7 to 10 minutes. Total cook time for a standard one-pound tenderloin in a 1400W-plus air fryer is typically 16 to 20 minutes. But time is just a guideline.
Temperature is what matters.
5. Check the internal temperature by inserting an instant-read thermometer into the thickest part. You're looking for 165°F.
This is the USDA's recommended safe minimum internal temperature for all poultry.
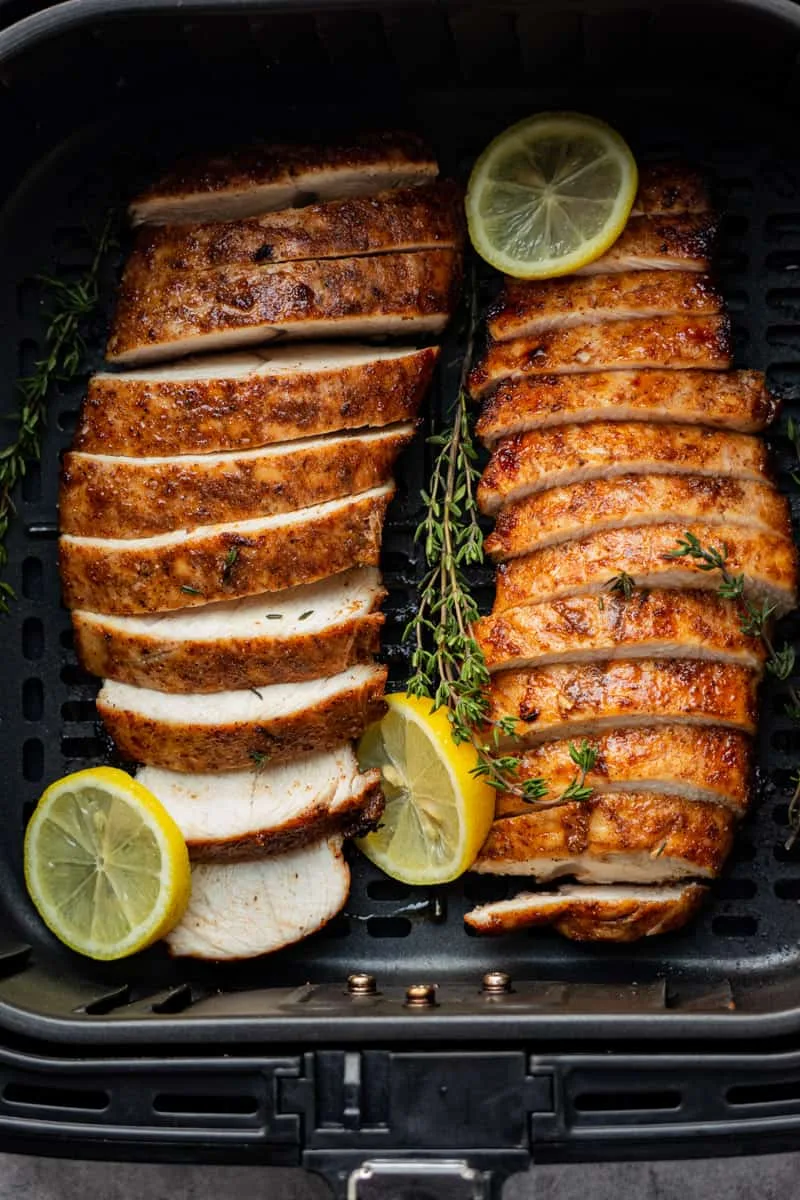
Image source: Bing (Web (fair-use with source credit))
6. Rest the tenderloin for 5 to 10 minutes on a cutting board, tented loosely with aluminum foil. This step is non-negotiable.
Resting lets the muscle fibers relax and reabsorb the juices. If you slice immediately, all that moisture runs out onto the cutting board.
7. Slice against the grain into 1/2-inch medallions. Cutting against the grain shortens the muscle fibers, making each slice more tender to eat.
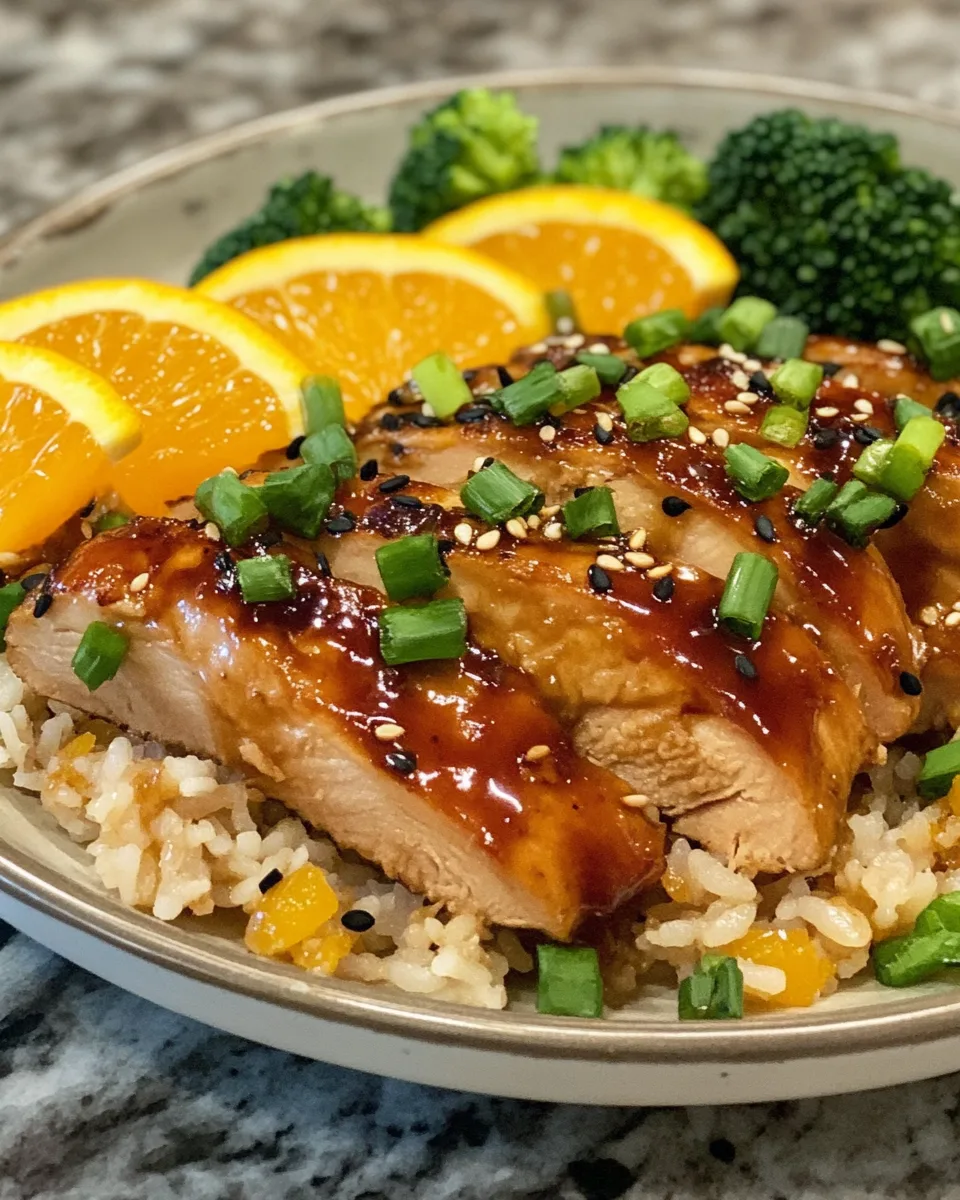
Image source: Bing (Web (fair-use with source credit))
The whole process, including prep and rest time, takes about 35 to 40 minutes. Active cooking time is under 20 minutes. For a lean, high-protein dinner with almost no mess, it's hard to beat.
If you're curious whether your specific air fryer model handles poultry well, our research on whether the Instant Vortex is a good air fryer covers performance details that apply directly to cooking turkey tenderloin.
Cook Times and Temperatures by Thickness and Air Fryer Wattage
Cook times vary more than most recipes admit. The two biggest variables are the tenderloin's thickness and your air fryer's wattage. A 1700W Instant Vortex cooks noticeably faster than a 1000W compact model.
Here's a practical reference table based on aggregate user reports and manufacturer cooking charts.
| Tenderloin Thickness | Air Fryer Wattage | Temperature | Estimated Cook Time (Thawed) |
|---|---|---|---|
| 1 inch or less | 1400W or higher | 375°F | 14 to 17 minutes |
| 1 to 1.5 inches | 1400W or higher | 375°F | 16 to 20 minutes |
| 1.5 to 2 inches | 1400W or higher | 360°F | 20 to 25 minutes |
| 1.5 to 2 inches | 1000W to 1200W | 360°F | 24 to 30 minutes |
| Any thickness, frozen | 1400W or higher | 360°F | 28 to 35 minutes |
Always flip at the halfway mark regardless of wattage. If your air fryer doesn't have a preheat function, add about 2 minutes to the total time. These are estimates.
Your thermometer is the final authority.
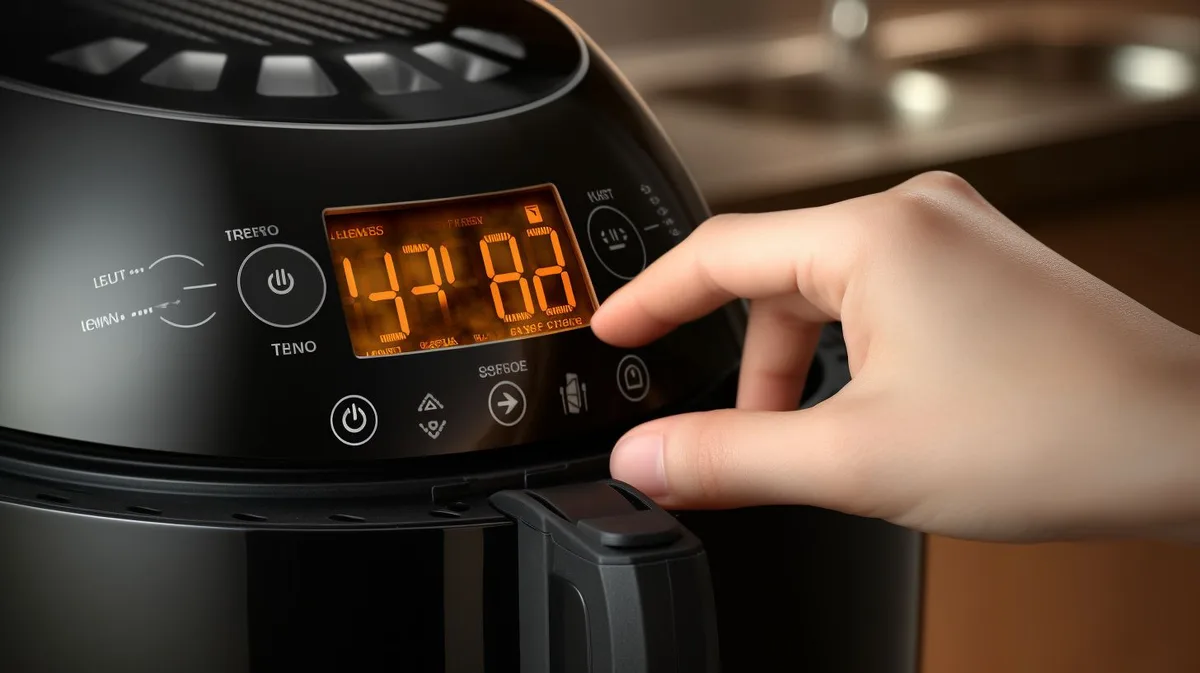
Image source: Bing (Web (fair-use with source credit))
If you're cooking from frozen, don't thaw first. Just drop the temperature by 15 to 20 degrees and add roughly 10 minutes. The exterior will take longer to brown, but the interior will cook through more evenly than if you blast it at high heat.
For those using a larger air fryer, like an 8 qt model for roasting chicken, the wattage tends to be higher, which means you can stick to the shorter end of these ranges.
Brining and Seasoning Options That Actually Make a Difference
Seasoning turkey tenderloin isn't complicated, but a little effort here pays off big. The meat is mild and lean, which means it takes on whatever you give it. The problem is that it also dries out fast, so anything you do to add moisture before cooking is worth the extra time.
Dry Rub (Fastest Option)
A dry rub is the easiest approach and works well when you're short on time. Mix kosher salt, black pepper, garlic powder, smoked paprika, and a pinch of dried thyme. Coat the oiled tenderloin on all sides and cook immediately.
The paprika gives a nice color and subtle smokiness without any liquid to deal with.
Wet Marinade (More Flavor Depth)
If you have 1 to 4 hours, a wet marinade adds more flavor penetration. A simple mix of olive oil, lemon juice, minced garlic, soy sauce, and a tablespoon of honey works well. The acid in the lemon tenderizes the surface slightly, and the soy sauce adds umami.
Don't marinate longer than 12 hours though. The acid will start to break down the texture and make the exterior mushy.
Brine (Best for Moisture)
Brining is the single most effective way to keep turkey tenderloin juicy. A basic salt brine, 1/4 cup kosher salt per 4 cups of water, changes the meat's protein structure so it retains more moisture during cooking. Submerge the tenderloin for 30 minutes to 4 hours in the refrigerator.
Rinse it off and pat dry before seasoning.
For a flavor brine, add 1/4 cup sugar, a few bay leaves, peppercorns, and crushed garlic to the salt water. Aggregate user reviews consistently report that brined tenderloin comes out noticeably juicier than unbrined, especially in air fryers that run hot.
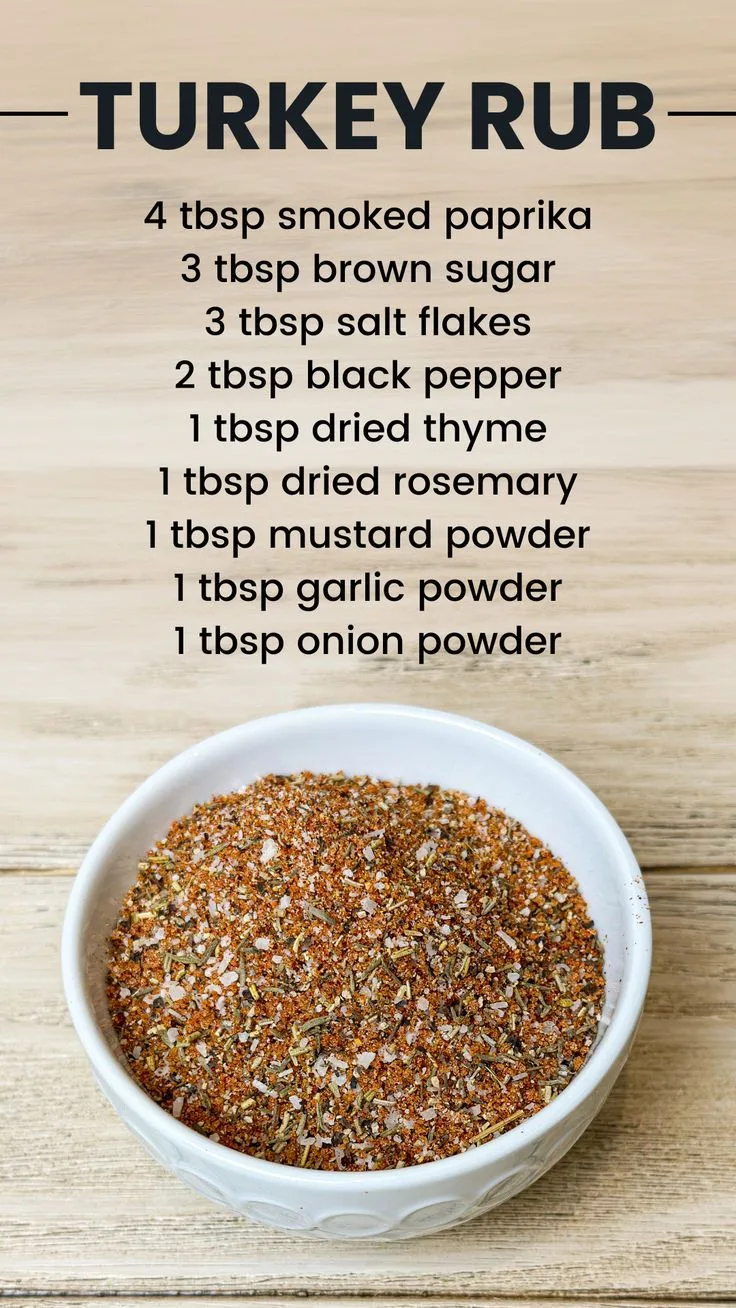
Image source: Bing (Web (fair-use with source credit))
One mistake to avoid: don't skip the oil. Even with a wet marinade, a light coat of oil before the tenderloin goes into the basket helps with browning and prevents sticking. It also helps the seasoning form a light crust instead of blowing off in the air fryer's fan.
How to Tell When It's Done (Without Overcooking It)
The USDA Food Safety and Inspection Service sets the safe minimum internal temperature for all poultry at 165°F. That number is non-negotiable for food safety. But here's the thing: if you wait until your thermometer reads 165°F inside the air fryer, you'll likely overcook the tenderloin by the time it rests.
Pull the tenderloin at 155°F to 160°F. Carryover cooking during the rest period will bring it up to 165°F within 5 to 10 minutes. This technique, called pull temperature cooking, is standard in professional kitchens and makes a real difference with lean cuts.
Use an instant-read thermometer, not a leave-in probe. Insert it into the thickest part of the tenderloin, avoiding the very tip, which cooks faster and gives a misleadingly high reading. Check the temperature at the 14-minute mark for a standard one-pound tenderloin, then every 2 minutes after that.
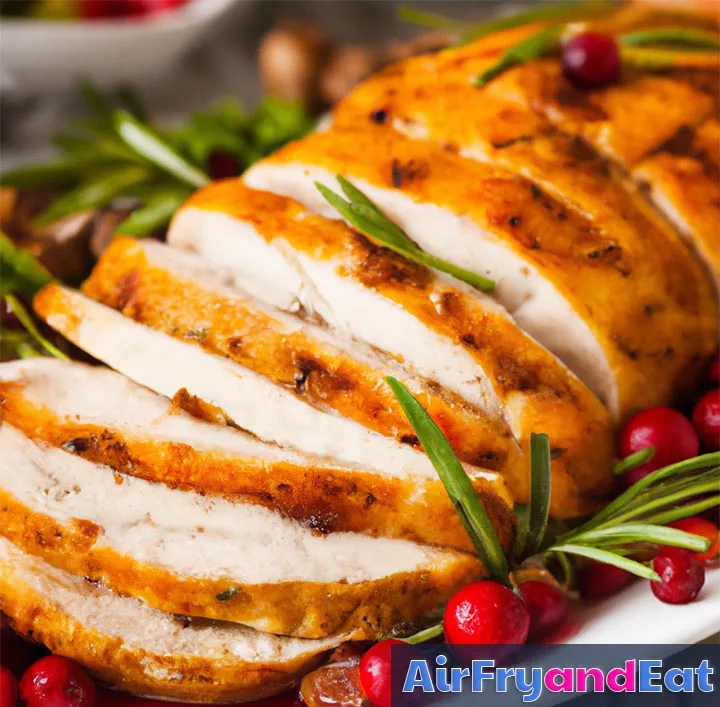
Image source: Bing (Web (fair-use with source credit))
Visual cues can help, but they're not reliable on their own. The exterior should be golden brown and the juices should run clear when you pierce the thickest part. If the juices are still pink, keep cooking.
But color alone doesn't confirm safety. Temperature does.
If you don't have a thermometer, get one. They cost under ten dollars and they're the only way to cook turkey tenderloin consistently without guessing. Guessing is how you end up with dry, overcooked meat or, worse, undercooked poultry.
The #1 Mistake That Dries Out Turkey Tenderloin and How to Avoid It
The single most common mistake is cooking by time alone and pulling the tenderloin out too late. Turkey tenderloin goes from juicy to dry in a very small window. At 375°F, the difference between perfect and overcooked can be as little as 3 to 4 minutes.
Here's what happens. The tenderloin's internal temperature climbs slowly for most of the cook, then accelerates in the final few minutes. Once it passes 160°F, the muscle fibers start squeezing out moisture rapidly.
By 170°F, you've lost a noticeable amount of juiciness. By 175°F, the meat is stringy and dry no matter how well you seasoned it.
The fix is simple: use a thermometer and respect the pull temperature. Set a timer for the halfway flip, but after that, let temperature guide you. Start checking at the low end of the estimated cook time range and pull at 155°F to 160°F.
Other mistakes that contribute to dryness:
- Skipping the rest. Cutting into the tenderloin immediately after cooking releases all the juices you worked to preserve.
- Cooking straight from frozen at full temperature. The exterior overcooks before the center thaws. Lower the temp and add time.
- Overcrowding the basket. Two tenderloins stacked on top of each other steam instead of roast. Cook in batches if needed.
- Not brining or marinating. With such a lean cut, any pre-cook moisture boost helps.
If you're using a high-wattage air fryer, like those in our best 8 qt air fryer guide, be especially careful. These models cook fast and the margin for error is smaller.
How Do Air Fryer, Oven, and Stovetop Methods Compare?
Each method works, but they produce different results. Here's a practical comparison.
| Method | Cook Time | Juiciness | Ease of Use | Best For |
|---|---|---|---|---|
| Air Fryer | 15 to 25 min | High (with thermometer) | Very easy | Weeknight dinners, small portions |
| Conventional Oven | 40 to 60 min | Moderate | Easy | Cooking for a crowd, hands-off |
| Stovetop (Pan-Sear) | 12 to 18 min | Moderate to high | Moderate | Crispy exterior, small batches |
| Grill (Outdoor) | 15 to 20 min | Moderate | Moderate | Smoky flavor, summer cooking |
The air fryer wins on speed and convenience. It also produces a more consistent exterior crust than the oven because the circulating hot air hits all sides at once. The oven tends to dry out the top and bottom while the sides stay pale.
Stovetop pan-searing gives you the best browning, but it requires more attention. You need to sear on all sides and then finish in the oven or cover and lower the heat, which adds steps. It's great if you want a restaurant-style crust, but it's not as hands-off.
The grill adds smoky flavor that the air fryer can't replicate, but it's weather-dependent and harder to control temperature precisely. Flare-ups can char the lean tenderloin before the interior cooks through.
For most people cooking one or two tenderloins on a weeknight, the air fryer is the best balance of speed, consistency, and minimal cleanup. If you're feeding a crowd, the oven makes more sense because you can fit multiple tenderloins on a sheet pan without worrying about basket space.
Turkey Tenderloin vs. Other Cuts: Which Works Best in an Air Fryer?
Not all turkey cuts behave the same in an air fryer. Here's how the tenderloin stacks up against the alternatives.
Turkey breast cutlets are sliced thin, usually under 1 inch thick. They cook in 8 to 10 minutes but dry out faster than tenderloins because of their high surface-area-to-volume ratio. They're good for quick meals but less forgiving.
Whole turkey breast (bone-in, 4 to 6 pounds) is too large for most air fryer baskets. Even if it fits, the exterior overcooks before the interior reaches 160°F. This cut belongs in the oven.
Turkey thighs have more fat and connective tissue, which makes them more forgiving than tenderloins. They take longer, about 25 to 30 minutes at 375°F, but they're harder to overcook. If you prefer dark meat, thighs are a solid air fryer option.
Chicken breast tenderloins are the closest substitute for turkey tenderloins. They're smaller and cook about 2 to 3 minutes faster, but the method is identical. If you can't find turkey tenderloins, chicken works with the same seasoning and technique.
The tenderloin hits the sweet spot: thick enough to stay juicy with proper temperature control, thin enough to cook through in under 20 minutes, and uniform enough to cook evenly without constant attention.
Troubleshooting: Common Problems and Quick Fixes
Even with a solid recipe, things can go sideways. Here are the most common issues and how to fix them.
The exterior is burning but the center is raw. Your air fryer runs hot or the tenderloin is too thick for the temperature. Drop the temperature to 350°F and add 5 to 8 minutes. If it's happening consistently, your air fryer's calibration may run high.
An oven thermometer inside the basket can confirm.
The tenderloin is dry and stringy. It was overcooked. Pull at 155°F to 160°F next time and let carryover cooking do the rest. Brining before cooking also helps significantly.
The seasoning blew off. Air fryers have powerful fans. Press the rub firmly into the oiled surface and avoid loose herbs or powders on top. A light spray of oil over the seasoning after application helps it stick.
The tenderloin is sticking to the basket. Make sure the basket is clean and the oiled side goes down first. Perforated parchment liners designed for air fryers also prevent sticking and make cleanup easier.
Smoke coming from the air fryer. Excess oil or marinade dripped onto the heating element. Use less oil next time and make sure the tenderloin isn't dripping when you place it in the basket.
Uneven cooking, one end thicker than the other. Tuck the thin end under slightly to even out the thickness. You can also pound the thicker section gently with a meat mallet before seasoning.
Meal Prep and Leftover Storage
Turkey tenderloin is one of the best proteins for meal prep. It reheats well, holds its texture, and portions easily.
Cook two tenderloins at once if your basket allows it. Slice both and divide into containers with rice, roasted vegetables, or salad greens. Each 4-ounce serving delivers about 22 to 24 grams of protein with minimal fat.
Storage guidelines per USDA Food Safety:
- Refrigerate cooked turkey within 2 hours of cooking.
- Store in airtight containers for 3 to 4 days.
- Freeze for longer storage, up to 2 to 3 months.
- Reheat to an internal temperature of 165°F.
To reheat, slice the tenderloin and warm it in the air fryer at 300°F for 3 to 4 minutes. This brings back some of the exterior crispness without drying out the interior. Microwave reheating works too but softens the texture.
If you're prepping for a full week, season the raw tenderloins and store them uncooked in the fridge for up to 2 days before cooking. Cooked and sliced turkey also freezes well. Portion it into single servings before freezing so you only thaw what you need.
Expert Tips for Juicy, Flavorful Results Every Time
A few small upgrades make a noticeable difference.
Use avocado oil instead of olive oil. It has a higher smoke point, which means better browning at the air fryer's high temperatures without any burnt flavor.
Add a teaspoon of cornstarch to your dry rub. It helps create a thin, crispy crust on the exterior. This is the same technique used in many restaurant-style air fryer recipes.
Let the seasoned tenderloin sit for 10 minutes before cooking. This gives the salt time to start penetrating the surface, which improves flavor and moisture retention.
Don't skip the flip. The bottom of the basket runs hotter in most models. Flipping at the halfway mark ensures even browning and cooking on both sides.
Slice against the grain. Turkey tenderloin has long, visible muscle fibers. Cutting perpendicular to those fibers shortens them, making each bite noticeably more tender.
Use a perforated parchment liner. It prevents sticking, makes cleanup faster, and doesn't block airflow the way solid liners do. They're inexpensive and reusable.
If you're looking for an air fryer that handles poultry consistently, models with smart controls and accurate temperature regulation make a real difference. Our guide to the best 8 qt air fryer with smart controls covers options that hold temperature precisely, which matters a lot with lean cuts like turkey tenderloin.
Frequently Asked Questions
How long does it take to cook turkey tenderloin in an air fryer?
A thawed, one-pound turkey tenderloin takes 16 to 20 minutes at 375°F in a standard 1400W-plus air fryer. Flip it halfway through. Always check with a thermometer and pull at 155°F to 160°F for the best results.
Do you have to preheat an air fryer for turkey tenderloin?
Preheating isn't required, but it helps. If your model has a preheat function, run it at 375°F for 3 to 5 minutes before adding the tenderloin. Without preheating, add about 2 minutes to the total cook time.
Can you cook frozen turkey tenderloin in an air fryer?
Yes. Cook at 360°F for 28 to 35 minutes, flipping halfway. Don't thaw first.
Check the internal temperature at the 25-minute mark and cook until it reaches 165°F at the thickest point.
What temperature should turkey tenderloin be when done?
The USDA recommends a minimum internal temperature of 165°F for all poultry. Pull the tenderloin at 155°F to 160°F and let it rest for 5 to 10 minutes. Carryover cooking will bring it to 165°F.
Is turkey tenderloin healthy?
Turkey tenderloin is one of the leanest protein sources available. A 4-ounce serving has about 100 to 120 calories, 22 to 24 grams of protein, and only 1 to 2 grams of fat. It fits well into low-carb, keto, and high-protein diets.
What goes well with air fryer turkey tenderloin?
Roasted sweet potatoes, steamed green beans, rice pilaf, and simple salads all pair well. The mild flavor of the turkey takes on whatever sides you serve, so it's versatile for meal prep and family dinners alike.