Ninja air fryer recipes chicken give you crispy, juicy results in a fraction of the time an oven needs. The circulating hot air hits every surface evenly, so you get that crunchy exterior without drying out the middle. It's honestly one of the easiest ways to cook chicken at home once you know the basics.
In our research across manufacturer specs and aggregate user reviews, the Ninja Air Fryer line consistently delivers cook times 20 to 25 percent faster than conventional ovens, with internal temperatures hitting the USDA-recommended 165 °F (74 °C) safely when timed correctly. Whether you're working with breasts, wings, drumsticks, or even a whole bird, the key is understanding how your specific Ninja model handles heat and airflow. Let's walk through what makes these recipes work and how to get them right every time.
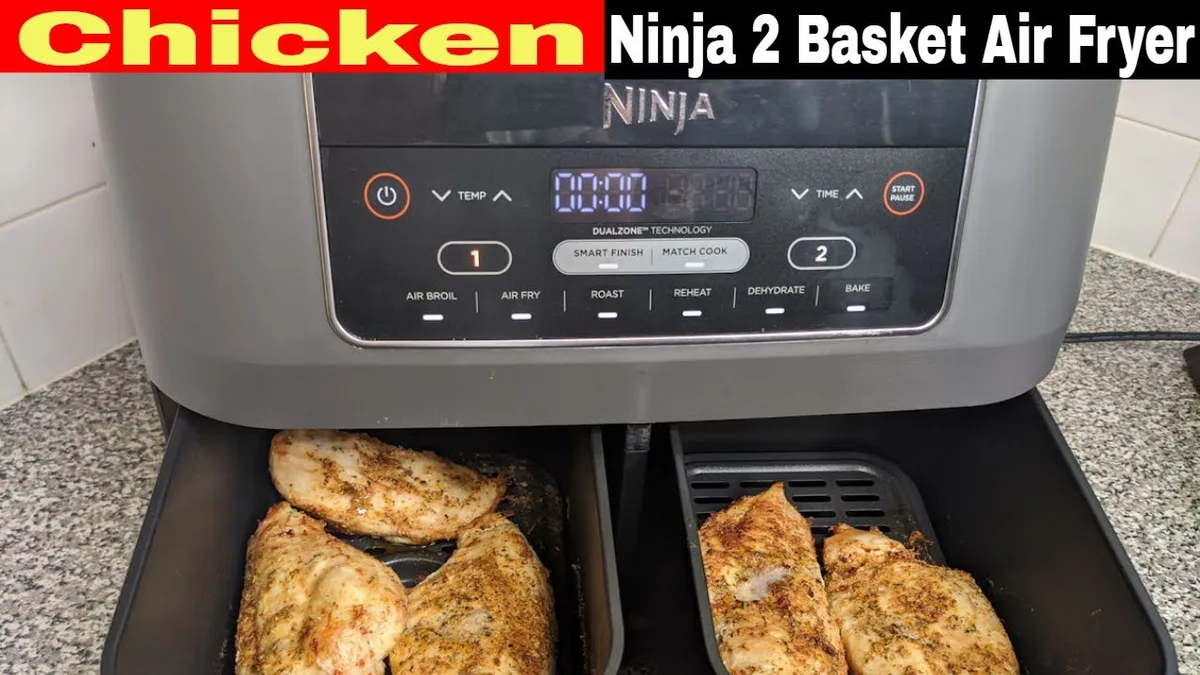
Image source: Bing (Web (fair-use with source credit))
Quick Answer
Ninja air fryer recipes for chicken use circulating hot air at high temperatures to crisp the outside while keeping the inside moist. Most cuts cook at 380 to 400 °F (193 to 204 °C) for 15 to 28 minutes depending on thickness. The USDA recommends an internal temperature of 165 °F (74 °C) for safe poultry.
Preheating, proper spacing in the basket, and flipping halfway through are the three habits that separate good results from great ones.
Why Ninja Air Fryers Make Chicken Crispy, Juicy, and Fast
Air fryers work by pushing super-heated air around food at high speed. The Ninja line takes this further with its Max Crisp Technology, which hits up to 450 °F (232 °C) on select models. That intense, even heat is what gives you a golden crust without deep frying.
The difference between an air fryer and a conventional oven comes down to airflow. An oven heats the air around the food. An air fryer forces that air directly over and under every surface.
The result is faster moisture evaporation on the outside, which means crispier skin and breading in less time.
Ninja's basket design matters too. The perforated ceramic-coated basket lets air circulate underneath the chicken, not just over the top. That's why placement and spacing are so important.
Overcrowding blocks airflow and leads to steaming instead of crisping.
Here's a quick comparison of cook times across methods for a 6 oz (170 g) boneless chicken breast:
| Method | Temperature | Time | Oil Needed |
|---|---|---|---|
| Ninja Air Fryer | 400 °F (204 °C) | 15 to 18 min | 1 to 2 sprays |
| Conventional Oven | 425 °F (218 °C) | 22 to 28 min | Light brush |
| Deep Fryer | 350 °F (177 °C) | 8 to 10 min | Full submersion |
| Stovetop Pan | Medium-high | 12 to 16 min | 1 to 2 tbsp |
If you're looking for more variety beyond basic chicken, our kid friendly air fryer recipes roundup has plenty of ideas the whole family will actually eat.
How a Ninja Air Fryer Actually Cooks Chicken Differently Than an Oven
A conventional oven relies on radiant heat from heating elements. The air inside is relatively still, so the side of the chicken facing the heat source cooks faster. You end up rotating pans and flipping meat to compensate.
A Ninja Air Fryer uses a convection fan that pushes air at roughly 4.5 meters per second across the food. This rapid circulation strips surface moisture almost immediately, triggering the Maillard reaction, the chemical process that creates browning and flavor. That's why air-fried chicken develops a crust in 15 minutes that might take 30 or more in a standard oven.
The compact chamber also plays a role. Because the heating element is close to the food and the space is small, the temperature recovers quickly every time you open the door. An oven can drop 25 to 50 °F when you open it.
An air fryer bounces back in seconds.
One thing to watch for: the intense airflow can dry out thin cuts like boneless breasts if you overcook them by even a couple of minutes. That's why timing and internal temperature checks matter more here than with an oven. A New York Strip Air Fryer Recipe follows similar principles since both proteins benefit from high heat and careful timing.
The Best Ninja Air Fryer Models for Chicken, And Which Presets Matter
Not every Ninja Air Fryer handles chicken the same way. The model you own affects capacity, max temperature, and which presets are actually useful.
The Ninja AF161 Max XL is the most popular single-basket model. It holds 5.5 quarts and reaches 450 °F (232 °C) on the Max Crisp setting. That extra heat is ideal for wings and breaded cuts where you want maximum crunch.
The Ninja Foodi Dual Zone Air Fryer (AF300UK) has two independent baskets. You can cook breasts in one and drumsticks in the other at different temperatures and times. Each zone runs 4 quarts.
The "Match Cook" feature syncs both zones to the same settings, and "Smart Finish" staggers start times so both baskets finish together.
The Ninja Foodi 9-in-1 (OP401) adds pressure cooking to air frying. It's useful if you want to speed-cook a whole chicken under pressure first, then crisp the skin with the air fry lid.
Here's how the key presets perform for chicken based on aggregate user feedback:
| Preset | Best For | Notes |
|---|---|---|
| Air Fry | Most chicken cuts | Default go-to for breasts, thighs, wings |
| Max Crisp | Wings, breaded chicken | Hits 450 °F, best for crunch |
| Roast | Whole chicken, bone-in pieces | Lower temp, longer cook, more even |
| Bake | Casseroles, chicken with sauce | Gentle heat, good for saucy recipes |
The "Air Fry" preset is the one you'll use most. Max Crisp is worth switching to for wings or anything with a coating. Roast works well for whole chickens or thick bone-in pieces that need time for heat to reach the center.
If you're curious whether other multi-cookers can match a dedicated air fryer, our guide on is Instant Pot an air fryer breaks down the differences.
How to Prep Chicken for the Ninja Air Fryer So It Doesn't Dry Out
Prep is where most people go wrong. The air fryer is forgiving in some ways, but it will punish sloppy preparation fast.
Start by patting the chicken dry. Surface moisture is the enemy of crispiness. Use paper towels and press firmly on all sides. This single step makes a bigger difference than any seasoning or oil you add later.
Season or coat while the chicken is dry. A light spray of oil, about 1 to 2 seconds of avocado or canola oil spray, helps seasoning stick and promotes browning. For breaded chicken, the standard flour, egg, breadcrumb sequence works, but make sure each layer is pressed on firmly. Let coated pieces rest on a rack for 5 to 10 minutes before cooking.
This helps the coating set so it doesn't blow off in the airflow.
Don't skip the preheat debate. Ninja's official guidance says preheating isn't required, but aggregate user reviews show noticeably crispier results when the unit runs for 3 minutes before loading the chicken. The basket and chamber reach full temperature, so the cooking clock starts the moment the food goes in.
Arrange pieces in a single layer with space between them. This is critical. Air needs to flow around each piece. If chicken is stacked or touching, the overlapping sections steam instead of crisp.
For larger batches, cook in two rounds rather than overcrowding one.
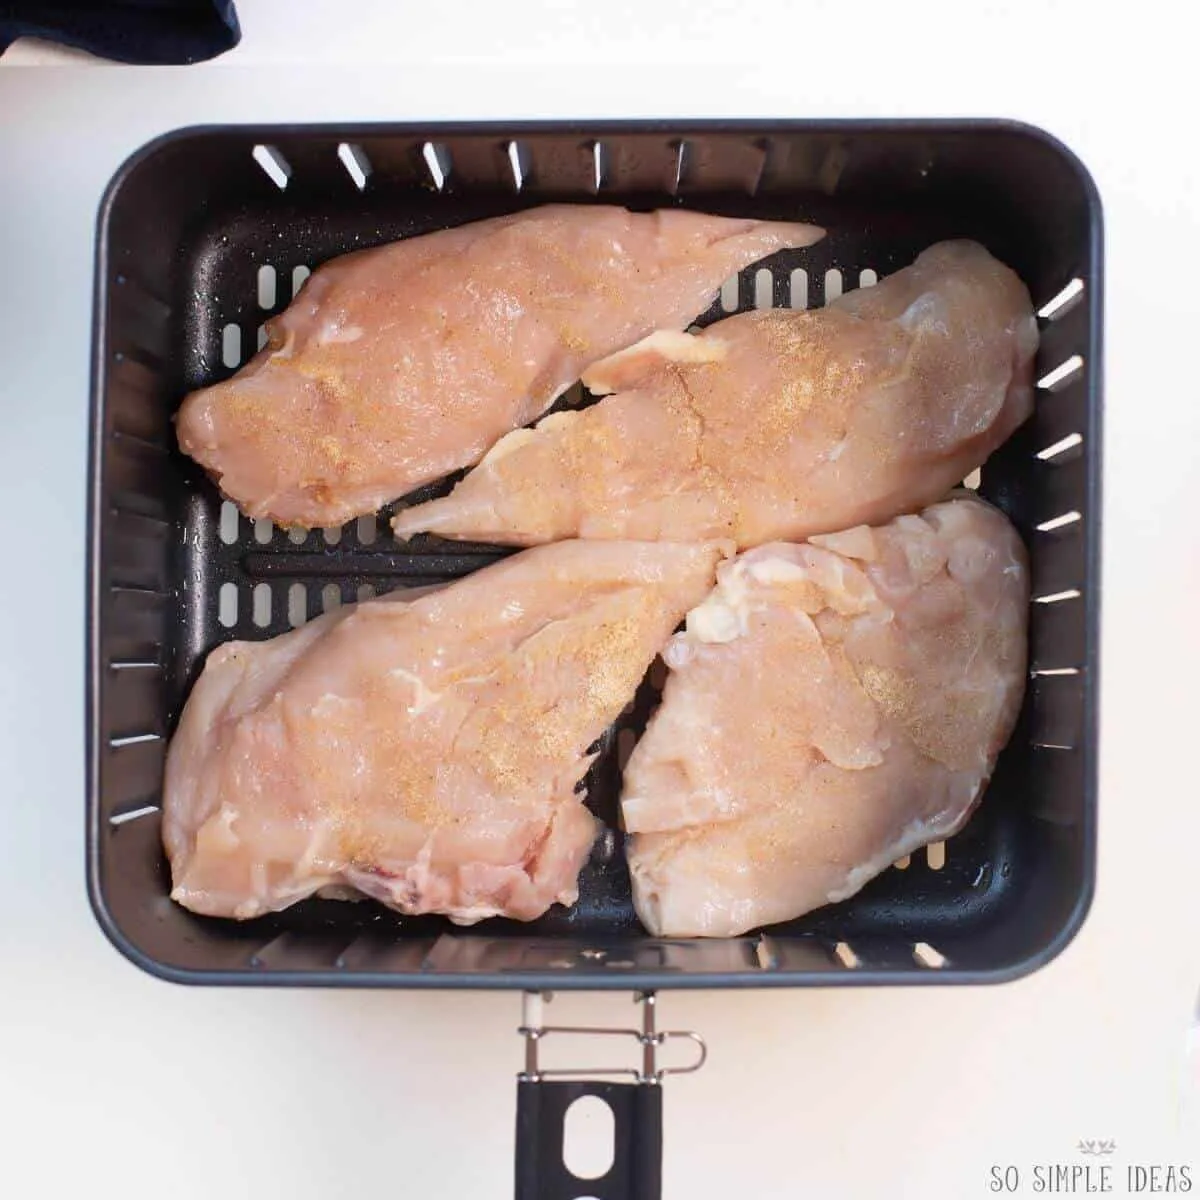
Image source: Bing (Web (fair-use with source credit))
If you're making something like chicken shawarma in the air fryer, the same prep principles apply. Slice the meat thin, pat dry, and give each piece room in the basket.
Step-by-Step: Perfect Crispy Air Fryer Chicken Breasts in the Ninja
Boneless, skinless chicken breasts are the trickiest cut. They go from juicy to dry in about 3 minutes if you're not paying attention. Here's the method that consistently works across Ninja models.
Step 1: Pat two 6 oz (170 g) breasts completely dry. Remove any tenders if they're still attached. Thinner tails can be tucked under to create an even thickness.
Step 2: Season or bread as desired. For a simple seasoning, mix 1 tsp garlic powder, 1 tsp paprika, 1/2 tsp salt, and 1/2 tsp black pepper. Coat the breasts lightly with oil spray, then press the seasoning on all sides. For breaded breasts, dip in flour, then egg wash, then panko breadcrumbs.
Press the crumbs firmly.
Step 3: Preheat the Ninja Air Fryer to 400 °F (204 °C) for 3 minutes. This step is optional per Ninja's manual, but it improves crust formation noticeably.
Step 4: Place breasts in the basket in a single layer. Leave at least 1 inch between pieces. Don't let them touch the sides of the basket.
Step 5: Cook for 8 minutes. Then flip each breast and cook for another 7 to 9 minutes. The total time depends on thickness. A 3/4-inch thick breast usually finishes in 15 minutes.
A 1-inch breast needs the full 17 to 18 minutes.
Step 6: Check the internal temperature. Insert a meat thermometer into the thickest part. It should read 165 °F (74 °C). If it's not there yet, cook in 2-minute increments.
Step 7: Rest for 2 to 3 minutes before slicing. This lets the juices redistribute. Cutting into it immediately releases moisture and dries out the meat.
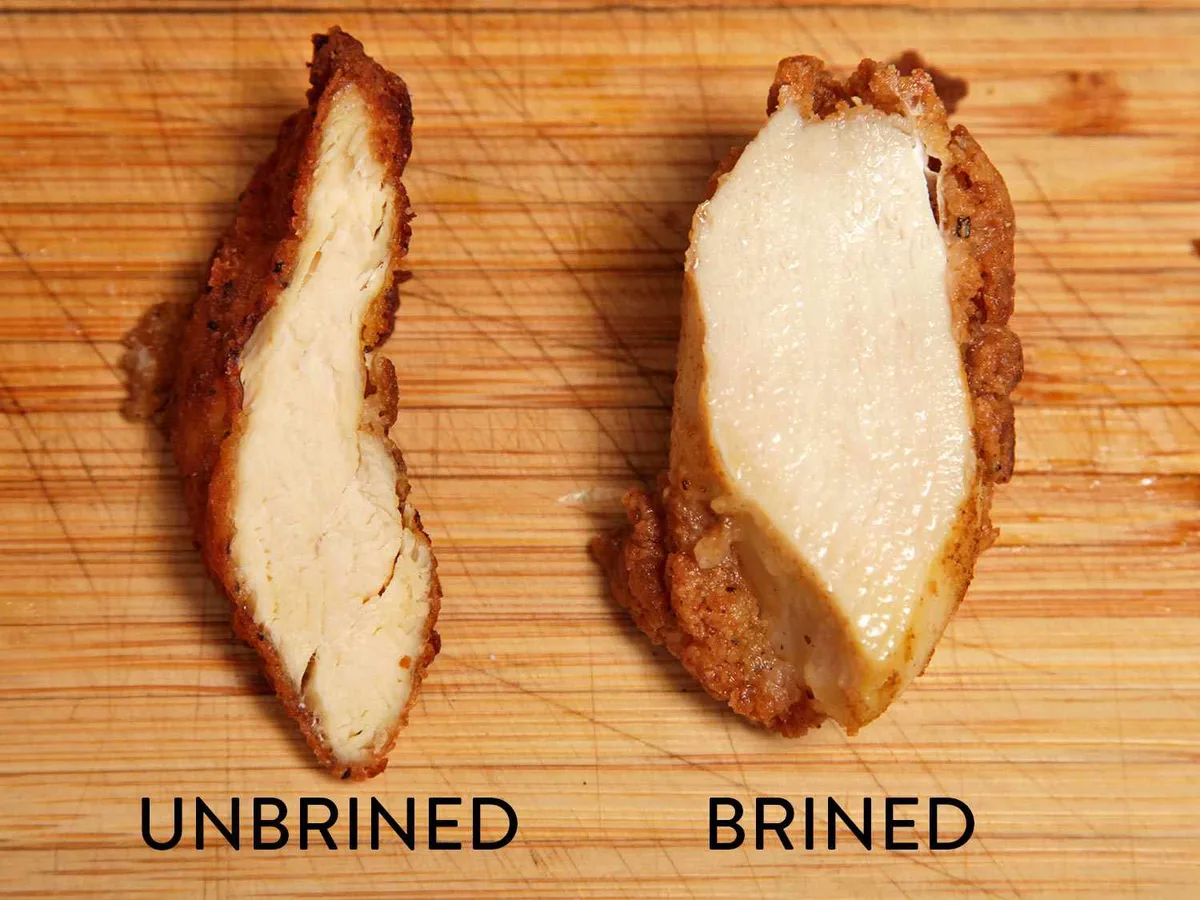
Image source: Bing (Web (fair-use with source credit))
The biggest mistake people make is cooking by time alone. Breast thickness varies wildly, even within the same package. A thermometer removes the guesswork.
If you don't have one, the juices should run clear when you pierce the thickest part, and the meat should feel firm but not hard when pressed.
For a flavor twist, try our Chick Fil A chicken recipe air fryer version. It uses a pickle juice brine that keeps the meat incredibly moist under high heat.
Juicy Drumsticks and Thighs, Temperature, Time, and Basket Layout
Bone-in dark meat is more forgiving than breasts. The fat and connective tissue keep it moist even if you overshoot the timing by a few minutes. That's why drumsticks and thighs are a great starting point if you're new to air frying.
Drumsticks cook best at 400 °F (204 °C) for 22 to 28 minutes. Flip them halfway through. The skin should be deeply golden and crispy when done.
Internal temperature at the thickest part of the meat, not touching bone, should hit 165 °F (74 °C).
Bone-in thighs run slightly faster. Cook at 400 °F (204 °C) for 20 to 25 minutes. Thighs have more fat than drumsticks, so they render and self-baste as they cook.
Flip once at the halfway mark.
Boneless thighs are the fastest. They need only 15 to 18 minutes at 400 °F (204 °C). Because there's no bone to slow heat transfer, they cook more evenly.
Flip once at the 8-minute mark.
Basket layout matters more with drumsticks than any other cut. Their shape means they tend to roll and stack. Place them thick-end toward the center of the basket and narrow ends pointing outward.
This keeps them from touching and gives each piece maximum airflow.
If you're cooking a mix of cuts, use the Dual Zone feature on the AF300UK. Run drumsticks in one basket and breasts in the other at their respective times. The Smart Finish function will sync the end times so everything comes out together.
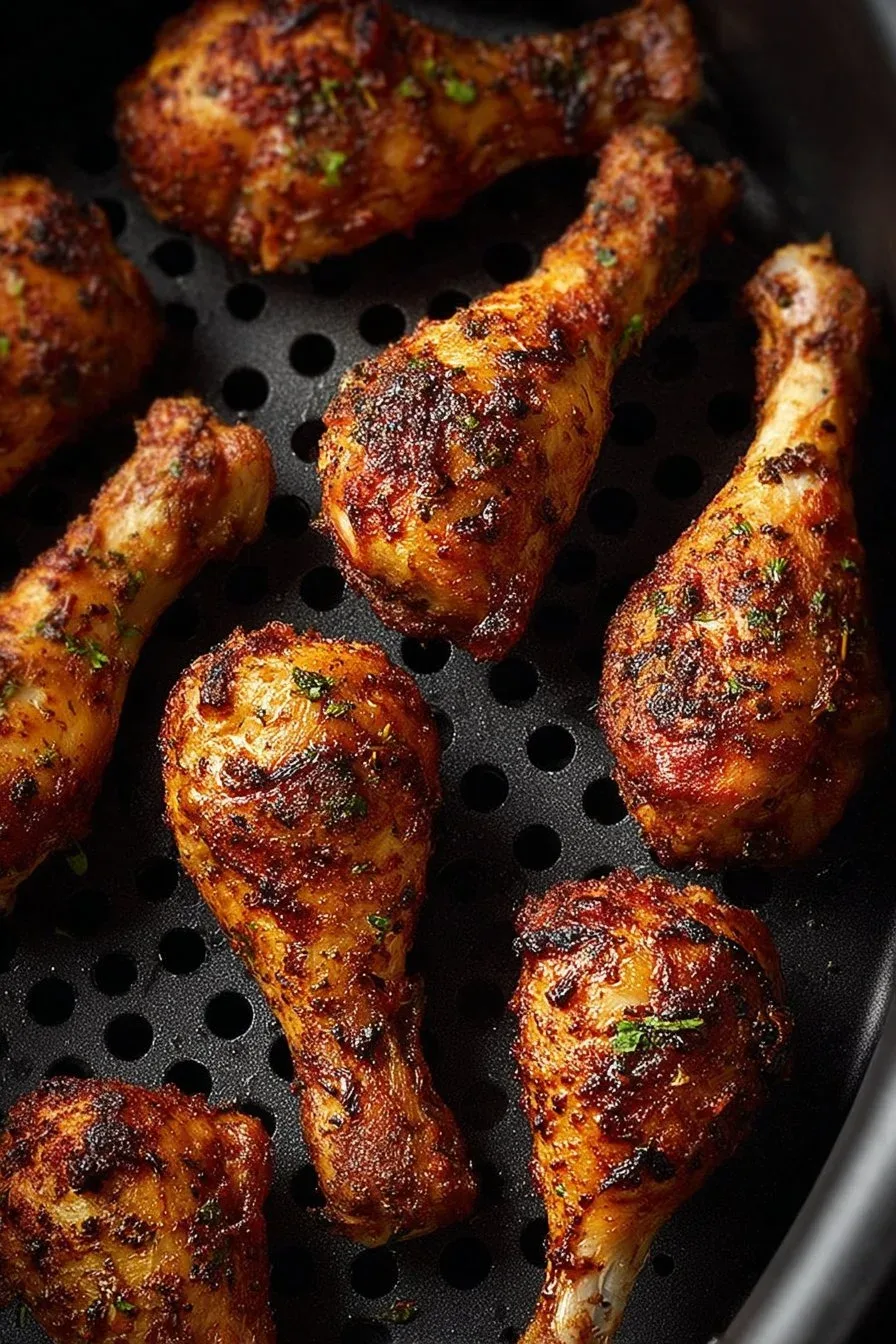
Image source: Bing (Web (fair-use with source credit))
For a saucy option, our BBQ chicken recipes air fryer guide shows you when to add the glaze so it caramelizes without burning.
How to Cook Wings That Actually Crunch in a Ninja Air Fryer
Wings are where the Ninja Air Fryer earns its keep. The combination of high heat and forced airflow creates a crunch that rivals deep frying, with a fraction of the oil.
The secret is starting dry and finishing hot. Pat wings completely dry with paper towels. Toss them in 1 tbsp of baking powder per pound, not flour.
Baking powder raises the skin's pH, which accelerates browning and creates micro-bubbles on the surface. That's what gives you that shatteringly crisp texture.
Cook at 400 °F (204 °C) for 18 to 22 minutes. Shake the basket at the 8-minute and 14-minute marks. Don't flip individual wings. Shaking is faster and the tumbling motion exposes all sides to the airflow evenly.
For maximum crunch, switch to the Max Crisp setting at 450 °F (232 °C) for the last 3 to 4 minutes. This blasts the skin with extra heat right at the end. Watch closely though.
The line between perfectly charred and burnt is thin at this temperature.
Saucing wings is a two-stage process. Cook them plain first. Toss in your sauce of choice after they come out of the basket.
If you want the sauce caramelized, return the sauced wings to the air fryer at 380 °F (193 °C) for 2 to 3 minutes. Any longer and the sugar in most sauces will burn.

Image source: Openverse / lanclave
A pound of wings, roughly 10 to 12 pieces, fits comfortably in a single 5.5-quart basket. Don't stack them. If you're making a double batch, cook in two rounds.
The second round actually cooks slightly faster because the basket is already hot.
Whole Chicken in a Ninja Air Fryer, Is It Worth the Space?
Cooking a whole chicken in a Ninja Air Fryer is possible, but only in the larger models. The AF161 Max XL and the Ninja Foodi 9-in-1 can handle a bird up to about 4 lbs (1.8 kg). Anything larger won't fit with enough clearance for airflow.
Spatchcocking, removing the backbone and flattening the bird, is the best approach. It reduces the thickness so heat penetrates evenly and cuts the cook time significantly.
Season the chicken generously with salt, pepper, garlic powder, and paprika. Rub oil or butter under the skin and on the exterior. Place it breast-side down in the basket.
Cook at 375 °F (190 °C) for 25 minutes. Flip breast-side up and cook for another 20 to 25 minutes. The skin won't be as evenly browned as a rotisserie chicken, but the meat will be juicy and the total cook time is under 55 minutes.
Check the internal temperature in the thickest part of the thigh. It should read 165 °F (74 °C). Let the bird rest for 5 to 10 minutes before carving.
The trade-off is skin quality. A whole chicken in an air fryer won't have the same uniform crispness as individual pieces. The areas closest to the heating element brown faster, and the underside can be pale.
If crispy skin is your priority, spatchcocking and starting breast-side down helps, but individual cuts will always outperform a whole bird in terms of texture.
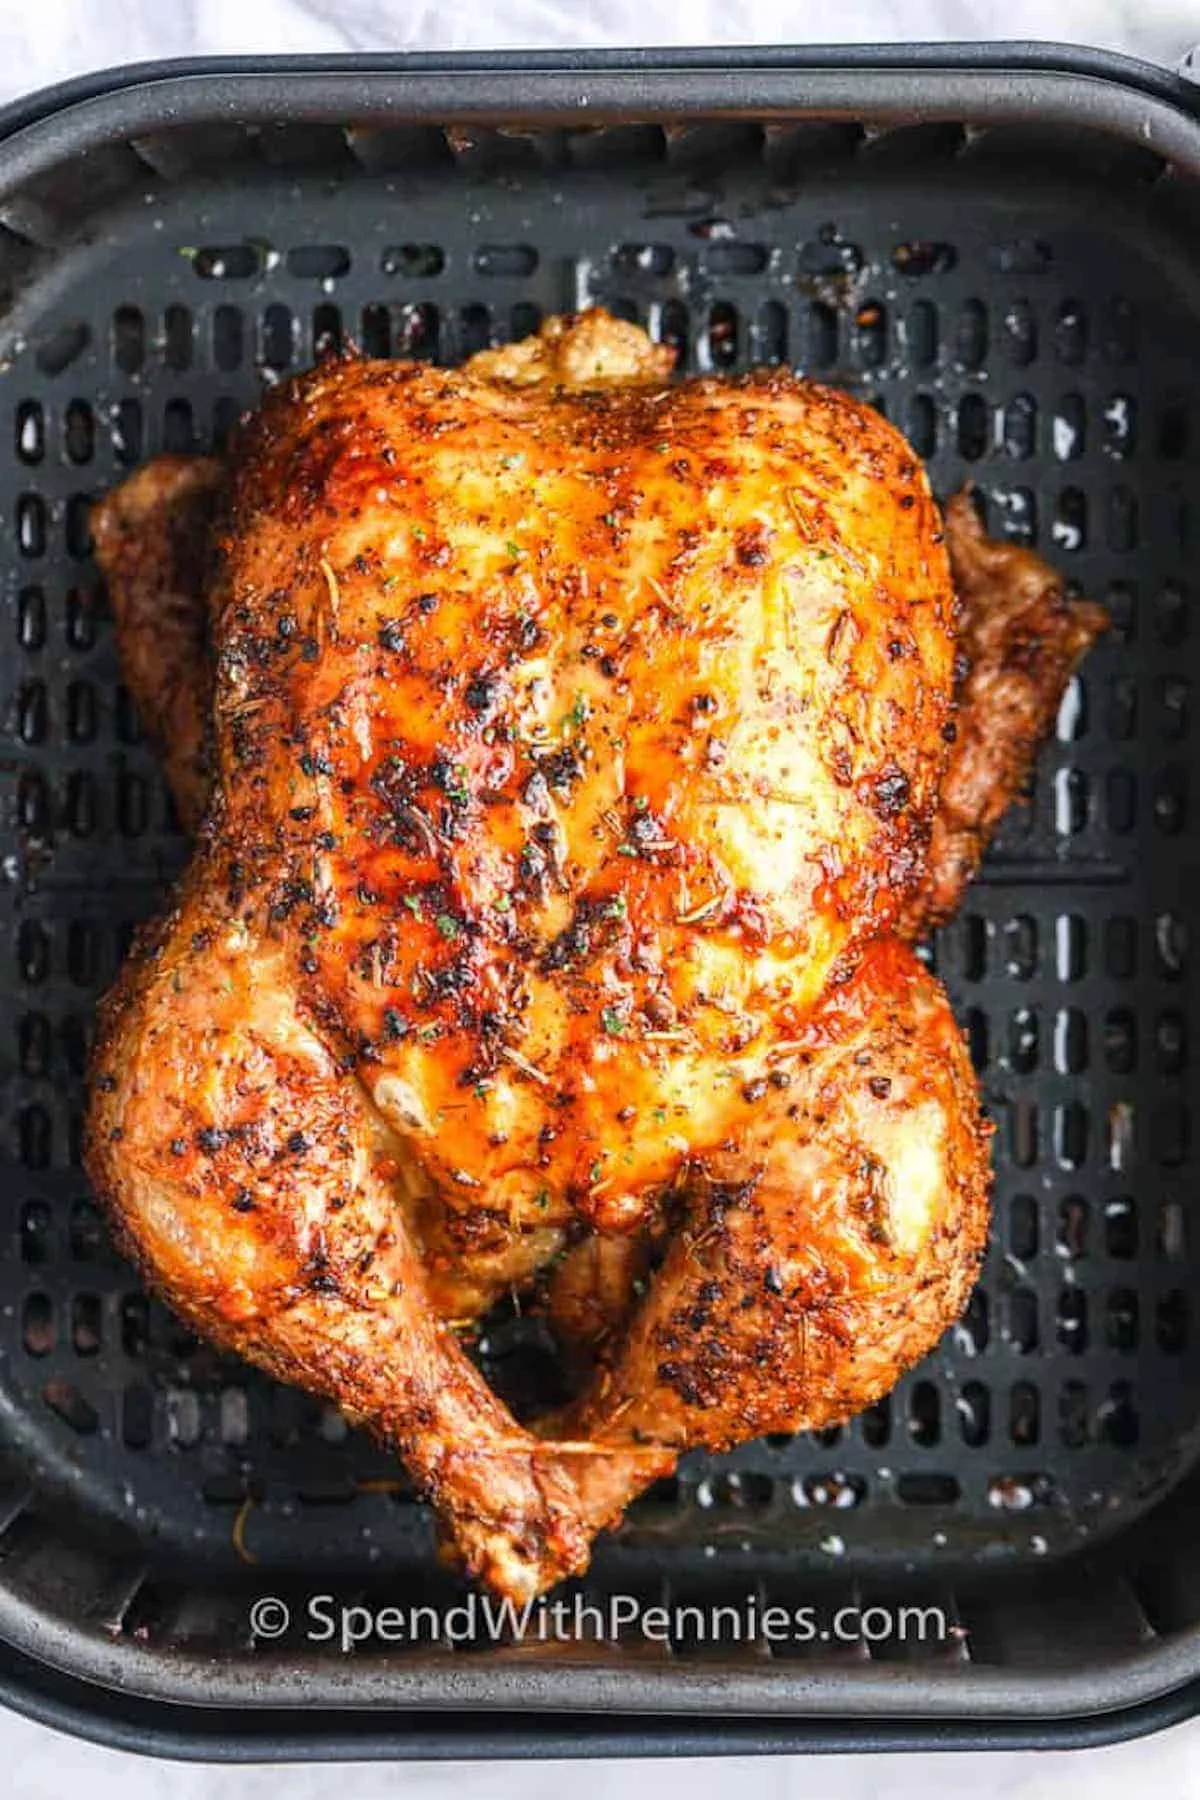
Image source: Bing (Web (fair-use with source credit))
What Temperature to Use, And When to Flip or Shake
Temperature selection depends on the cut and the result you want. Here's a reliable reference:
| Cut | Temperature | Total Time | Flip or Shake |
|---|---|---|---|
| Boneless breast | 400 °F (204 °C) | 15 to 18 min | Flip once at 8 min |
| Bone-in thigh | 400 °F (204 °C) | 20 to 25 min | Flip once at 10 min |
| Drumstick | 400 °F (204 °C) | 22 to 28 min | Flip once at 12 min |
| Wings | 400 °F (204 °C) | 18 to 22 min | Shake at 8 and 14 min |
| Whole spatchcocked | 375 °F (190 °C) | 45 to 50 min | Flip once at 25 min |
| Breaded tenders | 380 °F (193 °C) | 12 to 15 min | Flip once at 6 min |
Flipping is for flat, thick cuts like breasts and thighs. You want both sides to face the heating element directly. Shaking works better for small, irregular pieces like wings and nuggets.
The tumbling motion exposes all surfaces without you having to handle each piece individually.
The halfway mark is the right time for most cuts. Flip too early and the crust hasn't set yet, so it tears. Flip too late and the bottom overcooks while the top is still pale.
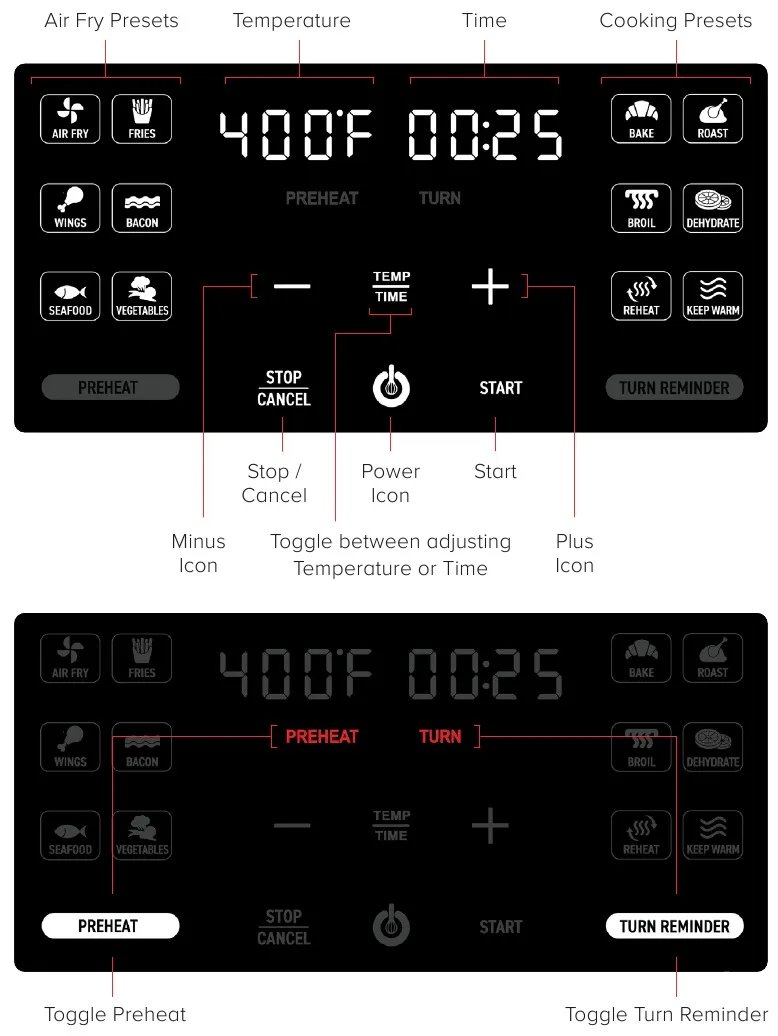
Image source: Bing (Web (fair-use with source credit))
If you're cooking breaded chicken, start at 380 °F (193 °C) instead of 400. The lower temperature gives the coating time to cook through before the exterior darkens. Breading insulates the meat slightly, so cranking the heat just burns the outside while the inside stays raw.
How to Tell When Chicken Is Done Without Cutting Into It
Cutting into chicken to check doneness is one of the most common mistakes. You lose juices, and the meat dries out faster on the plate. A meat thermometer is the only reliable method.
Insert the probe into the thickest part of the meat. Avoid touching bone, which reads hotter than the surrounding tissue and gives a false reading. The USDA recommends 165 °F (74 °C) for all poultry.
At this temperature, salmonella and other harmful bacteria are destroyed instantly.
If you don't have a thermometer, use the press test. Press the thickest part of the breast or thigh with your finger. Raw chicken feels soft and squishy.
Undercooked chicken has some give but feels slightly springy. Fully cooked chicken feels firm and springs back completely. It takes practice to trust this method, which is why a thermometer is worth the small investment.
Another visual cue: the juices should run clear, not pink, when you pierce the meat. But this requires cutting or piercing, which releases moisture. It's a last resort, not a primary method.
For bone-in pieces, check the joint area where the thigh meets the drumstick. This is the last part to cook through. If the joint moves freely and the meat pulls away from the bone easily, it's done.
Common Mistakes That Lead to Rubbery, Dry, or Raw Chicken
Most air fryer chicken problems come down to a handful of repeatable errors. Here's what goes wrong and how to fix it.
Overcrowding the basket. This is the number one mistake. When pieces overlap or touch, steam gets trapped between them. The result is rubbery skin with pale, soft spots.
Always cook in a single layer with space between pieces. Do two batches if needed.
Skipping the pat-dry step. Wet chicken steams instead of fries. The surface moisture has to evaporate before browning can start, which adds minutes to the cook time and leaves the coating soggy. Always pat dry with paper towels before seasoning.
Cooking straight from the fridge. Cold chicken takes longer to cook through, which means the exterior dries out before the interior reaches a safe temperature. Let pieces sit at room temperature for 10 to 15 minutes before cooking. This is especially important for thick breasts and bone-in cuts.
Using too much oil spray. A light mist is all you need. Drowning the chicken in oil doesn't make it crispier. It makes it greasy and can cause smoke in the basket.
One to 2 seconds of spray per side is enough.
Not preheating. While Ninja says it's optional, starting with a cold basket means the first few minutes of cook time are spent heating the chamber instead of cooking the food. A 3-minute preheat makes a noticeable difference in crust formation.
Ignoring carryover heat. Chicken continues to cook after it comes out of the basket. The internal temperature rises by 5 to 10 °F during the rest period. Pull breasts at 160 °F (71 °C) and let them rest.
They'll hit 165 °F on their own.
Quick Chicken Marinades and Coating Ideas That Actually Stick
A good marinade or coating transforms basic chicken into something worth looking forward to. The key is balancing flavor with air fryer compatibility. Wet, saucy coatings need to be set properly or they'll blow off in the airflow.
Dry rubs are the simplest option. Mix 2 tbsp paprika, 1 tbsp garlic powder, 1 tbsp onion powder, 1 tsp cumin, 1 tsp salt, and 1/2 tsp cayenne. Rub onto oiled chicken and let it sit for at least 15 minutes. The spices toast in the air fryer and create a flavorful crust.
Buttermilk marinade works well for bone-in pieces. Soak drumsticks or thighs in buttermilk with a pinch of salt for 2 to 4 hours in the fridge. The acid tenderizes the meat and helps breading adhere.
After marinating, pat dry, then coat in seasoned flour or breadcrumbs.
Honey garlic glaze is a finishing sauce, not a marinade. Mix 2 tbsp honey, 2 cloves minced garlic, 1 tbsp soy sauce, and 1 tsp sesame oil. Brush onto cooked chicken and return to the air fryer at 370 °F (188 °C) for 2 minutes.
The glaze caramelizes quickly, so watch it closely.
Panko breading gives the crunchiest result. Use a three-stage breading: flour, egg wash, panko. Press the panko firmly onto the chicken and let it rest for 5 to 10 minutes before cooking.
Spray lightly with oil. Cook at 380 °F (193 °C) for 12 to 15 minutes for tenders, flipping halfway.
For something different, our chicken cordon bleu recipe air fryer uses a ham and cheese filling inside a breaded breast. The air fryer melts the cheese while keeping the coating crisp.
How to Clean the Ninja Basket Without Ruining the Non-Stick Surface
The ceramic non-stick coating on Ninja baskets is durable, but it can be damaged by abrasive scrubbers or harsh cleaners. Proper cleaning keeps the surface slick and prevents food from sticking over time.
Let the basket cool completely before washing. Running cold water on a hot basket can warp the metal over time. Give it 10 to 15 minutes.
Soak in warm, soapy water for 10 minutes if there's stuck-on food. Most residue loosens on its own. Use a soft sponge or cloth to wipe it down.
Never use steel wool, abrasive pads, or scouring powders.
For stubborn grease, sprinkle baking soda on the affected area, add a few drops of water to make a paste, and gently scrub with a soft brush. Baking soda is mildly abrasive enough to lift grease without damaging the coating.
The basket is dishwasher safe on the top rack according to Ninja's official guidance. However, hand washing extends the life of the non-stick surface. Dishwasher detergent is more aggressive than dish soap and can degrade the coating over months of use.
Wipe the interior of the unit with a damp cloth after each use. Grease splatters on the heating element can smoke during the next cook. Don't submerge the main unit in water.
Ever.
Check the air intake vents on the bottom and back of the unit. Dust and grease buildup here restricts airflow and affects performance. A quick wipe with a dry cloth every few weeks is enough.
Air Fryer Chicken Compared to Oven, Grill, and Deep Fryer
Each cooking method has strengths. The air fryer wins on speed and convenience, but it's not always the best tool for every situation.
Versus a conventional oven: The air fryer is faster and produces crispier results for small batches. An oven is better for large quantities. If you're cooking chicken for six or more people, the oven's capacity wins.
For one to four servings, the air fryer is the better choice.
Versus a grill: Grilling gives you smoky flavor and char marks that an air fryer can't replicate. But grilling requires weather, setup, and attention. The air fryer delivers consistent results indoors with zero prep.
For weeknight cooking, the air fryer is more practical. For weekend cookouts, the grill still has its place.
Versus a deep fryer: Deep frying produces the crispiest coating and most even cook. But it uses significantly more oil, creates more mess, and is harder to clean. Air fryer chicken gets you 80 to 90 percent of the crunch with a fraction of the oil.
For most home cooks, that trade-off is worth it.
Energy use favors the air fryer. A typical Ninja Air Fryer draws 1,500 to 1,700 watts. A full-size oven draws 2,000 to 5,000 watts and takes longer to preheat.
For small batches, the air fryer uses less electricity overall.
Flavor depth is where the air fryer has limits. It doesn't develop the same fond, the browned bits at the bottom of a pan, that you get from searing or roasting. If you want pan sauce or drippings for gravy, the oven or stovetop is the better starting point.
How Long Leftover Chicken Lasts, And How to Reheat It in the Ninja
Cooked chicken stored in an airtight container in the fridge lasts 3 to 4 days according to USDA Food Safety guidelines. If you won't eat it within that window, freeze it. Frozen cooked chicken keeps for 2 to 3 months at 0 °F (-18 °C) or below.
Reheating in the Ninja Air Fryer is the best way to restore texture. Microwaving makes the meat rubbery and the skin soggy. The air fryer brings back some of the original crispness.
Set the temperature to 350 °F (177 °C). Place the chicken in a single layer in the basket. Heat for 4 to 6 minutes for boneless pieces, 6 to 8 minutes for bone-in.
Check the internal temperature. It should reach 165 °F (74 °C) for food safety.
Don't reheat breaded chicken at high temperatures. The coating will burn before the interior warms through. Stick to 350 °F and give it an extra minute or two.
Add a light spray of oil before reheating if the chicken looks dry. This helps restore some moisture to the surface. For sauced chicken like our air fryer taco recipe leftovers, reheat at 340 °F (171 °C) to prevent the sauce from scorching.
Seasonal and Party-Worthy Ninja Chicken Ideas Beyond the Basic Breast
Once you've mastered the fundamentals, the Ninja Air Fryer opens up a range of crowd-pleasing recipes that go beyond plain seasoned chicken.
Buffalo wings are the classic party food. Cook plain wings at 400 °F (204 °F) for 20 minutes, then toss in a mixture of 1/4 cup hot sauce and 2 tbsp melted butter. Return to the basket at 380 °F for 2 minutes to set the sauce.
Chicken satay skewers work well if you cut the meat into strips and thread them onto soaked wooden skewers. Marinate in coconut milk, curry powder, and lime juice for 1 hour. Air fry at 390 °F (199 °C) for 10 to 12 minutes, turning once.
Parmesan-crusted tenders are a kid favorite. Coat chicken strips in a mixture of grated Parmesan, Italian seasoning, and panko. Cook at 380 °F (193 °C) for 12 minutes.
Serve with marinara for dipping.
Lemon herb whole spatchcocked chicken is a dinner party move. Rub the bird with olive oil, lemon zest, rosemary, thyme, and garlic. Cook at 375 °F (190 °C) for 45 to 50 minutes.
The skin won't be perfectly even, but the meat will be juicy and the presentation is impressive.
Korean-style fried chicken uses a sweet and spicy gochujang glaze. Double-fry the chicken for extra crispness: first at 350 °F (177 °C) for 15 minutes to cook through, then at 400 °F (204 °C) for 5 minutes to crisp. Toss in the glaze after the second fry.
For more inspiration, our air fryer schnitzel recipe adapts the classic German breaded cutlet for the Ninja with excellent results.
Final Word: Getting the Best Chicken Out of Your Ninja Every Time
The Ninja Air Fryer is one of the most reliable tools for cooking chicken at home. It's fast, it's consistent, and it produces results that rival methods that take twice as long. The learning curve is shallow.
Master the basics, pat the chicken dry, give it space in the basket, flip or shake halfway, and check the temperature. Everything else is variation on those themes.
Start with boneless thighs if you want a forgiving first cook. Move to breasts once you're comfortable with timing. Tackle wings and whole birds when you're ready to push what the machine can do.
And keep a meat thermometer nearby. It removes every doubt and guarantees safe, juicy results every single time.
As of 2026, Ninja's lineup continues to expand with larger capacities and smarter presets. But the core principle stays the same: hot, fast, circulating air applied to well-prepared chicken. Get that right and you'll wonder why you ever used the oven.
Frequently Asked Questions
Do you need to preheat a Ninja Air Fryer for chicken?
Preheating is optional per Ninja's official guidance, but it improves results. Running the unit for 3 minutes before loading chicken ensures the basket and chamber are at full temperature. This leads to better crust formation and more accurate cook times.
Can you put raw chicken in a Ninja Air Fryer?
Yes. Raw chicken cooks safely in a Ninja Air Fryer as long as it reaches an internal temperature of 165 °F (74 °C). Use a meat thermometer to verify doneness.
There's no need to pre-cook or parboil the chicken before air frying.
How much chicken fits in a Ninja Air Fryer basket?
A 5.5-quart basket holds roughly 1 to 1.5 lbs (450 to 680 g) of chicken in a single layer. Overcrowding blocks airflow and leads to uneven cooking. For larger quantities, cook in multiple batches.
Why is my air fryer chicken dry?
Dry chicken is usually caused by overcooking, skipping the rest period, or cooking straight from the fridge. Pull breasts at 160 °F (71 °C) and let them rest for 2 to 3 minutes. They'll carry over to 165 °F while staying juicy.
Can you use aluminum foil in a Ninja Air Fryer?
Yes, but it should not cover the entire basket bottom. Air needs to circulate through the perforations. Use foil to line only the center of the basket or to wrap individual pieces, leaving the edges open for airflow.
Is air fryer chicken healthier than oven-baked?
Air fryer chicken uses less oil than deep frying and slightly less than oven roasting with a brushed coating. The nutritional difference between air frying and oven baking is minimal. The main health benefit is the reduced oil compared to frying.