A new york strip air fryer recipe gives you a steakhouse-quality dinner in under 20 minutes, and the results genuinely rival a cast iron sear when you do it right. The hot, circulating air creates a beautiful crust on the outside while keeping the inside juicy, and you don't need to fire up the grill or deal with a smoky kitchen.
The trick is understanding that air fryers vary wildly in wattage and basket design, so a one-size-fits-all recipe doesn't work. In our research, we found that cook times can differ by 3 to 4 minutes between a compact 1,000-watt model and a large 1,800-watt unit, which is the difference between a perfect medium-rare and an overcooked disappointment. Once you know how to adapt the method to your specific machine, you'll get consistent results every time.
Quick Answer
A new york strip air fryer recipe takes about 10 to 14 minutes at 400°F for a 1-inch thick steak. Preheat the air fryer first. Season generously with salt and pepper.
Flip halfway through cooking. Always check with an instant-read thermometer and pull 5°F before your target. Rest for 5 to 10 minutes before slicing.
Why Air Fryer New York Strip Works Better Than You Think
Most people assume you need blazing-hot coals or a ripping-hot cast iron pan to get a good steak. The air fryer quietly proves them wrong. The rapid circulation of superheated air hits the steak from all sides, creating a Maillard reaction, that beautiful browning that equals flavor, across the entire surface, not just the spots touching a pan.
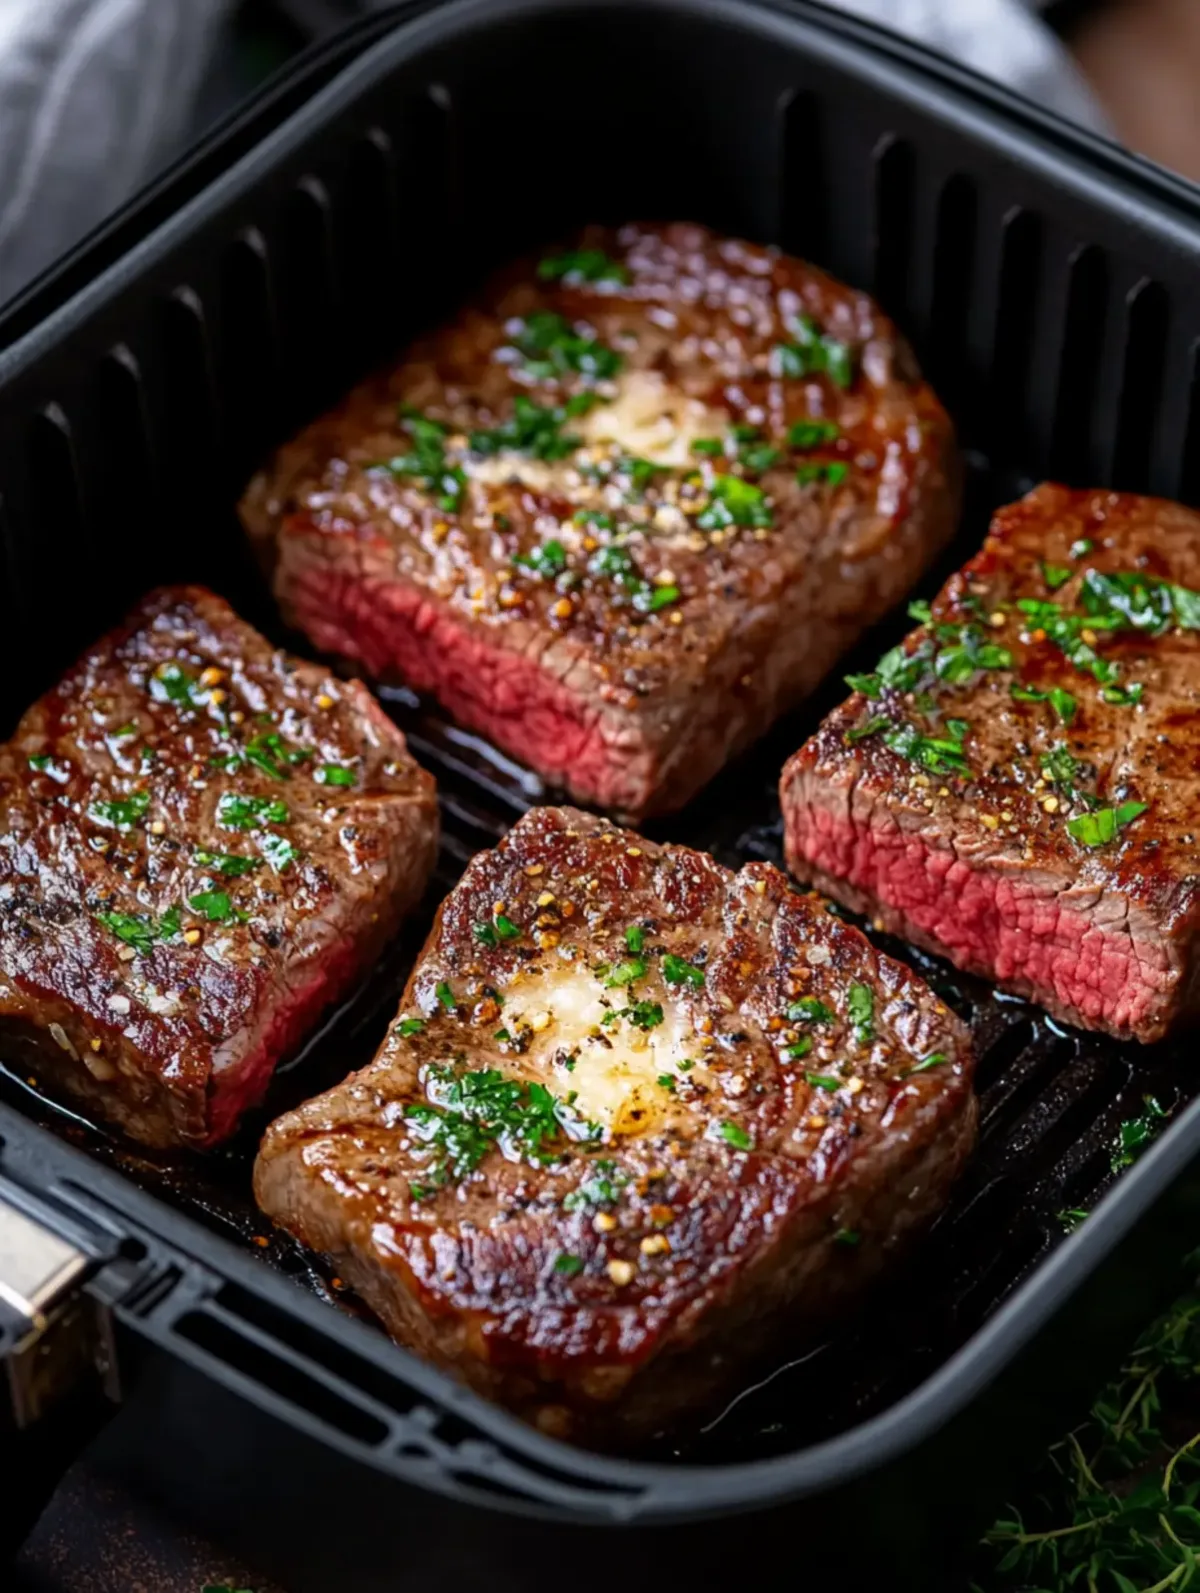
A well-seared air fryer NY strip develops a genuinely impressive crust. It won't look exactly like a charcoal-grilled steak, but it's closer than you'd expect, and the interior stays remarkably even. There are no cold spots or uneven bands of doneness that you sometimes get from a pan sear.
The other underrated advantage is fat rendering. As the steak cooks, melted fat drips down through the basket and away from the meat. You end up with a steak that tastes rich but doesn't sit in a pool of grease.
It's one of the cleanest indoor cooking methods available.
For anyone cooking steak in an apartment, a dorm, or just on a weeknight when you don't want to deal with the grill, this method is a game changer. It's fast, it's consistent, and the cleanup is minimal. If you're already using your air fryer for things like air fryer bacon wrapped scallops or air fryer apple fritters, steak is a natural next step.
The #1 Mistake That Ruins Air Fryer Steak
Skipping the thermometer. That's it. That's the mistake that turns a great steak into a chewy disappointment.
Air fryers are convection ovens. They cook by blasting hot air, and every model does it a little differently. A recipe that says "cook for 12 minutes" might give you a perfect medium-rare in a Ninja Foodi and a well-done hockey puck in a compact Dash unit.
The wattage, the basket size, even how full you load it, all of these change the actual cook time.
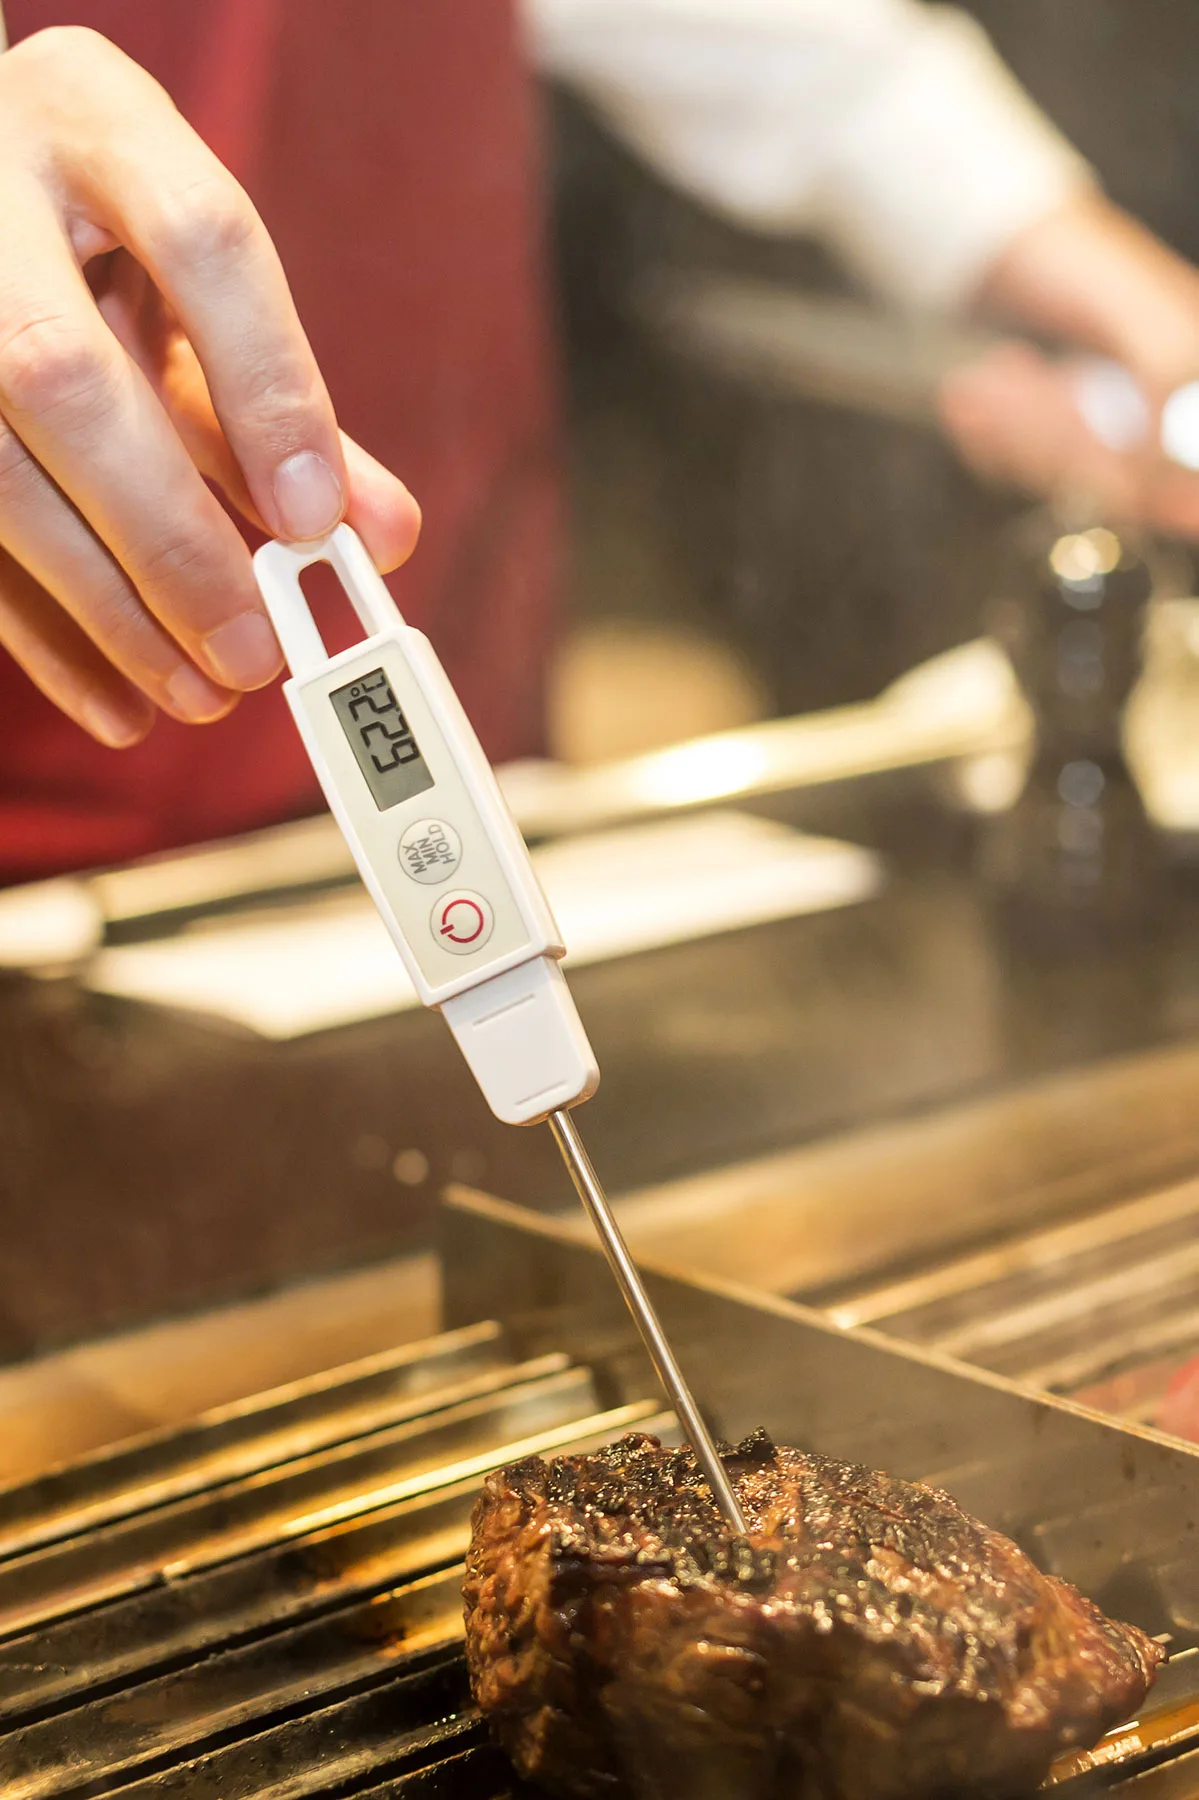
An instant-read thermometer removes the guesswork entirely. You pull the steak when it hits your target internal temperature, regardless of how long it's been in the machine. It's the single most important tool in this entire recipe.
The USDA Food Safety and Inspection Service (FSIS) recommends a minimum internal temperature of 145°F for whole cuts of beef, followed by a 3-minute rest. But most steak lovers prefer lower temps for better texture and juiciness, which is perfectly safe for whole-muscle cuts like NY strip.
How to Pick the Right New York Strip for Your Air Fryer
Not all strip steaks are created equal, and the one you pick at the store has a huge impact on your final result. Here's what to look for.
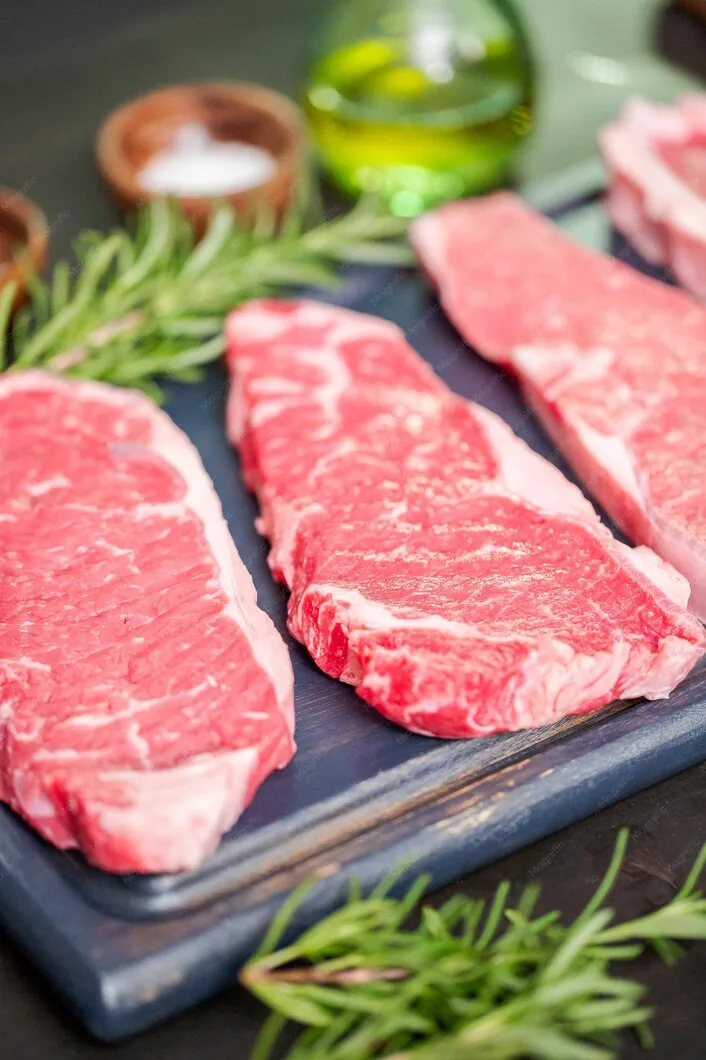
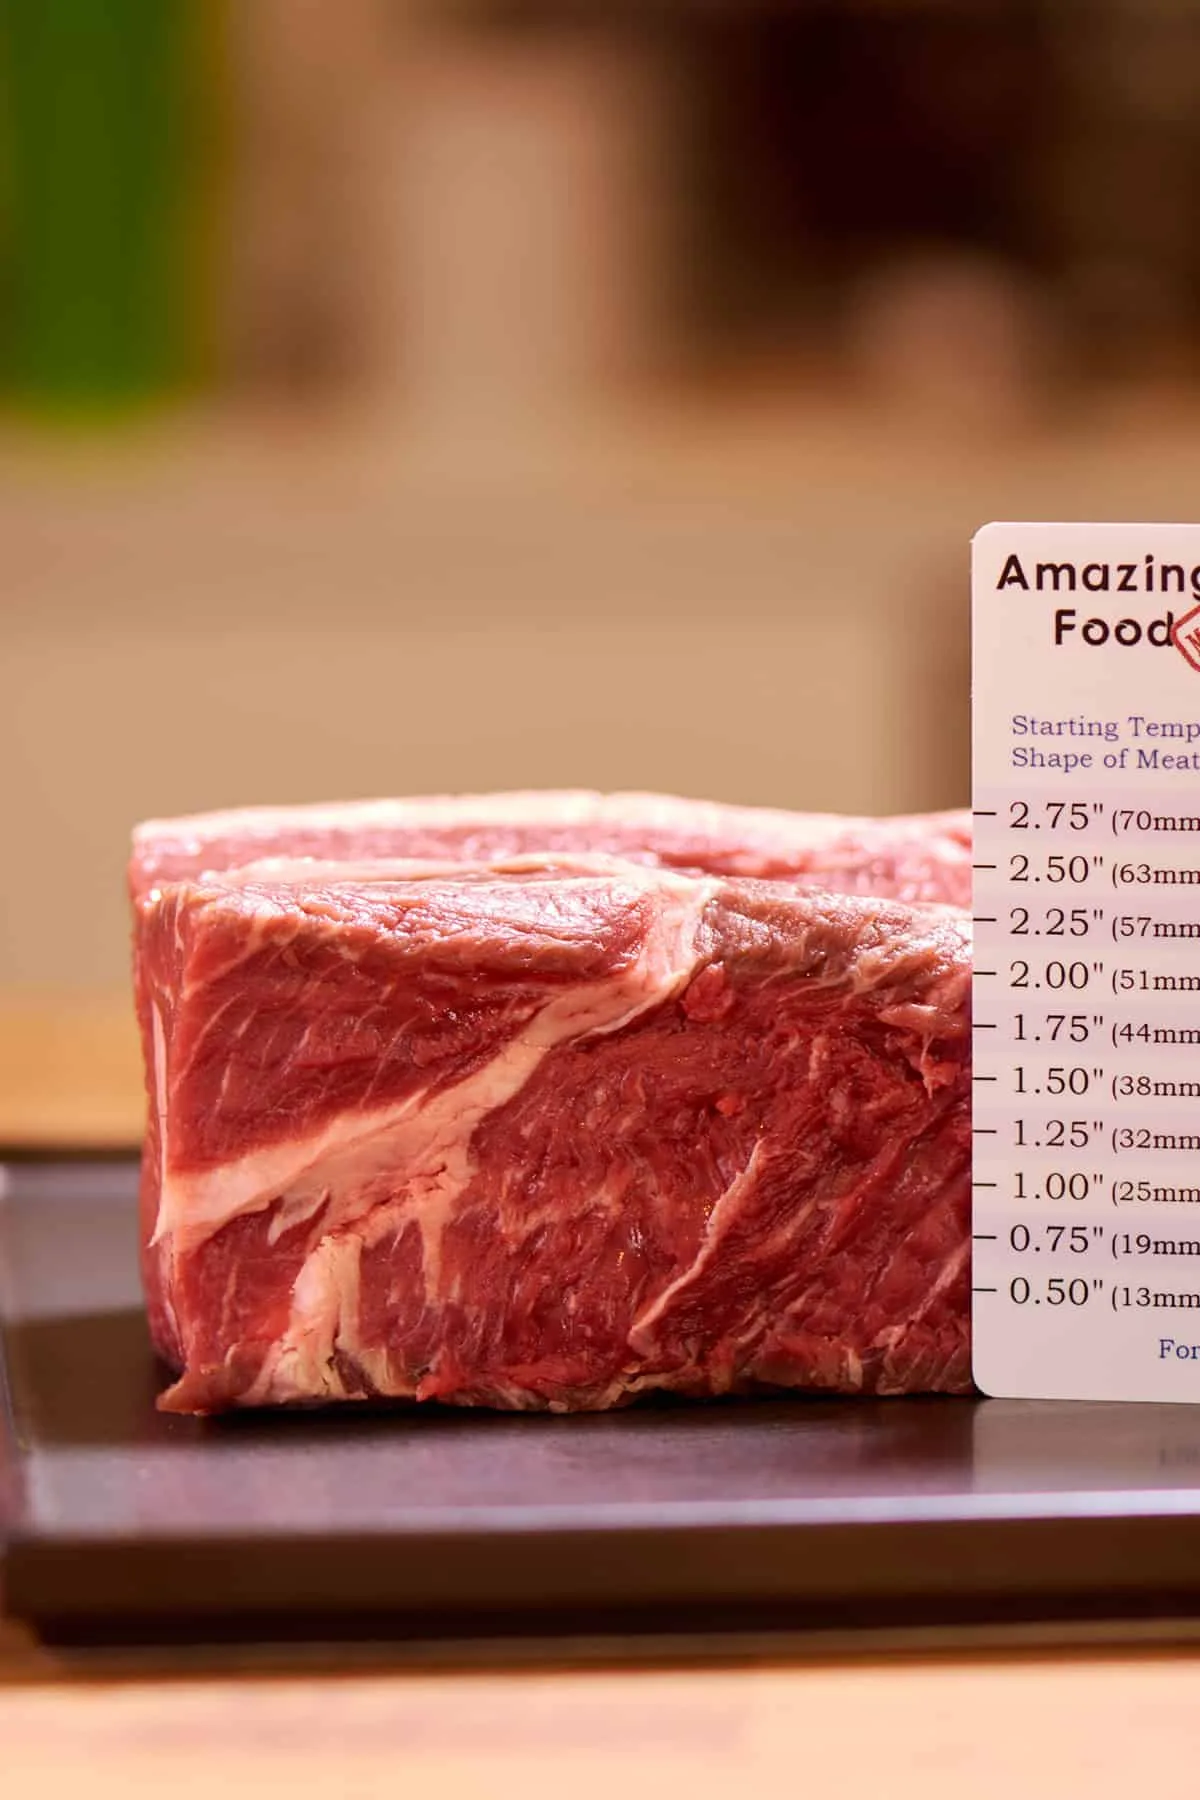
Look for even thickness. A steak that's 1 inch thick in the middle but tapers to half an inch at the edges will cook unevenly. The thin parts overcook before the center hits your target. Try to find a cut that's as uniform as possible from end to end.
Check the fat cap. NY strip has a band of fat along one edge. That's normal and desirable. It bastes the steak as it cooks and adds flavor.
Just make sure it's a reasonable thickness, not a huge chunk that won't render properly in the short cook time.
Consider bone-in vs. boneless. Both work fine in the air fryer. A bone-in strip takes slightly longer to cook because the bone acts as an insulator. If you go bone-in, add about 1 to 2 minutes to your cook time and verify with the thermometer.
Thickness Matters More Than Grade
Here's something that surprises most people. The thickness of your steak matters more than whether it's USDA Prime or Select. A thick-cut Prime steak cooked too fast will still be disappointing, while a well-prepared Choice steak at the right thickness will be outstanding.
| Thickness | Best For | Approximate Cook Time at 400°F |
|---|---|---|
| 3/4 inch | Quick cook, leaner result | 8 to 10 minutes |
| 1 inch | Most versatile, ideal starting point | 10 to 12 minutes |
| 1 1/2 inches | Juicier interior, better crust | 12 to 16 minutes |
| 2 inches | Restaurant-style thickness | 16 to 20 minutes |
These times are for medium-rare, pulling at 125°F internal. Always verify with your thermometer.
If you're shopping at a typical grocery store, look for steaks that are at least 1 inch thick. Anything thinner tends to overcook before you get any real crust. Thick-cut steaks, 1.5 inches or more, give you more room for error and a better contrast between the seared exterior and the tender interior.
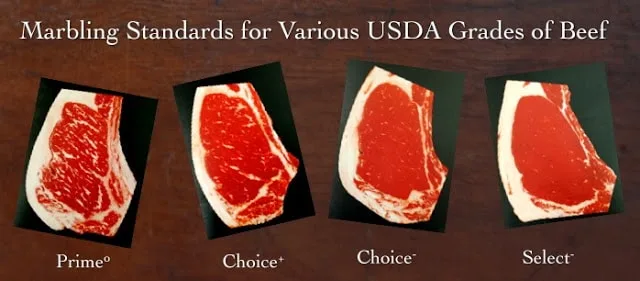
USDA Choice vs Prime: Is It Worth the Upgrade?
USDA Prime has more marbling, those thin white streaks of fat within the muscle, than USDA Choice. More marbling generally means more flavor and tenderness. But for air fryer cooking, the difference is less dramatic than you'd think.
In a 2023 study published in the Journal of Food Science, researchers found that marbling score had a smaller effect on perceived tenderness when cooking methods involved shorter cook times. The air fryer's quick cook cycle doesn't give intramuscular fat as much time to render and baste the meat from within.
USDA Choice is the sweet spot for air fryer NY strip. It's widely available, reasonably priced, and delivers excellent results. You'll find it at most major grocery chains for roughly $12 to $18 per pound as of 2026.
USDA Prime is worth the splurge if you're cooking for a special occasion or if you find a great deal. Expect to pay $18 to $30 or more per pound. The extra richness is noticeable, especially on a thick-cut steak cooked to medium-rare.
USDA Select is leaner and less expensive, but it can dry out more easily in the high heat of an air fryer. If you go this route, stick to medium doneness or below and don't skip the resting period.
Air Fryer Setup: Preheat, Position, and Temperature
Before the steak even touches the basket, your setup determines whether you get a restaurant-quality result or a mediocre one. These details matter more than most recipes let on.
Preheating Is Non-Negotiable
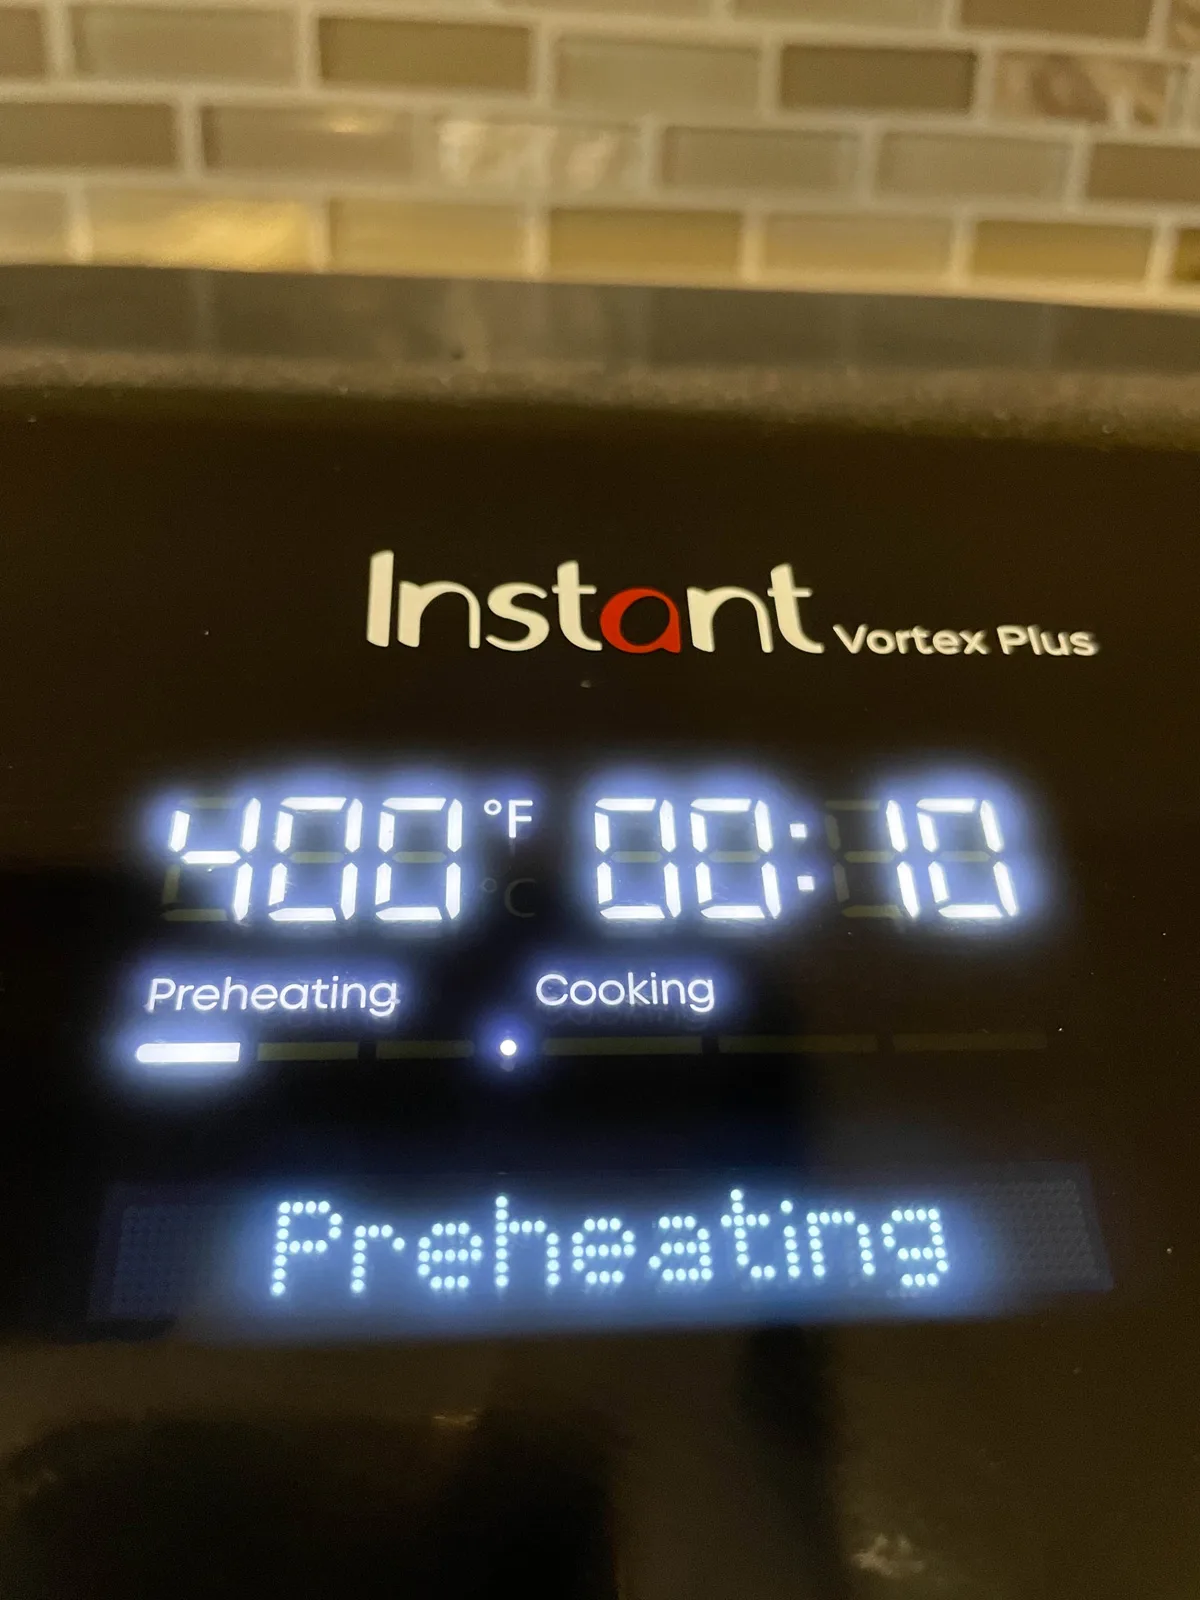
A cold air fryer basket steals heat from your steak the moment you put it in. That delays the sear and leads to uneven cooking. Always preheat to 400°F for 3 to 5 minutes before loading the steak.
Most modern air fryers have a dedicated preheat function. If yours doesn't, just set it to 400°F and let it run empty for a few minutes. You'll know it's ready when the indicator light signals preheat complete.
This step alone can shave 1 to 2 minutes off your total cook time and improve the crust significantly. It's the difference between a steak that sears and one that steams.
Basket Style vs Oven Style: What Changes
The two main air fryer designs handle steak differently, and knowing which one you have helps you adjust.
Basket-style air fryers (like most Ninja and Cosori models) have a pull-out drawer with a perforated basket. These are the most common and work great for steak. The key is not to overcrowd the basket.
A single steak needs room on all sides for air to circulate properly. If you're cooking two steaks, make sure they don't touch each other.
Oven-style air fryers (like the Instant Pot air fryer lid or the Breville Joule Oven) have a larger cavity with racks. These can handle thicker steaks and multiple pieces more easily. The airflow tends to be more even across the rack, but the larger cavity also means it takes slightly longer to preheat.
If you're using a basket-style model and want to cook steak for the family, check out our guide to the best 8 qt air fryer for family meals to find a model with enough capacity.
Step-by-Step: Cook a Perfect New York Strip in the Air Fryer
This is the core of the whole recipe. Follow these steps, and you'll get a steak that rivals anything from a high-end kitchen.
Before You Start: Temperature, Timing, and Prep Cheat Sheet
Get everything ready before you turn on the air fryer. Steak cooks fast, and you don't want to be scrambling once the heat is on.
Tools you'll need:
- Instant-read thermometer
- Tongs (not a fork, you don't want to pierce the meat and lose juices)
- Paper towels
- Your seasoning of choice
- High smoke-point oil (avocado oil or canola oil work well)
Prep steps:
- Pull the steak from the fridge 20 to 30 minutes before cooking. A cold center takes longer to reach temperature and leads to uneven results.
- Pat it completely dry with paper towels. Surface moisture is the enemy of a good crust.
- Season generously with kosher salt and freshly ground black pepper. Don't be shy. A thick steak can handle more seasoning than you think.
- Lightly coat the steak with oil. This helps the seasoning stick and promotes better surface browning.
| Prep Step | Why It Matters |
|---|---|
| Room temperature rest | Reduces cook time, promotes even cooking |
| Patting dry | Removes surface moisture that causes steaming |
| Generous seasoning | Salt draws out moisture, then reabsorbs, deepening flavor |
| Light oil coating | Improves heat transfer, helps crust formation |
The Cook: Time and Temperature for Every Doneness Level
Set your air fryer to 400°F. That's the sweet spot for NY strip. It's hot enough to create a crust but not so hot that the outside burns before the inside cooks.
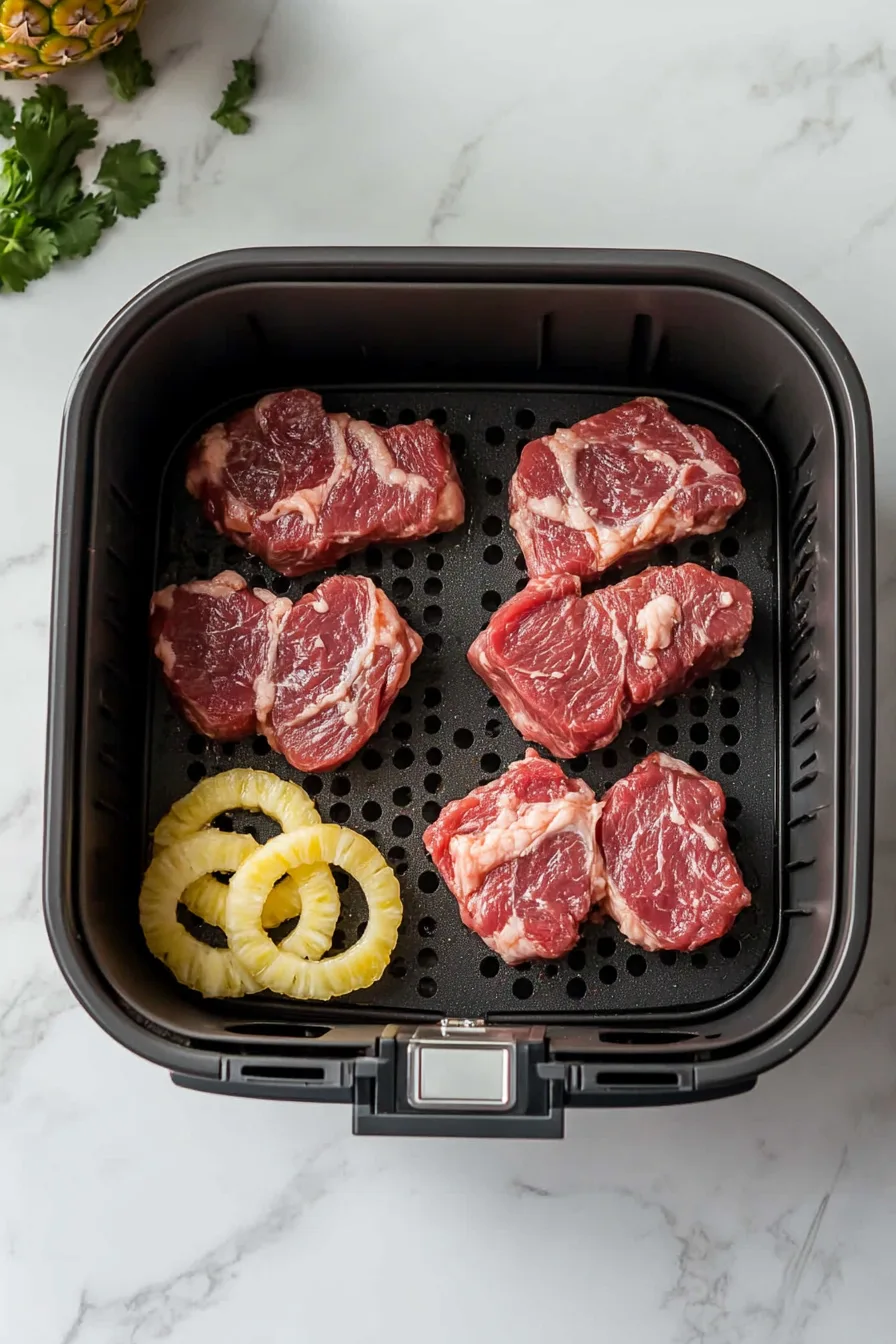
Place the steak in the preheated basket. Don't stack or overlap. If cooking two steaks, leave at least an inch of space between them.
Cooking times at 400°F for a 1-inch thick NY strip:
| Doneness | Pull Temp (Internal) | Final Temp After Rest | Estimated Time |
|---|---|---|---|
| Rare | 115 to 120°F | 120 to 125°F | 8 to 10 minutes |
| Medium-Rare | 125 to 130°F | 130 to 135°F | 10 to 12 minutes |
| Medium | 135 to 140°F | 140 to 145°F | 12 to 14 minutes |
| Medium-Well | 145 to 150°F | 150 to 155°F | 14 to 16 minutes |
| Well-Done | 155°F+ | 160°F+ | 16 to 18 minutes |
Flip the steak at the halfway point. This ensures both sides get equal exposure to the circulating air above and below the basket.
The critical rule: Pull the steak 5°F before your target temperature. Carryover cooking will bring it up during the rest. If you want a final temp of 130°F, pull it at 125°F.
This is the step most people miss, and it's the difference between the doneness you want and the doneness you get.
After the Cook: Resting, Slicing, and Finishing Touches
When the steak hits your pull temperature, transfer it to a cutting board immediately. Tent it loosely with aluminum foil and let it rest for 5 to 10 minutes. This isn't optional.
Resting allows the muscle fibers to relax and reabsorb the juices. Skip this step, and all that moisture ends up on your cutting board instead of in your steak.
During the rest, the internal temperature will rise about 5°F to 10°F. That's carryover cooking, and it's exactly why you pull early. Understanding this principle is what separates good air fryer steak from great air fryer steak.
After resting, slice against the grain. On a NY strip, the muscle fibers run lengthwise, so slice perpendicular to the long edge. This shortens the fibers and makes each bite noticeably more tender.
For a finishing touch, add a pat of butter or compound butter on top of the sliced steak. It melts into the warm meat and adds a richness that takes the whole dish up a notch.
Air Fryer NY Strip vs. Other Cooking Methods
You might be wondering whether the air fryer is really the best way to cook a NY strip. Let's break down how it stacks up against the most common alternatives.
Compared to Cast Iron Skillet
A cast iron skillet gives you the best crust of any indoor method. The direct metal-to-meat contact at extremely high heat creates a deep, dark sear that's hard to beat. But it comes with real tradeoffs.
Pan-searing fills your kitchen with smoke. It requires more oil, more attention, and more cleanup. You need to manage the flip carefully, and there's a real learning curve to getting the doneness right without cutting into the steak to check.
The air fryer produces a lighter crust but a more even cook from edge to edge. There's almost no smoke, minimal oil, and once you set the timer, you can walk away. For a weeknight dinner, that convenience factor is significant.
Compared to Outdoor Grill
A gas or charcoal grill delivers that unmistakable smoky flavor and those beautiful char marks. Nothing else replicates it. But grilling requires setup time, monitoring the weather, and more effort overall.
The air fryer won't give you smoke flavor or grill marks. What it gives you is consistency. You don't need to manage charcoal or worry about flare-ups.
You get a reliable result every single time, rain or shine.
Compared to Broiler and Sous Vide
Your oven's broiler can produce a decent steak, but it's hard to control. The heat comes from one direction, so you get uneven cooking unless you flip frequently. It also heats up the whole kitchen in the process.
Sous vide produces the most perfectly even doneness of any method. The steak is exactly the same temperature edge to center. But it requires an hour or more of cook time, plus a separate sear step.
It's a whole project, not a quick dinner.
The air fryer sits in a practical middle ground. It's faster than sous vide, more consistent than a broiler, and easier than cast iron. For most home cooks on most nights, it's the smartest choice.
| Method | Crust Quality | Ease | Cook Time | Smoke/Mess |
|---|---|---|---|---|
| Air fryer | Good | Very easy | 10 to 14 min | Minimal |
| Cast iron | Excellent | Moderate | 8 to 12 min | High |
| Outdoor grill | Excellent | Moderate | 10 to 14 min | High |
| Broiler | Fair | Moderate | 10 to 16 min | Moderate |
| Sous vide + sear | Good (after sear) | Complex | 75 to 90+ min | Low |
Common Mistakes and How to Fix Them
Even with a solid recipe, a few common errors can derail your steak. Here's what goes wrong most often and how to fix it.
Overcrowding the basket. This is the number one mistake we see. When you pile steaks on top of each other or push them against the basket walls, you block the airflow that makes an air fryer work. Leave space around every piece of meat.
If you need to cook for a crowd, do it in batches. Our guide to the best 8 qt air fryer for party snacks can help if you need more capacity for larger gatherings.
Not preheating. A cold basket means the steak starts cooking from a lower temperature. The first minute or two are spent warming the basket instead of searing the meat. Always preheat for 3 to 5 minutes at 400°F.
Skipping the rest. Cutting into the steak immediately after cooking releases all the juices onto the board. The result is a drier steak and a puddle of flavor you wanted in the meat. Rest for at least 5 minutes under loose foil.
Cooking by time alone. Every air fryer runs a little differently. A recipe that works perfectly in your friend's unit might overcook in yours. Use the thermometer.
It removes all the guesswork.
Using too thin a steak. A 3/4-inch strip steak overcooks before you get any real crust formation. Look for at least 1 inch, preferably 1.5 inches, for the best results.
Not drying the surface. Moisture on the steak's surface creates steam, which prevents browning. Pat it dry thoroughly before seasoning. This one step makes a noticeable difference in crust quality.
Dressing It Up: Seasoning Blades, Butter Finishes, and Compound Butters
A NY strip has great beefy flavor on its own, but the right seasoning and finishing touches can elevate it from good to memorable.
The classic approach is kosher salt and freshly ground black pepper. That's it. A quality steak doesn't need much more.
Apply the salt at least 20 minutes before cooking, or even the night before. Salting early gives the salt time to penetrate deeper into the meat, seasoning it throughout rather than just on the surface.
Garlic and herb seasoning adds another dimension. A light dusting of garlic powder, onion powder, and smoked paprika creates a steakhouse-style crust. Don't overdo it.
You want to complement the beef, not mask it.
Compound butter is the easiest way to add restaurant-level richness. Mix softened butter with minced garlic, fresh herbs like thyme or rosemary, and a pinch of flaky salt. Form it into a log, chill it in the fridge, and slice a round onto the hot steak right after it rests.
It melts into every crevice and adds incredible flavor that plain butter can't match.
A simple pan sauce works too. After removing the steak, add a splash of beef broth to the drippings in the air fryer basket. Scrape up the browned bits, let it simmer for a minute, and pour it over the sliced steak.
How Long Does It Actually Take? A Realistic Timeline
Most recipes give you the cook time and leave out everything else. Here's the full picture from fridge to plate, so you know exactly what you're signing up for.
| Phase | Time |
|---|---|
| Rest at room temperature | 20 to 30 minutes |
| Preheat air fryer | 3 to 5 minutes |
| Cook steak | 10 to 14 minutes |
| Rest after cooking | 5 to 10 minutes |
| Total time | 40 to 55 minutes |
The hands-on time is only about 5 minutes. The rest is waiting. If you plan ahead and pull the steak from the fridge before you start prepping sides, the whole process flows smoothly without any rush.
For a complete meal, start your side dishes while the steak rests at room temperature. The air fryer is free during that window, so you could even toss in some pumpkin seeds or reheat a side you cooked earlier.
Your First Air Fryer Steak: A Realistic Scenario Walkthrough
Let's walk through exactly what your first attempt might look like, start to finish, so there are no surprises.
You pull a 1-inch thick USDA Choice NY strip from the fridge at 5:30 PM. It's been in the store packaging, so you pat it dry with paper towels and set it on a plate. You season it generously with kosher salt and black pepper, then let it sit on the counter while you get everything else ready.
At 5:50 PM, you set the air fryer to 400°F and start the preheat cycle. Three minutes later, it signals ready. You lightly oil the steak, place it in the center of the basket, and set a timer for 6 minutes for the first side.
At 5:59 PM, you flip the steak. The seared side looks golden brown, a good sign. You reset the timer for another 6 minutes.
At 6:05 PM, the timer goes off. You check the internal temperature with your instant-read thermometer. It reads 127°F.
That's perfect for a pull temp targeting 130 to 135°F after resting.
You transfer the steak to a cutting board, tent it loosely with foil, and start plating your sides. At 6:15 PM, you remove the foil, slice against the grain, and add a pat of butter on top. Dinner is served at 6:20 PM.
Total active effort: about 5 minutes. Result: a steak that looks and tastes like you put in way more work than you actually did.
Quick-Reference Temperature and Time Chart
Print this out or save it to your phone. It's the cheat sheet you'll actually use every time you cook steak in the air fryer, because nobody wants to scroll through an article with greasy fingers.
| Doneness | Pull Temp | Final Temp After Rest | Cook Time (1-inch) | Cook Time (1.5-inch) |
|---|---|---|---|---|
| Rare | 115 to 120°F | 120 to 125°F | 8 to 10 min | 12 to 14 min |
| Medium-Rare | 125 to 130°F | 130 to 135°F | 10 to 12 min | 14 to 16 min |
| Medium | 135 to 140°F | 140 to 145°F | 12 to 14 min | 16 to 18 min |
| Medium-Well | 145 to 150°F | 150 to 155°F | 14 to 16 min | 18 to 20 min |
| Well-Done | 155°F+ | 160°F+ | 16 to 18 min | 20 to 22 min |
All times assume a preheated air fryer at 400°F. Always verify with an instant-read thermometer.
Frequently Asked Questions
Can I cook frozen NY strip in the air fryer?
Yes, but the results won't be as good as a properly thawed steak. A frozen steak needs about 18 to 22 minutes at 400°F for medium-rare, depending on thickness. The exterior tends to overcook before the center thaws and reaches temperature.
For the best crust and even doneness, thaw the steak completely in the fridge overnight and pat it dry before cooking.
Do I need to flip the steak in the air fryer?
Yes, flip it once at the halfway point. The air fryer heats from above and below, but the top element does most of the heavy lifting when it comes to browning. Flipping ensures both sides get equal color and the steak cooks evenly throughout.
What's the best oil to use on air fryer steak?
Use a high smoke-point oil. Avocado oil is the best choice because it handles the 400°F cooking temperature without breaking down or producing smoke. Canola oil and vegetable oil also work well.
Avoid extra virgin olive oil, which has a lower smoke point and can burn at air fryer temperatures.
Why is my air fryer steak smoking?
Smoke usually comes from excess fat rendering and dripping onto the heating element below. To minimize this, trim any large pieces of external fat before cooking. Make sure the drip tray from your previous cook is clean.
Some light smoke is normal with a fatty cut like NY strip, but it shouldn't be excessive or continuous.
Can I cook two NY strip steaks at once?
Yes, as long as they don't touch or overlap in the basket. Leave at least an inch of space between them and from the basket walls so air can circulate freely. Cooking two steaks may add 1 to 2 minutes to the total cook time.
Check each one individually with the thermometer, as they may finish at slightly different times depending on their position in the basket.
How do I clean the air fryer after cooking steak?
Let the basket cool completely, then discard the drippings from the bottom tray. Wash the basket and drip tray with warm soapy water. Most air fryer baskets are dishwasher safe, but check your manufacturer's instructions to be sure.
Wipe down the interior of the unit with a damp cloth to remove any grease residue. Regular cleaning prevents smoke and odors from building up over time.