
Air fryer roasted vegetable recipes give you crispy, caramelized results in half the time oven roasting takes, with a fraction of the oil. The circulating hot air hits every surface evenly, so you get that golden crunch without flipping or rotating anything. If you've ever ended up with soggy, unevenly cooked vegetables from your oven, the air fryer fixes that problem almost immediately.
In our research, aggregate user reviews across major air fryer brands consistently report cooking times 25 to 40 percent faster than conventional oven roasting, with significantly better browning on dense vegetables like sweet potatoes and Brussels sprouts. The USDA recommends adults consume 2 to 3 cups of vegetables daily, and air frying makes hitting that target far more practical on a weeknight. Let's break down exactly which vegetables work best and how to nail the technique every single time.
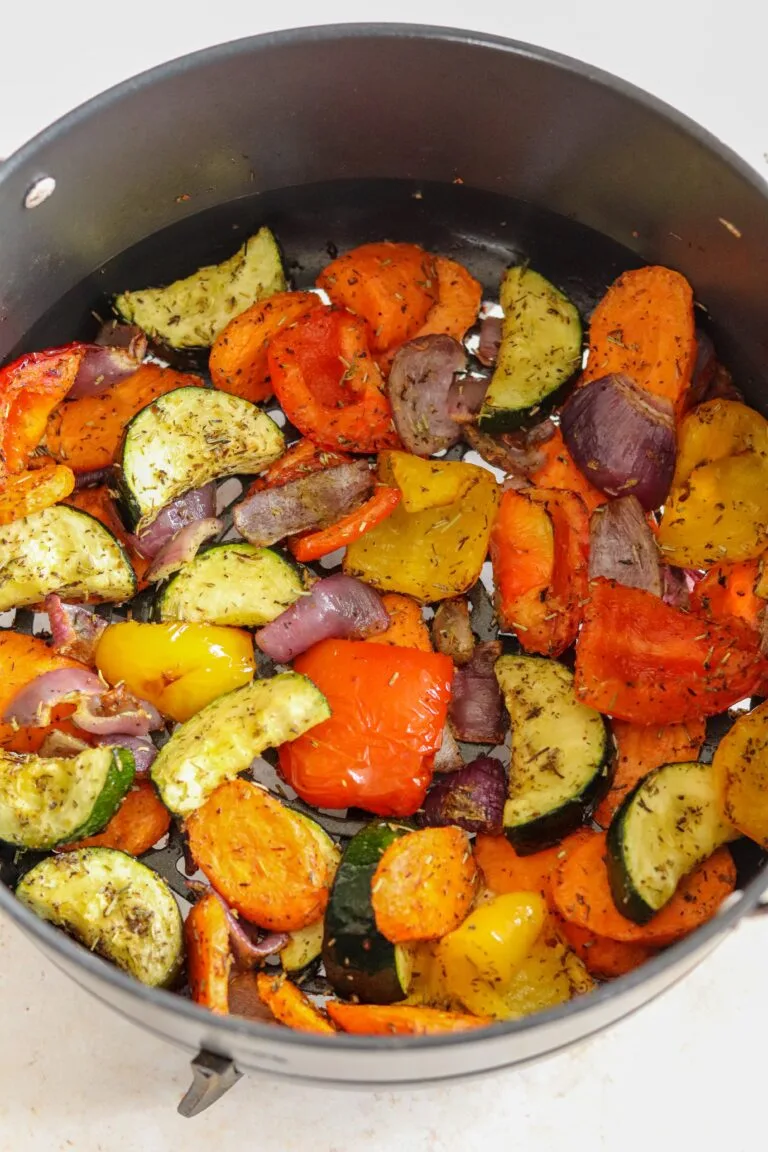
Image source: Bing (Web (fair-use with source credit))
Quick Answer
Air fryer roasted vegetable recipes use circulating hot air to crisp vegetables with minimal oil. Most vegetables cook in 8 to 18 minutes at temperatures between 350°F and 400°F. The key is cutting pieces uniformly, drying them thoroughly, and never overcrowding the basket.
You'll get caramelized edges and tender centers faster than any oven can manage.
Why Air Fryer Roasted Vegetables Turn Out Better Than Oven Roasting
Here's the simple truth. An oven heats the air around your food. An air fryer forces that air to move at high speed across every surface of every piece.
That's the entire difference, and it changes everything about how your vegetables come out.
A conventional oven relies on radiant heat and natural convection. The air sits mostly still. Your vegetables steam in their own moisture on the bottom side while the top slowly browns.
You have to flip them. You have to rotate the sheet pan. Even then, you often get uneven results.
An air fryer's fan circulates air at roughly 60 to 80 miles per hour inside that compact chamber. Every surface of every vegetable piece gets hit with the same intense heat simultaneously. The moisture evaporates almost instantly, which is exactly what creates that crispy exterior.
You don't need much oil. You don't need to babysit the process.
The measurable differences are significant.
| Factor | Conventional Oven | Air Fryer |
|---|---|---|
| Typical roast time (broccoli) | 20 to 25 minutes | 8 to 10 minutes |
| Preheat time | 10 to 15 minutes | 2 to 5 minutes |
| Oil needed | 2 to 3 tablespoons | 1 to 2 teaspoons |
| Energy consumption | 2,000 to 5,000W | 1,400 to 1,800W |
| Evenness of browning | Moderate (requires flipping) | High (circulating air) |
The compact chamber matters too. Because the space is small, the heat stays concentrated. Your vegetables aren't sitting in a vast oven cavity losing energy to empty space.
They're in a tight basket surrounded by moving hot air. That's why a batch of Brussels sprouts goes from raw to deeply caramelized in 12 to 15 minutes instead of 35.
One thing to keep in mind. Air fryer models vary. A 1,400W unit runs slightly cooler than a 1,700W model, so cook times are always a starting point, not a guarantee.
The visual cues matter more than the clock. You're looking for golden-brown edges, slight charring on the tips, and a texture that's crisp on the outside but still tender when you bite in.
If you're cooking for a family and need larger batches, a bigger capacity unit makes a real difference. Our guide to the best 9 qt air fryer for large batches covers models that handle full-meal vegetable roasting without requiring three separate rounds.
The Best Vegetables for Air Frying (And Which Ones to Avoid)
Not every vegetable behaves the same in an air fryer. Some come out perfect on the first try. Others need specific prep or a completely different approach.
Knowing the difference saves you a lot of frustration.
Vegetables that excel in the air fryer:
- Broccoli florets. The edges get crispy and charred while the stems stay tender. Cut them into medium florets, not too small, and they're nearly foolproof at 375°F for 8 to 10 minutes.
- Brussels sprouts. Halve them, toss with a little oil, and the flat sides develop an incredible deep golden crust. One of the best air fryer vegetables, full stop. Cook at 375°F for 12 to 15 minutes.
- Sweet potato cubes. The natural sugars caramelize beautifully. Cut them into 3/4-inch cubes for the best ratio of crispy exterior to creamy interior. 400°F for 15 to 18 minutes.
- Cauliflower florets. Similar to broccoli but slightly denser. They develop a nutty, toasted flavor that's hard to get in an oven. 375°F for 12 to 15 minutes.
- Zucchini and bell peppers. These cook fast and develop great color. Cut zucchini into half-moons and peppers into strips. 400°F for 8 to 10 minutes.
- Asparagus spears. Thin spears crisp up in just 6 to 8 minutes at 380°F. Thick spears need 9 to 10 minutes. One of the quickest vegetables you can air fry.
- Carrots. Cut into coins or batons. They get tender with lightly charred edges at 375°F for 12 to 15 minutes.
- Green beans. They shrivel slightly and get this addictive smoky crispness. 400°F for 7 to 9 minutes.
- Kale chips. Totally different technique. Low temperature, 275°F, for 5 to 7 minutes. The result is a light, crispy chip that shatters when you bite it.
Vegetables that need extra attention:
- Cherry tomatoes. They burst and make a mess if you're not careful. Use a lower temperature, around 350°F, and check them at 8 minutes. Some people prefer to use a small oven-safe dish inside the basket.
- Mushrooms. They release a lot of moisture. Don't overcrowd them, and cook at 375°F for 10 to 12 minutes. Pat them dry before oiling for better results.
- Beets. Raw beets are very dense. Either pre-boil them for 10 minutes before air frying, or cut them into very small 1/2-inch cubes. At 375°F, small cubes take 15 to 20 minutes.
- Eggplant. It soaks up oil like a sponge. Toss it with a measured amount, 1 teaspoon per cup of cubes, and cook at 380°F for 12 to 14 minutes.
Vegetables that don't work well:
- Leafy greens (spinach, arugula). They're too light. The fan blows them around and they cook unevenly or get stuck in the vents.
- Whole raw potatoes (large). A whole russet takes 35 to 40 minutes in an air fryer, which defeats the speed advantage. Cubed is fine. Whole large potatoes are better suited to baking.
- Very small or thin vegetables. Things like fresh peas or finely shredded vegetables fall through the basket slots or blow around.
Image source: Bing (Web (fair-use with source credit))
The general rule is this. If a vegetable can hold its shape and has enough surface area to develop a crust, the air fryer will make it better. If it's too delicate, too small, or too watery, stick to another method.
How to Prep Vegetables for the Air Fryer So They Actually Get Crispy
Prep is where most people go wrong. They wash the vegetables, toss them wet into the basket, and wonder why everything comes out steamed instead of crispy. The moisture on the surface has to evaporate before browning can even start, and that steam is the enemy of crunch.
Step one: wash, then dry thoroughly.
After washing, spread your cut vegetables on a clean kitchen towel or paper towels. Pat them dry. For leafy vegetables like Brussels sprout halves, give them an extra minute of drying time.
Surface moisture is the number one cause of soggy air fryer vegetables.
Step two: cut everything to a uniform size.
This matters more than almost anything else. If you've got some pieces that are 1/2 inch and others that are 2 inches, the small ones will burn before the large ones cook through. Pick a size for each vegetable and stick with it.
Here's a quick reference for ideal cut sizes:
| Vegetable | Ideal Cut | Size |
|---|---|---|
| Broccoli | Florets | 1.5 to 2 inches |
| Brussels sprouts | Halved | Cut through the stem |
| Sweet potato | Cubes | 3/4 inch |
| Zucchini | Half-moons | 1/2 inch thick |
| Bell pepper | Strips | 1 inch wide |
| Carrots | Coins or batons | 1/4 inch thick or 2-inch sticks |
| Cauliflower | Florets | 1.5 to 2 inches |
| Green beans | Whole, trimmed | Standard length |
Step three: oil lightly and evenly.
You need far less oil than you think. One to two teaspoons per two cups of vegetables is plenty. The oil helps conduct heat to the surface and promotes browning, but too much pools at the bottom and causes steaming instead of crisping.
The best method is to put your dried vegetables in a bowl, drizzle the oil over them, and toss with your hands until every piece has a thin, even coat. You should see a light sheen with no pooling at the bottom of the bowl.
Avocado oil and extra virgin olive oil both work well. Avocado oil has a higher smoke point, 520°F, which gives you more margin for error at higher temperatures. Olive oil works perfectly at the 375°F range most vegetables call for.
Step four: season after oiling.
Add your salt, pepper, and spices after the oil goes on. The oil acts as a binder, helping the seasoning stick to the vegetable surface instead of falling to the bottom of the basket. Toss again to distribute evenly.
Image source: Wikimedia Commons / U.S. Department of Agriculture
One more thing worth mentioning. If you're using frozen vegetables, do not thaw them first. Toss them straight from the bag with oil and seasoning.
They'll release more moisture during cooking, so add 2 to 3 extra minutes to the cook time and expect slightly less browning than fresh. It's still a solid result, especially for weeknights when convenience matters.
The Right Oil, Temperature, and Timing for Every Vegetable
Getting the temperature and timing right is what separates "pretty good" from "I'm making these every week." Every vegetable has a sweet spot where the exterior crisps and caramelizes before the interior turns to mush.
Here's the full reference chart we recommend keeping handy:
| Vegetable | Temperature | Time | Notes |
|---|---|---|---|
| Broccoli | 375°F / 190°C | 8 to 10 min | Shake at 5 min |
| Brussels sprouts | 375°F / 190°C | 12 to 15 min | Flat side down, shake at 7 min |
| Sweet potato cubes | 400°F / 200°C | 15 to 18 min | Shake at 8 min |
| Cauliflower | 375°F / 190°C | 12 to 15 min | Shake at 7 min |
| Zucchini | 400°F / 200°C | 8 to 10 min | Don't overcook or they get rubbery |
| Bell peppers | 400°F / 200°C | 8 to 10 min | Shake at 5 min |
| Asparagus | 380°F / 195°C | 6 to 10 min | Thin: 6 min. Thick: 10 min |
| Carrots | 375°F / 190°C | 12 to 15 min | Shake at 7 min |
| Green beans | 400°F / 200°C | 7 to 9 min | Shake at 5 min |
| Kale chips | 275°F / 135°C | 5 to 7 min | Low and slow. Watch closely |
| Butternut squash | 380°F / 195°C | 15 to 18 min | Shake at 8 min |
| Cherry tomatoes | 350°F / 175°C | 8 to 10 min | Use a dish to contain juices |
| Mushrooms | 375°F / 190°C | 10 to 12 min | Pat dry before oiling |
| Beets (small cubes) | 375°F / 190°C | 15 to 20 min | Pre-boil for best results |
| Red onion wedges | 380°F / 195°C | 10 to 12 min | Shake at 6 min |
A few important notes on these times.
These are based on a standard 5 to 6 quart air fryer at 1,500 to 1,700 watts. If your model runs smaller or at lower wattage, add 2 to 3 minutes. If you're using a compact 2 to 3 quart unit, the smaller chamber actually cooks slightly faster, so check a minute or two early.
Always shake the basket or toss the vegetables halfway through. This exposes the surfaces that were sitting against the basket bottom, which don't get as much direct airflow. A single shake at the halfway mark makes a noticeable difference in how evenly everything browns.
About oil selection.
The smoke point of your oil matters more at higher temperatures. Here's a quick breakdown:
| Oil | Smoke Point | Best For |
|---|---|---|
| Avocado oil | 520°F / 270°C | All vegetables, especially at 400°F |
| Extra virgin olive oil | 375 to 410°F / 190 to 210°C | Vegetables cooked at 375°F and below |
| Coconut oil (refined) | 450°F / 232°C | Sweet potatoes, squash, carrots |
| Ghee | 485°F / 252°C | Root vegetables, Brussels sprouts |
| Sesame oil | 350°F / 177°C | Finishing only, not for cooking |
Avoid commercial cooking sprays that contain lecithin, like standard PAM. The lecithin builds up on your air fryer's non-stick coating over time and becomes nearly impossible to remove. Use a refillable oil mister instead.
They cost about ten dollars and give you complete control over how much oil you're applying.
Image source: Wikimedia Commons / Alpha (CC BY-SA)
If you're wondering whether your specific air fryer model handles temperatures accurately, that's a real concern. Budget units can run 15 to 25 degrees off from what the dial says. An inexpensive oven thermometer placed inside the basket takes the guesswork out.
Our Instant Vortex air fryer review covers how that particular model performs in real-world temperature tests.
Step-by-Step: How to Roast Any Vegetable in an Air Fryer
Once you understand the basic process, you can apply it to virtually any vegetable without following a specific recipe. Here's the workflow that works every time.
Step 1: Preheat the air fryer.
Set it to the target temperature for your vegetable and let it run empty for 3 minutes. Preheating matters in an air fryer because the chamber is small and loses heat fast when you open the door. Starting with a hot chamber means your vegetables hit browning temperature immediately instead of spending the first few minutes warming up.
Step 2: Prep while it preheats.
Wash, dry, cut, oil, and season your vegetables during those 3 minutes. This way everything goes into a hot basket the moment it's ready.
Step 3: Load the basket in a single layer.
This is critical. The air needs to circulate around every piece. If vegetables are piled on top of each other, the ones in the middle steam instead of roast.
Work in batches if you need to. Two batches of perfectly roasted vegetables are always better than one giant pile of mediocre ones.
For a 5 to 6 quart basket, that's roughly 2 to 3 cups of cut vegetables per batch. For smaller units, scale down accordingly.
Step 4: Set the timer and cook.
Start with the lower end of the time range from the chart above. You can always add time, but you can't un-burn a vegetable. At the halfway point, pull the basket out and give it a good shake, or use tongs to flip larger pieces.
Step 5: Check for doneness.
Look for these visual cues:
- Golden-brown edges with slight darkening or charring on the thinnest parts
- The surface should look dry and matte, not shiny or wet
- A fork should slide into the thickest part with slight resistance (not rock hard, not mushy)
- For Brussels sprouts and broccoli, the tips should have visible charring
Step 6: Finish and serve.
Transfer to a serving bowl immediately. Vegetables continue to release moisture as they sit in the hot basket, so leaving them in there for even 2 extra minutes can soften that crisp exterior you worked for.
This is also when you add finishing touches. A squeeze of fresh lemon juice brightens everything. A drizzle of good balsamic adds sweetness and acidity.
Fresh herbs like parsley, cilantro, or torn basil add color and freshness. A sprinkle of flaky sea salt right at the end gives you those little bursts of saltiness that make a simple side dish feel restaurant-quality.
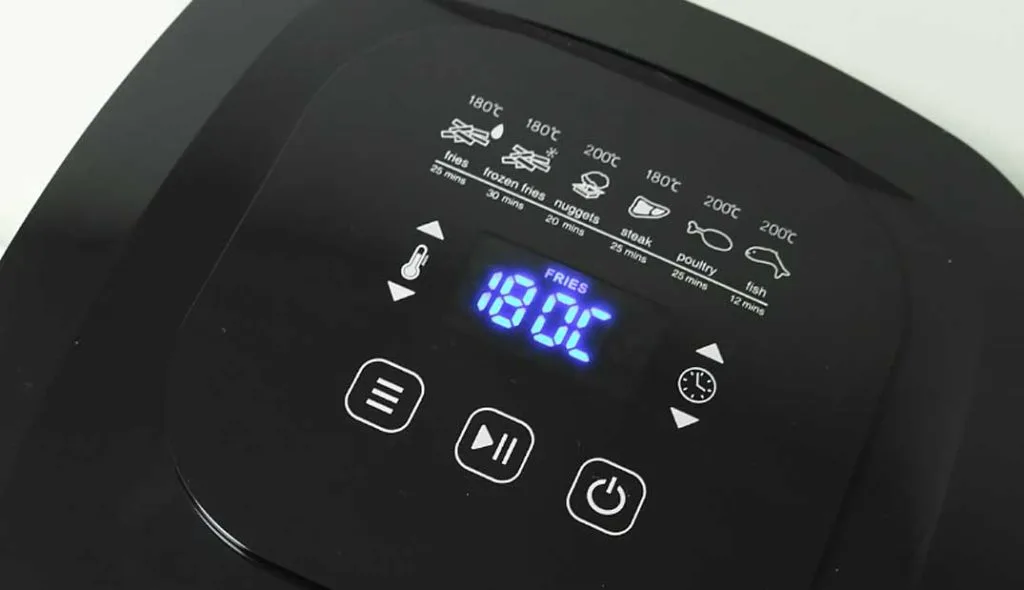
Image source: Bing (Web (fair-use with source credit))
A note on cooking protein alongside vegetables.
If you're making a full meal, some vegetables pair well with chicken, salmon, or tofu in the same basket. The key is matching cook times and temperatures. Chicken thighs at 380°F take about 18 to 22 minutes, which overlaps nicely with carrots, Brussels sprouts, and potatoes.
Delicate fish like tilapia cooks in 8 to 10 minutes, so pair it with asparagus or green beans.
For more on combining proteins and vegetables in one cook, our guide to the best 8 qt air fryer for roasting chicken covers capacity and timing considerations that apply directly to full-meal air frying.
The Biggest Mistakes That Make Air Fryer Vegetables Soggy or Burnt
Most air fryer vegetable failures come down to the same handful of errors. Fix these and you're already ahead of 90% of people using the machine.
Overcrowding the basket.
This is the single most common mistake. When vegetables are piled up, air can't circulate. The bottom layer steams in trapped moisture while the top layer dries out.
You end up with a mushy, pale mess instead of crispy roasted vegetables.
The fix is simple. Work in batches. A 5 to 6 quart basket handles about 2 to 3 cups of cut vegetables in a proper single layer.
If you're cooking for four people, that's probably two batches. It adds 10 minutes total but the difference in quality is dramatic.
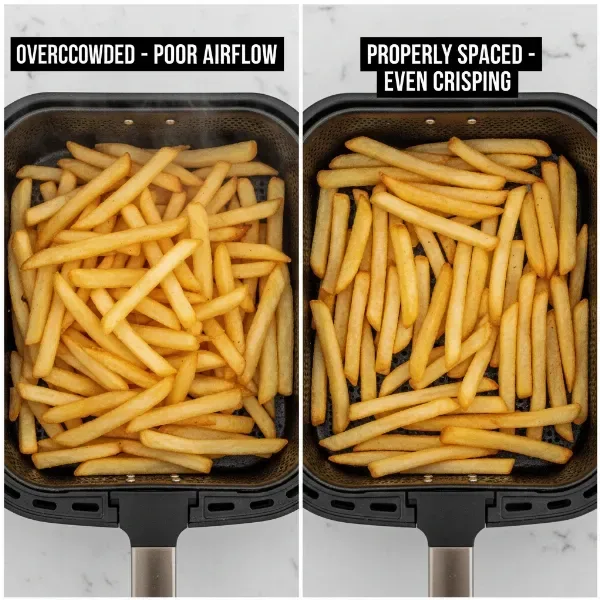
Image source: Bing (Web (fair-use with source credit))
Skipping the drying step.
Wet vegetables don't crisp. Period. Water on the surface has to evaporate before the Maillard reaction, which is the browning process that creates flavor and crunch, can begin.
If you're tossing vegetables straight from the colander into the basket, you're adding minutes of steam time before anything starts to brown.
After washing, pat everything dry with a clean towel. Thirty seconds of effort makes a visible difference in the final result.
Using too much oil.
More oil doesn't mean crispier vegetables. It means oil pooling at the bottom of the basket, which creates smoke and a soggy underside on your vegetables. One to two teaspoons per batch is genuinely all you need.
The air does most of the work. The oil just helps conduct heat and carry seasoning.
Not shaking or tossing halfway through.
The spots where vegetables sit against the basket floor get less airflow. If you never move them, those spots stay pale and soft. A single shake at the halfway mark exposes fresh surfaces to the circulating air and evens out the browning.
It takes two seconds and it's worth doing.
Setting the temperature wrong for the vegetable.
High-moisture vegetables like zucchini and cherry tomatoes do better at slightly lower temperatures, around 350 to 375°F, so they have time to dry out before the exterior burns. Dense root vegetables like sweet potatoes and beets can handle 400°F because they need that extra heat to cook through before the outside overcooks.
Cutting pieces unevenly.
Mixed sizes mean mixed results. Small pieces burn while large ones are still raw inside. Take the extra minute to cut everything to a uniform size.
It's the easiest way to guarantee every piece comes out at the same time.
Air Fryer vs. Oven Roasting: Which Method Actually Wins
Both methods roast vegetables. The experience and results are quite different. Here's how they compare across the factors that actually matter.
| Factor | Air Fryer | Conventional Oven |
|---|---|---|
| Cook time | 8 to 18 minutes | 25 to 45 minutes |
| Preheat time | 2 to 5 minutes | 10 to 15 minutes |
| Oil needed | 1 to 2 tsp per batch | 2 to 3 tbsp per sheet pan |
| Browning quality | Excellent, all sides | Good, requires flipping |
| Batch size | 2 to 3 cups per batch | Full sheet pan (6 to 8 cups) |
| Energy use | 1,400 to 1,800W | 2,000 to 5,000W |
| Kitchen heat | Minimal | Significant |
| Hands-off level | High (one shake) | Moderate (flip and rotate) |
The air fryer wins on speed, energy efficiency, and convenience. The oven wins on batch size. If you're cooking vegetables for a crowd, a full sheet pan in the oven is still the more practical choice.
If you're cooking for one to four people, the air fryer is faster, uses less energy, and produces better browning with less effort.
One area where the oven still has an edge is capacity for large families. If you're meal prepping vegetables for a family of six, you'll run four to five air fryer batches versus one oven run. A larger air fryer, like a 9 quart dual-basket model, closes that gap significantly.
Our roundup of the best 9 quart air fryer for big families covers the models that handle full-batch vegetable roasting without the multiple rounds.
Image source: Bing (Web (fair-use with source credit))
The flavor difference is real but subtle. Air-fried vegetables tend to have a slightly more concentrated, nuttier flavor because the moisture evaporates so quickly. Oven-roasted vegetables retain a bit more of their natural water content, which some people prefer for certain dishes.
Neither is wrong. It comes down to texture preference and how much time you have.
Seasoning Combinations That Make Roasted Vegetables Taste Incredible
Plain salt and pepper is fine. But the right seasoning blend turns simple roasted vegetables into something you actually crave. Here are the combinations that work best, grouped by flavor profile.
Mediterranean.
Olive oil, garlic powder, dried oregano, lemon zest, and a pinch of red pepper flakes. Finish with fresh parsley and a squeeze of lemon juice after cooking. Works beautifully on zucchini, bell peppers, eggplant, and cauliflower.
Smoky Southwest.
Avocado oil, smoked paprika, cumin, chili powder, and a touch of garlic powder. Finish with fresh cilantro and a squeeze of lime. Perfect for sweet potatoes, corn, bell peppers, and green beans.
Savory herb.
Olive oil, fresh rosemary, fresh thyme, minced garlic, and black pepper. This is the go-to for root vegetables. Carrots, potatoes, parsnips, and beets all benefit from the earthy herb profile.
Umami Parmesan.
Olive oil, garlic powder, onion powder, and finely grated Parmesan cheese. Toss the vegetables in the oil and spices first, then add the Parmesan in the last 3 minutes of cooking so it melts and crisps without burning. Broccoli and Brussels sprouts are the standouts here.
Spicy Asian.
Sesame oil for finishing, soy sauce or tamari in the toss, garlic powder, and a drizzle of sriracha after cooking. Green beans, broccoli, and mushrooms take well to this combination.
Simple and clean.
Sometimes the best move is good olive oil, flaky sea salt, and nothing else. Let the caramelization do the talking. This works especially well with asparagus, cherry tomatoes, and any vegetable that's fresh and in season.
A few seasoning rules worth following. Always add salt before cooking, not after. It draws out a small amount of moisture that helps the surface dry and crisp.
Add delicate fresh herbs after cooking so they don't burn. And if you're using cheese, add it in the last few minutes only.
How to Cook a Whole Mix of Vegetables at Once (Without Ruining Them)
Mixed vegetable roasting in an air fryer is totally doable. You just need to account for the different cook times. There are two reliable approaches.
The staggered method.
Start with the vegetables that take the longest. Add quicker-cooking vegetables partway through. Here's an example timeline for a mixed batch at 375°F:
- Add carrots and sweet potato cubes. Cook for 6 minutes.
- Add broccoli and cauliflower florets. Cook for 5 more minutes.
- Add zucchini and bell peppers. Cook for the final 4 minutes.
Total time: 15 minutes. Everything finishes together.
The zone method.
If your air fryer has a divider or dual basket, put long-cooking vegetables on one side and quick-cooking ones on the other. Set the time for the longer-cooking side and remove the other side early. This works especially well in models like the Ninja Foodi Dual Zone or any unit with independent basket controls.
For single-basket models without a divider, you can create a makeshift zone by placing a piece of folded parchment paper as a barrier. It's not perfect, but it helps keep different vegetables separated so you can pull one section out early.
Which vegetables play well together?
Group vegetables by similar cook times and densities:
| Group A (15 to 18 min) | Group B (12 to 15 min) | Group C (7 to 10 min) |
|---|---|---|
| Sweet potato | Broccoli | Zucchini |
| Butternut squash | Cauliflower | Bell peppers |
| Beets (small cubes) | Brussels sprouts | Green beans |
| Carrots | Mushrooms | Asparagus |
| Red onion | Cherry tomatoes |
Mix within a group freely. Mix across groups using the staggered method.
Frozen Vegetables in the Air Fryer: Do They Work?
Frozen vegetables work surprisingly well in an air fryer. They're one of the best-kept secrets for fast weeknight sides. The texture won't be quite as crisp as fresh, but the convenience factor is hard to beat.
The key rules for frozen vegetables:
Do not thaw them. Cook them straight from frozen. Thawing releases excess moisture and makes the final result soggy.
Toss the frozen pieces with oil and seasoning in a bowl before adding them to the basket. The oil sticks better when the vegetables are still icy and the surface is slightly rough.
Increase the cook time by 2 to 4 minutes compared to fresh. The frozen starting temperature means the air fryer needs extra time to bring everything up to browning temperature. Expect slightly less caramelization than fresh, but still a solid result.
Frozen broccoli, cauliflower, green beans, and mixed stir-fry blends are the most popular choices. Frozen corn kernels also work well and develop a nice pop of sweetness. Avoid frozen leafy spinach or any vegetable that's mostly water content, as these tend to turn to mush.
One tip that makes a real difference. Spread the frozen vegetables in the basket and let them sit for 2 minutes at temperature before shaking. This gives the surface ice a chance to melt and start evaporating, which leads to better browning on the first toss.
Meal Prep Strategy: Roasting a Week's Worth of Vegetables in One Session
Sunday afternoon, one air fryer, about 90 minutes. That's all it takes to prep vegetables for the entire week. The trick is choosing vegetables that reheat well and storing them so they don't turn to mush by Wednesday.
Best vegetables for meal prep:
- Sweet potato cubes. Reheat beautifully and hold their texture for 4 to 5 days.
- Broccoli and cauliflower. Stay firm and take on flavor as they sit in the fridge.
- Brussels sprouts. Actually taste better the next day once the seasoning has settled in.
- Carrots and green beans. Hold up well to reheating without getting mushy.
Vegetables to avoid for meal prep:
- Zucchini. It releases water as it sits and turns rubbery within a day.
- Asparagus. Loses its snap and becomes limp after refrigeration.
- Cherry tomatoes. They break down and get watery.
The batch process:
- Prep all vegetables at once. Wash, dry, cut, and season each type separately.
- Start with the longest-cooking vegetables. Sweet potatoes and carrots first.
- Move to medium-cook times. Broccoli, cauliflower, Brussels sprouts.
- Finish with quick-cooking items. Green beans last.
- Let everything cool completely before storing. Trapped steam in the container creates condensation, which makes vegetables soggy.
Store in airtight glass containers in the refrigerator. They'll keep for 4 to 5 days. When reheating, use the air fryer again for 3 to 4 minutes at 375°F.
This restores the crispness that the microwave destroys.
If you're feeding a larger household, a dual-basket or high-capacity model cuts the total prep time in half. Our picks for the best 8 qt air fryer with dual basket are worth a look if you're regularly cooking vegetables for four or more people.
Quick Reference: Air Fryer Temperature and Time Chart for Every Vegetable
Keep this chart bookmarked. It covers every common vegetable and the settings that produce the best results.
| Vegetable | Cut | Temp | Time | Shake At |
|---|---|---|---|---|
| Asparagus | Whole spears | 380°F | 6 to 10 min | 4 min |
| Beets | 1/2 inch cubes | 375°F | 15 to 20 min | 8 min |
| Broccoli | Medium florets | 375°F | 8 to 10 min | 5 min |
| Brussels sprouts | Halved | 375°F | 12 to 15 min | 7 min |
| Butternut squash | 3/4 inch cubes | 380°F | 15 to 18 min | 8 min |
| Carrots | Coins, 1/4 inch | 375°F | 12 to 15 min | 7 min |
| Cauliflower | Medium florets | 375°F | 12 to 15 min | 7 min |
| Cherry tomatoes | Whole | 350°F | 8 to 10 min | 5 min |
| Green beans | Whole, trimmed | 400°F | 7 to 9 min | 4 min |
| Kale | Torn leaves | 275°F | 5 to 7 min | 3 min |
| Mushrooms | Halved | 375°F | 10 to 12 min | 6 min |
| Red onion | Wedges | 380°F | 10 to 12 min | 6 min |
| Sweet potato | 3/4 inch cubes | 400°F | 15 to 18 min | 8 min |
| Zucchini | Half-moons | 400°F | 8 to 10 min | 5 min |
| Bell pepper | 1 inch strips | 400°F | 8 to 10 min | 5 min |
All times assume a preheated 5 to 6 quart air fryer at standard wattage. Smaller units may cook 1 to 2 minutes faster. Larger or lower-wattage models may need an extra 2 to 3 minutes.
Expert Tips Most Air Fryer Recipes Leave Out
These are the small details that separate good air fryer vegetables from great ones. None of them are complicated, but most recipes skip them entirely.
Use perforated parchment liners.
They prevent small pieces from falling through the basket slots and make cleanup almost effortless. They also reduce the need for oil since vegetables don't stick as much. Just make sure the liners are specifically designed for air fryers with perforations.
Solid parchment blocks airflow and defeats the purpose.
Don't ignore the preheat.
Three minutes of preheating makes a measurable difference. Vegetables hit a hot chamber and start browning immediately instead of spending the first few minutes just warming up. Most people skip this step and wonder why their results are inconsistent.
Add a small amount of acid after cooking.
A squeeze of lemon juice, a drizzle of balsamic vinegar, or even a splash of red wine vinegar brightens the flavor of roasted vegetables instantly. The acid cuts through the richness of the oil and makes the whole dish taste more vibrant. This one trick elevates everything.
Rotate your basket position if your model allows it.
Some air fryers have a removable crisper tray that sits at different heights. Placing it lower puts vegetables closer to the heating element for more browning. Placing it higher is better for delicate items that burn easily.
Check your manual for specifics.
Clean the basket after every use.
Baked-on oil residue creates smoke and off-flavors in future cooks. A quick wipe with a damp cloth while the basket is still warm takes 30 seconds. For deeper cleaning, most baskets are dishwasher safe.
Our guide to the best 8 qt air fryer easy to clean covers which models have the most hassle-free maintenance.
Weigh your oil.
Most people eyeball it and use too much. One teaspoon of oil weighs about 5 grams. For a standard batch of 2 cups of vegetables, 10 to 15 grams of oil is the sweet spot.
Enough to coat everything lightly, not so much that it pools at the bottom.
Frequently Asked Questions
Do you need to preheat an air fryer for vegetables?
Yes. A 3-minute preheat ensures the chamber is at full temperature when vegetables go in. Without preheat, the first few minutes are spent warming the air instead of browning the food, which leads to uneven results and longer cook times.
Can you put aluminum foil in an air fryer?
You can, but it should not cover the entire basket floor. Blocking airflow prevents the convection effect that makes air frying work. If you use foil, leave the edges open or poke holes in it.
Perforated parchment liners are a better option since they're designed for airflow.
Why are my air fryer vegetables soggy?
The most common causes are overcrowding the basket, not drying vegetables after washing, or using too much oil. Fix all three and you'll see an immediate improvement. Work in smaller batches, pat vegetables dry, and stick to 1 to 2 teaspoons of oil per batch.
Can you air fry vegetables without any oil?
You can, but the results are noticeably different. Without oil, vegetables brown less evenly and seasoning doesn't stick as well. A very light coat, even from a spray mister, makes a significant difference in both texture and flavor.
How do you keep air fryer vegetables warm for serving?
Transfer finished vegetables to a warm oven set at 200°F. They'll hold for 15 to 20 minutes without losing much crispness. Don't leave them in the air fryer basket with the unit off.
The residual heat continues to cook them and they'll soften.
Are air fryer vegetables healthy?
Air frying uses 70 to 80 percent less oil than traditional roasting or deep frying, which significantly reduces calorie intake. A 2015 study in the Journal of Food Science found that air frying retained comparable nutrient levels to conventional roasting while reducing fat content. It's one of the healthier ways to prepare vegetables at home.