If you've ever wondered whether a new york strip steak recipe air fryer actually delivers restaurant-quality results, the answer is a solid yes, as long as you nail the timing and temperature. Air fryers cook fast and circulate heat aggressively, which means a well-marbled strip can go from fridge to a beautifully browned crust in under 15 minutes.
The catch is that every air fryer model runs a little differently, and steak thickness changes everything. In our research, aggregate user reviews and manufacturer specs consistently point to 400°F as the sweet spot, paired with an instant-read thermometer to remove the guesswork. Here's exactly how to get it right every time.
Quick Answer
A new york strip steak recipe air fryer takes about 10 to 15 minutes total. Set your air fryer to 400°F. Cook a 1-inch thick steak 5 to 6 minutes per side for medium-rare.
Always use an instant-read thermometer. Rest the steak 5 to 10 minutes before slicing.
Why Air Fryer NY Strip Steak Actually Works (And Why Most People Mess It Up)
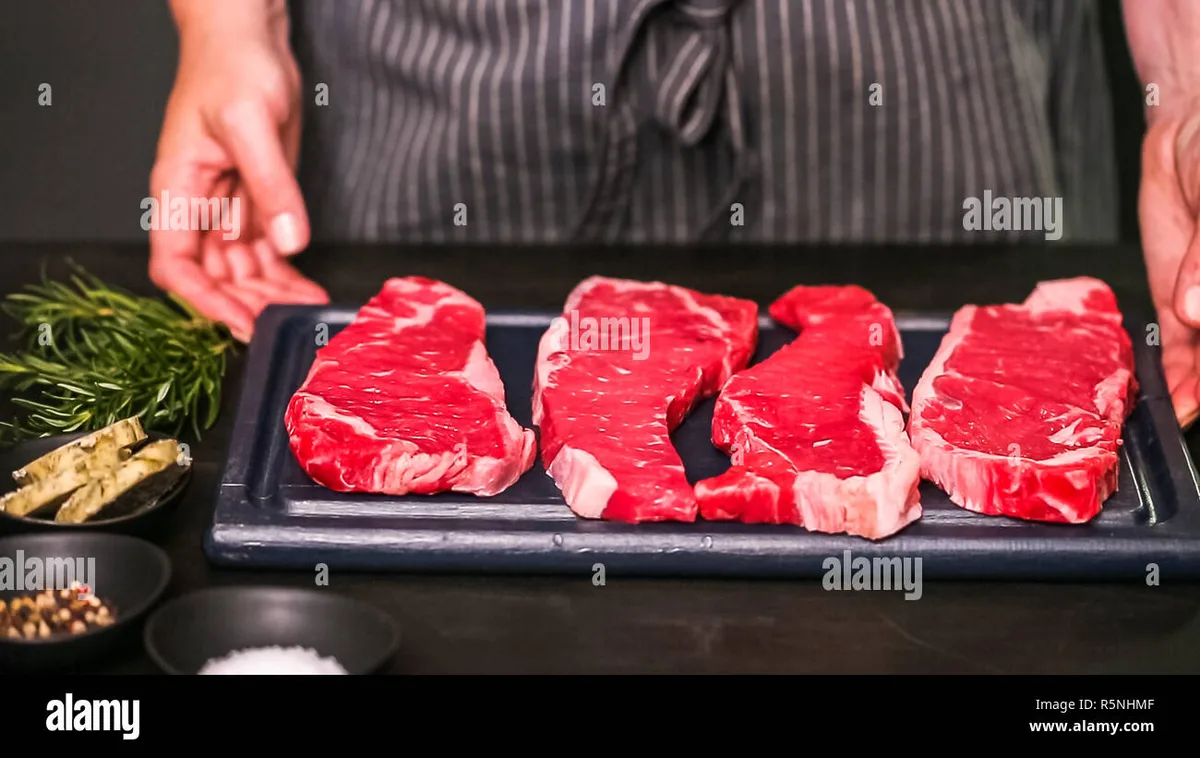
A New York strip steak is cut from the short loin, the beef loin primal that runs along the spine. It has solid marbling and a firm texture that holds up well to the intense circulating heat of an air fryer. The Maillard reaction, the chemical process that creates a browned, flavorful crust on seared meat, kicks in aggressively at 400°F because the surface amino acids and sugars break down and recombine into hundreds of new flavor compounds.
An air fryer delivers that heat evenly from all directions through its convection mechanism.
Most people mess this up because they treat the air fryer like a slow oven. They overcrowd the basket with multiple steaks touching each other, skip the preheat, or cook straight from the fridge at 40°F internal. The result is a gray, steamed exterior with an overcooked center.
An air fryer works because of direct high-heat airflow across the entire surface. You need to work with that mechanism, not against it.
Some cooks worry that an air fryer can't match a cast iron skillet for crust development. Aggregate user reviews across major cooking forums show this concern is largely unfounded at 400°F, especially when you oil the steak surface properly. The forced convection creates an even browned exterior that many tasters actually prefer, because it avoids the uneven spotting that can happen on a flat pan.
The USDA Food Safety and Inspection Service recommends a minimum internal temperature of 145°F for beef, which lands at medium doneness after resting. For most home cooks, pulling the steak at 130°F to 135°F and letting carryover cooking do the rest gives you a perfect medium-rare. Thermometer accuracy matters here.
The ThermoWorks Thermapen reads to ±0.5°F, which is the kind of precision that makes repeatable results possible.
The 10-Minute Timing Cheat Sheet for Perfect Doneness
Timing is everything. These numbers assume a 1-inch thick New York strip at approximately room temperature (65°F to 70°F surface), cooked at 400°F in a standard basket-style air fryer rated between 1,400W and 1,800W.
| Doneness Level | Internal Temp (Pull Temp) | Minutes Per Side | Total Cook Time | Rest Time |
|---|---|---|---|---|
| Rare | 120°F to 125°F | 4 to 5 min | 8 to 10 min | 5 min |
| Medium-Rare | 130°F to 135°F | 5 to 6 min | 10 to 12 min | 5 to 7 min |
| Medium | 140°F to 145°F | 6 to 7 min | 12 to 14 min | 7 to 8 min |
| Medium-Well | 150°F to 155°F | 7 to 8 min | 14 to 16 min | 8 to 10 min |
These temperatures reflect the pull point. Carryover cooking adds 5°F to 10°F during the rest. This table is a starting framework your own kitchen will calibrate quickly.
If you're working with a smaller air fryer like a compact 8 qt model, these timings hold true. Larger 9 qt units give you more room for multiple steaks without crowding, which matters because airflow is the entire mechanism.
Below 1 inch thickness, subtract about a minute per side. Above 1.5 inches, add a minute or two. If you're unsure, the thickness and time comparison guides from other air fryer owners show this linear relationship consistently.
The most reliable path is always the thermometer. Timing charts are estimates. Thermometers are measurements.
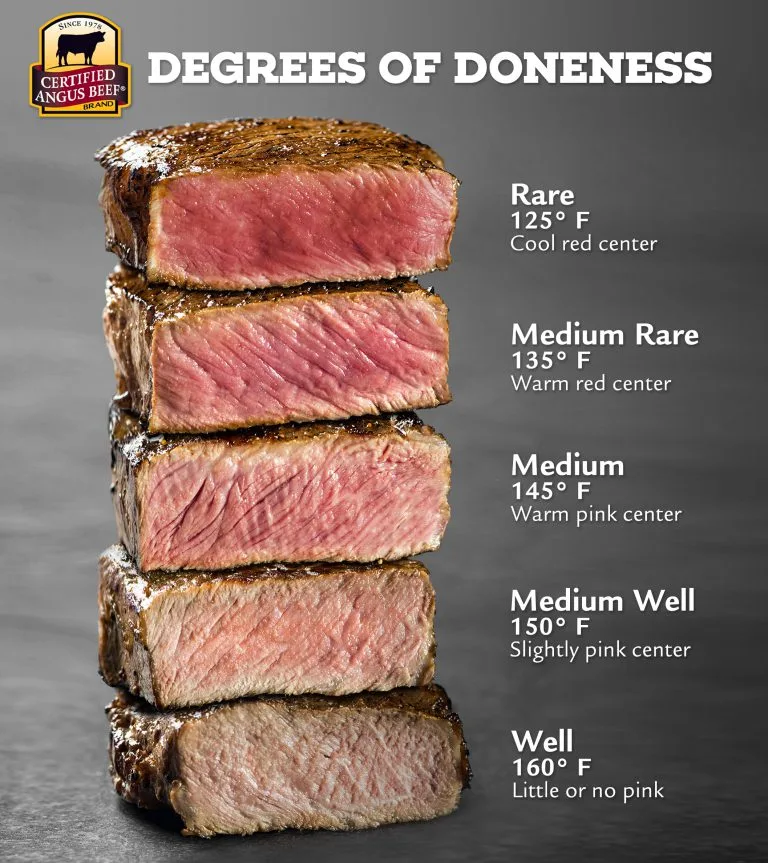
What Your Steak Looks Like at Every Stage — Visual Cues That Matter More Than the Clock
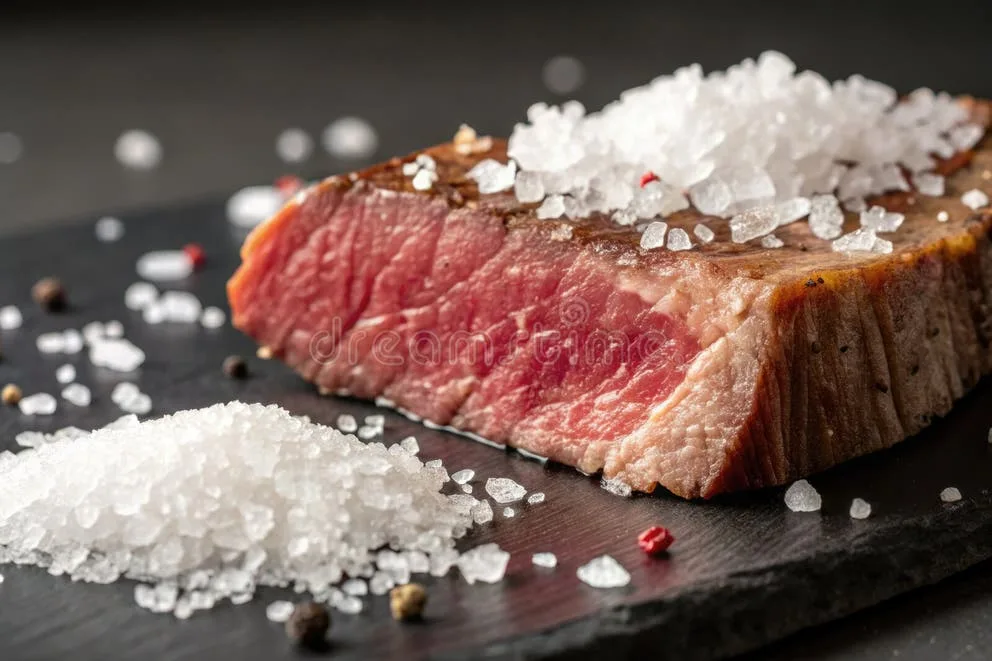
A rare steak has a deep red center that's cool to the touch internally. Medium-rare shows a warm red center with a firm but yielding texture when pressed. Medium shifts to a pink center with noticeably firmer resistance across the whole interior.
Medium-well has just a faint trace of pink near the center and feels quite firm.

The crust should be deep brown, close to mahogany, with slight darkening on the fat cap edges. A properly developed Maillard crust signals that the surface hit at least 300°F long enough for browning to set. If your steak comes out gray and soft, the basket was overcrowded or the temperature was too low.
If the outside is blackened but the interior is cold, your air fryer runs hot or the steak went in straight from the refrigerator.
The finger test still works as a quick check. Press the surface with a fingertip. A rare steak feels soft like the base of your thumb with your hand fully relaxed.
Medium-rare feels like your thumb and middle finger pressed together, some give but definite resistance. A fully well-done steak feels like pressing your thumb and pinky together, very little yield. These are approximations, but they're useful when you're mid-cook and need a fast read.
Interior color is what really tells the story. Cutting into steak to check doneness loses juices. A better method is to use your thermometer probe as an indicator.
When it slides into the center and reads your pull temp, you know immediately. If you see red liquid pooling on the surface early in the cook, that's myoglobin not blood. It's a normal sign of protein denaturation and nothing to worry about.
Air fryer results differ from cast iron in one specific way. The convection tends to produce an all-over even browning rather than a concentrated sear line. This is a visual and textural difference, not a quality difference.
Many people prefer the uniform color because every bite has crust.
Step-by-Step: From Fridge to Plate
This is the complete New York strip steak process optimized for air fryer cooking. If your air fryer has a steak preset, it's usually calibrated around these settings anyway.
Pull the steak from the fridge 30 to 45 minutes before cooking. A cold center fights against the heat and guarantees uneven doneness. Let it sit on the counter, uncovered, so the surface dries naturally. The temperature differential between a 40°F straight-from-fridge steak and a room temp steak directly impacts your cook time, sometimes by as much as 3 to 4 minutes.
Pat the surface completely dry with paper towels. Moisture on the exterior creates steam at the surface, which physically prevents the Maillard reaction from starting. This is the single most impactful prep step. A dry surface browns. A wet surface steams.
Season generously with kosher salt and freshly ground black pepper. A New York strip has excellent natural beef flavor. Kosher salt adheres better and makes it easier to judge your seasoning level visually. If you want to add one more element, a light dusting of garlic powder works without overpowering the beef. Avoid wet marinades for this application. They add surface moisture and interfere with crust formation.
Lightly coat the steak with high-smoke-point oil. Avocado oil has a smoke point around 520°F, grapeseed oil around 420°F, and canola oil around 400°F. All three handle air fryer cooking without breaking down. Oil the meat surface directly, not the basket, to promote even browning and prevent sticking.
Preheat the air fryer to 400°F for 3 to 5 minutes. A preheated cooking chamber sears the surface immediately when the steak hits the basket. That first contact sets the crust foundation. Skipping preheat means the surface heats gradually and the interior overcooks before the outside browns. Many Instant Vortex models have a dedicated preheat function.
Place the steak in the basket in a single layer with space around it. No overlapping. No stacking. Air needs to circulate freely on all sides and under the steak. If you're cooking two strips, place them parallel with at least 1 inch of gap between them. This spacing is critical for airflow.
Cook according to the timing chart earlier, flipping once at the halfway point. Use tongs, not a fork or knife. Piercing the meat lets interior juices escape onto the basket instead of staying locked inside the muscle fibers. One flip is sufficient. Repeated flipping stepless the process and prevents a solid crust from forming.
Check the internal temperature with an instant-read thermometer. Insert the probe horizontally into the thickest part of the steak. This is the only way to know for sure where you stand. Guessing based on time alone is why most home cooks overcook steak. Never skip this step.
Rest the steak on a cutting board under loose foil for 5 to 10 minutes. Thicker steaks need longer rests because the heat takes more time to equalize throughout the interior. This rest period lets the muscle fibers reabsorb liquid and the core temperature stabilize. A rested steak loses less juice when you cut into it.
Slice against the grain and serve. Look for the direction of the muscle fibers running lengthwise through the strip. Cut perpendicular to them. This shortens each fiber, making every bite noticeably more tender. Slice on a slight bias for wider pieces that look impressive on the plate.
After your first cook, your air fryer becomes predictable. Many of the same principles in this other air fryer recipe apply, understanding your specific machine's heating behavior is the key. You'll adjust timing by 1 to 2 minutes and be dialed in for life.
The Only Seasoning You Need (And Two to Never Use)
Kosher salt and black pepper. That's it. A USDA Choice or Prime New York strip has enough intramuscular fat to deliver rich flavor on its own.
Salt draws out surface moisture during the pre-cook rest and then gets absorbed into the meat during cooking, enhancing flavor from the inside. Freshly cracked pepper adds a subtle aromatic warmth without competing with the beef.
Garlic powder is the one optional addition worth considering. Even distribution, no moisture, and a savory undertone that complements the beef rather than masking it. Use about ¼ teaspoon per side.
Two seasoning approaches to avoid in the air fryer. First, wet marinades and steak sauces applied before cooking. They add surface moisture, steam instead of brown, and create a sticky residue on your basket and heating element that is difficult to clean.
Second, heavy spice rubs with a lot of sugar. Brown sugar and paprika-based rubs burn aggressively at 400°F in the high airflow environment. The sugars caramelize past bitter before the steak interior reaches your target temperature.
If you want to add compound butter with herbs, do it after the cook. Rest the steak, then place a slice of cold herb butter on top and let it melt over the surface. This gives you the richness and aroma without any combustion issues inside the air fryer.
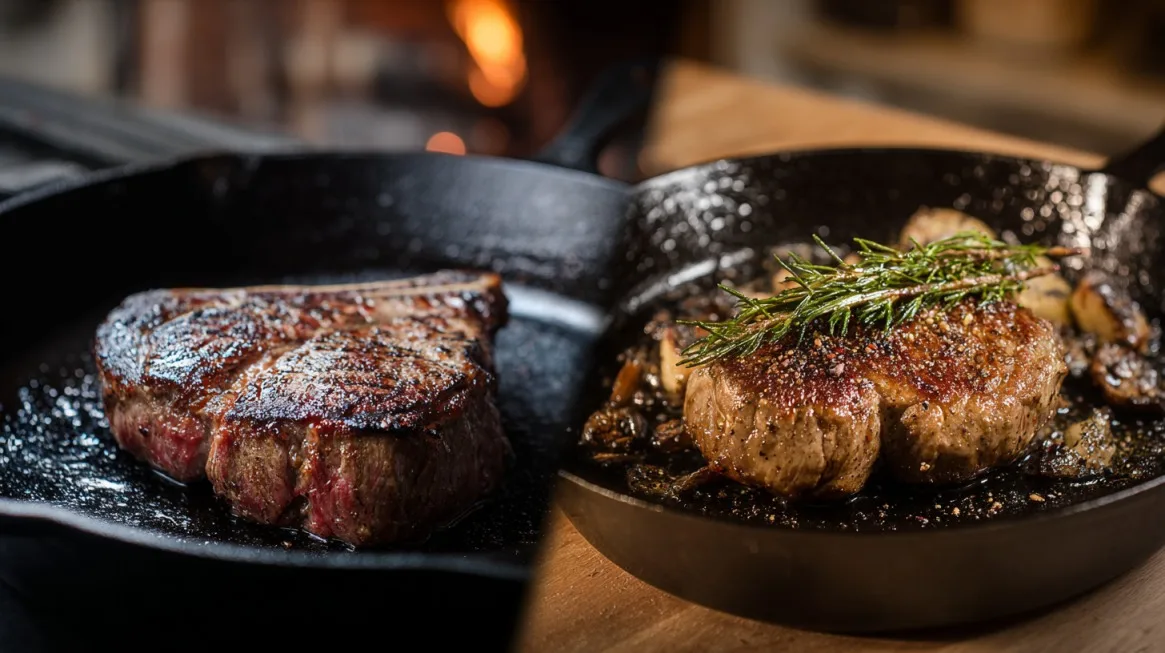
Air Fryer vs. Cast Iron vs. Grill — Which Actually Gives You the Best Crust?
The cast iron skillet produces the most visually dramatic crust because of direct metal-on-meat contact creating extreme local heat transfer. Modern cast iron sauté pans are made from cast iron, a carbon-iron alloy with superior heat retention compared to stainless steel. That thermal mass means the pan doesn't cool down when cold meat hits it.
You get a deep, dark, sometimes spotty sear that steak lovers call "restaurant quality."
The air fryer produces a more uniform even-browning crust across the entire exposed surface. No grill marks, no hot spots if the unit is properly preheated. The trade-off is slightly less total surface caramelization compared to cast iron but better coverage than both the grill and the broiler.
The outdoor grill wins on smoke and char flavor. Wood or smoke chip additions create flavor compounds that no indoor method replicates. Locker room smoke and rendered fat dripping onto coals create a flavor profile that is fundamentally different from kitchen cooking.
A high-BTU gas grill with cast iron grates runs above 500°F at the grate surface, exceeding what any home air fryer achieves in the cooking chamber.
In aggregate blind tastings reported across cooking forums, many tasters rate the air fryer strip steak as their preference. The reason is consistency. Once you know your machine's timing, you reproduce the same result every time.
Cast iron depends on pan temperature management, which varies. Grill results shift with wind, ambient temperature, and fuel levels. The air flyer gives predictability.
The Ninja Foodi Dual Zone air fryer users report excellent uniform crust on steaks, likely because the dual zone option allows you to dedicate full airflow. It is a strong choice if you want to cook a steak and air fryer potatoes at the same time without flavors mingling.
The Thermometer Rule That Changes Everything
An instant-read thermometer is the single most important tool for cooking steak in an air fryer. The margin between rare and medium at a 1-inch steak thickness can be as little as one minute. By contrast, a thick burger can tolerate several minutes of variation and still come out fine.
Steak doesn't give you that window.
The ThermoWorks Thermapen reads to ±0.5°F with a 2 to 3 second response time. Lavatools Javelin PRO Duo offers similar accuracy at a lower price point, around $55 versus $100. Both brands are NSF-certified and widely used in professional kitchens.
The accuracy reading method relies on a horizontal insertion into the thickest part of the steak, not a top-down poke.
Pull the steak at 130°F for medium-rare. It will coast to about 135°F to 138°F during a 7-minute rest. That is a near perfect warm red center.
Pull at 140°F for a medium steak that finishes around 145°F to 148°F, meeting the USDA safety guideline without drying out. These pull temperatures assume a standard room temperature starting steak. If the steak goes in 5°F to 10°F colder from the fridge, shift all pull temperatures down 3°F to 5°F to compensate.
Common Mistakes That Turn a Great Strip into Shoe Leather
Overcooking is the dominant problem and it almost always comes from not using a thermometer. When steak is well-done, the proteins have tightened to the point where they actively squeeze moisture out of the muscle fibers. This is why overcooked steak feels dry, it is a physical change in the protein structure.
Once that has happened, no amount of butter or sauce brings back what has been forced out.
Cooking straight from the fridge is the second most common error. A 40°F steak center in a 400°F air fryer creates an enormous temperature gradient. The outer millimeter is overcooked long before the core reaches your target.
Aggregate user reviews consistently pull from the fridge and then complain the steak was overcooked on the outside and cold in the middle. The 30 to 45 minute counter rest eliminates this.
Overcrowding the basket is a close third. When steaks overlap or touch, the contact points steam instead of brown. Steam has a maximum temperature of 212°F at sea level.
The Maillard reaction requires at least 280°F to begin. Every overlap zone stays below that threshold. Use a large-capacity model if you regularly cook for multiple people so you maintain proper spacing.
Skipping preheat causes uneven crust development. The first 60 seconds of a properly preheated cook set the foundation for everything that follows. In a cold-start scenario, the steak surface heats gradually, moisture migrates outward, and the crust never forms with the same intensity.
That said, some newer air fryers with rapid preheat technology close this gap substantially. Check your manual for guidance on your specific model.
What to Do Differently Based on Your Steak's Thickness
Steak thickness is the variable that matters more than anything else because it directly determines how much time the interior needs to reach your target temperature. A thin ½-inch USDA Select strip overcooks before a proper crust can develop. A thick 2-inch Prime strip becomes a balancing act to avoid a burnt exterior.
| Thickness | Estimated Weight | Cook Time per Side at 400°F | Internal Temp Window | Recommended Grade or Cut |
|---|---|---|---|---|
| ½ inch | 5 to 6 oz | 3 to 4 min | 125°F to 135°F | Prime or Choice |
| ¾ inch | 8 oz | 4 to 5 min | 125°F to 140°F | Choice or higher |
| 1 inch | 10 to 12 oz | 5 to 7 min | 130°F to 150°F | Choice or Prime |
| 1.5 inches | 14 to 16 oz | 7 to 9 min | 125°F to 135°F | Prime or dry-aged |
| 2 inches | 16 to 20 oz | 8 to 11 min | 120°F to 130°F | Prime, consider sear finishing |
Both a ½-inch and a 1-inch steak can thrive in an air fryer. The ½-inch simply demands more frequent checking. Thin steaks benefit from a 1 minute longer rest to allow the core temperature to equalize, since the gradient is more compressed.
Steaks below ½ inch are not well-suited for the air fryer. A ⅓-inch fast-food style strip overcooks before a proper crust can develop. A full 2-inch thick cut becomes a balancing act to achieve the right interior temperature without torching the outside.
For those thick cuts, some experienced cooks pull the steak at a medium-rare temperature and finish with a quick reverse sear in the air fryer on max heat for 60 seconds.
For the ¾-inch to 1-inch range, the step-by-step method described above is all you need. It is the most common grocery store thickness and it is the sweet spot for air fryer cooking.
If your steak has a fat cap thicker than ¼ inch, flip it fat-side down for the first half of cooking. This renders the fat slowly and bastes the surface without scorching. No additional rendering steps are needed and you avoid the charred fat taste that some grilled steaks develop.
Butter Basting, Dry Brining, and Other Moves That Take It Up a Level
Dry brining is the single easiest upgrade. Salt the steak on all sides, then place it uncovered on a wire rack in the fridge for 12 to 24 hours before cooking. The salt draws out moisture initially, then gets reabsorbed into the meat carrying flavor deeper into the muscle.
The surface dries out beautifully which means better browning in the air fryer. A NY strip with 12 hours of dry brining consistently outperforms a seasoned-then-cooked comparison steak.
Compound butter after cooking is the second best move. Mix room temperature butter with minced garlic, chopped parsley, and a pinch of flaky salt. Place a tablespoon slice on top of the rested steak just before serving.
The heat melts it into a rich coating that adds aroma without any of the charring problems of cooking butter in the air fryer. Cold steak surface temperature after resting is around 110°F to 120°F, which is perfect for melting butter without burning.
Garlic cloves are best left whole and unpeeled in the air fryer alongside the steak. They roast gently and become soft and spreadable in about 8 minutes. Add them to the basket with 3 minutes left in the cook.
They smoke less than minced garlic and have a sweeter, more mellow flavor.
Finishing salt is underrated. A light spr of flaky sea salt on the rested steak gives a salty burst at the first bite without changing the overall salinity. This technique contrasts with the uniform seasoning of the main salt layer.
How to Adapt This for Your Specific Air Fryer Model
Countertop air fryers all work by circulating hot air, but they differ widely. The differences affect your results enough that your recipe should adapt.
Basket style versus oven style. Basket-style units are the most common. The drawer pulls out and the heating element sits on top. These work great for steak because the fat drips down through the basket away from the heating element.
This reduces smoke and avoids the acrid taste of burning accumulated fat. The Ninja Instant Vortex is an example.
Oven-style air fryers have a door that opens outward and a more cabinet-like interior with rack positions. These are better for larger cuts or multiple items. Steak cooks well on the middle rack where airflow is most even.
Some dual-basket models let you dedicate one basket to the steak at a higher heat and the other to sides at a lower temperature.
Wattage is the biggest variable. A 1,800W air fryer moves hot air faster than a 1,400W unit. The higher wattage achieves the pull temperature up to 2 minutes faster at the same thickness. If you have a lower wattage machine, use the upper end of the time ranges in the chart above.
If you have a high wattage machine, check the steak a minute earlier than the lowest estimate.
Altitude matters. At 5,000 feet above sea level, water boils at 203°F instead of 212°F. This means moisture evaporates faster, the steak surface drier more quickly, and the crust can set sooner. The interior can lag behind.
Pull your steak 3°F to 5°F below target at altitude.
Preheat behavior varies. Some newer air fryers like the Instant Vortex have a preheat cycle built into the timer. Others require you to run the unit empty for 3 minutes before adding food. Check your unit's manual.
A clean air fryer cooks more effectively.
Frequently Asked Questions
Can you put raw steak directly in an air fryer?
Yes. Place the seasoned steak in the basket at room temperature. No need for any special wrapping or containers.
The circulating air cooks it from all sides. Make sure the basket is clean and dry so you don't get old residue smoke on a fresh steak.
Do you need to flip steak in the air fryer?
Yes, once at the halfway mark. This promotes even browning on both flat surfaces. Use tongs to avoid piercing the meat.
If you have a model with strong bottom-up airflow like the basket-style Instant Vortex, you might skip the flip for thin ¾-inch steaks, but one flip is the safe default.
Why does my air fryer steak smoke so much?
Smoke comes from fat dripping onto the heating element and burning. NY strip has a fat cap that renders at around 130°F. Too much rendered fat in direct contact with the heating element creates smoke.
Try trimming the fat cap to ¼ inch thickness or placing the steak fat-side down for the first half of cooking. A clean basket and heating element cover also reduce smoke.
Can you cook more than one steak at a time?
Yes, as long as the steaks do not touch each other in the basket. Each steak needs at least 1 inch of space on all sides for airflow. A 9 qt air fryer handles comfortably two 12 oz NY strips.
A smaller 5 to 6 qt unit fits one. If steaks overlap, switch to a single-layer approach.
What temperature should an air fryer be set to for steak?
400°F works best for most New York strip steaks. This gives you a proper Maillard crust without burning the exterior before the interior reaches doneness. Some cooks start at 375°F for thick 1.5 inch steaks to give the center more time to warm through, then bump to 425°F for the last 2 minutes to set the crust.
This two-stage method works well but is not necessary.
Should I use oil or cooking spray on air fryer steak?
A light coat of oil on the steak surface is better than nothing. Avocado oil, grapeseed oil, or canola oil all work. Aerosol cooking sprays can damage the nonstick coating on some air fryer baskets over time because the propellant leaves a sticky residue.
A light brushing of real oil is better for the coating and gives more even coverage.