
Many people wonder, “Is it hard to clean an air fryer?” The good news is, with the right approach, cleaning an air fryer is surprisingly straightforward. Regular, simple cleaning prevents tough messes, while a deeper clean tackles accumulated grease. This guide will walk you through everything you need to know to keep your air fryer sparkling.
So, you’ve jumped on the air fryer bandwagon, and you’re loving those crispy fries, perfectly cooked chicken wings, and quick weeknight meals. You might be asking yourself, “Is it hard to clean an air fryer?” It’s a common question, and the answer is: it *can* be, if you let it get excessively dirty. However, with a little bit of knowledge and consistent effort, cleaning your air fryer is actually quite manageable, and far from being a dreaded chore.
This comprehensive guide will demystify air fryer cleaning. We’ll break down the process into simple steps, offer practical tips, and provide solutions for those trickier situations. By the end, you’ll feel confident in keeping your air fryer in tip-top shape, ensuring it continues to deliver delicious results for years to come.
Key Takeaways
- Regular quick cleans are key: Wiping down the basket and interior after each use prevents food buildup and makes deep cleaning less frequent and easier.
- Most parts are dishwasher safe: Many air fryer baskets, drawers, and accessories can be washed in the dishwasher, significantly reducing manual scrubbing time.
- Soaking tackles stubborn grease: For greasy build-up, soaking the removable parts in warm, soapy water can loosen grime before scrubbing.
- Baking soda is a cleaning powerhouse: A paste of baking soda and water is excellent for tackling baked-on food and odors.
- Don’t forget the exterior: A damp cloth is usually sufficient for cleaning the outside of your air fryer, keeping it looking new.
- Troubleshooting common issues: Understanding how to deal with stuck-on food or lingering smells can save you time and frustration.
Understanding Air Fryer Cleaning Basics
Before we dive into the step-by-step instructions, let’s cover some fundamental principles that make air fryer cleaning easier.
Why Cleaning is Important
An air fryer works by circulating hot air at high speeds. This process, while great for cooking, can also lead to grease splatters and food particles accumulating inside. If left uncleaned, this residue can:
- Cause smoke: Dripping grease hitting the heating element can produce smoke, affecting the taste of your food and creating a fire hazard.
- Affect taste: Old food particles can burn and impart unpleasant flavors to your next meal.
- Reduce efficiency: A buildup of debris can potentially obstruct airflow, slightly impacting cooking performance.
- Harbor bacteria: Like any kitchen appliance, an uncleaned air fryer can become a breeding ground for bacteria.
Frequency of Cleaning
The best approach to cleaning an air fryer is to do it regularly. This means:
- After each use: A quick wipe-down of the basket and drawer.
- Weekly (or more often if used daily): A more thorough clean of the removable parts.
- Monthly (or as needed): A deep clean of the interior and heating element.
The Step-by-Step Guide to Cleaning Your Air Fryer
Cleaning your air fryer can be broken down into two main parts: cleaning the removable parts and cleaning the interior.
Cleaning the Removable Parts (Basket and Drawer)
This is the part of the air fryer that gets the most direct contact with food, and therefore, the most mess.
Step 1: Let it Cool Down
Crucial First Step: Always unplug your air fryer and let it cool completely before attempting to clean it. Hot surfaces can cause burns, and attempting to clean a hot appliance is dangerous.
Visual guide about Is It Hard to Clean an Air Fryer
Image source: feelgoodfoodie.net
Visual guide about Is It Hard to Clean an Air Fryer
Image source: airfryerworld.com
Step 2: Remove the Basket and Drawer
Carefully slide out the basket and the drawer it sits in. Most air fryers have a release button or mechanism on the handle to separate the basket from the drawer. Check your model’s manual if you’re unsure.
Step 3: Assess the Mess
Take a look at how dirty the parts are. Is there just a light dusting of crumbs, or is there significant grease and stuck-on food?
Step 4: The Quick Clean (For Light Messes)
For minor crumbs and light residue:
- Dishwasher Option: Many air fryer baskets and drawers are dishwasher safe. Check your appliance’s manual. If so, simply place them on the top rack of your dishwasher. This is the easiest and quickest method.
- Hand Wash Option: If not dishwasher safe, or if you prefer hand washing:
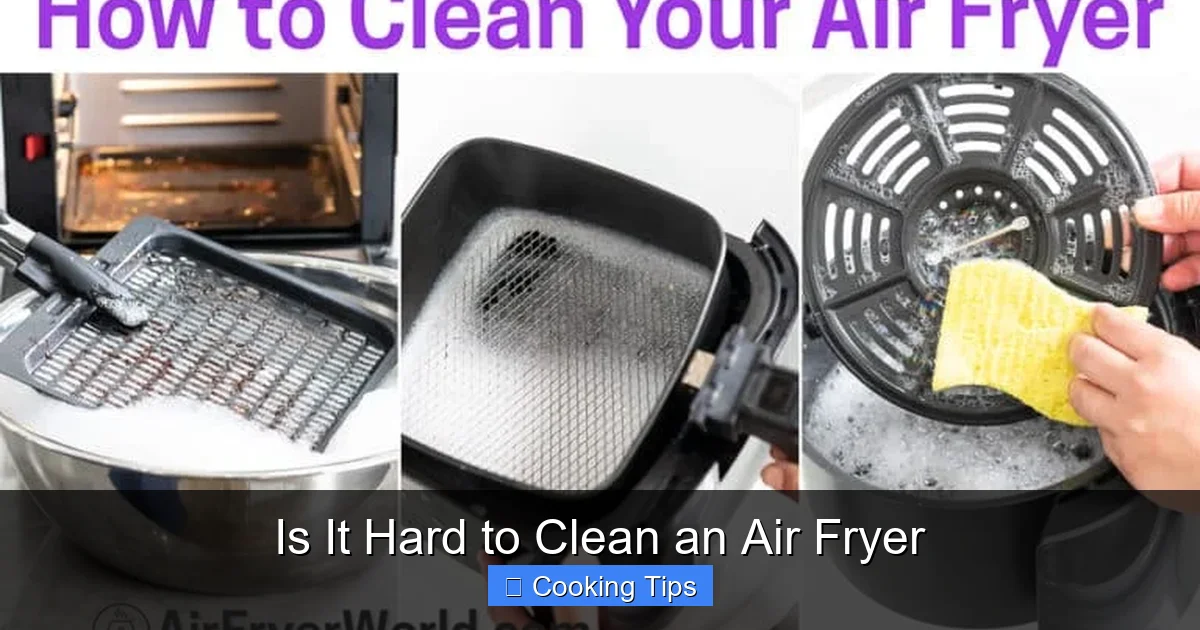
- Rinse the parts under warm running water to remove loose debris.
- Use a soft sponge or cloth with a few drops of mild dish soap.
- Gently scrub the surfaces. Avoid using abrasive scrubbers or steel wool, as these can scratch non-stick coatings.
- Rinse thoroughly with warm water.
- Dry completely with a soft cloth or let them air dry before reassembling.
Step 5: The Deeper Clean (For Greasy or Stuck-On Food)
When simple washing isn’t enough, you’ll need a slightly more intensive approach.
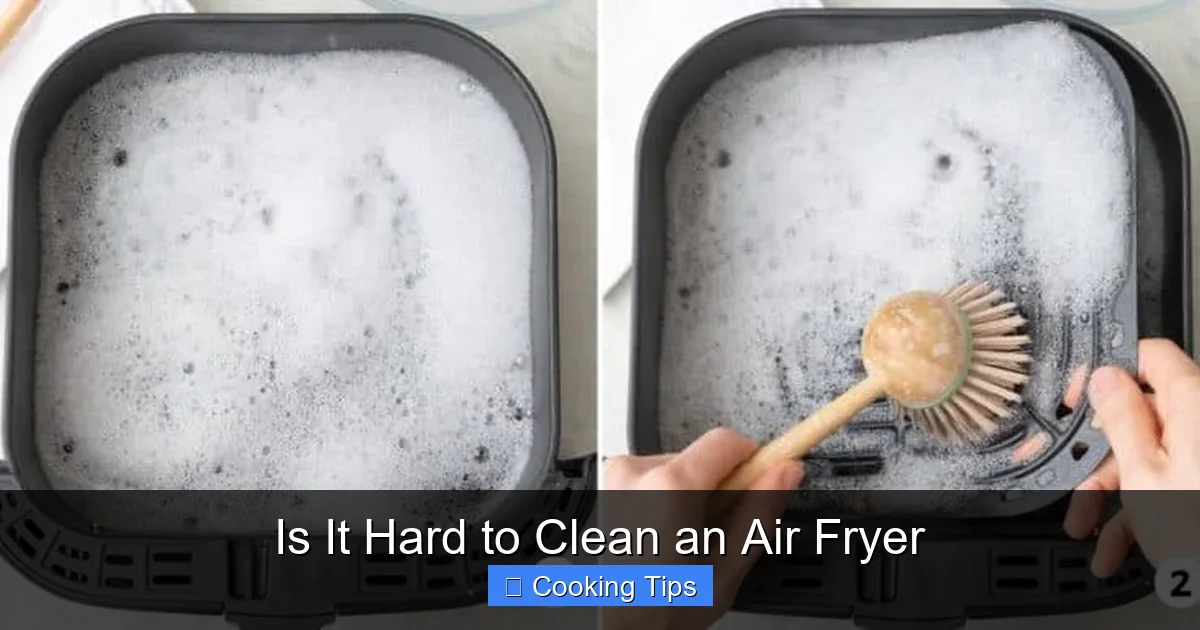
- Soaking is Your Friend: Fill your sink or a large basin with warm water and a generous amount of dish soap. Submerge the basket and drawer and let them soak for at least 10-15 minutes. This will help loosen stubborn grease and burnt-on food. For really tough spots, you can add a tablespoon of white vinegar or a degreaser to the soak.
- Scrubbing Power: After soaking, use a non-abrasive sponge or a soft-bristled brush to scrub away the loosened grime. For really baked-on bits, a plastic scraper can be helpful. Again, be gentle to protect the non-stick coating.
- Baking Soda Paste: For persistent, stuck-on food, a paste made from baking soda and water is incredibly effective. Mix about half a cup of baking soda with a few tablespoons of water to form a thick paste. Apply this paste to the problem areas and let it sit for 15-30 minutes. Then, scrub gently with a sponge or brush and rinse thoroughly. Baking soda is also great for deodorizing!
- Rinse and Dry: Once clean, rinse all parts thoroughly under warm water and dry them completely with a soft cloth. Ensuring they are dry before putting them back in the air fryer prevents moisture build-up.
Cleaning the Interior of the Air Fryer
The inside of your air fryer requires a bit more care, as you’ll be working around the heating element.
Step 1: Ensure It’s Cool and Unplugged
As always, safety first. Make sure the appliance is cool and disconnected from the power source.
Visual guide about Is It Hard to Clean an Air Fryer
Image source: airfryanytime.com
Step 2: Remove Loose Crumbs
Turn the air fryer upside down over a trash can or use a damp cloth to wipe out any loose crumbs or debris that have fallen into the main cavity.
Step 3: Wipe Down the Interior Walls
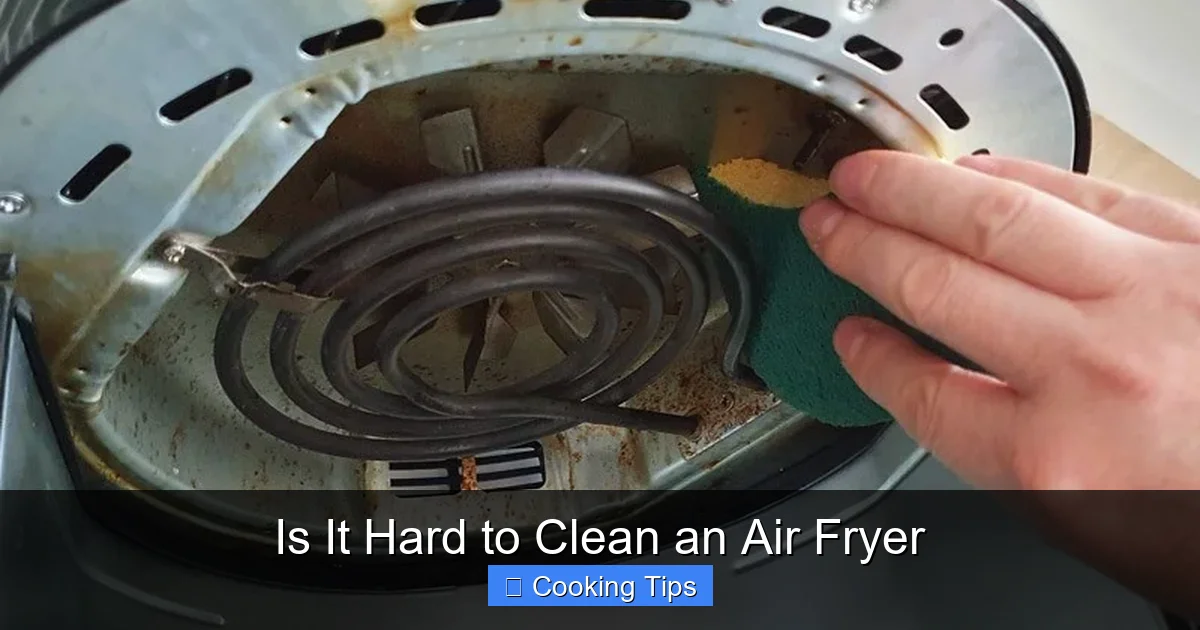
Dip a damp, non-abrasive cloth or sponge into warm, soapy water. Wring it out very well so it’s just damp, not wet. Gently wipe down the interior walls and the bottom of the air fryer cavity. Pay attention to areas where grease might have splattered.
Step 4: Tackle Stubborn Spots
For any particularly stubborn grease spots on the interior walls:
- You can use a small amount of the baking soda paste mentioned earlier. Apply it with a cloth or cotton swab, let it sit for a few minutes, and then gently wipe away.
- Some manufacturers recommend using a soft brush or a specific air fryer cleaning solution if available for your model. Always check your manual.
Step 5: Cleaning the Heating Element
The heating element is usually at the top of the air fryer. Be very careful when cleaning this area.
- Ensure it is completely cool.
- Use a soft, dry brush or a slightly damp cloth to gently wipe away any food debris that may have accumulated on the element or its protective cover. Do NOT spray any cleaning solutions directly onto the heating element, and avoid soaking it.
- If there’s grease stuck directly to the element, you might need to use a cotton swab dipped in a very small amount of dish soap, wipe gently, and then follow up with a clean, damp swab to remove any soap residue. Ensure it’s completely dry afterward.
Step 6: Dry Thoroughly
Use a clean, dry cloth to wipe down the entire interior. You can also leave the air fryer door open for a while to allow any residual moisture to evaporate.
Cleaning the Exterior of the Air Fryer
Keeping the outside of your air fryer clean is simple and helps maintain its overall appearance.
Step 1: Unplug and Cool
As with interior cleaning, ensure the appliance is unplugged and cool.
Step 2: Wipe with a Damp Cloth
For most exterior surfaces (plastic, stainless steel), a soft cloth dampened with water and a mild dish soap is sufficient. Wipe down the control panel, sides, and top. Avoid getting water into vents or electrical components.
Step 3: For Stainless Steel Surfaces
If your air fryer has stainless steel parts, you can use a cleaner specifically designed for stainless steel after wiping it down with a damp cloth. Always wipe in the direction of the grain.
Step 4: Dry and Polish
Use a dry, soft cloth to buff the exterior and remove any water spots or streaks.
Special Considerations and Tips
Here are some extra tips to make air fryer cleaning even easier:
- Use Parchment Paper or Liners: For messier foods, consider using perforated parchment paper liners or silicone air fryer liners. These catch grease and crumbs, making cleanup as simple as discarding the liner. Make sure they are suitable for your air fryer model and don’t obstruct airflow.
- Pre-Cooked Foods are Easier to Clean: Foods that are already cooked and less likely to splatter, like some frozen appetizers, can result in less mess. For example, learning how to make Tyson chicken nuggets in an air fryer can be less messy than frying something from scratch.
- Don’t Overload the Basket: Overcrowding can lead to uneven cooking and more splattering, making cleanup harder.
- Clean Spills Immediately: If you notice a spill or splatter on the heating element or interior while the appliance is still warm (but unplugged and safe to touch), wipe it up immediately. It will be much easier to remove than when it’s baked on.
- Deodorizing: If your air fryer retains odors (e.g., from strong-smelling foods like fish or certain spices), you can try running it empty for a few minutes with a slice of lemon or a tablespoon of white vinegar inside. Let it cool, then clean as usual.
Troubleshooting Common Air Fryer Cleaning Issues
Even with the best intentions, you might encounter a few cleaning challenges.
Problem: Stuck-on, Burnt Food
Solution: Soaking is your best bet. Let the parts sit in warm, soapy water for at least 30 minutes, or even overnight for very stubborn messes. Follow up with gentle scrubbing, and if necessary, use a baking soda paste. Never use sharp metal objects to scrape off burnt food, as this will damage the non-stick coating. If you’re cooking something prone to sticking, like maybe beef cheeks, consider using a liner or a bit of oil.
Problem: Lingering Odors
Solution: As mentioned, try the lemon or vinegar deodorizing trick. Ensure you are cleaning all removable parts thoroughly, as residual grease can hold odors. Sometimes, simply airing out the appliance with the door open for a day can help.
Problem: Scratched Non-Stick Coating
Solution: Unfortunately, once the non-stick coating is scratched, it can’t be repaired. This is why it’s crucial to always use soft sponges, cloths, and avoid abrasive materials or utensils. A scratched coating can be a sign that it’s time to consider replacing your air fryer, as scratched coatings can sometimes flake into food.
Problem: Water/Residue in the Drawer Mechanism
Solution: After washing, ensure all parts, especially the drawer where the basket sits, are completely dry. You can use a towel to dry any nooks and crannies, or let them air dry thoroughly before reassembly. This prevents water from seeping into areas where it shouldn’t be.
Conclusion: Air Fryer Cleaning Made Easy
So, is it hard to clean an air fryer? Absolutely not, if you approach it with a little foresight and consistency. By performing quick cleans after each use, tackling deeper cleans weekly, and knowing how to handle stubborn messes, you can keep your air fryer in pristine condition. A clean air fryer not only looks better but also cooks better, delivering those delicious, crispy results you love without smoke or unwanted flavors. Embrace these simple cleaning routines, and your air fryer will be a trusted companion in your kitchen for a long time to come. Happy cooking, and happy cleaning!