Unlock the full potential of your air fryer oven with this comprehensive guide. Learn about its versatile functions, how to prepare your food, and essential cooking techniques to achieve perfectly crispy and delicious results every time. From simple fries to elaborate dishes, this guide will help you become an air fryer oven pro.
So, you’ve got a shiny new air fryer oven, and you’re ready to dive into a world of crispy, delicious, and healthier cooking. But where do you start? Air fryer ovens are incredibly versatile, offering a fantastic alternative to traditional ovens and deep fryers. They use rapid hot air circulation to cook food quickly and evenly, giving you that satisfying crunch without all the extra oil. This guide is designed to walk you through everything you need to know to work your air fryer oven like a pro, from understanding its basic functions to mastering advanced techniques.
We’ll cover how to set it up, prepare your food, select the right settings, and even offer tips for cleaning and troubleshooting. By the end of this guide, you’ll be confident in using your air fryer oven to create a wide range of delectable meals, from simple snacks to full dinners. Get ready to transform your home cooking!
Key Takeaways
- Understand Your Air Fryer Oven’s Functions: Familiarize yourself with key settings like air fry, bake, roast, toast, and dehydrate to maximize its capabilities.
- Proper Food Preparation is Crucial: Learn how to cut food into uniform sizes, lightly oil, and avoid overcrowding the basket for optimal air circulation and crispiness.
- Preheating Matters: Most air fryer oven recipes benefit from preheating to ensure even cooking and a perfectly crisp exterior right from the start.
- Shake or Flip Foods Midway: Regularly shaking the basket or flipping food halfway through cooking is essential for achieving uniform browning and crispiness on all sides.
- Utilize Accessories Wisely: Learn how to use racks, trays, and rotisseries to their full potential for various cooking tasks.
- Cleaning and Maintenance are Key: Regular cleaning ensures your air fryer oven functions efficiently and lasts longer.
- Experiment and Adjust: Don’t be afraid to experiment with cooking times and temperatures, as different air fryer oven models may vary.
Understanding Your Air Fryer Oven
Before you start cooking, it’s essential to get acquainted with your specific air fryer oven model. While designs can vary, most air fryer ovens share common features and functions.
Key Components and Features
- Heating Elements: Air fryer ovens typically have heating elements at the top and bottom, sometimes with a fan to circulate hot air.
- Control Panel: This is where you’ll find buttons or a dial for selecting cooking modes, temperature, and time. Some models have digital displays, while others use analog controls.
- Cooking Basket/Tray: This is where you place your food. It’s designed to allow air to circulate freely around the food.
- Racks: Many air fryer ovens come with multiple racks, allowing you to cook larger quantities or different items simultaneously.
- Accessories: Some models include special accessories like rotisserie spits, pizza pans, or drip trays.
Common Cooking Functions Explained
Your air fryer oven likely boasts several cooking functions, each suited for different types of food and desired results. Understanding these will help you choose the right setting for your meal.
- Air Fry: This is the signature function. It uses a powerful fan and high heat to circulate air rapidly, mimicking the crisping effect of deep frying. It’s perfect for foods like fries, chicken wings, and vegetables.
- Bake: Similar to a traditional oven, the bake function is ideal for cakes, cookies, muffins, and bread. It provides consistent heat for even baking.
- Roast: This setting is designed for larger cuts of meat, vegetables, or whole dishes that require longer cooking times and a browned exterior. It often uses a slightly lower temperature than air fry but with more even heat distribution. For example, you can achieve a beautifully roasted pork tenderloin or even a whole cornish hen.
- Toast: This function is for toasting bread, bagels, or English muffins, usually with top heating elements.
- Broil/Grill: This function uses intense heat from the top element to sear, brown, or melt cheese on food quickly.
- Dehydrate: If your air fryer oven has this setting, it allows you to gently remove moisture from fruits, vegetables, or meats to create snacks like jerky or dried fruit.
Getting Started: Setup and First Use
Setting up your air fryer oven is straightforward. Follow these steps to ensure it’s ready for its first culinary adventure.
Visual guide about How to Work Air Fryer Oven
Image source: lianaskitchen.co.uk
Initial Cleaning
Before its first use, it’s crucial to clean your air fryer oven. Most manufacturers recommend wiping down the interior and exterior with a damp cloth. Wash any removable accessories like baskets or trays with warm, soapy water. Ensure everything is thoroughly dry before plugging it in.
Plug It In and Test
Once clean and dry, find a stable, heat-resistant surface for your air fryer oven. Ensure there’s enough space around it for proper ventilation. Plug it into a grounded electrical outlet. Some people like to run the air fryer oven on a high setting for about 10-15 minutes empty before the first cooking session to burn off any manufacturing residues. This might produce a slight odor, which is normal and should dissipate quickly.
Preparing Your Food for the Air Fryer Oven
The way you prepare your food significantly impacts the final result. Here are some essential tips for optimal air fryer oven cooking.
Visual guide about How to Work Air Fryer Oven
Image source: thebustedoven.com
Cutting and Portioning
- Uniform Size: Cut your food into uniform, bite-sized pieces. This ensures everything cooks at the same rate, preventing some pieces from burning while others remain undercooked.
- Avoid Overcrowding: This is one of the most critical rules! Don’t fill the basket or tray to the brim. Food needs space for the hot air to circulate around it. Overcrowding leads to steaming rather than crisping. If you’re cooking a larger batch, it’s better to cook in multiple rounds.
Oiling Your Food
While air fryers use less oil than traditional methods, a little bit of oil can enhance crispiness and flavor. You can use a spray oil bottle or toss your food with a small amount of oil (about 1-2 teaspoons for a pound of food).
- Types of Oil: Use oils with a high smoke point, such as avocado oil, canola oil, grapeseed oil, or light olive oil.
- Even Coating: Ensure the oil is evenly distributed for consistent browning.
Seasoning
Season your food before or after adding oil, depending on your preference. Salt, pepper, herbs, and spices all work wonderfully. For marinated items, ensure excess marinade is drained off before placing food in the air fryer oven to prevent dripping and smoking.
How to Cook with Your Air Fryer Oven: Step-by-Step
Now that you’re familiar with your appliance and have prepped your food, let’s get cooking!
Visual guide about How to Work Air Fryer Oven
Image source: airfryeraid.com
Step 1: Preheat Your Air Fryer Oven
For most recipes, preheating your air fryer oven is recommended. This ensures the food starts cooking immediately and evenly, leading to a crispier exterior.
- Select Mode: Choose the desired cooking mode (e.g., Air Fry, Bake, Roast).
- Set Temperature: Set the temperature specified in your recipe. If you’re unsure, start with a common temperature like 375°F (190°C).
- Set Timer: Set the timer for 3-5 minutes.
- Wait: Allow the air fryer oven to reach the set temperature. Many digital models will beep or indicate when preheated.
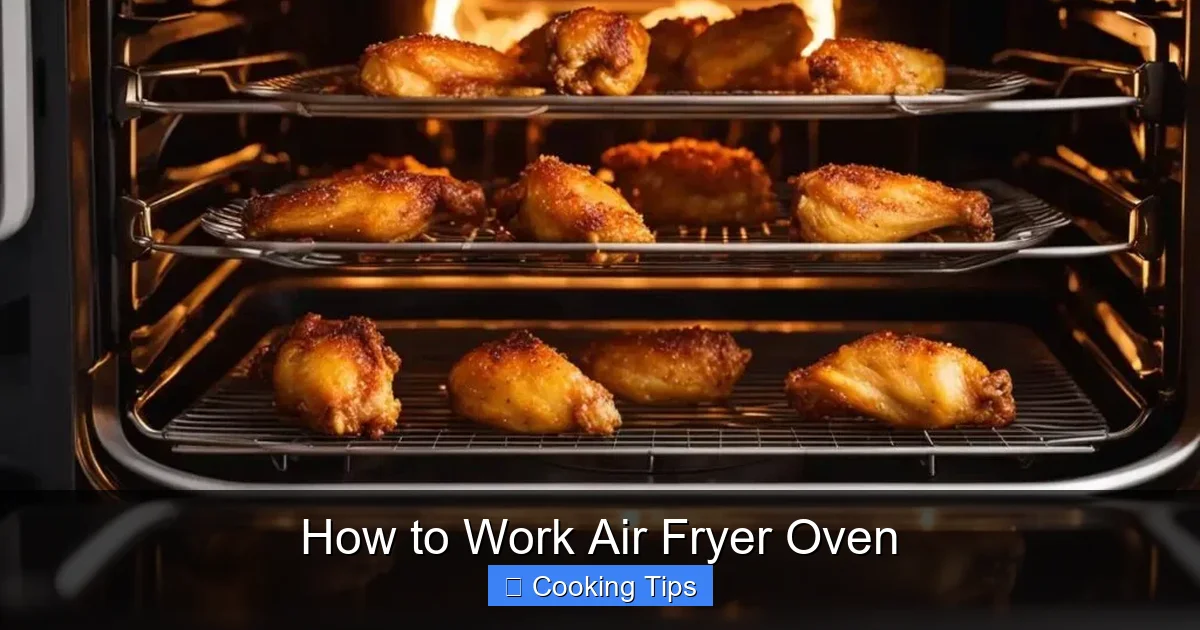
Step 2: Prepare and Place Food in the Basket/Tray
Once preheated, carefully open the air fryer oven. Place your prepared food in a single layer on the basket or tray. Remember not to overcrowd!
Step 3: Select Cooking Mode, Temperature, and Time
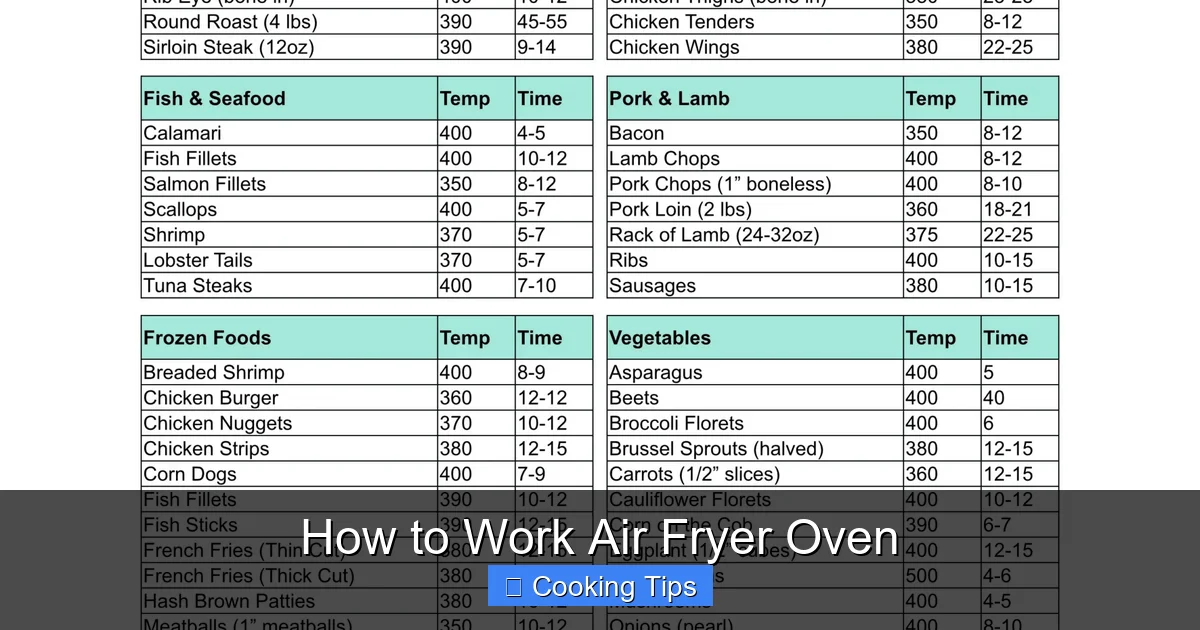
Refer to your recipe for the specific settings. If you’re experimenting, start with guidelines from similar foods.
- Air Fry: Typically uses higher temperatures (375°F – 400°F / 190°C – 200°C) for shorter cooking times.
- Bake/Roast: May use moderate temperatures (325°F – 375°F / 160°C – 190°C) for longer periods.
Tip: For common items, consult online resources. For instance, learning how to cook bone-in chicken breast in an air fryer can provide a good starting point for similar poultry dishes.
Step 4: Cook and Monitor
Close the air fryer oven and let it cook. Most air fryer ovens have a transparent window, allowing you to monitor the food’s progress. This is also a good time to check if you need to shake or flip.
Step 5: Shake or Flip Food Midway
This is a crucial step for achieving even cooking and crispiness on all sides. About halfway through the cooking time, carefully pull out the basket or tray and shake the food well, or use tongs to flip individual pieces. For larger items like a pork steak, flipping is essential.
Step 6: Check for Doneness
Once the cooking time is nearly up, check if your food is cooked through and crispy. Use a food thermometer for meats to ensure they reach a safe internal temperature. For vegetables, check for tenderness and browning.
Step 7: Remove Food and Serve
Once cooked to perfection, carefully remove the basket or tray and transfer your delicious, crispy food to a plate. Let it cool slightly before enjoying!
Tips for Optimal Results
Elevate your air fryer oven cooking with these practical tips:
- Don’t Forget the Drip Tray: If your model has one, ensure it’s in place to catch any drips and make cleanup easier.
- Use Parchment Paper or Foil Sparingly: While you can use perforated parchment paper or small amounts of foil to line the bottom, ensure they don’t block airflow. Avoid covering the entire basket, as this defeats the purpose of air circulation.
- Experiment with Accessories: If your air fryer oven comes with different racks or trays, try them out! The roasting rack is great for whole chickens or roasts, while a pizza pan is perfect for mini pizzas or flatbreads.
- Adjust Cooking Times: Recipes are often a guide. Air fryer ovens can vary in power. It’s better to check your food a few minutes early and add more time if needed than to overcook it.
- Consider Thickness: Thicker cuts of meat or larger vegetables might require longer cooking times or slightly lower temperatures to ensure they cook through without burning the outside. For example, cooking something like a porterhouse steak might need careful temperature management.
- Crisping Up Leftovers: Air fryer ovens are fantastic for reheating leftovers, especially fried or crispy foods like fries or chicken wings. They’ll become crispy again, unlike microwaving.
Cleaning and Maintenance
Keeping your air fryer oven clean is vital for its performance and longevity.
Daily Cleaning
- After each use and once cooled, wipe down the interior with a damp cloth or sponge.
- Wash the basket and any removable trays or racks in warm, soapy water. Some parts might be dishwasher safe – check your manual.
- Wipe down the exterior with a damp cloth.
Deep Cleaning
Periodically, you’ll want to give your air fryer oven a more thorough clean.
- Heating Elements: Gently wipe down heating elements with a soft brush or damp cloth to remove any food debris. Be careful not to damage them.
- Door: Clean the glass door with a glass cleaner or a mixture of vinegar and water.
- Filter: If your model has a removable filter, clean it according to the manufacturer’s instructions.
Always ensure the appliance is unplugged and completely cool before cleaning.
Troubleshooting Common Air Fryer Oven Issues
Even with the best intentions, you might encounter a few hiccups. Here are some common issues and how to solve them:
- Food is not crispy:
- Cause: Overcrowding the basket, not using enough oil, or insufficient cooking time.
- Solution: Cook in smaller batches, ensure food is lightly oiled, and increase cooking time or temperature slightly. Make sure there’s adequate space for air circulation.
- Food is burning on top but undercooked inside:
- Cause: Temperature is too high, or food is too close to the top heating element.
- Solution: Lower the temperature, move food to a lower rack (if applicable), or reduce cooking time and finish with a quick broil if needed.
- Smoking:
- Cause: Drippings from fatty foods are hitting the heating element, or residual food particles are burning.
- Solution: Ensure the drip tray is in place and clean. For fatty foods, consider lightly wiping them with a paper towel before cooking, or use a lower temperature. Clean your air fryer oven thoroughly after each use.
- Uneven Cooking:
- Cause: Food pieces are different sizes, or the basket wasn’t shaken/food wasn’t flipped.
- Solution: Ensure food is cut uniformly and remember to shake or flip halfway through cooking.
Conclusion
Working your air fryer oven is a rewarding experience that opens up a world of possibilities in your kitchen. By understanding its functions, preparing your food correctly, and following these simple steps, you can consistently achieve delicious, crispy results. Remember to experiment, adjust as needed, and most importantly, have fun exploring all the culinary creations your air fryer oven can help you make!