Discover how to bake a delicious vanilla cake in your air fryer! This guide provides simple, step-by-step instructions for creating a moist and fluffy cake. Learn essential tips for success, from choosing the right pan to achieving the perfect bake. Get ready for a surprisingly easy and delightful air fryer baking experience!
Are you looking for a quick, easy, and delicious way to satisfy your sweet cravings? Baking a cake doesn’t always require a big oven. With an air fryer, you can whip up a delightful vanilla cake in no time! This guide will walk you through everything you need to know to make a perfect vanilla cake in your air fryer. We’ll cover the ingredients, the steps, and even some handy tips to ensure your cake turns out wonderfully moist and fluffy. Get ready to impress yourself (and maybe a few lucky taste-testers) with this simple air fryer baking method.
You might be wondering if an air fryer is really suitable for baking a cake. The answer is a resounding yes! Air fryers circulate hot air very efficiently, which can lead to incredibly moist and evenly baked goods. This is especially true for smaller cakes, making your air fryer the perfect tool for those times you want a treat without the fuss of a full-sized oven.
Let’s get started on our journey to air fryer vanilla cake perfection!
Key Takeaways
- Perfect for Small Batches: Air fryers are ideal for baking smaller cakes, making them perfect for single servings or when you don’t need a full-sized cake.
- Achieve Moistness: This method often results in a wonderfully moist cake due to the circulating hot air.
- Faster Baking Time: Air fryer cakes typically bake faster than conventional oven cakes, saving you time.
- Adaptable Recipe: The base vanilla cake recipe is versatile and can be adapted with different extracts or additions.
- Temperature is Key: Accurately preheating and maintaining the correct temperature in your air fryer is crucial for even baking.
- Troubleshooting Common Issues: Learn how to fix common problems like a burnt exterior or undercooked center.
Gather Your Ingredients
Before you begin, ensure you have all the necessary ingredients and equipment. This recipe is for a standard 6-inch cake pan, which fits most air fryers.
Dry Ingredients:
- 1 ½ cups all-purpose flour
- 1 cup granulated sugar
- 1 ½ teaspoons baking powder
- ½ teaspoon salt
Wet Ingredients:
- ½ cup unsalted butter, softened
- 2 large eggs, at room temperature
- 1 teaspoon pure vanilla extract
- ½ cup milk, at room temperature (whole milk is recommended for richness)
Equipment:
- Air fryer
- 6-inch round cake pan (ensure it fits your air fryer basket)
- Parchment paper
- Mixing bowls
- Whisk or electric mixer
- Spatula
- Toothpick or cake tester
Step-by-Step Guide to Making Vanilla Cake in Air Fryer
Making this vanilla cake is straightforward. Follow these steps carefully for the best results.
Step 1: Prepare Your Cake Pan
Proper pan preparation is essential to prevent your cake from sticking and to ensure easy removal.
Prepping the Pan:
- Grease your 6-inch cake pan generously with butter or cooking spray.
- Line the bottom of the pan with a circle of parchment paper. This is crucial for easy removal and prevents sticking, especially for delicate cakes.
- Grease the parchment paper as well.
- Lightly flour the greased and lined pan. Tap out any excess flour.
This triple-threat method – greasing, parchment paper, and flouring – ensures your air fryer vanilla cake will slide out like a dream.
Step 2: Mix the Dry Ingredients
In a medium-sized mixing bowl, combine all your dry ingredients.
Combining Dry Ingredients:
- Add the all-purpose flour, granulated sugar, baking powder, and salt to the bowl.
- Whisk these ingredients together until they are well combined and there are no lumps. This step ensures that the leavening agents and sugar are evenly distributed throughout the batter, which is key for a consistent rise.
Step 3: Cream the Butter and Sugar
In a larger mixing bowl, cream together the softened butter and sugar.
Creaming Process:
- Add the softened unsalted butter to the bowl.
- Add the granulated sugar.
- Using an electric mixer on medium speed, or a whisk and some elbow grease, beat the butter and sugar together until the mixture is light, fluffy, and pale yellow. This process, known as creaming, incorporates air into the batter, which contributes to the cake’s light texture. Scrape down the sides of the bowl occasionally to ensure everything is evenly mixed.
This usually takes about 2-3 minutes with an electric mixer.
Step 4: Add Eggs and Vanilla Extract
Once the butter and sugar are creamed, it’s time to add the wet ingredients.
Incorporating Wet Ingredients:
- Add the eggs, one at a time, beating well after each addition. Make sure each egg is fully incorporated before adding the next. This prevents the batter from looking curdled.
- Stir in the vanilla extract. Use good quality vanilla extract for the best flavor.
Ensure the eggs are at room temperature. Cold eggs can sometimes cause the butter mixture to seize up.
Step 5: Alternate Dry and Wet Ingredients
Now, you’ll gradually add the dry ingredients and milk to the creamed mixture. This alternating method helps to create a smooth, well-emulsified batter without overmixing.
Alternating Method:
- Add about one-third of the dry ingredients to the butter mixture. Mix on low speed (or stir gently with a spatula) until just combined.
- Next, add about half of the milk. Mix until just combined.
- Repeat with another third of the dry ingredients, then the remaining half of the milk.
- Finally, add the remaining dry ingredients and mix until just combined. Do not overmix the batter. Overmixing can develop the gluten in the flour, leading to a tough cake. A few small lumps are okay.
Scrape down the sides of the bowl as needed. The batter should be smooth and have a pouring consistency.
Step 6: Pour Batter into Prepared Pan
Gently pour the cake batter into your prepared 6-inch cake pan.
Filling the Pan:
- Pour the batter evenly into the greased and floured cake pan.
- Use a spatula to spread the batter gently, ensuring it’s level.
- Tap the pan lightly on the counter a couple of times to release any large air bubbles.
Ensure your pan is not filled more than two-thirds full, to allow room for the cake to rise.
Step 7: Prepare Your Air Fryer
Preheating your air fryer is crucial for even baking.
Preheating:
- Preheat your air fryer to 320°F (160°C).
- Most air fryers have a preheat setting. If yours doesn’t, simply set it to the desired temperature and let it run for 3-5 minutes.
It’s important to use a slightly lower temperature than you might use in a conventional oven to prevent the outside from burning before the inside is cooked.
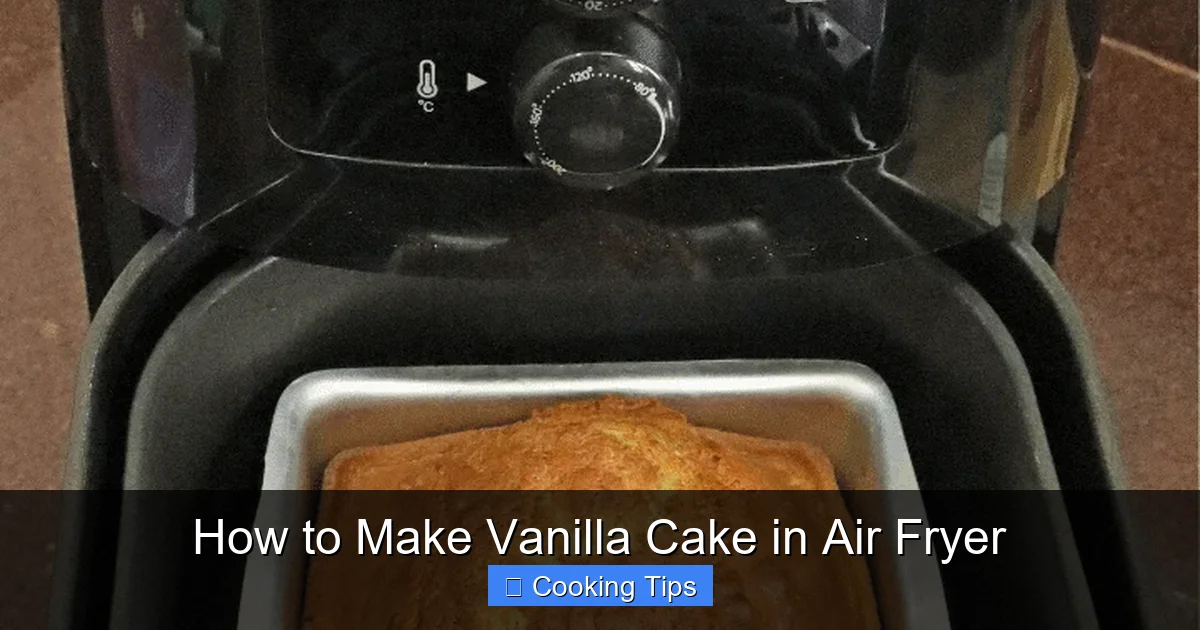
Step 8: Bake the Vanilla Cake in the Air Fryer
Carefully place the cake pan into the air fryer basket.
Baking Process:
- Carefully place the prepared cake pan into the preheated air fryer basket. You might need to use oven mitts or tongs for this.
- Set your air fryer to bake at 320°F (160°C) for approximately 25-35 minutes.
- Start checking for doneness around the 25-minute mark. The exact baking time will vary depending on your air fryer model and its wattage.
- To check if the cake is done, insert a toothpick or cake tester into the center. If it comes out clean, the cake is ready. If it comes out with wet batter, continue baking for a few more minutes and check again.
If the top of the cake is browning too quickly, you can loosely tent it with a piece of aluminum foil.
Step 9: Cool the Cake
Once baked, it’s important to let the cake cool properly.
Cooling Instructions:
- Carefully remove the cake pan from the air fryer using oven mitts.
- Let the cake cool in the pan for about 10-15 minutes. This allows it to firm up before you attempt to remove it.
- After 10-15 minutes, invert the cake onto a wire rack.
- Gently peel off the parchment paper from the bottom of the cake.
- Let the cake cool completely on the wire rack before frosting or serving.
Cooling completely is essential. Trying to frost a warm cake will result in melted frosting and a mess.
Practical Tips for Air Fryer Vanilla Cake Success
Here are some extra tips to ensure your air fryer vanilla cake is a triumph:
* Room Temperature Ingredients: Make sure your butter, eggs, and milk are at room temperature. This helps them emulsify better, creating a smoother batter and a lighter cake texture. If you forget to take them out, you can quickly warm eggs by placing them in a bowl of warm (not hot) water for a few minutes. For butter, you can grate it to soften it faster.
* Don’t Overfill Your Air Fryer: Only bake one cake at a time, and ensure the cake pan fits comfortably in the basket with space around it for air circulation. Overcrowding will lead to uneven cooking.
* Know Your Air Fryer: Every air fryer is different. You might need to adjust the cooking time and temperature slightly based on your specific model. It’s always a good idea to keep an eye on your cake, especially the first time you bake it.
* Use a 6-inch Pan: This size is generally the most suitable for standard air fryer baskets. If you have a larger air fryer, you might be able to fit an 8-inch pan, but you will likely need to adjust the baking time and possibly the temperature. Always check your air fryer’s manual for pan size recommendations.
* Adjust Baking Time: If your cake is browning too quickly on top, you can loosely tent it with aluminum foil. This allows the inside to cook through without burning the exterior.
* Flavor Variations: While this is a vanilla cake, you can easily adapt it. Add a teaspoon of lemon zest for a lemon-vanilla flavor, or a tablespoon of cocoa powder to a portion of the batter for a marbled effect.
* Storage: Once cooled, store your air fryer vanilla cake in an airtight container at room temperature for up to 3 days.
Troubleshooting Common Air Fryer Cake Issues
Even with the best intentions, sometimes things don’t go as planned. Here are some common issues and how to fix them:
Problem 1: Cake is Burnt on the Outside, Undercooked Inside
Cause: The temperature is too high, or the cake is baked for too long.
Visual guide about How to Make Vanilla Cake in Air Fryer
Image source: topairfryerrecipes.com
Visual guide about How to Make Vanilla Cake in Air Fryer
Image source: topairfryerrecipes.com
Visual guide about How to Make Vanilla Cake in Air Fryer
Image source: topairfryerrecipes.com
Solution: Lower the temperature of your air fryer by 10-20°F (5-10°C) for the next bake. Also, ensure you are checking for doneness at the earlier end of the suggested time range. If the top is browning too quickly, tent it with foil during the last 10-15 minutes of baking.
Problem 2: Cake Sank in the Middle
Cause: The cake was underbaked, or the baking powder is old/inactive.
Solution: Make sure to bake until a toothpick inserted comes out clean. Check the expiration date on your baking powder and replace if necessary. Opening and closing the air fryer door too frequently can also cause the cake to sink, as it disrupts the heat circulation.
Problem 3: Cake is Dry and Crumbly
Cause: Overmixing the batter, overbaking, or not using enough moisture in the batter.
Solution: Be careful not to overmix the batter after adding the flour. Ensure you are using fresh ingredients, especially baking powder. Bake just until done; avoid overbaking. Using whole milk and ensuring your butter is at room temperature can also help with moisture.
Problem 4: Cake Sticks to the Pan
Cause: Improper pan preparation.
Solution: Always grease your pan thoroughly, line the bottom with parchment paper, and grease the parchment paper. A light dusting of flour after greasing also helps. Ensure you are cooling the cake in the pan for at least 10 minutes before inverting.
Conclusion
Baking a vanilla cake in your air fryer is surprisingly simple and incredibly rewarding. You can achieve a moist, delicious cake with minimal effort and time. This guide provides a clear, step-by-step process to help you master this technique. Remember to use room temperature ingredients, preheat your air fryer, and always check for doneness. Don’t be afraid to experiment with the tips and troubleshoot any issues that may arise. Soon, you’ll be whipping up air fryer vanilla cakes for any occasion, or just because you can! Enjoy your homemade treat!