
Achieve remarkably crispy and juicy fried chicken legs in your air fryer with this comprehensive guide. You’ll learn the best methods for seasoning, coating, and cooking, ensuring delicious results every time. Say goodbye to greasy, oven-baked chicken and hello to a healthier, faster, and incredibly satisfying meal.
Key Takeaways
- Achieve Crispy Perfection: Learn the secrets to a golden-brown, crunchy exterior that mimics traditional deep-fried chicken.
- Juicy and Flavorful Inside: Discover techniques to ensure your chicken legs are cooked through to tender, moist perfection.
- Simple Seasoning Strategies: Explore versatile seasoning blends to elevate the flavor of your air fryer chicken legs.
- Effortless Coating Techniques: Master the best ways to coat your chicken for maximum crispiness and adhesion.
- Optimal Air Frying Parameters: Understand the ideal temperature and cooking times for perfectly cooked chicken legs.
- Healthy Alternative: Enjoy the taste and texture of fried chicken with significantly less oil and fewer calories.
- Troubleshooting Common Issues: Get advice on how to fix common problems like uneven cooking or a less-than-crispy coating.
How to Cook Fried Chicken Legs in Air Fryer
Who doesn’t love a piece of perfectly fried chicken? The satisfying crunch of the coating, the juicy, tender meat within – it’s a classic for a reason. But traditional deep-frying can be messy, time-consuming, and frankly, not the healthiest option. What if I told you there’s a way to achieve that same incredible flavor and texture with a fraction of the oil, right in your own kitchen? Enter the air fryer!
This guide will walk you through everything you need to know to cook delicious, crispy fried chicken legs in your air fryer. We’ll cover selecting the best chicken, mastering the coating, and uncovering the perfect cooking techniques. Get ready to impress yourself and your loved ones with this healthier, easier, and equally satisfying take on a beloved comfort food. You’ll discover how to get that golden-brown, crave-worthy crunch without the deep fryer.
Choosing and Preparing Your Chicken Legs
The foundation of any great fried chicken dish starts with the quality of the chicken itself. For air fryer fried chicken legs, it’s best to use drumsticks. They have a good amount of meat and bone, which helps them cook evenly and stay moist.
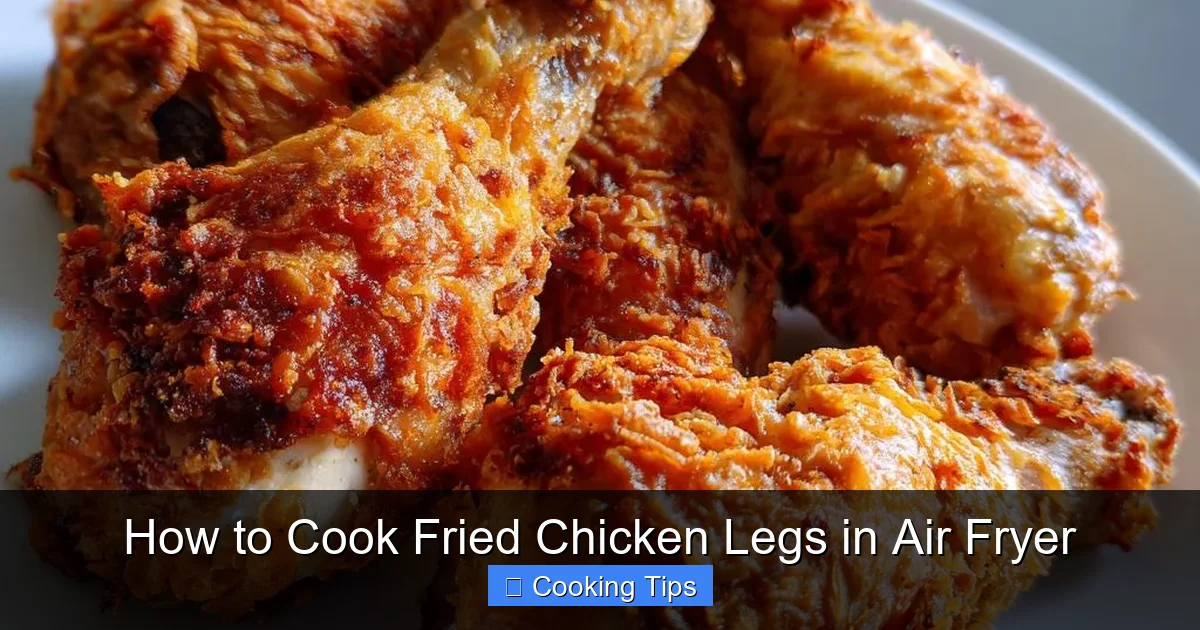
Visual guide about How to Cook Fried Chicken Legs in Air Fryer
Image source: vihaad.com
Selecting the Best Chicken Legs
- Size Matters: Opt for chicken legs that are roughly the same size. This ensures they will cook at a similar rate, preventing some from being overcooked while others are still undercooked.
- Freshness is Key: Always use fresh, good-quality chicken legs. Look for a bright pink color and no strong odors.
- Skin On: For the crispiest results, ensure your chicken legs have the skin on. The skin renders fat during cooking, contributing to both crispiness and flavor.
Preparing the Chicken Legs
Proper preparation is crucial for both food safety and achieving a great texture. Don’t skip these important steps!
- Thaw if Frozen: If your chicken legs are frozen, make sure they are completely thawed before you begin. You can thaw them in the refrigerator overnight or by using the defrost setting on your microwave.
- Pat Dry Thoroughly: This is arguably the most critical step for crispy chicken. Use paper towels to pat each chicken leg completely dry. Any moisture on the surface will steam the chicken rather than fry it, leading to a less crispy coating. Get into all the nooks and crannies!
- Remove Excess Fat (Optional): You can trim off any large, loose pieces of fat from around the skin if you prefer, though some fat contributes to crispiness.
Mastering the Coating: The Secret to Crispy Fried Chicken Legs
The coating is what gives fried chicken its signature crunch. For air fryer fried chicken legs, we want a coating that adheres well and gets incredibly crispy. There are many ways to achieve this, but a classic dredge method works wonderfully.
The Dry Dredge Method (Simple & Effective)
This is a straightforward method that yields great results. It involves a seasoned flour mixture.
Ingredients for Your Dry Dredge:
- 2 cups all-purpose flour
- 2 teaspoons salt
- 1 teaspoon black pepper
- 1 teaspoon paprika (for color and mild flavor)
- 1/2 teaspoon garlic powder
- 1/2 teaspoon onion powder
- (Optional additions: cayenne pepper for heat, dried herbs like thyme or oregano)
Steps for Dry Dredging:
- Mix Your Seasonings: In a shallow dish or a large resealable plastic bag, combine the flour, salt, pepper, paprika, garlic powder, onion powder, and any other desired seasonings. Whisk or shake well to ensure everything is evenly distributed.
- Coat the Chicken: Take one dried chicken leg at a time and place it into the seasoned flour mixture. Make sure the entire leg is thoroughly coated. Press the flour onto the chicken to help it adhere. For an extra-thick, crispy coating, you can double-dip: first coat, then dip in an egg wash (see below), and then coat again.
- Shake Off Excess: Gently shake off any excess flour. You want a good coating, but not so much that it will clump up and burn.
- Rest the Coated Chicken: This is another crucial step for adhesion. Place the coated chicken legs on a wire rack set over a baking sheet and let them rest for at least 10-15 minutes. This allows the flour to absorb some moisture from the chicken, creating a paste that helps the coating stick better during cooking.
The Wet Batter/Egg Wash Method (For Extra Adhesion)
For an even crispier, more robust coating, you can incorporate an egg wash. This creates a sticky surface for the flour to cling to, resulting in a thicker, more adhered crust.
Ingredients for Egg Wash:
- 2 large eggs
- 2 tablespoons milk or water
- A pinch of salt and pepper
Steps for Using an Egg Wash:
- Prepare the Egg Wash: In a shallow bowl, whisk together the eggs, milk (or water), salt, and pepper until well combined.
- Prepare the Flour Dredge: Prepare your seasoned flour mixture as described above in a separate shallow dish or bag.
- The Dredging Process:
- Take a dried chicken leg and dip it into the egg wash, ensuring it’s fully submerged and coated. Let any excess drip off.
- Transfer the egg-washed chicken leg to the seasoned flour mixture. Coat it thoroughly, pressing the flour onto the chicken.
- For an extra-crispy coating, you can repeat the process: dip the flour-coated chicken back into the egg wash, and then back into the flour mixture. This is often called a “double dredge.”
- Shake off excess flour and let the coated chicken rest on a wire rack for 10-15 minutes, as described previously.
Air Frying Your Crispy Chicken Legs
Now that your chicken legs are prepped and coated, it’s time to let the magic of the air fryer work its wonders. Proper temperature and timing are key to achieving that perfect crispy exterior and juicy interior.
Preheating Your Air Fryer
Just like with an oven, preheating your air fryer is important for even cooking. It ensures that the moment the chicken hits the basket, it starts to crisp up immediately.
- Preheat Temperature: Set your air fryer to 380°F (190°C).
- Preheat Time: Let it preheat for about 3-5 minutes. Most air fryers will signal when they are ready.
Arranging the Chicken Legs in the Air Fryer
Proper placement of the chicken legs in the air fryer basket is essential for achieving an even, crispy coating all around.
- Single Layer: Do NOT overcrowd the air fryer basket. You must cook the chicken legs in a single layer, with no pieces touching each other. This allows the hot air to circulate freely around each leg, ensuring uniform cooking and crisping.
- Work in Batches: If you have a lot of chicken legs to cook, it’s better to cook them in multiple batches. This might take a little longer overall, but it’s the only way to guarantee crispy results.
Cooking Time and Temperature
The cooking time will vary slightly depending on the size of your chicken legs and your specific air fryer model. However, here are general guidelines.
- Initial Cook Time: Air fry the chicken legs at 380°F (190°C) for 18-20 minutes.
- Flip and Continue Cooking: After the initial 18-20 minutes, carefully flip the chicken legs using tongs. Continue to air fry for another 8-12 minutes, or until the chicken is golden brown, crispy, and cooked through.
- Internal Temperature Check: The most reliable way to know if your chicken is done is by using an instant-read meat thermometer. Insert it into the thickest part of the chicken leg, avoiding the bone. The internal temperature should reach 165°F (74°C).
Getting Extra Crispy Skin
If you want an extra crispy skin, you can increase the temperature slightly for the last few minutes of cooking.
- Final Crisping Stage: Once the chicken has reached an internal temperature of 165°F (74°C), you can increase the air fryer temperature to 400°F (200°C) for the last 2-4 minutes. Keep a close eye on it to prevent burning. This final blast of heat will help to make the skin even more crackly and delicious.
Tips for the Best Air Fryer Fried Chicken Legs
Here are some extra tips to elevate your air fryer fried chicken leg game:
- Don’t Skip the Rest Time: As mentioned, letting the coated chicken rest for 10-15 minutes is crucial for the coating to adhere properly.
- Use an Oil Spray: For an even crispier exterior and a more golden color, lightly spray the chicken legs with cooking oil (like olive oil, avocado oil, or canola oil) before air frying. You can also lightly spray them halfway through cooking.
- Experiment with Seasonings: Don’t be afraid to get creative with your spice blends! Smoked paprika, chili powder, dried herbs, or even a touch of curry powder can add unique flavors.
- Consider a Baking Rack: If your air fryer came with a baking rack accessory, consider using it. It elevates the chicken, allowing for even better air circulation.
- Listen to Your Air Fryer: Every air fryer is a little different. Pay attention to how yours cooks and adjust times and temperatures as needed.
Troubleshooting Common Air Fryer Fried Chicken Problems
Even with the best intentions, you might run into a few hiccups. Here’s how to fix common issues:
Problem: Chicken is not crispy enough.
Solution: This is usually due to insufficient drying of the chicken, overcrowding the basket, or not enough cooking time. Ensure you’ve patted the chicken extremely dry, cook in a single layer, and consider extending the cooking time or increasing the temperature for the last few minutes.
Problem: Coating is falling off.
Solution: This often happens if the chicken wasn’t dried sufficiently, or if the coating wasn’t given time to adhere (the resting period). Make sure to pat the chicken very dry and allow the coated chicken to rest for at least 10 minutes before cooking.
Problem: Chicken is unevenly cooked.
Solution: This is almost always a result of overcrowding the air fryer basket. Ensure you are cooking in a single layer with space between each piece for proper air circulation. Flip the chicken halfway through cooking.
Problem: Coating is burning before the chicken is cooked.
Solution: This can happen if the temperature is too high, or if there’s too much sugar in your coating blend (some spices have natural sugars). Reduce the cooking temperature by 10-15°F or cover the chicken loosely with foil if the coating starts to brown too quickly.
Serving Your Delicious Air Fryer Fried Chicken Legs
Once your air fryer fried chicken legs are perfectly cooked, remove them from the air fryer basket. Let them rest for a minute or two before serving. This allows the juices to redistribute throughout the meat, making it even more tender and moist.
These crispy air fryer chicken legs are fantastic served with classic sides like:
- Mashed potatoes and gravy
- Coleslaw
- Corn on the cob
- Macaroni and cheese
- A simple green salad
Conclusion
Cooking fried chicken legs in an air fryer is a game-changer. You can achieve that irresistible crispy coating and juicy, flavorful chicken without the guilt or mess of deep-frying. By following these simple steps – from properly preparing your chicken and mastering the coating techniques to utilizing the correct air frying parameters – you’ll be whipping up batches of delicious, healthier fried chicken in no time. So, dust off your air fryer, gather your ingredients, and get ready to enjoy a truly satisfying meal. Happy air frying!