Learn how to make a delicious and surprisingly easy egg on bread in your air fryer! This method offers a convenient and quick way to enjoy a satisfying meal. Perfect for busy mornings or a light snack, this guide provides step-by-step instructions and helpful tips for achieving crispy bread and perfectly cooked eggs every time.
How to Cook Egg on Bread in Air Fryer
Are you looking for a quick, delicious, and surprisingly simple way to make breakfast or a light meal? The air fryer has revolutionized how we cook many foods, and this method for cooking egg on bread is no exception! Forget messy pans and long cooking times; this technique delivers crispy bread and a perfectly cooked egg with minimal effort.
In this comprehensive guide, we’ll walk you through everything you need to know to master the art of cooking egg on bread in your air fryer. We’ll cover the best types of bread to use, how to get that perfect egg consistency, and all the little tips and tricks that will make your air fryer egg on bread a consistent success. Get ready to elevate your breakfast game!
Key Takeaways
- Perfectly Crispy Base: Air frying ensures your bread gets delightfully crispy without being burnt, providing a sturdy and flavorful foundation for your egg.
- Customizable Cooking: You can easily adjust the cooking time and temperature to achieve your desired egg doneness, from runny yolks to fully set whites.
- Minimal Mess: This cooking method is significantly less messy than pan-frying, with fewer dishes and less splatter.
- Quick & Easy: The air fryer dramatically speeds up the cooking process, making this a fantastic option for busy individuals.
- Versatile Snack/Meal: Egg on bread in the air fryer is not just for breakfast; it’s a versatile option for lunch or a satisfying snack any time of day.
- Simple Ingredients: You only need a few basic ingredients: bread, eggs, and a little seasoning, making it an accessible recipe for everyone.
Why Cook Egg on Bread in an Air Fryer?
Before we dive into the “how,” let’s talk about the “why.” What makes this air fryer method so great?
* **Speed:** Air fryers cook food faster than conventional ovens. This means you can have a hot, satisfying meal ready in minutes.
* **Convenience:** It’s incredibly straightforward. No preheating a large oven, no babysitting a frying pan. Just place it in and let the air fryer do its magic.
* **Crispiness:** The circulating hot air in an air fryer creates a fantastic crispy texture on the bread that’s hard to achieve otherwise, especially without adding extra oil.
* **Minimal Mess:** This is a big one for many people. You avoid the oil splatters and grease that often come with pan-frying. Cleanup is usually a breeze.
* **Healthier Option:** While you can certainly add butter or oil, this method requires very little, if any, compared to traditional frying.
What You’ll Need
Gather your ingredients and tools. It’s a short list!
Ingredients:
- Bread slices (your favorite kind!)
- Eggs
- Salt and pepper (to taste)
- Optional: Butter or cooking spray (for extra flavor/non-stick)
- Optional toppings: Cheese, chives, hot sauce, avocado, etc.
Equipment:
- Air Fryer
- Small bowl or ramekin (optional, for cracking the egg)
- Spatula
Step-by-Step Guide to Cooking Egg on Bread in the Air Fryer
Let’s get cooking! Follow these simple steps for a delicious outcome.
Step 1: Prepare Your Bread
The foundation of your egg on bread is, well, the bread! The type of bread you choose can significantly impact the final result.
Choosing the Right Bread
For the best results, opt for bread that has a good structure and won’t get too soggy. Here are some excellent choices:
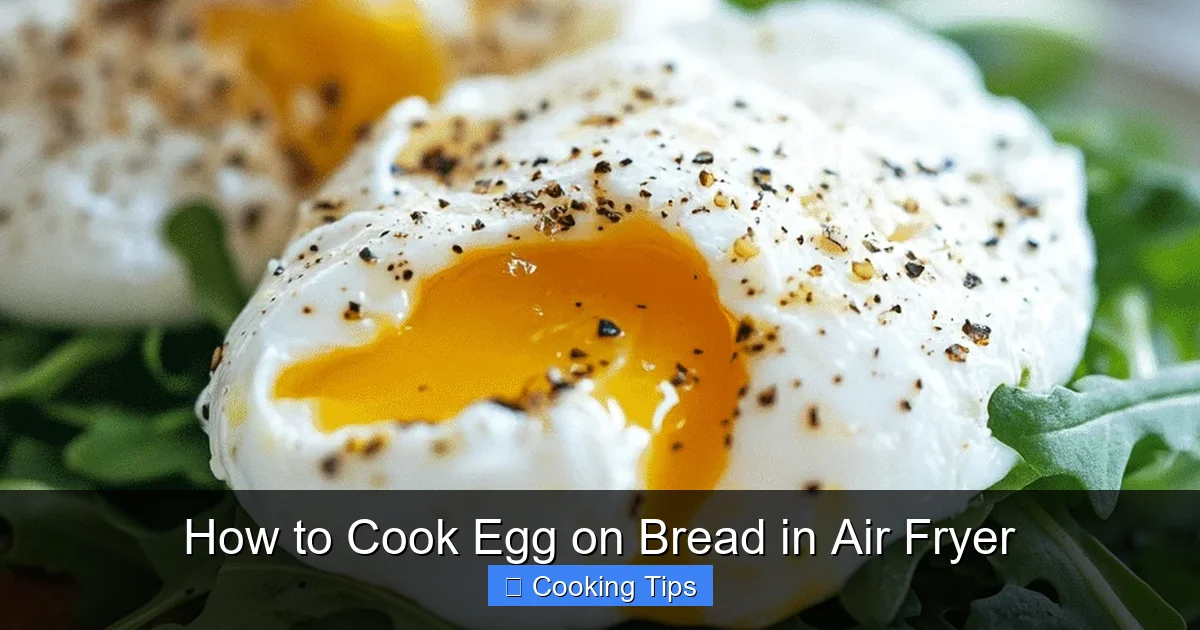
Visual guide about How to Cook Egg on Bread in Air Fryer
Image source: airfryerdiaries.com

Visual guide about How to Cook Egg on Bread in Air Fryer
Image source: diyjoy.com
- Sourdough: Its sturdy texture holds up well to the egg and air frying, and the tangy flavor is a great complement.
- Whole Wheat/Multigrain: These denser breads also provide a good base and add extra fiber and nutrients.
- Brioche/Challah: If you’re looking for a slightly sweeter, richer bread, these work beautifully, though they might cook a little faster due to their sugar content.
- Thicker Sliced White Bread: While softer, a slightly thicker slice can still work, just be mindful of cooking times.
Avoid very thin or flimsy breads, as they might become too brittle or break apart during the process.
Toasting the Bread (Optional but Recommended)
While the air fryer will toast the bread, you can give it a head start for an even crispier result. You can lightly toast your bread in a toaster or in the air fryer for a minute or two before adding the egg. This prevents the bottom from becoming too soft if you’re worried about sogginess.
Tip: If you want a very crispy edge, you can lightly brush the edges of the bread with melted butter or a tiny bit of olive oil before air frying. This also helps prevent sticking.
Step 2: Create a Well for the Egg
This is where the magic happens! You need a space for your egg to sit comfortably.
The “Hole” Method
The most common and effective way to do this is to create a well in the center of your bread slice. Here’s how:
- Take your slice of bread.
- Using the back of a spoon or your finger, gently press down in the center of the bread, creating a slight indentation or well. Be careful not to press all the way through the bread.
- You’re essentially creating a small “bowl” shape in the bread.
Alternative: Using a Cookie Cutter
For a neater, more uniform hole, you can use a large round cookie cutter or even a shot glass to cut a circle out of the center of the bread. You can eat the removed circle of bread separately, or dip it into the runny yolk later!
Step 3: Add the Egg
Now it’s time to introduce the star of the show – the egg!
Cracking the Egg
You have a couple of options here:
- Directly into the Well: Carefully crack an egg directly into the well you’ve created in the bread. Try to get the yolk centered. If some egg white spills over the sides, that’s usually okay.
- Crack into a Small Bowl First: For more control, especially if you’re new to this, crack the egg into a small bowl or ramekin first. Then, gently pour the egg into the well on the bread. This helps ensure you don’t break the yolk and can manage any excess white.
Tip: If you want a very neat egg with minimal white overflow, you can carefully spoon out a little excess egg white from the bread before air frying.
Step 4: Season Your Egg
Don’t forget the flavor!
Sprinkle your egg with salt and freshly ground black pepper to your liking. This simple seasoning makes a big difference.
Get Creative with Seasoning:
- Add a pinch of garlic powder or onion powder.
- A dash of paprika can add a nice color and subtle smoky flavor.
- Dried herbs like parsley or chives are also lovely additions.
Step 5: Air Fry!
This is the exciting part. Time to let the air fryer work its magic.
Preheating the Air Fryer (Recommended)
For the most consistent results, it’s a good idea to preheat your air fryer. Preheat it to around 350°F (175°C) for about 3-5 minutes. This ensures the air fryer is at the optimal temperature when you place your egg on bread inside.
Cooking Time and Temperature
Place your prepared egg-on-bread slice carefully into the air fryer basket. Ensure it lies flat.
Suggested Settings:
- Temperature: 350°F (175°C)
- Time: This is where it gets personal, as everyone likes their eggs cooked differently. Start with 6-8 minutes.
Checking for Doneness:
After 6 minutes, check on your egg. The whites should be mostly set, and the yolk should be cooked to your preference. If you like a runny yolk, 6-8 minutes is usually perfect. If you prefer a firmer yolk, continue cooking for another 1-2 minutes.
Tip: Cooking times can vary slightly depending on your air fryer model and the thickness of your bread. It’s always best to check a minute or two before the suggested time is up, especially on your first attempt.
Step 6: Remove and Serve
Carefully take your creation out of the air fryer.
Using a spatula, gently lift the egg on bread from the air fryer basket. Be careful, as it will be hot!
Transfer it to a plate. If you used the cookie cutter method, you might need to use the spatula to gently guide the egg onto the bread.
Step 7: Add Your Favorite Toppings
This is where you can truly personalize your dish.
The possibilities are endless! Some popular and delicious topping ideas include:
- Cheese: Shredded cheddar, mozzarella, or crumbled feta cheese are fantastic. Add cheese in the last minute of cooking so it melts perfectly.
- Fresh Herbs: Chopped chives, parsley, or cilantro add freshness.
- Avocado: Sliced or mashed avocado is a classic pairing.
- Hot Sauce: A drizzle of your favorite hot sauce for a kick.
- Bacon Bits or Cooked Sausage: For a more substantial breakfast.
- Everything Bagel Seasoning: A trendy and flavorful addition.
- Red Pepper Flakes: For a touch of heat.
Troubleshooting Common Issues
Even with simple recipes, sometimes things don’t go perfectly the first time. Here are some common problems and how to fix them.
My Bread is Too Soggy
Cause: The bread absorbed too much moisture from the egg, or it wasn’t toasted enough beforehand.
Solution:
- Toast the Bread: Always consider lightly toasting your bread in a toaster or in the air fryer for a minute or two *before* adding the egg.
- Use Denser Bread: Opt for sourdough or whole wheat bread, which are less likely to become soggy.
- Create a Deeper Well: Ensure the well is deep enough to contain most of the egg white.
- Drain Excess White: If you notice a lot of egg white pooling outside the well, gently spoon some of it off before air frying.
My Egg is Undercooked/Overcooked
Cause: Incorrect cooking time or temperature, or the air fryer model behaves differently.
Solution:
- Adjust Cooking Time: For undercooked eggs, increase the cooking time by 1-2 minutes. For overcooked eggs, reduce the time by 1 minute on your next attempt.
- Check Your Air Fryer: Air fryers can have hot spots or vary in power. Familiarize yourself with how your specific model cooks.
- Egg Size Matters: A larger egg might take slightly longer to cook than a smaller one.
My Egg White Spilled Out
Cause: The well wasn’t deep enough, or the egg was cracked too vigorously.
Solution:
- Deeper Well: Ensure you press down firmly to create a good-sized indentation.
- Crack Carefully: Crack the egg into a separate bowl first for better control.
- Cook in a Ramekin: If you struggle with containment, you can try placing the egg on bread inside a small, air-fryer-safe ramekin. This acts as a barrier.
My Bread is Burnt Around the Edges
Cause: The temperature is too high, or the cooking time is too long for the type of bread.
Solution:
- Lower Temperature: Try reducing the temperature by 10-15°F (5-8°C).
- Reduce Cooking Time: Check your egg more frequently towards the end of the cooking cycle.
- Use Foil (Carefully): If only the edges are burning, you can try loosely tenting the edges of the bread with a small piece of foil for the last few minutes of cooking. Be cautious not to cover the egg itself.
Conclusion
Cooking egg on bread in an air fryer is a game-changer for anyone seeking a fast, easy, and delicious meal. With just a few simple steps, you can achieve perfectly crispy bread and a wonderfully cooked egg, all with minimal mess and maximum flavor. Whether you’re a breakfast enthusiast, a busy student, or just looking for a satisfying snack, this method is sure to become a staple in your cooking repertoire.
Experiment with different breads, seasonings, and toppings to discover your favorite combination. The air fryer makes it incredibly forgiving, so don’t be afraid to play around. Happy air frying, and enjoy your delicious egg on bread!