Learn how to cook incredibly tender and juicy chicken tenderloins in your air fryer with this comprehensive guide. We cover everything from preparation to cooking times and offer helpful tips for achieving crispy, flavorful results. Get ready for a quick, healthy, and delicious meal!
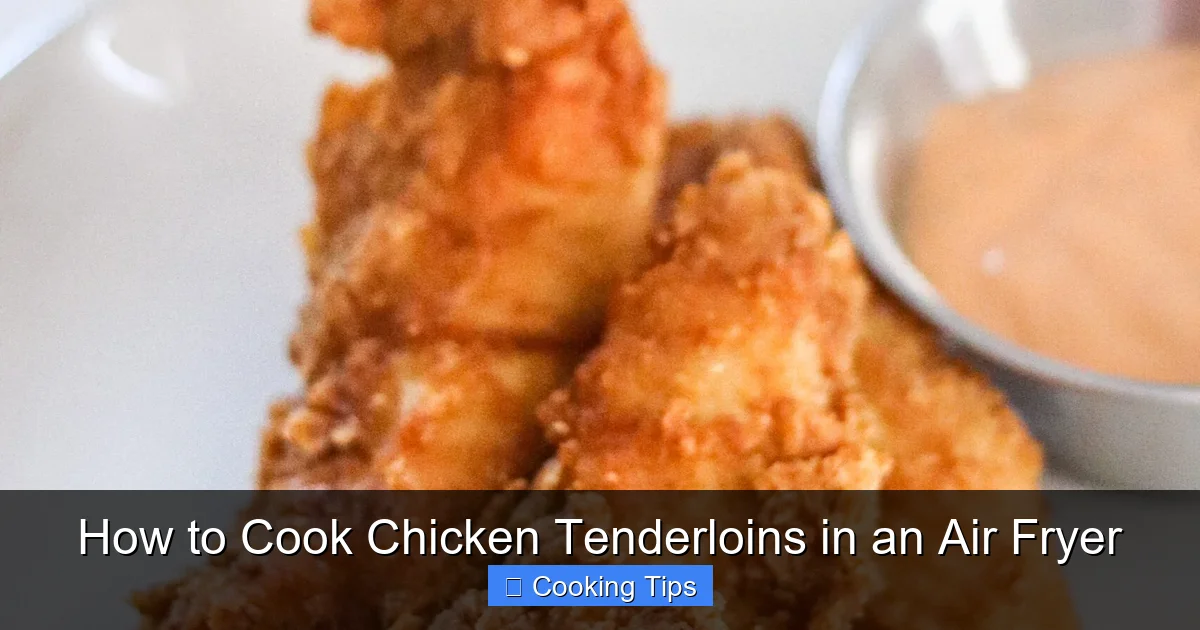
How to Cook Chicken Tenderloins in an Air Fryer
Welcome to your ultimate guide on cooking chicken tenderloins in an air fryer! If you’re looking for a fast, healthy, and incredibly delicious way to prepare chicken, you’ve come to the right place. Air fryers have revolutionized home cooking, and chicken tenderloins are one of the stars of the show. They cook quickly, absorb marinades beautifully, and come out perfectly tender and juicy every single time. Forget dry, overcooked chicken; the air fryer is your new best friend.
In this guide, we’ll walk you through every step, from selecting your chicken to enjoying the final, mouth-watering product. We’ll cover essential preparation techniques, the best cooking temperatures and times, and tips to ensure your chicken tenderloins are a culinary success. Whether you’re a seasoned air fryer user or just getting started, this guide will equip you with the knowledge to create perfectly cooked chicken tenderloins.
Let’s get started on your journey to air fryer chicken tenderloin perfection!
- Effortless Preparation: Chicken tenderloins require minimal prep, making them ideal for quick meals.
- Even Cooking: Air fryers circulate hot air, ensuring your chicken tenderloins cook evenly and develop a nice exterior.
- Perfect Tenderness: Achieve moist and tender chicken tenderloins by avoiding overcooking.
- Crispy Exterior: A light coating of oil and proper cooking temperature help create a delightful crispiness.
- Versatile Meal: Air fryer chicken tenderloins can be enjoyed as is, in salads, wraps, or as part of larger dishes.
- Quick Cooking Time: Chicken tenderloins cook much faster in an air fryer compared to traditional methods.
[FEATURED_IMAGE_PLACEHOLDER]
Why Cook Chicken Tenderloins in an Air Fryer?
Before we dive into the “how,” let’s talk about the “why.” Why choose an air fryer for your chicken tenderloins?
- Speed: Air fryers cook food significantly faster than conventional ovens. Chicken tenderloins, being small and thin, are ideal for this speedy cooking.
- Healthier Option: Air frying uses circulating hot air and a minimal amount of oil to achieve a crispy texture, reducing the need for deep frying.
- Tenderness and Juiciness: The precise temperature control and convection cooking of an air fryer help lock in moisture, resulting in incredibly tender chicken.
- Crispy Texture: Achieve that satisfying crispiness without the greasiness of frying.
- Versatility: Cooked chicken tenderloins are incredibly versatile. They are fantastic on their own as a main dish, or they can be added to salads, sandwiches, wraps, pasta dishes, and more.
- Easy Cleanup: Most air fryer baskets are non-stick and dishwasher-safe, making cleanup a breeze.
Ingredients and Equipment You’ll Need
Gathering your supplies before you start is always a good idea. Here’s what you’ll need:
For the Chicken Tenderloins:
- 1 pound of chicken tenderloins
- 1-2 tablespoons of olive oil or your preferred cooking oil (avocado oil, vegetable oil)
- Salt and freshly ground black pepper, to taste
- Optional Seasonings: Garlic powder, onion powder, paprika, dried herbs (like oregano or thyme), chili powder, cayenne pepper, or your favorite chicken rub.
For Marinating (Optional but Recommended):
If you have a little extra time, marinating adds incredible flavor and helps ensure tenderness. Some great marinade options include:
- Simple Lemon Herb: Olive oil, lemon juice, minced garlic, dried oregano, salt, and pepper.
- Soy Ginger: Soy sauce (or tamari), grated fresh ginger, minced garlic, a touch of honey or maple syrup.
- BBQ Marinade: Your favorite store-bought or homemade BBQ sauce.
Equipment:
- Air Fryer
- Mixing bowl
- Tongs
- Measuring spoons
- Measuring cups
- Meat thermometer (optional, but highly recommended for accuracy)
Step-by-Step Guide to Cooking Chicken Tenderloins in Your Air Fryer
Let’s get cooking! Follow these simple steps for perfectly air-fried chicken tenderloins.
Step 1: Prepare the Chicken Tenderloins
This is where you get your chicken ready for its flavor journey.
Inspect and Trim
- Start by taking your chicken tenderloins out of their packaging.
- Check for any excess fat or silvery membrane (the thin, tough connective tissue) and trim it away with a sharp knife. This ensures a more pleasant eating experience.
- Pat the chicken tenderloins thoroughly dry with paper towels. This step is crucial for achieving a nice, crispy exterior and allowing seasonings to adhere properly.
Seasoning or Marinating
This is your chance to infuse flavor!
Marinating (Optional)
If you’re marinating, place the dried chicken tenderloins in a resealable bag or a bowl. Pour your chosen marinade over the chicken, ensuring each piece is well-coated. Marinate in the refrigerator for at least 30 minutes, or up to 4 hours. For longer marinating times, be mindful of acidic ingredients in the marinade, as they can start to “cook” the chicken if left too long.

Visual guide about How to Cook Chicken Tenderloins in an Air Fryer
Image source: howtocookguides.com
Visual guide about How to Cook Chicken Tenderloins in an Air Fryer
Image source: domesticsuperhero.com

Visual guide about How to Cook Chicken Tenderloins in an Air Fryer
Image source: cycookery.com
Seasoning
If you’re skipping the marinade, or after you’ve removed the chicken from its marinade (and discarded the used marinade), it’s time to season. Drizzle the chicken tenderloins with 1-2 tablespoons of olive oil. Toss them gently to coat evenly. The oil helps the seasonings stick and promotes browning.
Next, sprinkle generously with salt and freshly ground black pepper. Now, add your chosen dry seasonings. Don’t be shy! You can create a simple garlic-herb blend, go for a smoky paprika flavor, or use your favorite pre-made chicken rub. Ensure all sides of the tenderloins are well-coated with the seasonings.
Step 2: Preheat Your Air Fryer
Preheating your air fryer is a critical step, just like with a conventional oven. It ensures that your food starts cooking immediately and evenly, leading to better texture and browning.
Most air fryers recommend a preheating time of 3-5 minutes. Set your air fryer to 375°F (190°C). Once the preheating cycle is complete (usually indicated by a beep or light on the appliance), your air fryer is ready.
Tip: Refer to your air fryer’s manual for specific preheating instructions, as models can vary.
Step 3: Arrange Chicken Tenderloins in the Air Fryer Basket
Proper arrangement is key to even cooking.
Carefully place the seasoned or marinated chicken tenderloins in the air fryer basket in a single layer. Do not overcrowd the basket. Overcrowding will steam the chicken instead of air frying it, resulting in less crispy and unevenly cooked pieces. If you have a lot of chicken, you may need to cook in batches. The hot air needs to circulate freely around each tenderloin to achieve optimal results.
Step 4: Air Fry the Chicken Tenderloins
This is the main event!
Cooking Time and Temperature
Once the tenderloins are arranged in the basket, place the basket back into the air fryer. Set the temperature to 375°F (190°C).
The cooking time will vary slightly depending on the size of your tenderloins and the specific model of your air fryer. A good starting point is:
- For 1-inch thick tenderloins: Cook for 10-12 minutes.
- For smaller or thinner tenderloins: Cook for 8-10 minutes.
Flipping for Even Cooking
About halfway through the cooking time (around the 5-6 minute mark), carefully pull out the air fryer basket and use tongs to flip each chicken tenderloin. This ensures that all sides of the chicken get beautifully browned and crispy. You can also shake the basket gently if you prefer.
Step 5: Check for Doneness
Ensuring your chicken is cooked through is paramount for safety and taste.
Internal Temperature
The most accurate way to check if chicken tenderloins are done is by using a meat thermometer. Insert the thermometer into the thickest part of a tenderloin. The chicken is safely cooked when it reaches an internal temperature of 165°F (74°C).
Visual Cues
If you don’t have a thermometer, you can also check visually. The chicken should no longer be pink inside. When pierced with a fork or knife, the juices should run clear, not pink or bloody.
Important: Chicken tenderloins cook very quickly. It’s better to check for doneness a minute or two early and add more time if needed, rather than overcooking them.
Step 6: Rest and Serve
This final step makes all the difference in juiciness.
Once the chicken tenderloins have reached the correct internal temperature, carefully remove the basket from the air fryer. Transfer the cooked tenderloins to a clean plate or cutting board. Tent them loosely with foil and let them rest for 5 minutes. This resting period allows the juices to redistribute throughout the meat, making them incredibly moist and tender. If you’re cooking in batches, you can place the first batch on a warm plate while you cook the second, ensuring everything stays warm.
Serving Suggestions
Your perfectly cooked chicken tenderloins are ready to be enjoyed! Here are a few ideas:
- As a simple main: Serve with your favorite side dishes like roasted vegetables, a fresh salad, or mashed potatoes.
- In salads: Slice them and add them to a Caesar salad, a mixed green salad, or a Cobb salad.
- In wraps or sandwiches: Chop them up and add them to a tortilla wrap with your favorite fillings, or make a delicious chicken sandwich.
- With dipping sauces: Serve with BBQ sauce, honey mustard, ranch dressing, or your favorite dipping sauce.
- Kid-friendly: They make a healthier alternative to traditional chicken nuggets.
Tips for Perfect Air Fryer Chicken Tenderloins
Here are some extra tips to elevate your air fryer chicken tenderloin game:
- Don’t Skip the Oil: Even a small amount of oil helps with browning and crispiness.
- Uniform Size Matters: If your tenderloins are vastly different in size, you might want to trim the larger ones to match the smaller ones for more even cooking.
- Know Your Air Fryer: Air fryer cooking times can vary. It might take a couple of tries to find the exact perfect time for your specific model. Keep notes!
- Don’t Overcrowd: This is worth repeating! For the best results, ensure there’s space for air to circulate.
- Experiment with Seasonings: Don’t be afraid to get creative with your spice blends! Consider trying a peri-peri seasoning or a jerk spice for a kick.
- For Extra Crispy Results: If you like your chicken extra crispy, you can lightly coat the tenderloins in a thin layer of panko breadcrumbs after oiling and seasoning, before air frying.
- Thawing Frozen Tenderloins: It’s best to thaw frozen chicken tenderloins completely before air frying for even cooking. If you absolutely must cook them from frozen, add a few extra minutes to the cooking time and ensure they reach 165°F internally.
Troubleshooting Common Issues
Even the best cooks encounter occasional hiccups. Here’s how to fix them:
My chicken tenderloins are dry.
This usually means they were overcooked. Next time, reduce the cooking time by 1-2 minutes and check for doneness earlier. Resting the chicken properly after cooking is also crucial for retaining moisture.
My chicken tenderloins are not crispy.
Ensure you’re not overcrowding the basket. Make sure you’ve used a little bit of oil to help with browning. Also, check that your air fryer is preheated properly. If your tenderloins are still not as crispy as you’d like, you can return them to the air fryer for an extra minute or two after checking for doneness.
My chicken tenderloins are unevenly cooked.
This can happen if the tenderloins are of very different sizes, or if the basket was overcrowded. Trimming to uniform size and cooking in a single layer without overlapping is key. Flipping them halfway through also helps ensure even cooking.
Conclusion
Cooking chicken tenderloins in an air fryer is a simple, efficient, and rewarding way to get a delicious and healthy meal on the table in no time. By following these steps, you’ll achieve tender, juicy chicken with a delightful crispy exterior every time. Experiment with different marinades and seasonings to discover your favorite flavor combinations.
This method is so versatile that it can become a staple in your weekly meal rotation. Whether you’re feeding a family, preparing a quick lunch, or looking for a healthy post-workout meal, air fryer chicken tenderloins are a fantastic choice. Enjoy experimenting and happy cooking!