Unlock the secret to perfectly cooked chicken in your air fryer! This guide offers step-by-step instructions for achieving crispy skin and juicy interiors, regardless of the chicken cut. Discover tips for seasoning, cooking times, and ensuring your chicken is safe to eat. You’ll be a chicken air frying pro in no time!
How to Cook Chicken in the Air Fryer
Welcome to your ultimate guide on mastering the art of cooking chicken in your air fryer! If you’re looking for a way to achieve that delicious, crispy chicken without all the added oil and mess of deep frying, you’ve come to the right place. The air fryer is a game-changer for chicken lovers, and by the end of this guide, you’ll be confident in creating perfectly cooked chicken every single time.
We’ll cover everything from choosing your chicken and preparing it to the best methods for cooking various cuts. You’ll learn about essential seasonings, optimal cooking temperatures and times, and how to tell when your chicken is perfectly done and safe to eat. Get ready to elevate your weeknight meals with incredibly tasty and healthy air-fried chicken!
Key Takeaways
- Effortless Perfection: Air frying chicken provides a quick, healthy, and delicious way to cook chicken, offering crispy exteriors and moist interiors with minimal oil.
- Versatility is Key: From wings to whole chickens, the air fryer can handle various chicken cuts and preparations, making it a versatile kitchen tool.
- Seasoning is Everything: Proper seasoning and marinating are crucial for infusing flavor and ensuring the chicken is tender and delicious.
- Temperature and Time Matters: Understanding the correct cooking temperature and time for different chicken cuts is essential for food safety and optimal texture.
- Don’t Overcrowd: Ensure adequate air circulation by not overcrowding the air fryer basket to achieve uniform crispiness.
- Rest is Best: Allowing the chicken to rest after cooking is vital for redistributing juices and ensuring a moist final product.
Why Air Fry Chicken?
Before we dive into the ‘how,’ let’s quickly touch upon the ‘why.’ Air fryers work by circulating hot air around your food at high speeds, creating a convection effect. This process mimics deep frying by producing a crispy exterior, but it uses significantly less oil – often just a light spray. This means you get all the delicious crunch you crave with a healthier outcome.
Cooking chicken in an air fryer offers several benefits:
- Healthier: Significantly less oil is required compared to traditional frying.
- Faster: Air fryers often cook food faster than conventional ovens.
- Crispier: Achieve a wonderfully crisp texture that’s hard to replicate otherwise.
- Easier Cleanup: Less oil means less mess and easier cleaning.
- Versatile: Perfect for a wide range of chicken dishes, from appetizers to main courses.
Choosing Your Chicken
The beauty of the air fryer is its versatility. You can cook almost any cut of chicken in it. Here are some popular choices and what to expect:
Bone-in Chicken Pieces
- Chicken Thighs: These are forgiving and tend to stay very moist thanks to their higher fat content. They develop a fantastic crispy skin when air-fried. If you love tender, flavorful thighs, learning how to cook bone-in chicken thighs in air fryer is a must.
- Chicken Drumsticks: Similar to thighs, drumsticks get wonderfully crispy and are a crowd-pleaser.
- Bone-in Chicken Breasts: While they take a bit longer to cook than boneless, they remain incredibly juicy. Many find that air frying bone-in breasts is the best way to avoid dry chicken. Check out our guide on how to cook bone-in chicken breast in air fryer for specific tips.
- Whole Chicken or Cornish Hens: Yes, you can air fry a whole chicken or smaller Cornish hens! This requires a larger air fryer and careful placement, but the results are spectacular – crispy skin and moist meat.
Boneless Chicken Pieces
- Boneless, Skinless Chicken Breasts: These are lean and cook quickly. The key here is to avoid overcooking to maintain moisture.
- Boneless, Skinless Chicken Thighs: Even more tender and flavorful than breasts, these are also very forgiving in the air fryer.
- Chicken Tenders/Strips: Perfect for quick meals, snacks, or kid-friendly dinners.
- Chicken Wings: The air fryer is arguably the best appliance for making restaurant-quality chicken wings at home.
Preparation is Key: Seasoning and Marinating
No matter the cut, how you prepare your chicken before it goes into the air fryer makes a huge difference.
Seasoning Your Chicken
You can keep it simple with salt, pepper, and garlic powder, or get creative with your favorite spice blends.
- Dry Rubs: Mix herbs and spices like paprika, onion powder, cumin, chili powder, rosemary, or thyme. Rub the mixture all over the chicken pieces, ensuring they are evenly coated.
- Salt and Pepper: This classic combination is often all you need, especially for good quality chicken.
- Pre-Made Seasonings: Utilize your favorite store-bought chicken rubs or spice blends.
For extra crispy skin on bone-in chicken, patting the chicken very dry with paper towels before seasoning is a crucial step.
Marinating Your Chicken
Marinating adds moisture and flavor deep into the chicken.
- Citrus-Based Marinades: Lemon, lime, or orange juice can tenderize the meat.
- Yogurt-Based Marinades: Yogurt is excellent for tenderizing and adding a subtle tang.
- Oil and Vinegar/Soy Sauce Marinades: These help to infuse flavor and add richness.
Marinate chicken for at least 30 minutes for boneless cuts and up to 4 hours for bone-in pieces. For stronger flavors, marinate longer, but be mindful of acidic ingredients which can ‘cook’ the chicken if left too long.
Adding a Light Coating of Oil
While the air fryer uses less oil, a light coating of cooking oil (like olive oil, avocado oil, or vegetable oil) on the chicken before seasoning helps the spices adhere and promotes crispiness. You can brush it on or use an oil mister for an even application.
Cooking Chicken in the Air Fryer: Step-by-Step
Now, let’s get to the actual cooking! The process is generally the same for most chicken cuts, with slight adjustments for time and temperature.
Step 1: Preheat Your Air Fryer
Preheating is important for ensuring even cooking and achieving that desirable crispiness from the start.
- Most air fryers recommend preheating for 3-5 minutes at the desired cooking temperature.
- Refer to your air fryer’s manual for specific preheating instructions.
Step 2: Prepare the Chicken
This involves seasoning or marinating as discussed above. Ensure your chicken is dry if you’re aiming for crispy skin.
Step 3: Arrange Chicken in the Air Fryer Basket
This is a critical step for achieving optimal results.
- Don’t Overcrowd: This is the golden rule of air frying. If you pack the basket too full, the hot air cannot circulate properly. This results in unevenly cooked chicken – some parts might be burnt while others are still raw or pale.
- Single Layer: Arrange the chicken pieces in a single layer. If you’re cooking a large batch, you’ll need to cook in multiple batches.
- Spacing: Leave a little space between each piece for air to flow freely.
If you’re cooking wings or smaller pieces, you might be able to fit more, but always err on the side of caution. You can also invest in an air fryer rack if your model supports it, allowing you to cook more in two layers.
Step 4: Set Temperature and Time
Cooking times and temperatures will vary depending on the type and size of your chicken pieces. Here are some general guidelines. Always use a meat thermometer to ensure your chicken is cooked to a safe internal temperature.
General Guidelines for Air Frying Chicken
These are approximate times and temperatures. Adjust based on your specific air fryer model and the thickness of your chicken pieces.
Boneless, Skinless Chicken Breasts
- Temperature: 375°F (190°C)
- Time: 18-22 minutes
- Flipping: Flip halfway through cooking (around 10 minutes).
- Tip: For thinner breasts, reduce the time. Thicker ones might need a few extra minutes.
Boneless, Skinless Chicken Thighs
- Temperature: 400°F (200°C)
- Time: 16-20 minutes
- Flipping: Flip halfway through cooking.
- Tip: Thighs are more forgiving than breasts and tend to stay moist.
Bone-in Chicken Breasts
- Temperature: 375°F (190°C)
- Time: 30-35 minutes
- Flipping: Flip halfway through cooking.
- Tip: Ensure the thickest part of the breast reaches the safe internal temperature.
Bone-in Chicken Thighs and Drumsticks
- Temperature: 400°F (200°C)
- Time: 25-30 minutes
- Flipping: Flip halfway through cooking.
- Tip: You want the skin to be golden brown and crispy, and the juices to run clear.
Chicken Wings
- Temperature: 400°F (200°C)
- Time: 20-25 minutes
- Flipping: Shake the basket or flip the wings halfway through.
- Tip: For extra crispy wings, you can toss them in a teaspoon of baking powder (mixed with your seasonings) before cooking. This helps to dry out the skin.
Whole Chicken (approx. 3-4 lbs / 1.4-1.8 kg)
- Temperature: 375°F (190°C)
- Time: 45-60 minutes (depending on size)
- Flipping: You might need to carefully turn the chicken to ensure even browning. A roasting rack inside the basket can help with this.
- Tip: If the skin starts browning too quickly, you can loosely tent the chicken with foil.
Step 5: Cook and Monitor
Once your chicken is in the basket, start the air fryer.
- Shake/Flip: For smaller pieces like wings or tenders, shake the basket halfway through. For larger pieces, use tongs to flip them over to ensure even browning and cooking.
- Visual Check: Keep an eye on the chicken. If some pieces are browning much faster than others, you can rearrange them or remove them early if they are done.
Step 6: Check for Doneness
This is the most crucial step for food safety and deliciousness.
- Internal Temperature: Use an instant-read meat thermometer. Insert it into the thickest part of the chicken, avoiding the bone.
- Safe Internal Temperature: Chicken is safely cooked when it reaches an internal temperature of 165°F (74°C).
- Juices Run Clear: If you don’t have a thermometer, you can poke the chicken with a knife or skewer. The juices should run clear, not pink.
If your chicken hasn’t reached the safe temperature, return it to the air fryer for a few more minutes, checking frequently.
Step 7: Rest Your Chicken
Don’t skip this step! Resting allows the juices to redistribute throughout the meat, making it more tender and moist.
- Tent the cooked chicken loosely with foil.
- Let it rest for 5-10 minutes for smaller cuts, and 10-15 minutes for larger pieces like whole chickens or bone-in breasts.
Troubleshooting Common Air Fryer Chicken Problems
Even with the best intentions, sometimes things don’t go perfectly. Here are a few common issues and how to fix them:
Problem: Chicken is Dry
Cause: Overcooking or using lean cuts like boneless breasts without enough attention.
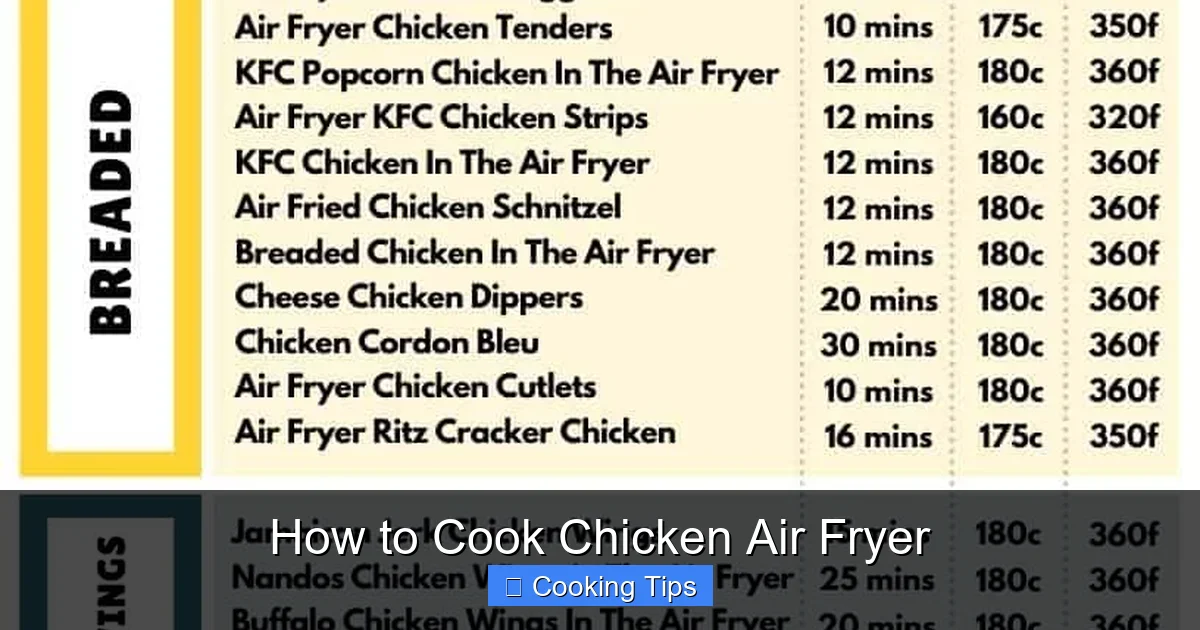
Visual guide about How to Cook Chicken Air Fryer
Image source: recipethis.com
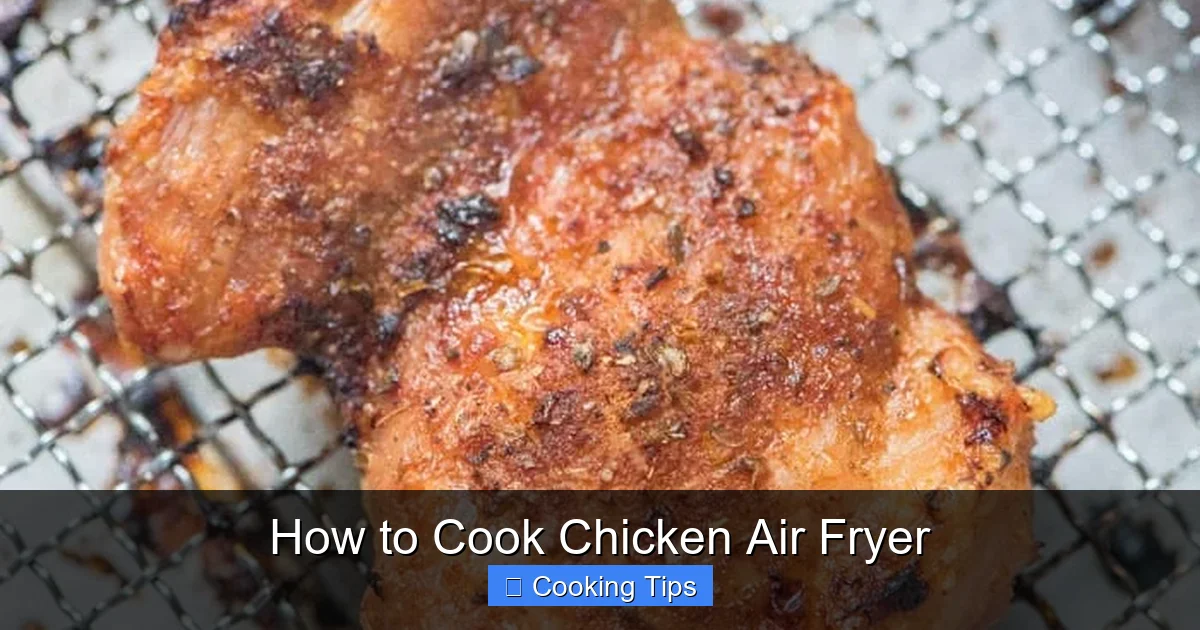
Visual guide about How to Cook Chicken Air Fryer
Image source: courtneyssweets.com
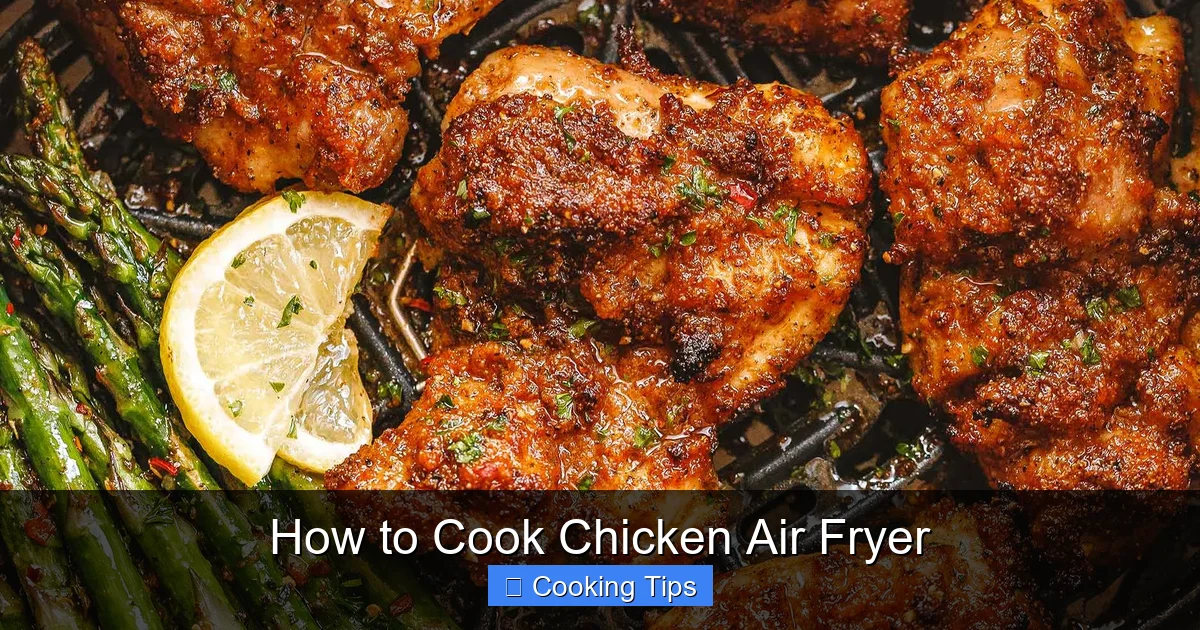
Visual guide about How to Cook Chicken Air Fryer
Image source: eatwell101.com
Solution: Use a meat thermometer religiously. Cook to 165°F (74°C) and remove immediately. Consider marinating or brining, especially for breasts. For bone-in cuts, they are naturally more forgiving.
Problem: Chicken is Unevenly Cooked or Burnt on One Side
Cause: Overcrowding the basket or not flipping/shaking the food.
Solution: Ensure there’s adequate space between chicken pieces for air circulation. Cook in batches if necessary. Flip or shake the food halfway through the cooking time.
Problem: Skin is Not Crispy
Cause: Not drying the chicken enough, insufficient oil, or cooking at too low a temperature for too long.
Solution: Pat the chicken very dry with paper towels before seasoning. Use a light coating of oil. Ensure your air fryer is preheated. Consider increasing the temperature slightly for the last few minutes of cooking, or try the baking powder trick for wings.
Problem: Chicken is Still Pink Inside
Cause: Undercooking or thick pieces not reaching the internal temperature.
Solution: Always use a meat thermometer. If it’s not 165°F (74°C), continue cooking and re-check. You may need to adjust cooking times based on your appliance.
Popular Chicken Air Fryer Recipes & Ideas
The possibilities are endless! Here are a few ideas to get you started:
- Air Fryer Chicken Wings: Tossed in buffalo sauce, BBQ, or lemon pepper.
- Air Fryer Fried Chicken: Use a seasoned flour or breadcrumb coating.
- Air Fryer Chicken Tenders: Great for a quick snack or meal. These are often a hit if you’re looking for easy meals like how to make Tyson chicken tenders in air fryer.
- Air Fryer Chicken Nuggets: Perfect for kids and adults alike. Similar to tenders, learning how to make Tyson chicken nuggets in air fryer can be a lifesaver.
- Air Fryer Chicken Breast for Salads: Cooked and sliced, perfect for adding protein to any salad.
- Air Fryer Chicken Fajitas: Slice marinated chicken breast and cook for quick fajitas.
Conclusion
Cooking chicken in the air fryer is a simple, healthy, and delicious way to enjoy your favorite protein. By following these steps – from proper preparation and seasoning to understanding cooking times and temperatures, and crucially, ensuring it reaches a safe internal temperature – you can achieve restaurant-quality results right in your own kitchen. Experiment with different seasonings and recipes, and discover just how versatile your air fryer can be for all your chicken cravings. Happy air frying!