Learn how to make delicious cheese bread in your air fryer! This guide provides simple, step-by-step instructions for achieving a perfectly crispy exterior and a gloriously gooey cheese center. It’s a quick and easy way to enjoy this crowd-pleasing snack or appetizer, perfect for any occasion.
How to Cook Cheese Bread in Air Fryer
Are you craving that irresistible combination of crispy bread and gooey, melted cheese? Look no further! This guide will walk you through the simple and satisfying process of making delicious cheese bread right in your air fryer. Forget preheating a large oven for a small batch; your air fryer is the perfect tool for this quick and easy treat. We’ll cover everything from selecting the best bread to achieving that perfect golden-brown finish.
By the end of this guide, you’ll be a pro at making air fryer cheese bread. You’ll learn the best bread options, how to prepare it, the ideal temperature and time settings for your air fryer, and even some fun variations to try. Get ready to impress yourself and your loved ones with this crowd-pleasing snack!
- Simple Ingredients: You likely have most of the ingredients for air fryer cheese bread already in your pantry and fridge.
- Quick Preparation: The prep time is minimal, making it ideal for a last-minute snack or side dish.
- Air Fryer Benefits: Using an air fryer ensures a crispy crust and evenly melted cheese in a fraction of the time compared to a conventional oven.
- Customizable Toppings: Easily adapt the recipe with your favorite herbs, spices, and even other cheeses or additions.
- Perfect for Any Occasion: Whether it’s a family movie night, a party appetizer, or a quick lunch, air fryer cheese bread is a versatile winner.
- Troubleshooting Tips: Learn how to avoid common pitfalls like soggy bread or burnt cheese to ensure perfect results every time.
[FEATURED_IMAGE_PLACEHOLDER]
Why Use an Air Fryer for Cheese Bread?
The air fryer is a game-changer for many foods, and cheese bread is no exception. Its circulating hot air technology creates a wonderfully crispy exterior that’s hard to achieve with traditional methods for smaller portions. It’s also incredibly fast, meaning you can go from craving to cheesy goodness in minutes. Plus, it uses less energy than a full-sized oven, making it an economical choice for quick snacks.
Gathering Your Ingredients
The beauty of cheese bread is its simplicity. You probably have most of these items on hand already!
Bread Base
The type of bread you choose can significantly impact the final texture and flavor. Here are some excellent options:
- Baguette or French Bread: These are classic choices. Slice them lengthwise or into thick rounds. They offer a sturdy base that gets wonderfully crisp.
- Italian or Sourdough Loaf: Similar to a baguette, these provide a good crust and chewy interior.
- Thicker Sliced Bread (e.g., Texas Toast): If you prefer a softer interior with a crisp edge, thicker slices work well.
- Pita Bread or Naan: These are great for individual servings and cook up super fast, creating a thin, crispy base.
Cheese
The star of the show! A good melt is key. Consider these:
- Mozzarella: The ultimate in stretchiness and meltability. Use shredded or fresh.
- Cheddar: Adds a sharp, tangy flavor. Medium or sharp cheddar works best.
- Parmesan: Great for adding a salty, nutty kick. Use finely grated.
- Provolone: Offers a mild, slightly smoky flavor and melts beautifully.
- Monterey Jack: Another excellent melter with a mild, creamy taste.
Tip: A blend of cheeses often yields the best flavor and texture. A combination of mozzarella for melt and cheddar or parmesan for flavor is a winning strategy.
Fat/Binder
This helps the seasonings stick and adds a touch of richness to the bread.
- Butter: Melted butter is traditional and delicious.
- Olive Oil: A healthier option that still provides great flavor and crisping.
- Garlic Butter: For an extra punch of flavor, mix minced garlic or garlic powder into softened or melted butter.
Seasonings (Optional but Recommended)
These elevate your cheese bread from simple to sensational.
- Garlic Powder: Essential for that classic garlic bread flavor.
- Italian Seasoning or Dried Oregano/Basil: Adds an herbaceous, savory note.
- Salt and Pepper: To taste.
- Red Pepper Flakes: For a touch of heat.
Step-by-Step Air Fryer Cheese Bread Preparation
Now, let’s get down to making your delicious cheese bread!
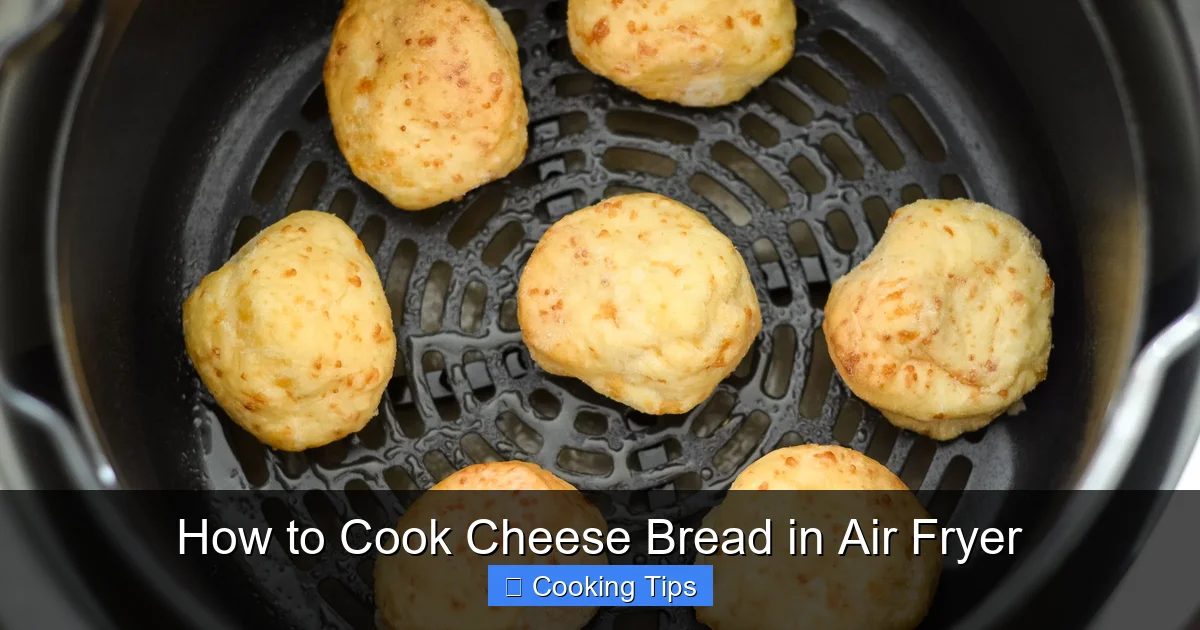
Visual guide about How to Cook Cheese Bread in Air Fryer
Image source: airfryerfanatics.com
Step 1: Prepare Your Bread
How you prepare your bread depends on the type you are using.
Slicing and Arrangement
- For Baguettes/Loaves: Slice your bread. You can slice them lengthwise to create larger pieces, or into thick rounds (about 1-inch thick). If slicing lengthwise, ensure the pieces aren’t too thin, or they might become overly crispy or break apart.
- For Pita/Naan: You can use them whole or cut them in half to create smaller, dippable pieces.
Arrangement in Air Fryer: If using slices from a baguette or loaf, you’ll likely need to arrange them in a single layer in your air fryer basket. You may have to cook in batches depending on the size of your air fryer.
Step 2: Apply the Fat/Binder and Seasonings
This step adds flavor and helps achieve a golden crust.
Coating the Bread
- Melt your butter or warm your olive oil.
- Add your desired seasonings (garlic powder, Italian herbs, salt, pepper, red pepper flakes) to the melted butter or oil. Stir well to combine.
- Brush or spread this mixture evenly over the cut sides of your bread slices. Ensure good coverage for maximum flavor and crispiness.
Tip: For a more intense garlic flavor, mince fresh garlic and sauté it briefly in butter before mixing with other seasonings. Be careful not to burn the fresh garlic.
Step 3: Add the Cheese
It’s time for the gooey goodness!
Layering the Cheese
- Sprinkle your shredded or grated cheeses generously over the buttered/oiled side of each bread slice.
- For longer pieces (like baguette halves), ensure the cheese covers most of the surface, leaving a small border if you want to avoid excessive overflow.
- If using a cheese blend, sprinkle the mozzarella or other melty cheeses first, followed by harder cheeses like parmesan for added flavor.
Don’t be shy with the cheese! The goal is a satisfying, melted cheese layer.
Step 4: Air Fry the Cheese Bread
This is where the magic happens!
Preheating and Cooking
- Preheat your air fryer. Most air fryers work best when preheated. Set your air fryer to 375°F (190°C) for about 3-5 minutes.
- Carefully place the prepared cheese bread slices in the air fryer basket in a single layer. Do not overcrowd the basket, as this will prevent the air from circulating properly and result in uneven cooking and less crispiness. You may need to cook in batches.
- Cook for 5-8 minutes. The exact time will depend on your air fryer model and the thickness of your bread and cheese.
- Check for doneness. You are looking for the cheese to be fully melted and bubbly, and the bread edges to be golden brown and crisp.
Shake or Flip: If you are using smaller pieces like pita halves, you might want to gently flip them halfway through cooking to ensure even crisping on both sides. For larger slices, the circulating air is usually sufficient.
Step 5: Serve and Enjoy!
The best part is always eating!
Finishing Touches
- Carefully remove the cheese bread from the air fryer basket using tongs or a spatula.
- Garnish (Optional): Sprinkle with fresh chopped parsley, more red pepper flakes, or a drizzle of your favorite sauce.
- Serve immediately while the cheese is hot and gooey and the bread is perfectly crisp.
Tips for Perfect Air Fryer Cheese Bread
To ensure your cheese bread turns out perfectly every time, keep these tips in mind:
- Don’t Overcrowd: This is crucial for air fryer success. Ensure there’s space between each piece for hot air to circulate.
- Watch Closely: Air fryers cook quickly. Keep an eye on your cheese bread during the last few minutes to prevent burning.
- Adjust Time and Temperature: Every air fryer is a little different. If your bread is browning too quickly, lower the temperature slightly (to 350°F/175°C). If it’s not crisping enough, increase the temperature by 10-15 degrees or cook for an extra minute or two.
- Bread Thickness Matters: Thicker slices will take longer to cook than thin ones. Adjust cooking time accordingly.
- Moisture Control: If your cheese seems to be melting too quickly or becoming oily, you can try placing a piece of parchment paper (air fryer specific, with holes) under the cheese to catch some of the grease, though this can slightly reduce crispiness.
Creative Variations
Once you’ve mastered the basic air fryer cheese bread, try these fun variations:
- Garlic Herb Cheese Bread: Add fresh chopped rosemary or chives to your butter mixture.
- Spicy Jalapeño Cheese Bread: Mix diced jalapeños (fresh or pickled) into your cheese topping.
- Pesto Cheese Bread: Spread a thin layer of pesto on the bread before adding cheese.
- Pizza Cheese Bread: Add a thin layer of pizza sauce and a sprinkle of dried oregano before topping with mozzarella and pepperoni. This is almost like a mini, crustless pizza!
- Bruschetta Style: Top with diced tomatoes, basil, and a balsamic glaze after cooking.
For inspiration on other appetizers, check out our guide on how to cook anytizers in an air fryer.
Troubleshooting Common Issues
Even with the best intentions, sometimes things don’t go perfectly. Here are a few common problems and how to fix them:
Soggy Bread
Cause: Too much moisture, not enough air circulation, or bread too thick without sufficient crisping time.
Solution: Ensure you’re not overcrowding the basket. Make sure your fat/binder is spread evenly to help crisp the bread. Consider slicing bread a little thinner or increasing the cooking time at a slightly higher temperature if it’s consistently soggy. You could also pre-toast the bread lightly before adding cheese.
Burnt Edges, Unmelted Cheese
Cause: Air fryer temperature too high for the cooking time, or uneven heat distribution.
Solution: Lower the temperature by 10-20°F (about 5-10°C) and extend the cooking time. If your air fryer has hotspots, you might need to rotate the basket halfway through. If the edges are burning too fast, you can loosely tent the edges with foil.
Cheese Overflowing and Dripping
Cause: Too much cheese, or cheese placed too close to the edges.
Solution: Use a moderate amount of cheese, or leave a small border around the edges. If it’s a persistent problem, consider using a slightly firmer cheese that melts less dramatically, or using a layer of mozzarella first (which is less likely to drip excessively) and then a more flavorful, meltier cheese on top.
Conclusion
Making cheese bread in your air fryer is a simple, fast, and incredibly rewarding cooking experience. You get that perfect crispy texture and delicious, melted cheese without the fuss of a traditional oven. Whether you’re serving it as a snack, an appetizer, or a side dish, this air fryer staple is sure to be a hit. So, grab your favorite bread, cheese, and seasonings, and get ready to create some cheesy perfection!
Experiment with different breads, cheeses, and seasonings to find your perfect combination. The air fryer opens up a world of quick and easy culinary adventures, from savory dishes like crab cakes to delightful snacks. Enjoy your homemade air fryer cheese bread!