Discover the secret to perfectly crispy, golden-brown breaded chicken using your air fryer. This comprehensive guide will walk you through every step, from preparing your chicken to achieving delicious, healthier results with minimal oil. Enjoy restaurant-quality breaded chicken right in your own kitchen, made easily and quickly with your air fryer.
How to Cook Breaded Chicken in Air Fryer
Are you craving that satisfying crunch of perfectly fried chicken but want to ditch the deep fryer? Look no further! Your air fryer is a culinary superhero, and today we’re going to unlock its potential for making incredibly delicious breaded chicken. This guide will teach you everything you need to know to achieve golden-brown, crispy, and juicy breaded chicken with minimal oil, making it a healthier and more convenient option for any meal.
Forget greasy messes and long cooking times. With a few simple steps and the magic of hot air circulation, you can transform raw chicken into a crispy delight that rivals your favorite takeout. Whether you’re making chicken tenders, cutlets, or even boneless wings, this method is versatile and incredibly rewarding. Let’s dive in and learn how to cook breaded chicken in your air fryer!
Key Takeaways
- Easy & Healthy: Air frying breaded chicken uses significantly less oil than traditional deep frying, making it a healthier alternative without sacrificing crispiness.
- Speedy Cooking: The air fryer circulates hot air rapidly, cooking breaded chicken faster than an oven while achieving a superior crispy texture.
- Perfect Breading Adhesion: Using a binder like egg wash or buttermilk is crucial for ensuring your breading sticks well and creates that desirable crunchy coating.
- Even Cooking: Don’t overcrowd the air fryer basket. This ensures hot air can circulate freely around each piece of chicken for even cooking and maximum crispiness.
- Temperature & Time Mastery: Finding the right balance of temperature and cooking time is key. This guide provides recommended settings, but internal temperature is the ultimate indicator of doneness.
- Flavor Versatility: Customize your breading with various seasonings, herbs, and spices to create endless flavor profiles for your breaded chicken.
Why Use an Air Fryer for Breaded Chicken?
Before we get our hands dirty, let’s talk about why the air fryer is the undisputed champion for this task.
Traditional deep frying involves submerging chicken in hot oil, which results in a delicious but often heavy and calorie-laden meal. An oven can bake chicken, but it rarely achieves that signature crispiness we love.
The air fryer, on the other hand, uses rapid air circulation around the food. This mimics the effect of deep frying by creating a crispy exterior while using only a fraction of the oil. You get all the crunch and flavor with significantly fewer calories and less mess. It’s a win-win for your taste buds and your health!
Ingredients You’ll Need
Gathering your ingredients is the first step to success. Here’s what you’ll generally need:
- Chicken: Boneless, skinless chicken breasts or thighs are excellent choices. Cut them into desired sizes (tenders, nuggets, cutlets).
- All-Purpose Flour: This is the first layer of your breading station, helping the wet ingredients adhere.
- Eggs: Beaten eggs act as the binder for the breadcrumbs. You can also use buttermilk or milk as an alternative.
- Breadcrumbs: Panko breadcrumbs are highly recommended for their extra crispiness. Regular breadcrumbs, crushed cornflakes, or even finely crushed crackers work too.
- Seasonings: Salt, black pepper, paprika, garlic powder, onion powder, and any other spices you love to add flavor.
- Oil Spray: A light mist of cooking oil (like olive oil, avocado oil, or canola oil) over the breaded chicken helps achieve that golden-brown, crispy finish.
Step-by-Step Guide to Air Frying Breaded Chicken
Now that you have your ingredients, let’s get cooking! Follow these simple steps for perfect air-fried breaded chicken.
Step 1: Prepare Your Chicken
Start by ensuring your chicken is prepped and ready to go. This is where you decide the shape and size of your breaded chicken pieces.

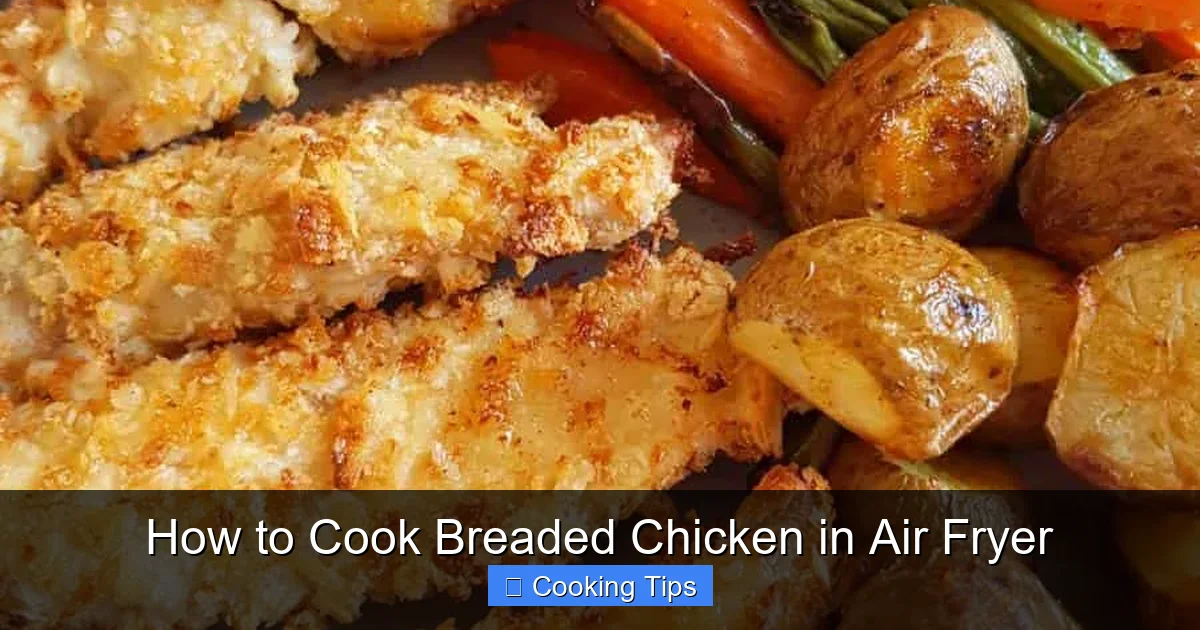
Visual guide about How to Cook Breaded Chicken in Air Fryer
Image source: i.pinimg.com
Visual guide about How to Cook Breaded Chicken in Air Fryer
Image source: hintofhealthy.com

Visual guide about How to Cook Breaded Chicken in Air Fryer
Image source: recipethis.com
Prepare the Chicken Pieces
- If using chicken breasts, you can either pound them to an even thickness (for cutlets) or cut them into uniform strips or cubes (for tenders or nuggets).
- Pat the chicken pieces thoroughly dry with paper towels. This is a crucial step, as moisture can prevent the breading from adhering properly.
Step 2: Set Up Your Breading Station
A well-organized breading station is key to an efficient and mess-free process. You’ll typically need three shallow dishes or plates.
The Three-Stage Breading Process
- Dish 1: Flour and Seasonings: In the first dish, combine the all-purpose flour with your chosen seasonings. A good starting point is salt, pepper, garlic powder, and paprika. Mix everything thoroughly.
- Dish 2: Egg Wash: In the second dish, beat 1-2 eggs until well combined. If you prefer, you can use about 1/2 cup of buttermilk or milk instead.
- Dish 3: Breadcrumbs and Seasonings: In the third dish, place your breadcrumbs. If you’re using plain breadcrumbs, you can add some extra seasonings here as well for an extra flavor boost. Panko breadcrumbs are a fantastic choice for maximum crunch.
Step 3: Bread the Chicken
This is where the magic happens! Dredging the chicken in this sequence ensures a thick, crispy coating.
Coating the Chicken
- Flour: Take a piece of chicken and dredge it in the seasoned flour, making sure to coat all sides. Shake off any excess flour.
- Egg Wash: Next, dip the floured chicken into the beaten egg mixture, allowing any excess to drip off. Ensure it’s fully coated.
- Breadcrumbs: Finally, transfer the egg-coated chicken to the breadcrumb dish. Press gently to ensure the breadcrumbs adhere well to all surfaces. If you want an extra thick crust, you can dip the chicken back into the egg wash and then back into the breadcrumbs for a double coating.
- Place on a Rack: As you bread each piece, place it on a clean plate or a wire rack. This prevents the breaded chicken from sticking to the plate and allows any excess moisture to escape, keeping the breading dry and crispy before cooking.
Step 4: Preheat Your Air Fryer
Preheating your air fryer is just as important as preheating your oven. It ensures even cooking and a crispier result from the moment the chicken hits the basket.
Preheating for Optimal Results
- Most air fryers recommend preheating for about 3-5 minutes at the desired cooking temperature. For breaded chicken, a good starting point is 375°F (190°C).
- Refer to your air fryer’s manual for specific preheating instructions.
Step 5: Arrange Chicken in the Air Fryer Basket
Proper arrangement in the air fryer basket is crucial for achieving that perfect crispy texture on all sides.
Achieving Even Air Circulation
- Place the breaded chicken pieces in a single layer in the air fryer basket. Do not overcrowd the basket. This is the most common mistake people make, and it leads to soggy chicken because the hot air cannot circulate effectively.
- If you are cooking a large batch, it’s better to cook in multiple batches than to overcrowd. You can keep the cooked chicken warm in a low oven (around 200°F or 95°C) while you cook the rest.
- Leave a little space between each piece of chicken.
Step 6: Air Fry the Chicken
Now it’s time to let the air fryer work its magic! The cooking time will vary depending on the thickness and size of your chicken pieces.
Cooking Time and Temperature
- For most chicken tenders or nuggets (about 1-inch thick), cook at 375°F (190°C) for 12-18 minutes.
- For thicker chicken cutlets, you might need a slightly lower temperature, around 360°F (180°C), for 15-20 minutes, or until cooked through.
- Flip Halfway: Halfway through the cooking time (around the 6-9 minute mark for tenders), carefully open the air fryer and flip the chicken pieces using tongs. This ensures even browning and crispiness on both sides.
- Oil Spray: After flipping, give the chicken a light spritz with cooking oil spray. This helps achieve a beautiful golden-brown color and extra crispiness.
Step 7: Check for Doneness
The most important part is ensuring your chicken is cooked through and safe to eat.
Ensuring Food Safety and Perfect Texture
- The internal temperature of cooked chicken should reach 165°F (74°C). Use an instant-read meat thermometer to check the thickest part of a few pieces.
- Visually, the chicken should be golden brown and crispy. The juices should run clear when pierced.
- If the chicken is not yet cooked through but the breading is already getting too dark, you can slightly reduce the air fryer temperature and continue cooking.
Step 8: Rest and Serve
Just like with any cooked meat, letting your breaded chicken rest for a few minutes before serving can make a difference.
The Importance of Resting
- Once cooked, remove the chicken from the air fryer basket and place it on a clean plate or a wire rack.
- Let it rest for 5 minutes before serving. This allows the juices to redistribute throughout the chicken, making it more tender and moist.
- Serve hot with your favorite dipping sauces, sides, or a fresh salad.
Tips for Perfect Air Fryer Breaded Chicken
Here are some extra tips to elevate your air-fried breaded chicken game:
- Panko is Your Friend: For the ultimate crispiness, always opt for Panko breadcrumbs. They are lighter and more porous than regular breadcrumbs, creating a fantastic crunch.
- Don’t Skip the Drying Step: Ensure your chicken is completely dry before breading. This is critical for the breading to stick and get crispy.
- Season Generously: Chicken can be bland. Don’t be shy with your seasonings in the flour and breadcrumb mixtures.
- Experiment with Breading: Get creative! Add grated Parmesan cheese to your breadcrumbs for a cheesy kick, or mix in dried herbs like oregano, thyme, or rosemary. Smoked paprika can add a wonderful depth of flavor.
- Consider Buttermilk: Marinating chicken in buttermilk for at least 30 minutes (or even overnight) before breading can make it incredibly tender and add a subtle tangy flavor that complements the crispy coating.
- Use an Oil Spritzer: A good quality oil spritzer bottle allows you to evenly coat the chicken with a fine mist of oil, promoting even browning and crispiness without using too much oil. This is much better than spraying directly from a can, which can dispense unevenly.
- Know Your Air Fryer: Air fryer models can vary slightly in their heating. It’s always a good idea to keep an eye on your chicken the first few times you make it to fine-tune cooking times. If you’re new to using an air fryer, our air fryer guide can provide more general tips.
Troubleshooting Common Issues
Even with the best intentions, sometimes things don’t go perfectly. Here are a few common problems and how to fix them:
Soggy Breading?
Cause: Overcrowded basket, not preheated air fryer, or chicken wasn’t dried properly.
Solution: Cook in batches, ensure the air fryer is preheated, and always pat chicken dry. Make sure the breading is dry before cooking – let it sit on a rack for a few minutes after breading.
Breading Falling Off?
Cause: Chicken wasn’t dried enough, not enough binder (egg), or too much flour is shaken off.
Solution: Ensure chicken is bone dry. Use enough egg wash and press breadcrumbs firmly. Consider a double dredge (flour-egg-flour-egg-breadcrumbs).
Uneven Browning?
Cause: Overcrowding, not flipping halfway, or uneven basket placement.
Solution: Ensure adequate space between pieces, flip halfway, and arrange pieces so they don’t overlap significantly.
Conclusion
Congratulations! You’ve successfully learned how to cook delicious, crispy breaded chicken in your air fryer. This method offers a healthier, faster, and less messy alternative to traditional frying, without compromising on that irresistible crunch.
From preparing your chicken and setting up your breading station to the final golden-brown result, each step is designed to lead you to a perfectly cooked meal. Experiment with different seasonings and coatings to discover your favorite flavor combinations. Enjoy your homemade, air-fried breaded chicken!