Learn how to cook brats in the air fryer for a quick, easy, and delicious meal. This guide provides simple steps to achieve perfectly juicy and browned brats without the mess. Discover the best temperatures and times for different types of brats, ensuring a fantastic outcome every time.
Key Takeaways
- Perfectly Cooked Brats: The air fryer delivers evenly cooked brats with a delightful crispy exterior and juicy interior, a culinary feat often achieved with more traditional methods.
- Speed and Convenience: Air frying brats is remarkably fast, often taking less time than pan-frying or grilling, making it ideal for weeknight meals or quick snacks.
- Minimal Mess: Say goodbye to splattering grease and burnt bits. The air fryer contains the cooking process, resulting in significantly less cleanup.
- Versatile Cooking: Whether you prefer pork, beef, or chicken brats, the air fryer handles them all with ease, requiring only minor adjustments to cooking time.
- Achieve a Great Sear: The hot, circulating air effectively sears the brats, giving them that desirable browned and slightly crispy skin that’s so satisfying.
- Easy to Monitor: Unlike grilling or pan-frying, you can easily check on your brats during the air frying process without disturbing the cooking environment.
How to Cook Brats in the Air Fryer
Are you looking for a way to cook delicious, juicy brats quickly and with minimal fuss? Look no further than your air fryer! This incredible kitchen appliance can transform ordinary brats into a culinary masterpiece. Forget about greasy stovetop splatters or unpredictable grill temperatures. With the air fryer, you can achieve perfectly cooked brats – browned, slightly crispy on the outside, and wonderfully juicy on the inside – with surprising ease.
In this comprehensive guide, we’ll walk you through every step of cooking brats in your air fryer. You’ll learn the ideal temperatures and cooking times, how to prep your brats for optimal results, and even some helpful tips and tricks to make your air fryer brat experience a resounding success. Whether you’re a seasoned air fryer enthusiast or a complete beginner, you’ll be enjoying delicious brats in no time!
Why Use an Air Fryer for Brats?
Before we dive into the “how-to,” let’s quickly touch upon why the air fryer is such a fantastic choice for cooking brats.
- Speed: Air fryers circulate hot air at high speeds, cooking food much faster than conventional ovens. Brats are no exception!
- Even Cooking: The consistent circulation of hot air ensures that your brats cook evenly on all sides, preventing burnt spots or undercooked centers.
- Crispy Texture: The intense heat and air circulation create a delightful crispy exterior on the bratwurst, which is often the most sought-after texture.
- Juiciness: Despite the crispy exterior, the quick cooking time helps to lock in the juices, resulting in a tender and flavorful interior.
- Less Mess: This is a big one! Compared to pan-frying, where grease can splatter everywhere, the air fryer keeps everything contained, making cleanup a breeze.
- Healthier Option: While brats are a treat, air frying uses significantly less oil than traditional deep-frying or even pan-frying, making it a slightly healthier preparation method.
Choosing Your Brats
The beauty of the air fryer is its versatility. It can handle various types of brats, from classic pork and beef to chicken or turkey.
- Pork Brats: These are the most traditional and readily available. They offer a rich flavor and are incredibly forgiving in the air fryer.
- Beef Brats: Often made with leaner beef, these can be slightly drier. The air fryer’s ability to retain moisture is a real advantage here.
- Chicken/Turkey Brats: These are typically leaner and cook faster. Keep an eye on them to prevent overcooking.
- Pre-cooked vs. Raw: Most brats you find in the grocery store are raw. This guide focuses on cooking raw brats. If you have pre-cooked brats, you’ll simply be reheating and crisping them, which takes less time.
Prepping Your Brats for the Air Fryer
Proper preparation is key to achieving the best results.
1. Thawing (If Frozen)
If your brats are frozen, it’s crucial to thaw them completely before air frying. Cooking frozen brats will result in uneven cooking – burnt exteriors with cold, raw centers.
Best Method: The safest and most effective way to thaw brats is in the refrigerator. Place the frozen package on a plate or in a container to catch any drips and allow them to thaw for 24-48 hours, depending on the package size.
Quick Method (Use with Caution): If you’re in a hurry, you can use the defrost function on your microwave. However, be very careful as this can sometimes start to cook the edges of the brats, which isn’t ideal. Once thawed in the microwave, cook them immediately.
2. Patting Dry
This step might seem minor, but it makes a significant difference in achieving that desirable crispy skin.
Use paper towels to thoroughly pat down each brat. Removing excess moisture helps the hot air circulate more effectively around the brat, promoting browning and crispiness.
3. Optional: A Light Coating of Oil
While not strictly necessary, a light coating of high-heat cooking oil can enhance browning and crispiness.
You can use a spray oil or brush a very thin layer of oil like canola, avocado, or vegetable oil over the brats. This helps the skin crisp up beautifully. Avoid using too much oil, as it can make the brats greasy and can cause smoking in some air fryers.
4. Pierce or Score (Optional, but Recommended for Some)
Some people like to pierce their brats with a fork or make shallow scores on the surface. This can help prevent them from bursting during cooking and can also allow some of the internal juices to render out, contributing to a slightly crispier skin.
Caution: Piercing too much can lead to a drier brat. If you’re unsure, skip this step or make just a few small punctures.
Step-by-Step Air Fryer Brat Cooking Instructions
Now that your brats are prepped, let’s get them into the air fryer!
Step 1: Preheat Your Air Fryer
Preheating is a crucial step for almost any air fryer recipe, and cooking brats is no exception. It ensures that your brats start cooking immediately and evenly, leading to better texture and doneness.
Temperature: Preheat your air fryer to 380°F (190°C).
Time: Allow it to preheat for about 3-5 minutes. Most air fryers have a preheat setting, or you can simply set the temperature and let it run for a few minutes before adding your food.
Step 2: Arrange Brats in the Air Fryer Basket
For optimal cooking, you need to ensure that air can circulate freely around each brat.
Single Layer: Place the brats in a single layer in the air fryer basket. Do not overcrowd the basket. If you have too many brats, you’ll need to cook them in batches. Overcrowding leads to steaming rather than crisping, resulting in pale, soft brats.
Spacing: Leave a little space between each brat to allow the hot air to reach all surfaces. Aim for about half an inch of space if possible.
Step 3: Cook the Brats
This is where the magic happens! The cooking time will vary slightly depending on the thickness of your brats and your specific air fryer model.
Initial Cooking Time: For most standard-sized raw brats, start with a cooking time of 10-12 minutes at 380°F (190°C).
Step 4: Flip the Brats Halfway Through
Turning your brats halfway through the cooking process is essential for even browning and cooking.
Flip: At the halfway point (around 5-6 minutes into the initial cooking time), carefully open the air fryer basket and use tongs to flip each brat. This ensures that all sides get exposed to the hot air, promoting uniform crispiness.
Step 5: Continue Cooking and Check for Doneness
After flipping, continue cooking the brats until they are fully cooked and reach your desired level of browning.
Total Cooking Time: The total cooking time will typically range from 12-18 minutes for most raw brats. Thicker brats will take longer, while thinner ones might be done closer to the 12-minute mark.
Checking for Doneness: The best way to ensure your brats are cooked through is to use an instant-read meat thermometer. Insert the thermometer into the thickest part of the brat. For pork and beef brats, the internal temperature should reach at least 160°F (71°C). For chicken or turkey brats, aim for 165°F (74°C).
Visual Cues: You’re looking for a nicely browned exterior, with some pleasant charring in places. The skin should feel firm and slightly crispy.
Step 6: Rest and Serve
Once cooked to perfection, remove the brats from the air fryer and let them rest for a few minutes.
Resting: Letting the brats rest for 2-3 minutes allows the juices to redistribute throughout the brat, resulting in a more tender and flavorful bite.
Serving: Serve your air fryer brats immediately on buns with your favorite toppings, or enjoy them on their own. They pair wonderfully with a side of air fryer fries or a fresh salad.
Tips for Perfect Air Fryer Brats
Here are some extra tips to elevate your air fryer brat game:
- Don’t Overcrowd: We’ve said it before, but it bears repeating. This is the most common mistake people make, leading to steaming instead of crisping. Cook in batches if necessary.
- Adjust Time Based on Thickness: Thicker brats (like foot-long brats) will require more time than standard-sized ones. Conversely, thinner bratwursts might cook a few minutes faster. Always check for doneness with a thermometer.
- Know Your Air Fryer: Air fryer models can vary in wattage and efficiency. If this is your first time cooking brats in your specific air fryer, err on the side of caution with cooking times and check for doneness frequently.
- Experiment with Temperatures: While 380°F (190°C) is a great starting point, some prefer slightly higher or lower temperatures. A higher temperature like 400°F (200°C) can speed up cooking and increase crispiness but also carries a higher risk of burning. A lower temperature like 360°F (180°C) might require a longer cooking time.
- Crispier Skin: For an extra crispy skin, you can add a minute or two of cooking time at the end, watching them closely to prevent burning.
- Adding Beer or Other Liquids: Some recipes involve simmering brats in beer or broth before grilling. You generally don’t need to do this for air fryer brats, as the air fryer creates a superior crust on its own. However, if you want to infuse flavor, you could try par-boiling them briefly in liquid before air frying.
Troubleshooting Common Air Fryer Brat Issues
Even with the best intentions, you might encounter a minor hiccup. Here’s how to fix them:
Problem: Brats are not browning well.
Solution: This is often due to overcrowding the basket or not preheating the air fryer. Ensure you have enough space between the brats and that your air fryer is properly preheated. Also, patting them dry thoroughly before cooking is essential.
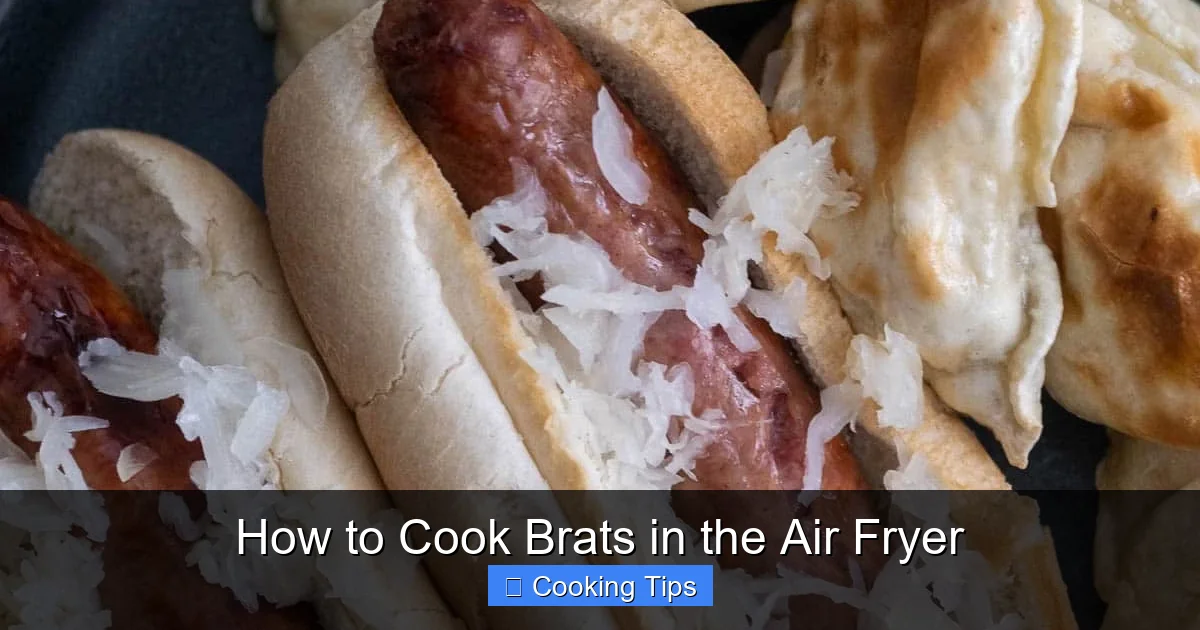
Visual guide about How to Cook Brats in the Air Fryer
Image source: upstateramblings.com
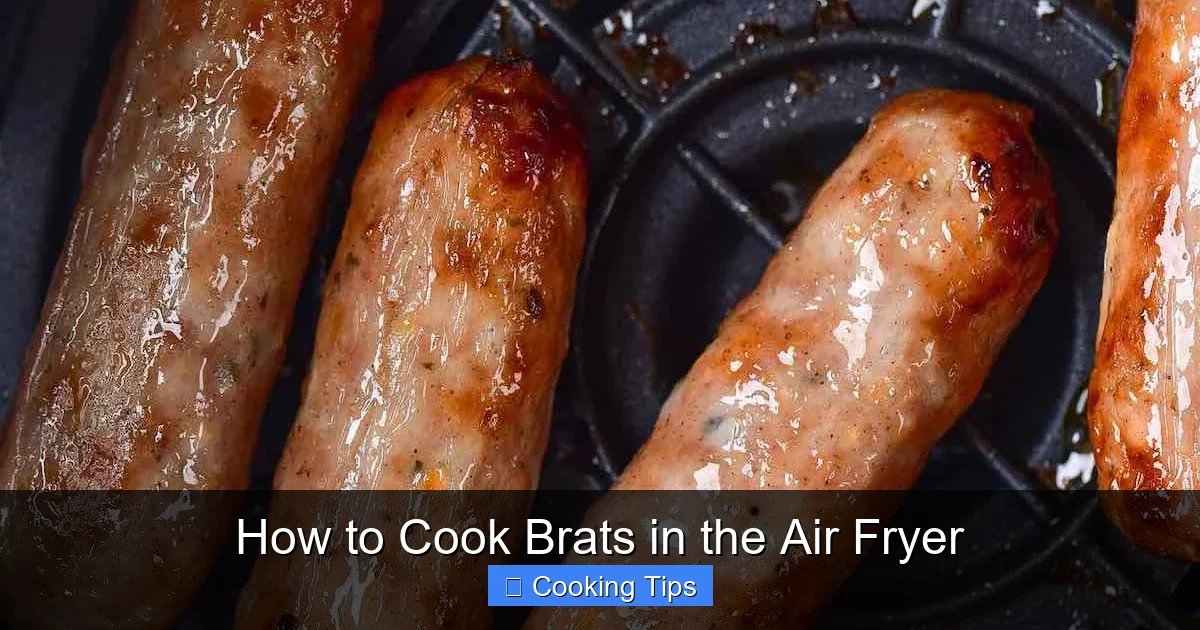
Visual guide about How to Cook Brats in the Air Fryer
Image source: thebigmansworld.com
Problem: Brats are burnt on the outside but raw inside.
Solution: This usually means the cooking temperature was too high for the cooking time, or the brats were cooked from frozen. Reduce the temperature slightly (e.g., to 370°F or 185°C) and increase the cooking time, or ensure brats are fully thawed and follow the recommended times, checking with a thermometer.
Problem: Brats are bursting.
Solution: If your brats are bursting significantly, they may have had too much internal pressure. Consider piercing them a few times with a fork or making shallow scores on the skin before cooking. Ensure you are not cooking them at an excessively high temperature, which can also cause this.
Problem: Air fryer is smoking.
Solution: If your air fryer starts smoking, it’s usually due to excess fat or food particles from previous cooking. Stop the air fryer, unplug it, and let it cool down. Clean the basket and the inside of the air fryer thoroughly. If you coated the brats in oil, you might have used too much; try using less next time.
Conclusion
Cooking brats in the air fryer is a game-changer. It’s a fast, efficient, and remarkably easy way to achieve that perfect balance of juicy interior and deliciously crispy exterior that everyone loves. By following these simple steps, you can consistently produce fantastic brats that are sure to be a hit, whether for a casual weeknight dinner, a game day snack, or a backyard barbecue.
So, dust off your air fryer, grab your favorite brats, and get ready to experience bratwurst perfection. Happy cooking!