Learn to cook a juicy and delicious boneless skinless turkey breast in your air fryer with this comprehensive guide. We’ll cover everything from prep to resting, ensuring a perfectly cooked meal with minimal fuss. Enjoy a healthier and faster alternative to traditional oven-roasting for a quick weeknight dinner or impressive gathering.
Cooking a boneless skinless turkey breast in the air fryer might sound new, but it’s a game-changer for busy cooks. Forget dry, bland turkey! This method delivers incredibly moist, flavorful, and tender results in a fraction of the time compared to traditional oven roasting. In this guide, you’ll learn everything you need to know to achieve turkey breast perfection every single time. We’ll walk you through the simple steps, offer delicious seasoning ideas, and provide tips to ensure your turkey breast is the star of your meal.
Let’s dive into how you can elevate your weeknight dinners or impress guests with this easy and delicious air fryer recipe. You’ll be surprised at how simple it is to get restaurant-quality results right in your own kitchen. Get ready to discover your new favorite way to cook turkey breast!
Key Takeaways
- Effortless Preparation: Simple seasoning and minimal prep make this recipe accessible for all skill levels.
- Fast Cooking Time: Air frying significantly reduces cooking time compared to conventional ovens, delivering a quick meal.
- Moist and Tender Results: The air fryer’s convection heat locks in moisture, guaranteeing a succulent turkey breast.
- Versatile Flavor Profiles: Easily customize seasonings to suit your taste, from classic herbs to spicy rubs.
- Healthy Cooking Method: Air frying uses less oil, making it a healthier alternative for preparing lean protein.
- Perfect for Any Occasion: Whether it’s a weeknight dinner or a small gathering, this method delivers impressive results.
Why Air Fry Boneless Skinless Turkey Breast?
Before we get to the “how,” let’s talk about “why.” Boneless, skinless turkey breast is a lean protein that can sometimes be tricky to cook without drying out. The air fryer, with its rapid air circulation, is uniquely suited to tackle this challenge. It creates a perfect environment for cooking turkey breast evenly and quickly.
The high heat and constant airflow work together to develop a beautiful exterior while keeping the inside incredibly juicy. It’s a healthier cooking method too, as you’ll need significantly less oil than pan-frying or even some other air fryer recipes. Plus, the cleanup is usually a breeze, making it a win-win for any home cook. If you’re interested in other kitchen appliances that can speed up your cooking, you might find our general air fryer category helpful.
Gather Your Ingredients and Equipment
For this simple recipe, you won’t need much. The star of the show is, of course, the turkey breast.
Ingredients:
- 1 boneless, skinless turkey breast (about 1.5 to 2 pounds)
- 1-2 tablespoons olive oil (or your preferred cooking oil)
- Salt, to taste
- Black pepper, to taste
- Your favorite seasonings (see ideas below)
Equipment:
- Air fryer
- Small bowl for mixing seasonings
- Paper towels
- Meat thermometer (highly recommended for accuracy)
- Optional: Basting brush
Step-by-Step Guide to Air Frying Turkey Breast
Let’s get cooking! Follow these simple steps for perfectly cooked air fryer turkey breast.
Step 1: Prepare the Turkey Breast
The first step is to get your turkey breast ready for seasoning and cooking.
H3: Thawing (if frozen)
If your turkey breast is frozen, make sure to thaw it completely before proceeding. The safest way to thaw is in the refrigerator overnight. For quicker thawing, you can submerge the vacuum-sealed package in cold water, changing the water every 30 minutes, until thawed. Never thaw at room temperature.
H3: Pat Dry
Once thawed, remove the turkey breast from its packaging. Place it on a clean plate or cutting board. Use paper towels to thoroughly pat the turkey breast dry. This is a crucial step because moisture on the surface can prevent seasonings from adhering well and can steam the turkey instead of browning it. A dry surface helps create a better crust.
H3: Trim Excess Fat
Inspect your turkey breast. While boneless, skinless breasts usually have minimal fat, trim off any large, visible pieces of fat or any tough connective tissue. This ensures a more even cooking surface.
Step 2: Season the Turkey Breast
This is where you can really make your turkey breast shine. Don’t be shy with the seasonings!
H3: Apply Oil
Drizzle the olive oil all over the turkey breast. Use your hands or a basting brush to coat it evenly. The oil acts as a binder for the seasonings and helps create a slightly crispy exterior as it cooks.
H3: Season Generously
In a small bowl, combine your desired seasonings. A good starting point is salt and black pepper. Then, let your creativity flow! Here are some popular and delicious seasoning combinations:
- Classic Herb: 1 tablespoon dried rosemary, 1 tablespoon dried thyme, 1 teaspoon garlic powder, 1 teaspoon onion powder, salt, and pepper.
- Smoky Paprika: 1 tablespoon smoked paprika, 1 teaspoon garlic powder, 1 teaspoon onion powder, 1/2 teaspoon cumin, salt, and pepper.
- Lemon Herb: 1 tablespoon dried parsley, 1 teaspoon lemon zest (from about 1/2 lemon), 1 teaspoon garlic powder, salt, and pepper.
- Spicy Cajun: 1 tablespoon Cajun seasoning, 1 teaspoon garlic powder, 1/2 teaspoon cayenne pepper (adjust to your spice preference), salt, and pepper.
- Italian Inspired: 1 tablespoon dried Italian seasoning, 1 teaspoon garlic powder, 1 teaspoon onion powder, salt, and pepper.
Rub the seasoning mixture all over the turkey breast, ensuring it’s well-coated on all sides. Get into all the nooks and crannies.
Step 3: Preheat Your Air Fryer
Preheating is important for even cooking and to get that desirable initial crisp.
H3: Set Temperature and Time
Most air fryers recommend preheating for recipes like this. Set your air fryer to 375°F (190°C). Preheat for about 3-5 minutes, or until the indicator light shows it’s ready.
Step 4: Air Fry the Turkey Breast
Now for the main event – cooking the turkey!
H3: Place Turkey in Air Fryer Basket
Carefully place the seasoned turkey breast in the preheated air fryer basket. Make sure it’s in a single layer. If your turkey breast is very large, you might need to cut it in half to fit properly or cook it in batches, though this is usually not necessary for a 1.5-2 pound breast. Ensure there’s some space around it for air circulation.
H3: Cooking Time and Flipping
The cooking time will vary depending on the size and thickness of your turkey breast, as well as your specific air fryer model. A general guideline for a 1.5 to 2-pound boneless, skinless turkey breast is about 20-25 minutes per pound.
For a 1.5-pound breast, start with around 30-35 minutes. For a 2-pound breast, aim for 40-50 minutes.
* At the halfway point (roughly 15-20 minutes into cooking), carefully open the air fryer basket and flip the turkey breast over. This ensures even browning and cooking on all sides. If you’re using a basting brush and have any leftover seasoned oil, you can lightly brush it on during this flip.
* If you notice the exterior is browning too quickly before the internal temperature is reached, you can loosely tent the turkey breast with aluminum foil.
Step 5: Check for Doneness
This is the most critical step to ensure your turkey is cooked perfectly and safely.
H3: Use a Meat Thermometer
The most reliable way to check for doneness is by using a meat thermometer. Insert the thermometer into the thickest part of the turkey breast, avoiding any bone fragments if present (though there shouldn’t be any in a boneless breast).
* The turkey breast is done when it reaches an internal temperature of 165°F (74°C).
* If the temperature is not yet 165°F, continue cooking in 5-minute increments, checking the temperature after each interval.
H3: Visual Cues (Use with caution)
Visually, the juices should run clear when pierced with a fork or knife. However, relying solely on visual cues can be misleading, so a thermometer is always best.
Step 6: Rest the Turkey Breast
Patience here will be rewarded with a juicier, more tender turkey.
H3: Tent and Rest
Once the turkey breast reaches 165°F (74°C), carefully remove it from the air fryer basket. Place it on a clean cutting board. Loosely tent it with aluminum foil.
H3: Resting Time
Let the turkey breast rest for at least 10-15 minutes. This resting period allows the juices to redistribute throughout the meat. If you slice it too soon, all those delicious juices will run out onto the cutting board, leaving you with drier turkey.
Step 7: Slice and Serve
Your perfectly cooked air fryer turkey breast is ready!
H3: Slicing
After resting, remove the foil. Use a sharp knife to slice the turkey breast against the grain. This ensures maximum tenderness.
H3: Serving Suggestions
Serve your air fryer turkey breast hot. It’s fantastic on its own, sliced for sandwiches, added to salads, or served as the main course with your favorite sides like roasted vegetables, mashed potatoes, or a fresh green salad.
Tips for Success
Here are a few extra tips to help you achieve consistently great results:
* Don’t Overcrowd the Basket: Ensure there’s enough space for air to circulate around the turkey breast. This is key to even cooking and crisping.
* Adjust Time for Your Air Fryer: All air fryers are a little different. The first time you make this, keep a close eye on it and adjust the cooking time as needed for your specific model.
* Consider Turkey Breast Size: Thicker breasts will take longer to cook than thinner ones. Always rely on the internal temperature to determine doneness.
* Experiment with Marinades: For even more flavor, you can marinate your turkey breast for a few hours (or overnight) in your favorite marinade before patting it dry and seasoning.
* Brining for Ultimate Juiciness: If you want to take it to the next level, consider a quick brine (a saltwater solution with herbs and spices) for a few hours before air frying. This can significantly boost moisture content.
Troubleshooting Common Issues
Even with the best guides, sometimes things don’t go as planned. Here are a few common issues and how to fix them.
Issue: Turkey Breast is Dry
Cause: Overcooked or not rested properly.
Solution: Always use a meat thermometer to avoid overcooking. Ensure you’re resting the turkey for at least 10-15 minutes after cooking. For future attempts, consider a quick brine or marinade.
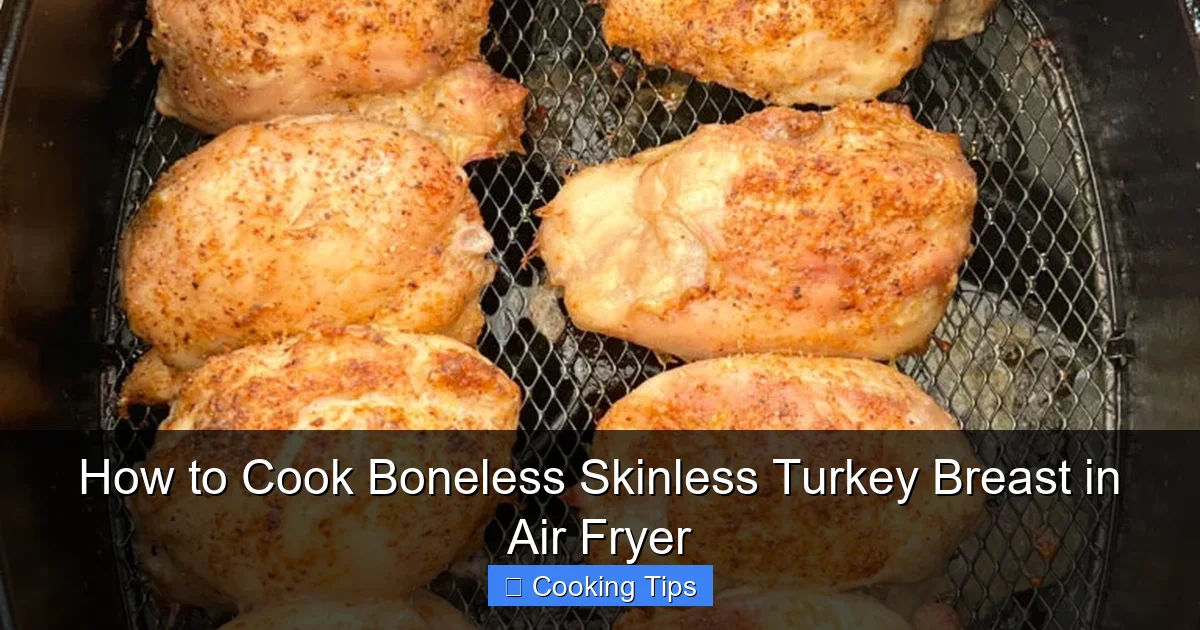
Visual guide about How to Cook Boneless Skinless Turkey Breast in Air Fryer
Image source: recipethis.com
Issue: Turkey Breast is Unevenly Cooked
Cause: Poor air circulation or uneven thickness.
Solution: Make sure the turkey breast is not overcrowded in the air fryer basket. Flip the turkey breast halfway through cooking. If the breast is very uneven in thickness, you can try to pound the thicker parts slightly to create a more uniform shape before cooking.
Issue: Exterior is Burnt, Interior is Undercooked
Cause: Air fryer temperature too high or cooking for too long without checking.
Solution: Lower the air fryer temperature slightly in subsequent attempts. Ensure you’re using the recommended cooking times as a guideline and checking the internal temperature frequently, especially towards the end of the cooking cycle. You can also loosely tent the turkey with foil if the exterior is browning too quickly.
Conclusion
Cooking boneless skinless turkey breast in the air fryer is a fantastic way to enjoy a healthy, delicious, and incredibly fast meal. With just a few simple steps, you can achieve a perfectly cooked, moist, and flavorful turkey breast that will become a regular in your cooking rotation. Forget dry, uninspired turkey – embrace the magic of your air fryer! Experiment with different seasonings, and enjoy the ease and convenience this method provides. Happy air frying!