Achieving perfectly cooked chicken drumsticks in an air fryer is simple and fast! This guide will walk you through the exact time and temperature needed for crispy skin and juicy, tender meat. Follow our easy steps and tips to ensure your drumsticks are a crowd-pleaser, making air fryer cooking a go-to method for delicious meals.
How Long to Cook Chicken Drumsticks in an Air Fryer
Are you craving deliciously crispy, juicy chicken drumsticks but want a quicker, healthier way to make them? Look no further than your air fryer! This amazing appliance can transform simple chicken drumsticks into a culinary masterpiece with minimal fuss. Gone are the days of greasy, oven-baked chicken. With an air fryer, you get that satisfying crunch without all the added oil.
This guide is designed to take the guesswork out of air fryer chicken drumsticks. We’ll cover everything you need to know, from the best temperature and cooking times to essential tips for achieving perfect results every single time. Whether you’re a seasoned air fryer pro or just starting out, you’ll be cooking up mouthwatering drumsticks in no time. Let’s get started on your journey to perfectly air-fried chicken drumsticks!
Key Takeaways
- Perfect Temperature is Key: Most recipes call for a consistent 400°F (200°C) to achieve a golden-brown, crispy exterior while ensuring the inside is fully cooked.
- Approximate Cooking Time: Expect to cook chicken drumsticks for about 18-25 minutes, flipping halfway through for even cooking.
- Don’t Overcrowd the Basket: Give your drumsticks space to allow hot air to circulate effectively, leading to crispier results.
- Internal Temperature is the Best Indicator: Always use a meat thermometer to check that the internal temperature reaches 165°F (74°C) for food safety.
- Preheating Matters: Preheating your air fryer for a few minutes before adding the drumsticks helps them cook more evenly and get crispier.
- Seasoning Enhances Flavor: Simple salt and pepper are great, but don’t hesitate to experiment with marinades or dry rubs for extra deliciousness.
Why Use an Air Fryer for Chicken Drumsticks?
Before we dive into the “how,” let’s talk about the “why.” Air fryers work by circulating hot air around your food at high speed. This creates a convection effect that mimics deep-frying, resulting in food that is incredibly crispy on the outside and moist on the inside.
For chicken drumsticks, this means:
- Crispier Skin: The hot air blasts away moisture from the skin, making it wonderfully brittle and delicious.
- Juicier Meat: The quick cooking time helps to seal in the natural juices of the chicken.
- Healthier Option: You use significantly less oil compared to traditional frying or even oven baking, making them a healthier choice.
- Speed and Convenience: Air fryers preheat quickly and cook faster than most ovens, making them ideal for weeknight meals.
It’s a fantastic way to prepare simple, satisfying meals. If you’re interested in other quick and easy air fryer recipes, you might enjoy learning how to make Tyson chicken nuggets in an air fryer or how to cook a hot dog in the air fryer for speedy snacks.
Preparing Your Chicken Drumsticks
The preparation stage is crucial for flavor and texture. Even simple drumsticks can be elevated with a little attention to detail.
Choosing Your Drumsticks
You can use fresh or thawed chicken drumsticks. Ensure they are of similar size for even cooking. If you have a mix of very large and small drumsticks, you might want to cook them in batches or remove the smaller ones earlier.
Seasoning is Key
This is where the magic begins! You can keep it simple or get creative.
Simple Seasoning (Classic Flavor)
For a classic taste, all you really need is:
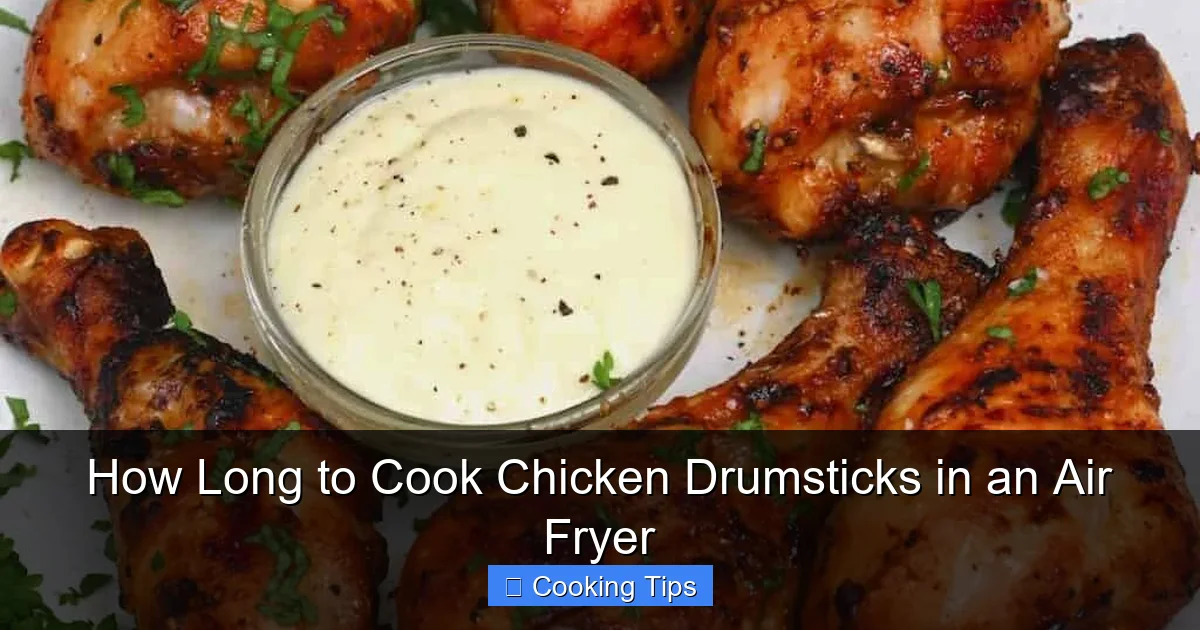
Visual guide about How Long to Cook Chicken Drumsticks in an Air Fryer
Image source: alphafoodie.com
- Salt
- Black pepper
- A little bit of oil (like olive oil or avocado oil) to help the seasonings stick and promote crispiness.
Toss the drumsticks in a bowl with a tablespoon or two of oil, then sprinkle generously with salt and pepper. Make sure each drumstick is evenly coated.
Marinating for Extra Flavor
For deeper flavor, consider marinating your drumsticks for at least 30 minutes (or up to 4 hours in the refrigerator) before cooking.
Great marinade ideas include:
- BBQ Marinade: Soy sauce, Worcestershire sauce, honey, garlic powder, onion powder, paprika.
- Lemon Herb Marinade: Olive oil, lemon juice, minced garlic, dried oregano, thyme, rosemary.
- Spicy Marinade: Hot sauce, olive oil, garlic powder, paprika, a pinch of cayenne pepper.
After marinating, pat the drumsticks slightly dry with a paper towel before adding oil and dry seasonings (like salt and pepper) if desired, as too much moisture can prevent crisping. The goal is to have a bit of oil on the surface for browning.
Dry Rubs for a Flavorful Crust
Dry rubs offer another fantastic way to add flavor. Mix your favorite spices like paprika, garlic powder, onion powder, chili powder, brown sugar, and a pinch of salt.
Coat the drumsticks thoroughly with the dry rub mixture after lightly oiling them. This creates a flavorful crust as it cooks.
The Ideal Air Fryer Temperature and Time
This is the heart of the matter! Getting the temperature and time just right is essential for perfectly cooked chicken drumsticks.
Preheating Your Air Fryer
Just like with a conventional oven, preheating your air fryer is a critical step. It ensures that your drumsticks start cooking immediately at the desired temperature, leading to more even cooking and a crispier exterior.
How to Preheat:
Visual guide about How Long to Cook Chicken Drumsticks in an Air Fryer
Image source: recipevibes.com
- Set your air fryer to the desired temperature (usually 400°F / 200°C).
- Let it run for about 3-5 minutes before adding your food.
Some air fryers have a preheat setting, while others you just set the temperature and time. Consult your air fryer’s manual if you’re unsure.
Recommended Temperature
For chicken drumsticks, the most common and effective temperature is 400°F (200°C). This high heat is perfect for achieving that desirable crispy skin while ensuring the chicken cooks through without drying out.
Determining the Cooking Time
The exact cooking time can vary based on several factors, including the size of the drumsticks, the make and model of your air fryer, and whether they are fresh or frozen.
General Guideline:
For standard-sized, fresh chicken drumsticks, plan for approximately 18 to 25 minutes of cooking time at 400°F (200°C).
Key to Success: Flipping!
To ensure your drumsticks cook evenly and get crispy on all sides, you must flip them halfway through the cooking process. This is where your air fryer’s basket comes into play.
Step-by-Step Guide to Air Frying Chicken Drumsticks
Now, let’s put it all together into a simple, actionable guide.
Step 1: Preheat the Air Fryer
Set your air fryer to 400°F (200°C) and let it preheat for 3-5 minutes.

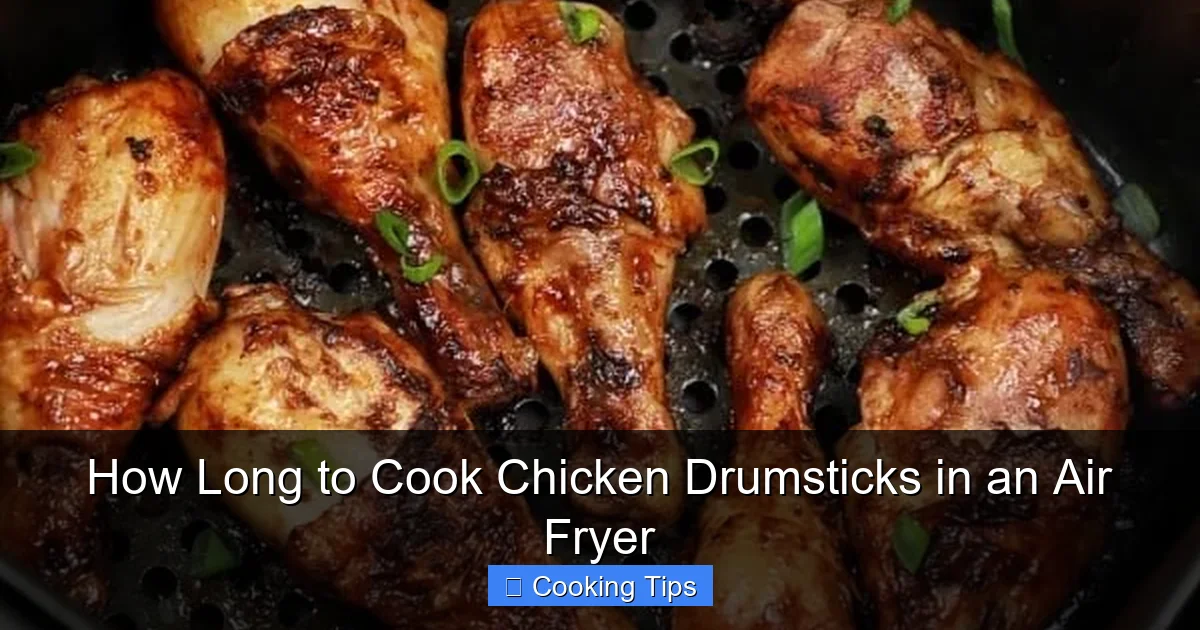
Visual guide about How Long to Cook Chicken Drumsticks in an Air Fryer
Image source: airfryeruniverse.com
Step 2: Prepare the Drumsticks
While the air fryer is preheating, ensure your drumsticks are seasoned or marinated as desired. Lightly toss them with about 1-2 tablespoons of cooking oil (like olive oil or avocado oil) to help with browning and crisping. This step is important even if you’ve marinated them, as residual moisture needs to be addressed for optimal crispiness. You can also add your dry seasonings or rubs at this stage if you haven’t already.
Step 3: Arrange Drumsticks in the Air Fryer Basket
Once preheated, carefully place the seasoned drumsticks in a single layer in the air fryer basket. Do not overcrowd the basket. Overcrowding prevents the hot air from circulating properly, leading to uneven cooking and soggy drumsticks. You may need to cook in batches, depending on the size of your air fryer and how many drumsticks you are preparing.
If you’re cooking a larger batch, consider using a second air fryer or cooking in stages. Learning how to operate an air fryer can help you optimize its use.
Step 4: Cook for the First Half of the Time
Place the basket back into the air fryer and set the timer for about 10-12 minutes.
Step 5: Flip and Continue Cooking
After the initial cooking time, carefully pull out the air fryer basket. Using tongs, flip each drumstick over to expose the other side to the heat. This ensures all sides get equally crispy.
Place the basket back in the air fryer and continue cooking for another 8-13 minutes, or until the chicken is cooked through and the skin is golden brown and crispy.
Step 6: Check for Doneness
The most reliable way to ensure your chicken is safe to eat is by using a meat thermometer. Insert the thermometer into the thickest part of the drumstick, avoiding the bone. The internal temperature should reach 165°F (74°C).
If the drumsticks are not quite done, return them to the air fryer for an additional 2-3 minutes and check again. Repeat if necessary, but be careful not to overcook, which can lead to dry chicken.
Step 7: Rest and Serve
Once cooked to perfection, carefully remove the drumsticks from the air fryer basket. Let them rest for a few minutes before serving. This allows the juices to redistribute throughout the meat, resulting in a more tender and flavorful bite.
Tips for Extra Crispy Skin
Want that ultimate crunch? Here are a few extra tricks:
- Ensure Drumsticks are Dry: Before adding oil and seasoning, pat your drumsticks thoroughly dry with paper towels. Excess moisture is the enemy of crispiness.
- Use a Little Oil: Even if marinated, a light coating of oil (about 1-2 tablespoons per pound of chicken) helps the skin crisp up beautifully.
- Don’t Overcrowd: We can’t stress this enough! Air needs to circulate freely around each drumstick.
- Higher Temperature is Your Friend: 400°F (200°C) is the sweet spot.
- Consider Baking Powder (Optional): For an even crispier skin, you can toss the drumsticks with 1 teaspoon of baking powder (not baking soda!) and your seasonings before adding oil. The baking powder helps to dry out the skin. Make sure to use aluminum-free baking powder if you’re concerned about a metallic taste.
Troubleshooting Common Air Fryer Chicken Drumstick Issues
Even with the best intentions, sometimes things don’t turn out perfectly. Here are some common issues and how to fix them:
Problem: Drumsticks are not crispy.
Cause: Overcrowding the basket, not using enough oil, not preheating, or cooking at too low a temperature.
Solution: Cook in smaller batches, ensure a light coating of oil, preheat your air fryer, and stick to 400°F (200°C). Ensure the drumsticks are dry before seasoning.
Problem: Drumsticks are dry.
Cause: Overcooked or cooked at too high a temperature for too long.
Solution: Use a meat thermometer to check for doneness at 165°F (74°C) and remove them promptly. Consider marinating for added moisture.
Problem: Drumsticks are burnt on the outside but not cooked through.
Cause: The air fryer temperature is too high, or the drumsticks are too small/thin and the outside cooked too fast.
Solution: Reduce the temperature slightly (e.g., to 375°F / 190°C) and increase the cooking time, or cook in smaller batches if using very small pieces.
Problem: Drumsticks are unevenly cooked.
Cause: Not flipping them halfway through, or overcrowding the basket.
Solution: Always flip your drumsticks halfway through the cooking time and ensure there is space between them in the basket.
Conclusion
Mastering how long to cook chicken drumsticks in an air fryer is incredibly rewarding. With the right temperature, time, and a few simple techniques, you can consistently achieve perfectly crispy, golden-brown exteriors and incredibly juicy, tender interiors. This method is not only delicious but also a healthier, faster alternative to traditional cooking methods.
So, don’t hesitate to fire up your air fryer and give these steps a try. Experiment with different seasonings and marinades to discover your favorite flavor combinations. Your air fryer is a versatile kitchen tool, capable of preparing a wide variety of dishes, from a simple pot pie to a hearty steak. Enjoy the process and, most importantly, enjoy your perfectly cooked air fryer chicken drumsticks!