
Achieving perfectly cooked chicken breast bites in the air fryer is simple! This guide walks you through the essential steps, focusing on temperature and time for juicy, tender results. You’ll learn how to prepare your chicken, the ideal cooking settings, and how to ensure it’s cooked through safely. Get ready for delicious, bite-sized chicken every time!
How Long to Cook Chicken Breast Bites in Air Fryer
Are you craving a quick, healthy, and incredibly delicious snack or meal? Air-fried chicken breast bites are a fantastic choice! They’re versatile, can be seasoned in countless ways, and cook up so fast. But the big question is: how long do you actually cook them to get that perfect tender and juicy result without drying them out?
You’ve come to the right place! This comprehensive guide will walk you through everything you need to know to achieve perfectly cooked chicken breast bites in your air fryer, every single time. We’ll cover preparation, the exact cooking times and temperatures, and essential tips to make sure your chicken is safely cooked and absolutely delicious.
- Perfectly Cooked Every Time: This guide provides the exact cooking times and temperatures needed for tender, juicy chicken breast bites in your air fryer, avoiding dryness or undercooking.
- Preparation is Key: Proper cutting, seasoning, and optional coating significantly impact the final texture and flavor of your chicken bites.
- Air Fryer Versatility: Learn how to adapt cooking times based on your specific air fryer model and the size of your chicken pieces.
- Food Safety First: Crucially, understand how to check for doneness using a meat thermometer to ensure your chicken is safely cooked to an internal temperature of 165°F (74°C).
- Troubleshooting Common Issues: Find solutions for common problems like chicken sticking to the basket or not cooking evenly.
- Maximizing Flavor: Discover tips for marinating and seasoning to elevate the taste of your air-fried chicken breast bites.
Why Air Fry Chicken Breast Bites?
Before we dive into the cooking times, let’s quickly chat about why air-frying chicken breast bites is such a brilliant idea. Traditional frying uses a lot of oil, making it less healthy. Baking can sometimes lead to dry chicken. The air fryer, however, circulates hot air around the food, creating a crispy exterior while keeping the inside moist and tender, all with minimal oil. It’s a healthier, faster, and often tastier alternative!
These little bites are perfect for appetizers, quick lunches, or as a protein boost to salads or grain bowls. Plus, they are incredibly easy to adapt to your favorite flavors. Think buffalo, lemon-herb, garlic-parmesan, or even a simple salt and pepper. You can even adapt some techniques used when making boneless chicken wings in an air fryer to get that perfect crispy coating.
The Golden Rule: Internal Temperature
The absolute most important factor for cooking any chicken safely is reaching an internal temperature of 165°F (74°C). This is non-negotiable for food safety. While cooking times are helpful guidelines, they can vary. A reliable meat thermometer is your best friend here. It ensures you never serve undercooked chicken, nor do you overcook it into a dry, rubbery mess.

Visual guide about How Long to Cook Chicken Breast Bites in Air Fryer
Image source: skinnytaste.com
Step-by-Step Guide to Cooking Chicken Breast Bites in the Air Fryer
Let’s get started on creating those perfect chicken breast bites!

Visual guide about How Long to Cook Chicken Breast Bites in Air Fryer
Image source: skinnytaste.com
Step 1: Prepare Your Chicken Breast
The first step is crucial for even cooking and great texture. Make sure your chicken breast is ready to go.
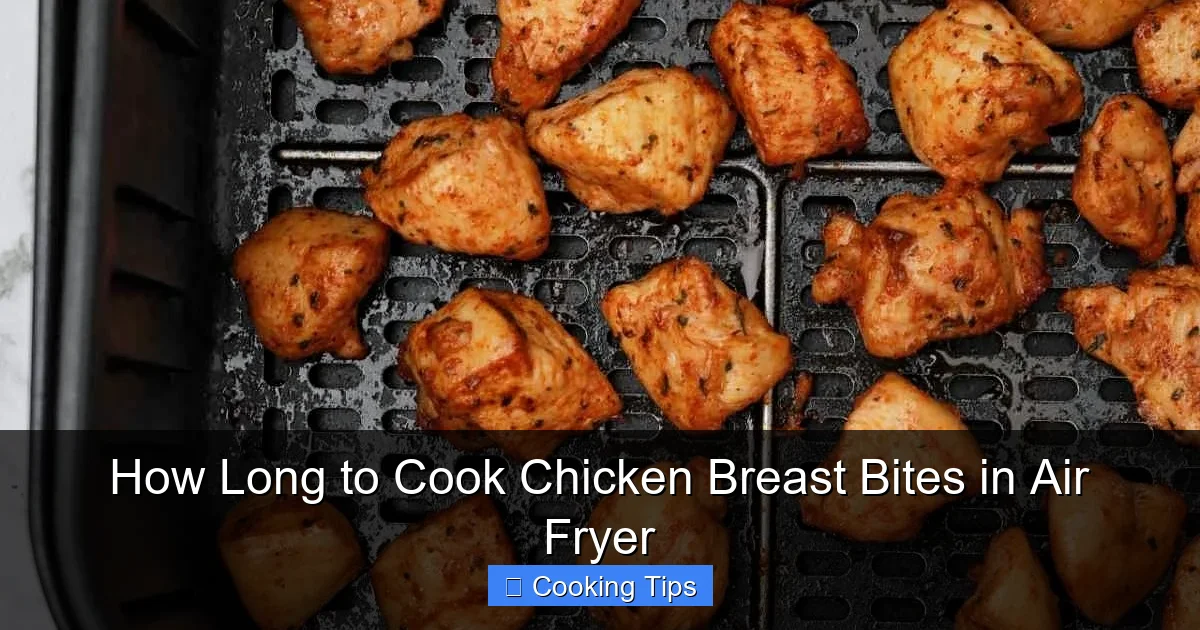
Visual guide about How Long to Cook Chicken Breast Bites in Air Fryer
Image source: recipevibes.com
1. Trim Excess Fat
If there’s any visible fat on your chicken breasts, trim it away. This ensures a cleaner cook and better adhesion for any marinades or coatings.
2. Cut into Even Bites
This is where “bites” comes in! Aim for pieces that are roughly uniform in size, about 1 to 1.5 inches. If you have some pieces significantly larger or smaller than others, they won’t cook evenly. Smaller pieces will dry out before larger ones are cooked through, and vice-versa. Consistency is key!
3. Pat Dry
Before adding any seasoning or marinade, use paper towels to pat the chicken pieces thoroughly dry. This helps your seasonings and coatings stick better and promotes crispiness. Moisture is the enemy of crispiness!
Step 2: Season or Marinate Your Chicken
This is where you infuse your chicken with flavor. You have two main options: seasoning or marinating.
1. Simple Seasoning
For a quick and easy option, toss your dry chicken bites with your favorite spices. A good starting point is salt, pepper, garlic powder, and paprika. You can also add onion powder, cayenne pepper for a kick, or dried herbs like oregano and thyme. Drizzle with a tablespoon of olive oil and toss well to coat every piece evenly.
2. Marinating for Extra Flavor and Tenderness
Marinating adds a deeper layer of flavor and can also help tenderize the chicken. Marinate for at least 30 minutes, or up to 4 hours in the refrigerator. Popular marinade ingredients include:
- Yogurt or buttermilk (for tenderness)
- Lemon juice or vinegar (acid helps tenderize)
- Soy sauce or tamari (umami flavor)
- Olive oil or other vegetable oil
- Garlic, ginger, herbs, and spices
After marinating, remember to pat the chicken dry again before air frying. This helps create that desirable crispy texture.
3. Breading for Extra Crispiness
If you want an extra crispy coating, you can bread your chicken bites. A common method is a three-step process:
- Step 1: Dredge in Flour: Toss the chicken bites in seasoned flour (add salt, pepper, garlic powder to all-purpose flour).
- Step 2: Dip in Egg Wash: Dip the floured chicken into a beaten egg.
- Step 3: Coat in Breadcrumbs: Roll the egg-coated chicken in seasoned breadcrumbs (panko breadcrumbs work wonderfully for extra crunch) or a mixture of Parmesan cheese and herbs.
If you bread your chicken, you might need to adjust the cooking time slightly, as the breading adds a layer that needs to crisp up and cook.
Step 3: Preheat Your Air Fryer
Preheating is crucial for even cooking and achieving that initial crisp. It’s like preheating your oven!
Recommended Preheating: Preheat your air fryer to 400°F (200°C) for about 3-5 minutes. This ensures the basket is hot when the chicken goes in, helping to sear the outside and start the crisping process immediately.
Step 4: Arrange Chicken in the Air Fryer Basket
This step is critical for ensuring your chicken bites cook evenly and get crispy, not soggy.
1. Single Layer is Best
Place the seasoned or breaded chicken breast bites in a single layer in the air fryer basket. Do NOT overcrowd the basket. Overcrowding will trap steam and prevent the hot air from circulating properly, leading to unevenly cooked and soggy chicken.
2. Leave Space Between Bites
Ensure there’s a little bit of space between each piece. This allows the hot air to reach all sides of the chicken, promoting even cooking and crisping. If you have a large batch, it’s better to cook in multiple batches.
Step 5: Air Fry the Chicken Breast Bites
Now for the magic! Here’s where we determine the cooking time.
1. Initial Cooking Time and Temperature
For plain, unbreaded chicken breast bites seasoned with oil and spices, a good starting point is:
- Temperature: 400°F (200°C)
- Initial Time: 8-12 minutes
This time frame is a general guideline. The exact time will depend on the size of your chicken bites and the specific make and model of your air fryer. Some air fryers cook hotter or circulate air more intensely than others. Think about how different brands might affect cooking, similar to how cooking bacon in a Ninja air fryer might differ from another model.
2. Shake or Flip Halfway Through
About halfway through the cooking time (around 4-6 minutes), open the air fryer and give the basket a good shake or use tongs to flip the chicken pieces. This ensures all sides get beautifully browned and crispy.
3. Check for Doneness
After the initial 8-12 minutes, check the chicken. The best way to do this is with an instant-read meat thermometer.
- Insert the thermometer into the thickest part of a few chicken bites.
- The chicken is safely cooked when the internal temperature reaches 165°F (74°C).
- The juices should run clear, and the meat should be opaque white throughout.
4. Adjust Cooking Time as Needed
If the chicken has not reached 165°F (74°C), continue cooking in 1-2 minute increments, checking the temperature after each interval. It’s always better to cook in short bursts to avoid overcooking.
Cooking Times for Breaded Chicken Bites
If you’ve breaded your chicken bites, they will likely need a little more time to ensure the breading is golden brown and crispy, and the chicken inside is cooked through.
- Temperature: 375°F (190°C) – A slightly lower temperature helps the breading crisp up without burning before the chicken is cooked.
- Time: 12-16 minutes
- Action: Shake or flip the basket halfway through (around 6-8 minutes).
- Check Doneness: Use your meat thermometer to confirm an internal temperature of 165°F (74°C).
Cooking breaded items can sometimes be tricky, much like trying to get a perfect crust on something like a crab cake in the air fryer. Patience and checking are key!
Tips for Perfectly Crispy and Juicy Chicken Breast Bites
Here are some extra tips to make your air-fried chicken breast bites the best they can be:
- Don’t Overcrowd: We can’t stress this enough! It’s the biggest culprit for soggy chicken.
- Use a Little Oil: Even with plain seasoned chicken, a tablespoon of olive oil helps with browning and crispiness. For breaded chicken, a light spray of cooking oil on top before air frying can boost crispiness.
- Experiment with Marinades: Get creative! From teriyaki to spicy lime, marinades are your secret weapon for flavor.
- Consider the Size: Smaller bites cook faster. If you cut your chicken into very small pieces (like popcorn chicken size), reduce the cooking time accordingly.
- Know Your Air Fryer: Every air fryer is a little different. Pay attention to how yours cooks and adjust times as needed after your first few tries. If you’re unsure about basic operation, learning how to operate an air fryer is a great first step.
- Resting Time: While not as crucial for small bites as for a whole breast, letting them rest for a minute or two after cooking can help the juices redistribute slightly.
Troubleshooting Common Air Fryer Chicken Bite Problems
Even with the best instructions, things can sometimes go awry. Here are common issues and how to fix them:
Problem: Chicken is dry and overcooked.
Solution: You likely cooked it for too long, or the pieces were too small. Always use a thermometer to check for 165°F (74°C). In the future, reduce the cooking time by 1-2 minutes and check sooner. Ensure you aren’t cooking in too high of a temperature for too long.
Problem: Chicken is still pink inside (undercooked).
Solution: It needs more time! Continue cooking in 1-2 minute increments until the internal temperature reaches 165°F (74°C). Ensure your air fryer is preheated and that you didn’t overcrowd the basket, which is a common reason for uneven cooking.
Problem: Chicken is soggy, not crispy.
Solution: This is usually due to overcrowding the basket or not preheating the air fryer. Make sure you are cooking in a single layer with space between pieces. Ensure the air fryer was fully preheated. Patting the chicken dry before seasoning is also essential for crispiness.
Problem: Chicken is sticking to the basket.
Solution: Make sure you used enough oil or coating. If using a non-stick basket, ensure it’s in good condition. For extra insurance, you can lightly spray the basket with cooking oil before adding the chicken, especially if you’re not using breading or a marinade with oil.
Conclusion
Mastering how long to cook chicken breast bites in the air fryer is all about understanding the key factors: preparation, temperature, and internal doneness. By following these steps, using a meat thermometer, and paying attention to your specific air fryer, you’ll be making perfectly cooked, juicy, and crispy chicken bites in no time.
Whether you’re serving them as a healthy appetizer or incorporating them into a meal, these air-fried chicken breast bites are sure to become a go-to recipe. Enjoy your delicious and effortlessly cooked chicken!