Discover how to cook a tenderloin to perfection in your air fryer! This guide provides precise cooking times and temperatures for various thicknesses, ensuring a juicy, flavorful result. You’ll learn essential prep steps, how to check for doneness, and tips for achieving a beautiful sear, making your air fryer tenderloin a restaurant-quality meal.
Tired of dry, overcooked tenderloin? Want to achieve that perfect, juicy steakhouse quality right in your own kitchen with minimal fuss? You’re in the right place! Cooking a tenderloin in the air fryer is surprisingly simple and incredibly effective, yielding fantastic results in a fraction of the time compared to traditional methods. In this comprehensive guide, we’ll walk you through everything you need to know to cook a tenderloin in your air fryer like a pro. You’ll learn the exact temperatures, the precise cooking times based on thickness, and all the secret tips to guarantee a tender, flavorful, and perfectly cooked piece of meat every single time. Get ready to impress yourself and anyone lucky enough to share your meal!
## Understanding the Magic of Air Fryer Tenderloin
The air fryer is a culinary powerhouse that circulates hot air around your food, creating a crispy exterior while keeping the inside moist and tender. This convection cooking method is ideal for cuts like tenderloin, which benefit from quick, high-heat cooking. Unlike ovens, air fryers heat up quickly and cook more efficiently, making them perfect for weeknight dinners or when you’re craving a delicious meal without a lot of wait time.
## The Importance of Tenderloin Thickness
Before we dive into cooking times, let’s talk about the most critical variable: the thickness of your tenderloin. This is the single biggest factor that will influence how long you need to cook it. A thicker cut will require more time to cook through to your desired internal temperature, while a thinner cut will cook much faster. Always measure your tenderloin at its thickest point before you start. We’ll use approximate thickness guides, but always be prepared to adjust.
## Step-by-Step Guide to Air Fryer Tenderloin Perfection
Follow these simple steps to achieve tenderloin greatness in your air fryer.
### Step 1: Selecting and Preparing Your Tenderloin
The quality of your tenderloin is the foundation of a great meal. Look for a well-marbled piece with a uniform thickness if possible.
#### Choosing the Right Cut
While “tenderloin” can refer to beef, pork, or even other meats, this guide focuses primarily on beef or pork tenderloin, which are common and excellent candidates for air frying. Ensure the cut is fresh and has a good color.
#### Trimming and Patting Dry
Most tenderloins come with a silver skin or membrane that can be tough. You can trim this off with a sharp knife or kitchen shears. Gently slide the knife under the silver skin and pull it away as you cut.
Next, it’s crucial to pat the tenderloin completely dry with paper towels. This step is vital for achieving a good sear and a crispy exterior. Moisture on the surface will steam the meat instead of searing it, preventing that beautiful browned crust we all love.
#### Seasoning for Maximum Flavor
This is where you can really elevate your tenderloin. A simple yet effective seasoning blend is salt and freshly ground black pepper. Don’t be shy with the salt; it helps draw out moisture to create a better crust.
For a more robust flavor, consider adding garlic powder, onion powder, paprika, or your favorite steak or pork rubs. A light coating of olive oil or avocado oil before seasoning helps the spices adhere and promotes browning.
Tip: For even more flavor, try marinating your tenderloin. A marinated pork tenderloin cooked in the air fryer can be exceptionally delicious. Just be mindful that marinades, especially those with sugar, can cause faster browning, so you might need to adjust the cooking time or temperature slightly.
### Step 2: Preheating Your Air Fryer
Preheating is a non-negotiable step for optimal results. Just like with a conventional oven, preheating your air fryer ensures that it’s at the correct temperature from the moment your tenderloin goes in. This helps with even cooking and achieving that desirable sear.
#### How to Preheat
Most air fryers have a preheat function. If yours doesn’t, simply set it to your desired cooking temperature and let it run for 3-5 minutes before adding your food. For tenderloin, a common preheating temperature is 400°F (200°C).
### Step 3: Cooking Your Tenderloin
Now for the main event! This is where we focus on getting that perfect cook.
#### Arranging the Tenderloin in the Basket
Place the seasoned tenderloin in the air fryer basket in a single layer. Do not overcrowd the basket. If you are cooking multiple tenderloins, cook them in batches to ensure proper air circulation. Overcrowding will lead to uneven cooking and a less desirable texture.
#### Determining Cooking Time and Temperature
This is where the thickness of your tenderloin truly matters. The recommended temperature for most tenderloins is **400°F (200°C)**.
Here are some general guidelines for **beef tenderloin** at 400°F (200°C):
* 1-inch thick: Approximately 8-10 minutes total.
* 1.5-inch thick: Approximately 12-15 minutes total.
* 2-inch thick: Approximately 16-20 minutes total.
And for **pork tenderloin** at 400°F (200°C):
* 1-inch thick: Approximately 9-12 minutes total.
* 1.5-inch thick: Approximately 14-18 minutes total.
* 2-inch thick: Approximately 18-22 minutes total.
Important Note: These are *total* cooking times. You will need to flip the tenderloin halfway through to ensure even cooking and browning on all sides. So, for a 1.5-inch thick beef tenderloin, you would cook it for about 6-7 minutes, flip it, and then cook for another 6-7 minutes.
#### Flipping for Even Cooking
About halfway through the estimated cooking time, carefully open the air fryer and flip the tenderloin using tongs. This ensures that both sides get equally exposed to the hot air, leading to consistent browning and cooking.
### Step 4: Checking for Doneness
This is the most critical step to avoid overcooking or undercooking your tenderloin. The only foolproof way to know your tenderloin is cooked perfectly is by using an instant-read meat thermometer.
#### Using a Meat Thermometer
Insert the thermometer into the thickest part of the tenderloin, avoiding any bone or fat pockets. Here are the target internal temperatures for different levels of doneness:
For Beef Tenderloin:
- Rare: 120-125°F (49-52°C)
- Medium-Rare: 130-135°F (54-57°C)
- Medium: 140-145°F (60-63°C)
- Medium-Well: 150-155°F (66-68°C)
- Well-Done: 160°F+ (71°C+) – *Note: Tenderloin is best enjoyed at medium-rare to medium for optimal tenderness.*
For Pork Tenderloin:
- Pork tenderloin is safely cooked and best enjoyed when it reaches an internal temperature of **145°F (63°C)**, followed by a 3-minute rest. It will still be very moist and tender at this temperature.
Carryover Cooking: Remember that food continues to cook after it’s removed from the heat source. This is called carryover cooking. Your tenderloin’s internal temperature will rise by about 5-10°F (3-5°C) during the resting period. Therefore, it’s best to remove the tenderloin from the air fryer when it’s a few degrees *below* your target temperature.
### Step 5: Resting Your Tenderloin
This step is as important as the cooking itself! Resting allows the juices within the meat to redistribute throughout the tenderloin. If you cut into it immediately after cooking, all those delicious juices will run out onto your cutting board, leaving you with dry meat.
#### How to Rest
Once removed from the air fryer, place the tenderloin on a clean cutting board. Tent it loosely with aluminum foil. Let it rest for at least 5-10 minutes. For larger cuts, a longer rest of 10-15 minutes can be beneficial.
### Step 6: Slicing and Serving
After resting, your tenderloin is ready to be sliced and enjoyed!
#### Slicing Techniques
Use a sharp knife to slice the tenderloin against the grain. This will ensure maximum tenderness in every bite. The grain of the meat runs in one direction; look for the lines of the muscle fibers and slice perpendicular to them.
#### Serving Suggestions
Air fryer tenderloin is incredibly versatile. Serve it as a main course with your favorite sides like roasted vegetables, mashed potatoes, or a fresh salad. It’s also fantastic sliced and added to sandwiches, salads, or served as part of an appetizer platter.
- Understand Tenderloin Thickness is Key: The most crucial factor for determining cooking time is the thickness of your tenderloin. Thicker cuts need more time.
- Preheating is Essential: Always preheat your air fryer to ensure even cooking and a good sear from the start.
- Season Generously for Flavor: Proper seasoning enhances the natural taste of the tenderloin and creates a delicious crust.
- Don’t Overcrowd the Basket: Allow air to circulate freely around the tenderloin for optimal crisping and even cooking.
- Resting is Non-Negotiable: Allowing the tenderloin to rest after cooking lets the juices redistribute, resulting in a more tender and moist final product.
- Use a Meat Thermometer: The most reliable way to ensure your tenderloin is cooked to your desired doneness (rare, medium-rare, etc.) is by using an instant-read meat thermometer.
- Adjust for Your Air Fryer Model: Cooking times can vary slightly between different air fryer models due to wattage and design.
Practical Tips for Air Fryer Tenderloin Success
Here are some extra tips to ensure your air fryer tenderloin turns out perfectly every time:
- Know Your Air Fryer: Every air fryer is a little different. Pay attention to how yours cooks. You might find you need to slightly adjust cooking times based on your specific model’s wattage and how it distributes heat. If you’re cooking a marinated pork tenderloin, keep a closer eye on it as the sugars can caramelize and burn quickly.
- Don’t Be Afraid to Experiment: Once you’ve mastered the basic cooking times, feel free to experiment with different rubs, marinades, and even finishing sauces.
- Thicker Ends, Thinner Middle: If your tenderloin has significantly thicker ends and a thinner middle, you might need to adjust your cooking strategy. You can try tying the thinner middle section with kitchen twine to create a more uniform thickness, or shield the thinner part with foil towards the end of cooking if it’s done before the thicker ends.
- Consider Broiling for an Extra Sear: If you want an even deeper sear after air frying, you can quickly broil the tenderloin for 1-2 minutes per side (watch it very closely!). This is optional but can give a restaurant-quality finish.
- Frozen vs. Fresh: This guide assumes you are cooking a fresh tenderloin. Cooking a frozen tenderloin in the air fryer is possible but requires significantly longer cooking times and different methods. For best results with tenderloin, thaw it completely first.
Troubleshooting Common Air Fryer Tenderloin Issues
Even with the best instructions, sometimes things don’t go exactly as planned. Here are a few common issues and how to fix them:
My Tenderloin is Dry
This is usually due to overcooking or not resting the meat properly. Always rely on a meat thermometer for accuracy and ensure you rest the tenderloin for at least 5-10 minutes after cooking. Next time, try pulling it out 5°F below your target temperature.
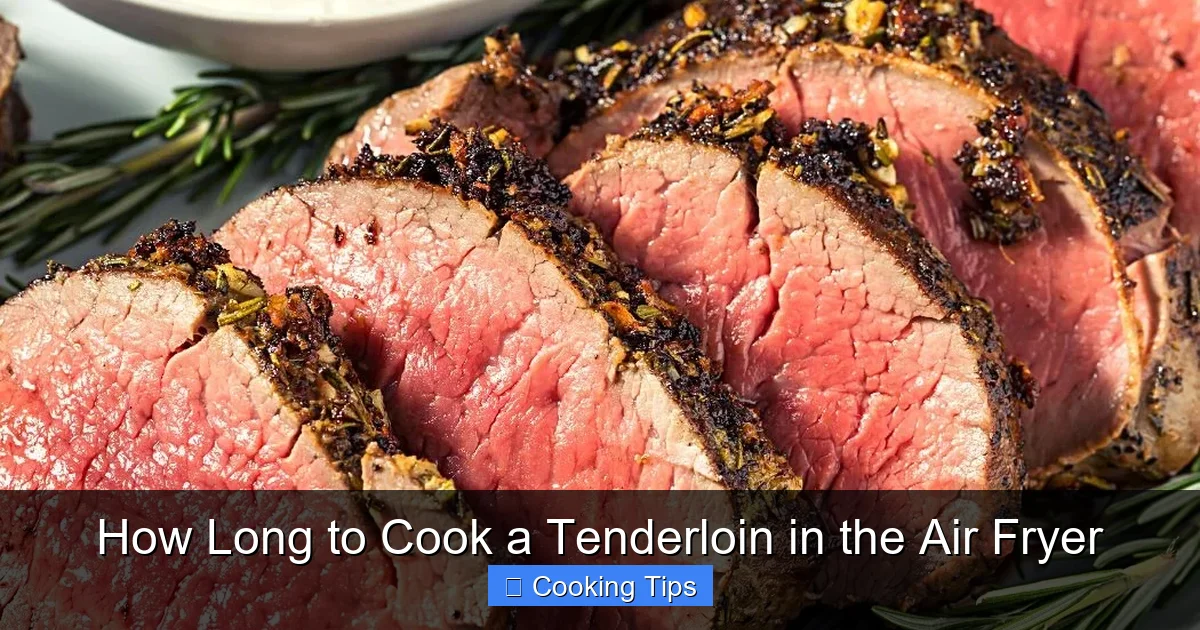
Visual guide about How Long to Cook a Tenderloin in the Air Fryer
Image source: cookingfrog.com
My Tenderloin is Undercooked
This can happen if your cooking time was too short, your tenderloin was very thick, or your air fryer didn’t reach the correct temperature. Always preheat your air fryer and use a meat thermometer to check the internal temperature. If it’s undercooked, simply pop it back into the air fryer for a few more minutes until it reaches your desired doneness.
The Outside is Burnt, but the Inside is Raw
This often happens with marinades containing sugar or if the temperature is too high for too long. Reduce the cooking temperature slightly (e.g., to 375°F/190°C) and check the internal temperature more frequently. You can also loosely tent the tenderloin with foil if the exterior is browning too quickly.
Uneven Cooking
This is usually a sign of overcrowding the air fryer basket. Ensure there’s enough space for the hot air to circulate freely around the tenderloin. Cook in batches if necessary.
Conclusion
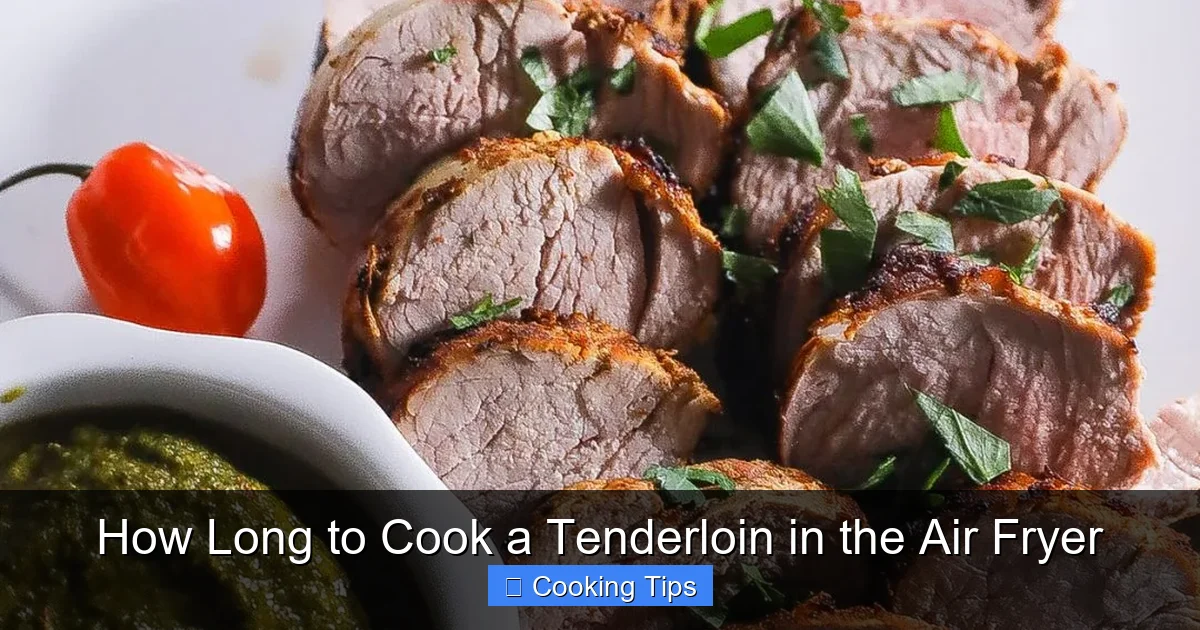
Visual guide about How Long to Cook a Tenderloin in the Air Fryer
Image source: foodfidelity.com
Cooking a tenderloin in the air fryer is a fantastic way to enjoy a delicious, restaurant-quality meal with minimal effort and maximum flavor. By understanding the importance of thickness, preheating, proper seasoning, and using a meat thermometer, you can confidently achieve perfectly cooked, juicy tenderloin every single time. Don’t be afraid to experiment with different seasonings and enjoy the versatility of this incredible cut of meat. Happy air frying!