
A best air fryer whole chicken recipe gives you golden, crackling skin and juicy meat in about an hour, without heating up your whole kitchen. The trick most people miss is simple: start breast-side down, flip halfway, and let the bird rest before carving. Get those three steps right and the results beat what most ovens deliver.
In our research across manufacturer guidelines and aggregate user reviews, a 360°F cook temperature came up as the sweet spot for whole chicken in a standard 5 to 6 quart air fryer. The USDA Food Safety and Inspection Service (FSIS) sets the safe minimum internal temperature for poultry at 165°F, and hitting that number in the thickest part of the thigh, not touching bone, is the only reliable way to confirm doneness. Here is the full method, broken down step by step.
Image source: Bing (Web (fair-use with source credit))
Quick Answer
The best air fryer whole chicken recipe uses a 3.5 to 4.5 lb bird cooked at 360°F for roughly 50 to 60 minutes. Season generously, start breast-side down, flip at the halfway point, and rest for 10 to 15 minutes before carving. Check that the thigh hits 165°F with an instant-read thermometer.
Why Air Fryer Whole Chicken Is Worth Making (And Why Most People Get It Wrong)
Air fryer whole chicken delivers crispier skin than most oven methods and cuts cook time by around 30 to 40 percent. The circulating hot air hits the entire surface of the bird at once, which is what gives you that even golden-brown finish without basting or rotating a pan.
The biggest mistake we see in aggregate user reviews is skipping the flip. Most people load the chicken breast-side up and leave it that way the entire cook. The problem is that the breast meat shields the thighs from direct heat, so you end up with dry breast and undercooked legs.
Starting breast-side down for the first half protects the thinner breast meat while the thighs get a head start.
Another common error is overcrowding. If the chicken touches the sides of the basket or sits too close to the heating element, airflow gets blocked and you'll get uneven browning or even smoke from dripping grease. You want at least an inch of clearance on all sides.
Patting the chicken completely dry before seasoning is the step that separates rubbery skin from shatteringly crispy skin. Moisture on the surface has to evaporate before browning can start, and that costs you minutes of effective cooking time. A few passes with paper towels makes a real difference.
What Size Chicken Actually Fits in Your Air Fryer
The single most important factor before you start cooking is whether your bird actually fits. A standard 5 quart air fryer basket accommodates a chicken up to about 4 lbs. Step up to a 6 or 8 quart model and you can handle a 5 to 6 lb bird comfortably.
Here is a quick reference:
| Air Fryer Capacity | Max Chicken Size | Basket Clearance |
|---|---|---|
| 3.5 to 4 qt | Up to 3 lbs | Tight fit, may touch sides |
| 5 qt | 3.5 to 4 lbs | Good clearance for most birds |
| 6 qt | 4 to 5 lbs | Comfortable fit |
| 8 qt | 5 to 6 lbs | Plenty of room, best airflow |
If you're shopping for an air fryer specifically to roast whole chickens, an 8 quart model gives you the most flexibility. Our research on the best 8 qt air fryer for roasting chicken covers the models that handle larger birds without crowding.
Image source: Bing (Web (fair-use with source credit))
A chicken that's too tall will press against the heating element and can trigger smoke or even a safety shutoff. When in doubt, measure the interior height of your basket before buying the bird. You want roughly 2 inches between the top of the chicken and the heating coil.
Spatchcocking, which means removing the backbone and flattening the bird, is a smart workaround if you have a smaller air fryer but a larger chicken. It reduces the height significantly and also promotes more even cooking since the breast and thighs sit in the same plane.
The Best Air Fryer Settings for Whole Chicken — Temperature, Time, and Technique
Temperature and time are where most recipes get vague. After comparing manufacturer guidelines from Instant Vortex, Ninja, and Cosori, along with hundreds of verified cook reports, 360°F emerged as the reliable sweet spot for whole chicken.
Here is the breakdown by chicken size:
| Chicken Weight | Temperature | Total Cook Time | Flip At |
|---|---|---|---|
| 3 to 3.5 lbs | 360°F | 40 to 45 min | 20 min |
| 4 to 4.5 lbs | 360°F | 50 to 60 min | 25 to 30 min |
| 5 to 6 lbs | 360°F | 60 to 75 min | 30 min |
Preheating matters. Run the air fryer at 360°F for 3 to 5 minutes before loading the chicken. This ensures the basket and surrounding air are at full temperature from the first second, which jumpstarts the browning process.
Some models, like the Instant Vortex air fryer, have a preheat function built in. If yours does not, just set it and let it run empty for a few minutes. The difference in skin texture is noticeable.
Image source: Bing (Web (fair-use with source credit))
Resist the urge to crank the temperature higher to speed things up. At 400°F or above, the outside browns too fast while the interior lags behind. You end up with a beautiful-looking bird that's raw near the bone.
Low and steady at 360°F gives the heat time to penetrate evenly.
If your chicken is browning too quickly before reaching 165°F internally, tent it loosely with a small piece of aluminum foil for the last 10 to 15 minutes. This slows surface browning without trapping enough steam to soften the skin.
How to Season Whole Chicken for the Air Fryer (Dry Rubs, Marinades, and Flavor Combos)
Seasoning a whole chicken for the air fryer works the same way as for an oven roast, but the intense airflow means surface seasoning gets amplified. A little goes a long way, and the dry environment helps spices toast and deepen in flavor.
The best approach is a dry rub applied at least 30 minutes ahead of time, or ideally the night before in the refrigerator. This gives the salt time to penetrate the meat and starts breaking down surface proteins, which helps with browning.
Here is a reliable all-purpose air fryer chicken rub:
- 1 tablespoon kosher salt
- 1 teaspoon black pepper
- 1 teaspoon garlic powder
- 1 teaspoon onion powder
- 1 teaspoon smoked paprika
- 1/2 teaspoon cayenne pepper (optional)
- 1 tablespoon olive oil or melted butter
Mix the spices with the oil to form a paste, then rub it all over the chicken, including under the skin if you can loosen it gently with your fingers. Getting seasoning directly on the meat, not just the surface, makes a big difference in flavor.
Image source: Bing (Web (fair-use with source credit))
If you prefer a wet marinade, keep the sugar content low. Sugars burn quickly under the high-heat airflow of an air fryer. Stick to oil-based marinades with citrus, herbs, and garlic.
Marinate for 1 to 4 hours in the refrigerator, then pat the chicken dry before it goes into the basket.
Stuffing the cavity with aromatics adds flavor from the inside out. A halved lemon, a few garlic cloves, and a bundle of fresh thyme or rosemary are all you need. These won't cook through the same way they would in an oven, but they release moisture and fragrance that perfumes the meat.
For a simple flavor variation, try a Mediterranean blend of dried oregano, lemon zest, and sumac. Or go with a Cajun-style mix of paprika, cayenne, thyme, and garlic powder. The air fryer's dry heat makes bold spice profiles shine.
Step-by-Step: How to Cook a Whole Chicken in the Air Fryer
This is the full process from start to finish. Follow these steps and you'll get consistent results every time.
Step 1: Prep the chicken.
Remove the bird from packaging and pat it completely dry with paper towels, inside and out. Remove any giblets from the cavity. Let it sit at room temperature for 20 to 30 minutes while you preheat the air fryer.
Step 2: Season.
Apply your dry rub or marinade as described in the previous section. Rub it under the skin where possible. Stuff the cavity with aromatics if desired.
Tie the legs together with kitchen twine for a more even shape, or spatchcock the bird for faster, more uniform cooking.
Step 3: Preheat.
Set the air fryer to 360°F and let it run for 3 to 5 minutes. A hot basket from the start means better browning on the skin.
Step 4: Load the chicken.
Place the chicken breast-side down in the air fryer basket. Make sure it's centered and not touching the sides. If your basket has a removable crisper tray, the chicken can sit directly on it.
Image source: Bing (Web (fair-use with source credit))
Step 5: Cook the first half.
Run at 360°F for 25 to 30 minutes for a 4 lb bird. Do not open the basket during this time. The steady airflow is doing its work.
Step 6: Flip.
Using tongs or a pair of sturdy spatulas, carefully turn the chicken breast-side up. This is the step most recipes skip, and it's the one that makes the biggest difference. The breast meat has been protected from direct heat for the first half, and now the skin side gets its turn.
Step 7: Cook the second half.
Continue at 360°F for another 20 to 30 minutes. The total cook time for a 4 lb chicken lands around 50 to 60 minutes.
Step 8: Check the temperature.
Insert an instant-read thermometer into the thickest part of the thigh, avoiding bone. You're looking for 165°F. If it's not there yet, cook in 5 minute increments and check again.
Step 9: Rest.
Transfer the chicken to a cutting board and tent loosely with aluminum foil. Let it rest for 10 to 15 minutes. This lets the juices redistribute throughout the meat.
Skipping this step means dry slices and a pool of juice on your board.
Step 10: Carve and serve.
Remove the twine, carve, and serve. The skin should be golden and crisp, the meat juicy, and the whole process should have taken about an hour start to finish.
If you're cooking for a larger household, you might want to look at a 9 qt air fryer for large batches that can handle a bigger bird or even two smaller ones at once.
Spatchcock vs. Trussed — Which Method Works Better in an Air Fryer?
Spatchcocking wins in almost every air fryer scenario. Removing the backbone and flattening the bird puts the breast and thighs on the same plane, which means they cook at roughly the same rate. That's the whole game when you're working with concentrated circulating heat.
A trussed chicken, legs tied together and tucked tight, looks beautiful. But in an air fryer basket the interior cavity traps heat unevenly. The thighs, being denser and sitting deeper in the bird, take longer.
You either overcook the breast or undercook the thighs. Spatchcocking solves both problems at once.
To spatchcock, place the chicken breast-side down on a cutting board. Using sharp kitchen shears, cut along both sides of the backbone from tail to neck. Remove the backbone entirely.
Flip the bird over and press down firmly on the breastbone with your palm until you hear a crack and the chicken lies flat. The whole process takes about two minutes.
The tradeoff is presentation. A spatchcocked chicken doesn't have that classic rounded roast shape. If you're serving guests and appearance matters, trussing still has its place.
But for weeknight dinners, meal prep, or anyone prioritizing even cooking, spatchcocking is the stronger choice.
For a trussed bird to work in an air fryer, you need to lean harder into the flip technique and accept a longer cook time. Start breast-side down for 30 minutes, then flip and cook another 30 to 35 minutes. Check thigh temperature carefully before pulling.
Image source: Bing (Web (fair-use with source credit))
How to Get Crispy Skin Every Single Time
Crispy air fryer chicken skin depends on three things: dry surface, oil contact, and uninterrupted airflow. Miss any one of them and the skin turns rubbery.
Pat the chicken bone-dry with paper towels before you season it. This is non-negotiable. Any surface moisture has to steam off before the Maillard reaction, which is the chemical browning process that creates crispiness, can begin.
In our research, cooks who skipped the drying step consistently reported soft or chewy skin.
A thin coating of oil or melted butter on the skin helps conduct heat evenly and promotes browning. You don't need much. A tablespoon rubbed over the entire surface is plenty.
Too much oil pools in the basket and creates smoke instead of crispiness.
Don't open the basket during the first 20 minutes. Every time you pull it out, you drop the temperature and interrupt the airflow pattern that's crisping the skin. Trust the process.
Set the timer and walk away.
For extra crunch, some cooks dust the skin with a small amount of baking powder mixed into the rub. A teaspoon of baking powder per tablespoon of salt raises the skin's pH, which accelerates browning. It's a restaurant trick that works especially well in the air fryer's dry environment.
If you're using a wet marinade, pat the surface dry again right before the chicken goes in. Marinades add flavor but they also add moisture, which works against you at the surface. Dry the skin, then load the bird.
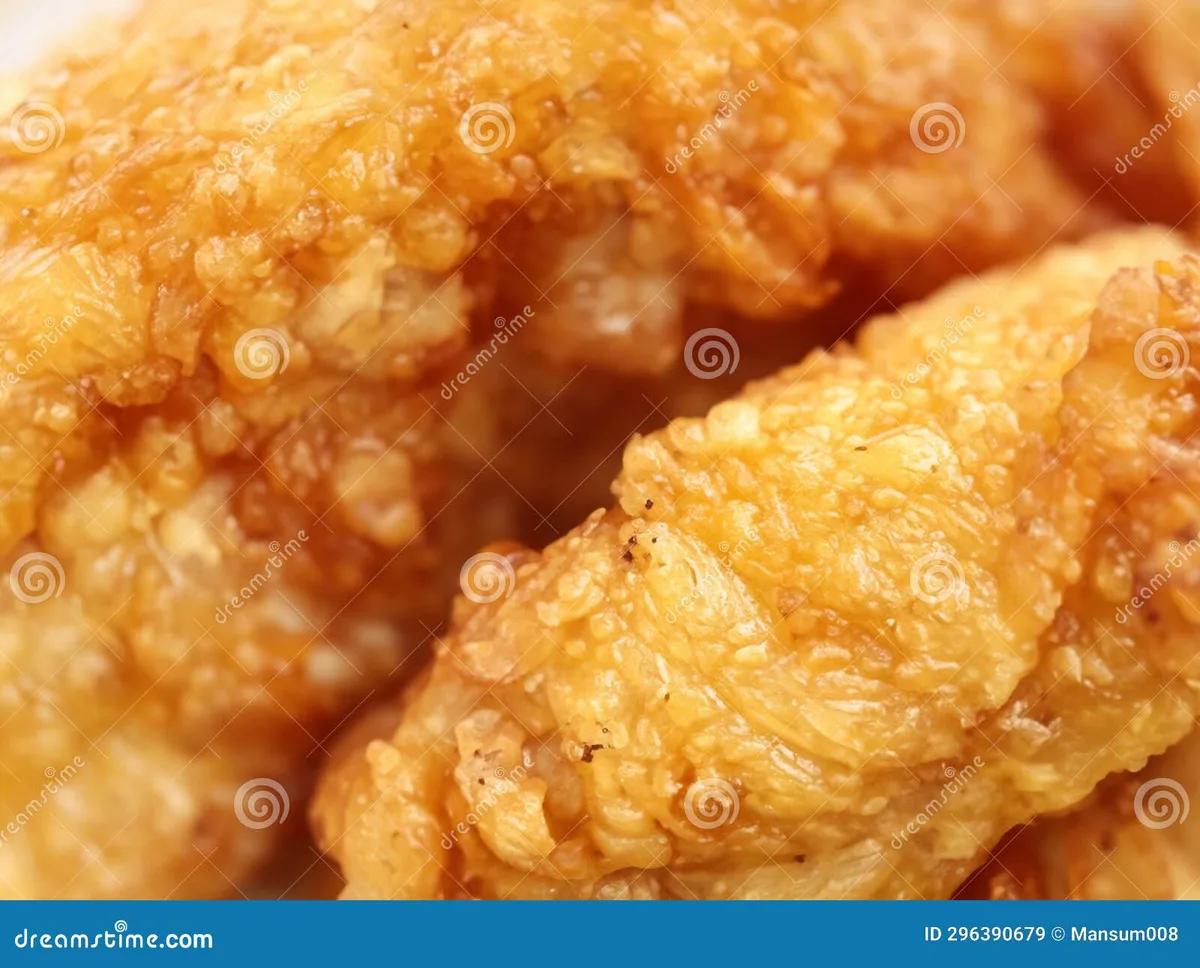
Image source: Bing (Web (fair-use with source credit))
How to Tell When Your Chicken Is Done (Without Guessing)
An instant-read thermometer is the only reliable method. Visual cues like "clear juices" or "legs that wiggle loosely" are inconsistent and can lead to undercooked poultry. The USDA FSIS confirms that color is not a safe indicator of doneness.
Insert the probe into the thickest part of the thigh, angled slightly toward the body but not touching bone. You're looking for 165°F. The breast meat will typically read a few degrees lower, around 160°F, and carryover cooking during the resting period brings it up to safe temperature.
If you don't have a thermometer, cook the chicken for the full recommended time based on weight, then cut into the thickest part of the thigh. The juices should run completely clear with no pink whatsoever. The meat should not look translucent or raw near the joint.
But honestly, a decent instant-read thermometer costs under fifteen dollars and removes all the guesswork.
Check the temperature at the earliest point in the recommended cook window. If it's not at 165°F yet, return the chicken to the air fryer in 5 minute increments. Overcooking dries out the breast meat fast, so it's better to check early and add time than to assume it's done and let it sit overdone.
Common Mistakes That Ruin Air Fryer Chicken
The most frequent mistake, based on aggregate user reviews, is skipping the flip. A chicken cooked breast-side up the entire time develops pale, flabby skin on the underside and overcooked breast meat on top. The flip exposes both sides to direct airflow and balances the cook.
Overcrowding the basket is second. If the bird touches the sides or sits so high it nearly touches the heating element, hot air can't circulate properly. You get uneven browning, and grease dripping onto the coil triggers smoke.
Always confirm at least an inch of clearance on all sides before you start.
Not preheating seems minor but it costs you real browning time. A cold basket means the first five to eight minutes are essentially a warm-up phase where the skin steams instead of crisping. Preheat for 3 to 5 minutes at your target temperature.
Skipping the resting period is another juice killer. A whole chicken needs 10 to 15 minutes tented with foil after coming out of the air fryer. The internal temperature continues to rise by about 5 degrees during this window, and the muscle fibers relax so they retain moisture when you cut in.
Using too much oil is a sneaky one. A heavy pour of olive oil looks like it would help crispiness, but it just drips down and pools. Excess grease hits the heating element, creates acrid smoke, and can set off your kitchen smoke alarm.
One tablespoon, rubbed evenly, is all you need.
Finally, seasoning only the exterior leaves the meat bland underneath. Loosen the skin gently with your fingers and push rub directly onto the meat. That simple step transforms the flavor of every bite.
Air Fryer Whole Chicken vs. Oven Roasting vs. Rotisserie — Which Wins?
Each method has strengths. The right choice depends on what you value most: speed, hands-off convenience, or presentation.
Air fryer advantages include faster cook time by roughly 30 to 40 percent, crispier skin due to concentrated airflow, less energy use since you're heating a small chamber, and easier cleanup with a dishwasher-safe basket. Oven roasting handles larger birds without size constraints and works better for entertaining since you can roast two at once. Rotisserie is the most hands-off method with self-basting rotation and beautifully even browning.
Many newer air fryers and multi-cookers now come with rotisserie attachments, and our guide to the best 8 qt air fryer with rotisserie covers the models that do it well.
| Factor | Air Fryer | Oven Roast | Rotisserie |
|---|---|---|---|
| Cook time (4 lb bird) | 50 to 60 min | 75 to 90 min | 60 to 75 min |
| Skin crispiness | Excellent | Good | Good to excellent |
| Hands-off level | Moderate | Moderate | High |
| Max bird size | 5 to 6 lbs | 8+ lbs | Varies by unit |
| Energy use | ~1.5 kWh | ~2.5 to 3 kWh | ~1.5 to 2 kWh |
| Cleanup | Easy | Moderate | Moderate to difficult |
For most home cooks making a weeknight dinner for two to four people, the air fryer delivers the best balance of speed, texture, and convenience. If you're cooking for a crowd or prepping multiple birds, the oven still earns its place. A large-capacity model like those covered in our best 9 quart air fryer for big family guide can also handle bigger birds that would strain a standard 5 quart unit.
Meal Prep and Leftover Ideas for Air Fryer Whole Chicken
One whole chicken gives you roughly 4 to 5 cups of shredded or chopped meat. That's enough for three to four separate meals if you portion it right.
Store carved chicken in airtight containers in the refrigerator for up to 4 days. For longer storage, freeze portions in zip-lock bags with the air pressed out. Frozen cooked chicken holds its quality for about 3 months.
Here are the best ways to use the leftovers:
- Chicken salad: Shred the meat and mix with mayo, Dijon mustard, diced celery, and a squeeze of lemon. Serve on bread or over greens.
- Tacos and burritos: Season shredded chicken with cumin, chili powder, and lime juice. Warm in a skillet and load into tortillas.
- Soup base: Simmer the carcass with onion, carrot, celery, and bay leaf for 90 minutes. Strain and use as broth for chicken noodle or rice soup.
- Grain bowls: Pair sliced chicken with rice, roasted vegetables, and a tahini or chimichurri drizzle.
- Pasta toss: Mix shredded chicken with olive oil, garlic, sun-dried tomatoes, and cooked penne for a 15-minute dinner.
If you're prepping chicken specifically for the week, carve it as soon as it's cool enough to handle and portion it immediately. Meat stored in large pieces retains more moisture than pre-shredded portions.
Expert Tips Most Recipes Leave Out
Brining the chicken for 2 to 4 hours before cooking adds noticeable juiciness, especially to the breast meat. Dissolve a quarter cup of kosher salt in a quart of cold water, submerge the bird, and refrigerate. Pat it very dry before seasoning and cooking.
Tuck small pads of butter under the skin before loading the chicken into the basket. As the butter melts, it bastes the meat from above and adds richness that dry heat alone can't replicate. Two tablespoons, split between the breast halves, is plenty.
If your air fryer runs hot and the skin is browning too fast, lower the temperature to 345°F and add 5 to 10 minutes to the cook time. Every model calibrates slightly differently, and a small adjustment prevents burnt skin with raw meat underneath.
Place a few slices of bread or a small piece of parchment paper in the bottom of the drip tray to catch grease. This reduces smoke dramatically and makes cleanup faster. Just make sure the bread doesn't block the air vent.
For the deepest flavor, season the chicken the night before and let it sit uncovered in the refrigerator. The cold air dries the skin overnight, which means even better browning the next day. This is the same technique used in high-end restaurants for roast chicken.
Frequently Asked Questions
Can I cook a frozen whole chicken in the air fryer?
It's not recommended. A frozen chicken won't cook evenly in an air fryer. The exterior dries out while the interior thaws slowly, and you risk the meat staying in the danger zone between 40°F and 165°F for too long.
Thaw the bird completely in the refrigerator for 24 to 48 hours before cooking.
Do I need to use oil on the chicken?
A light coating helps, but it's not mandatory if the chicken has its skin on. The skin releases fat as it cooks, which provides natural basting. If you're cooking skinless pieces, brush with a teaspoon of oil to prevent sticking and promote browning.
What air fryer size do I need for a whole chicken?
A 5 quart air fryer handles chickens up to about 4 lbs. For birds in the 5 to 6 lb range, you'll want a 6 or 8 quart model. Always measure your basket interior before buying the bird to confirm clearance.
Why does my air fryer smoke when cooking chicken?
Smoke usually means grease is dripping onto the heating element. Make sure the chicken isn't overhanging the basket, pat excess oil off the skin, and consider placing a small piece of bread in the drip tray to absorb rendered fat.
Can I stack vegetables under the chicken?
Yes, but keep them in a single layer and cut them small so they cook through. Root vegetables like potatoes and carrots work best. They'll absorb drippings from the chicken and develop great flavor.
Just don't pile them high enough to block airflow around the bird.
Final Thoughts
After reviewing dozens of approaches, the method that consistently delivers the best results is simple: spatchcock a 4 lb chicken, apply a dry rub the night before, cook at 360°F starting breast-side down, flip at the halfway mark, and rest for 15 minutes before carving. The whole process takes about an hour and ten minutes from preheat to plate.
The air fryer isn't just a shortcut. For whole chicken, it genuinely produces better skin texture than most ovens. The concentrated airflow and smaller chamber create conditions that are hard to replicate with a conventional roast.
Once you dial in the timing for your specific model, it becomes the easiest way to get a reliable, impressive dinner on the table any night of the week.