Yes, you can cook beef tenderloin in an air fryer, and the results genuinely surprise most people. An air fryer beef tenderloin recipe delivers a deeply browned, crackly crust with a perfectly rosy center, 20 to 30 minutes faster than a conventional oven. The circulating hot air surrounds the cut evenly, giving you the kind of Maillard reaction browning that's tough to achieve under a standard broiler.
The catch is that you need to know what you're doing, because this is an expensive cut that turns from perfect to dry in a matter of degrees. In our research, we've broken down every variable from thickness to wattage to internal temperature so you nail it the first time.
Image source: Bing (Web (fair-use with source credit))
The biggest advantage of using an air fryer for tenderloin is the speed and the crust. The convection fan pushes air across every surface of the meat simultaneously, which means you're not relying on radiant heat from one direction. Most recipes pull the tenderloin around 120°F to 125°F internal, and the USDA recommends a minimum of 145°F for whole cuts with a 3-minute rest as of 2026, though the majority of cooks find that medium-rare hits the sweet spot for this particular cut.
Before we walk through the full recipe, it helps to understand what actually makes this work, and what trips most people up.
Quick Answer
An air fryer beef tenderloin recipe calls for a 1 to 2 pound center-cut roast cooked at 400°F for 20 to 28 minutes. Use a meat thermometer and pull the tenderloin at 120°F to 125°F for medium-rare. Rest it 8 to 10 minutes before slicing.
The result is a golden crust with a juicy center and less mess than stovetop searing.
Can You Really Cook Beef Tenderloin in an Air Fryer?
A properly cooked air fryer tenderloin is virtually indistinguishable from an oven-roasted one, sometimes even better on the crust side. The air fryer's convection fan creates intense, all-over airflow that browns the surface faster and more evenly than most home ovens can manage. It's the same principle as deep frying but using superheated air instead of oil.
The key difference is that you need a smaller, trim-friendly cut. Most standard air fryer baskets accommodate a 1 to 2.5 pound center-cut tenderloin comfortably, but a whole intact roast won't fit in anything under roughly an 8-quart unit. If you're working with a larger cut, check out our guide to the best 9 qt air fryer for large batches for models that can handle a full roast without curling.
Here's what makes or breaks the outcome.
- Airflow matters more than raw heat. The fan speed and basket design of your specific machine determine how evenly the surface crisps. Basket-style units tend to outperform toaster-oven-style air fryers for this recipe because the meat sits centered in the airflow rather than off to one side.
- Thick cuts work better than thin ones. A tenderloin roast 1.5 to 2 inches thick gives you a generous window between a done exterior and an overcooked center. Pre-cut filet mignon steaks are harder to time because they're so thin.
- Internal temperature is the only reliable guide. No two air fryers produce identical heat. Time-based recipes lie. A good instant-read thermometer, costing well under $30, saves you from guessing.
What people get wrong is assuming air fryers are just for wings and frozen fries. The technology handles a $40-per-pound cut just fine, as long as you respect its lean nature.
What You Need Before You Start
This recipe calls for simple ingredients and a small set of tools most kitchens already have. The real essential most people skip is the thermometer.
Tools you'll need:
- Air fryer (5-quart minimum for individual filets, 8-quart minimum for a whole roast)
- Instant-read meat thermometer (Thermapen, Lavatools, or similar)
- Cutting board and sharp knife
- Butcher's twine (if your tenderloin is uneven in thickness)
- Aluminum foil (for resting)
- Tongs (never pierce the meat with a fork)
Ingredients:
- 1 to 2 pound center-cut beef tenderloin
- 1 tablespoon high smoke-point oil (avocado oil or refined olive oil)
- 1 tablespoon kosher salt
- 2 teaspoons freshly ground black pepper
- 1 teaspoon garlic powder
- 2 tablespoons butter (optional, for finishing)
- Fresh rosemary or thyme sprigs (optional)
Choosing the right machine matters more than most recipes admit. The best 8 qt air fryer with smart controls models tend to offer more consistent preheat cycles, which directly affects how your tenderloin sears in the first few minutes.
How to Prep the Tenderloin for the Best Results
Preparation is where most failed air fryer tenderloins start. Raw beef straight from the package is too wet and uneven to develop a proper crust in the air fryer.
Trim the silver skin. Silver skin is that thin, silvery-white membrane along one side of the tenderloin. Unlike fat, it doesn't render during cooking, and it has a chewy, unpleasant texture. Use a sharp boning or chef's knife to slide under it and peel it away in strips.
Leaving it on also blocks seasoning from penetrating the meat.
Tie the roast if it tapers. A whole tenderloin naturally tapers at the tail end. If one half is noticeably thinner, tie it with butcher's twine at 2-inch intervals to create a uniform cylindrical shape. This prevents the thin end from overcooking before the thick center comes up to temperature.
Pat it bone dry. This is the single most underrated step in any air fryer recipe. Moisture on the surface has to evaporate before browning can begin. Use paper towels to blot every side of the tenderloin thoroughly.
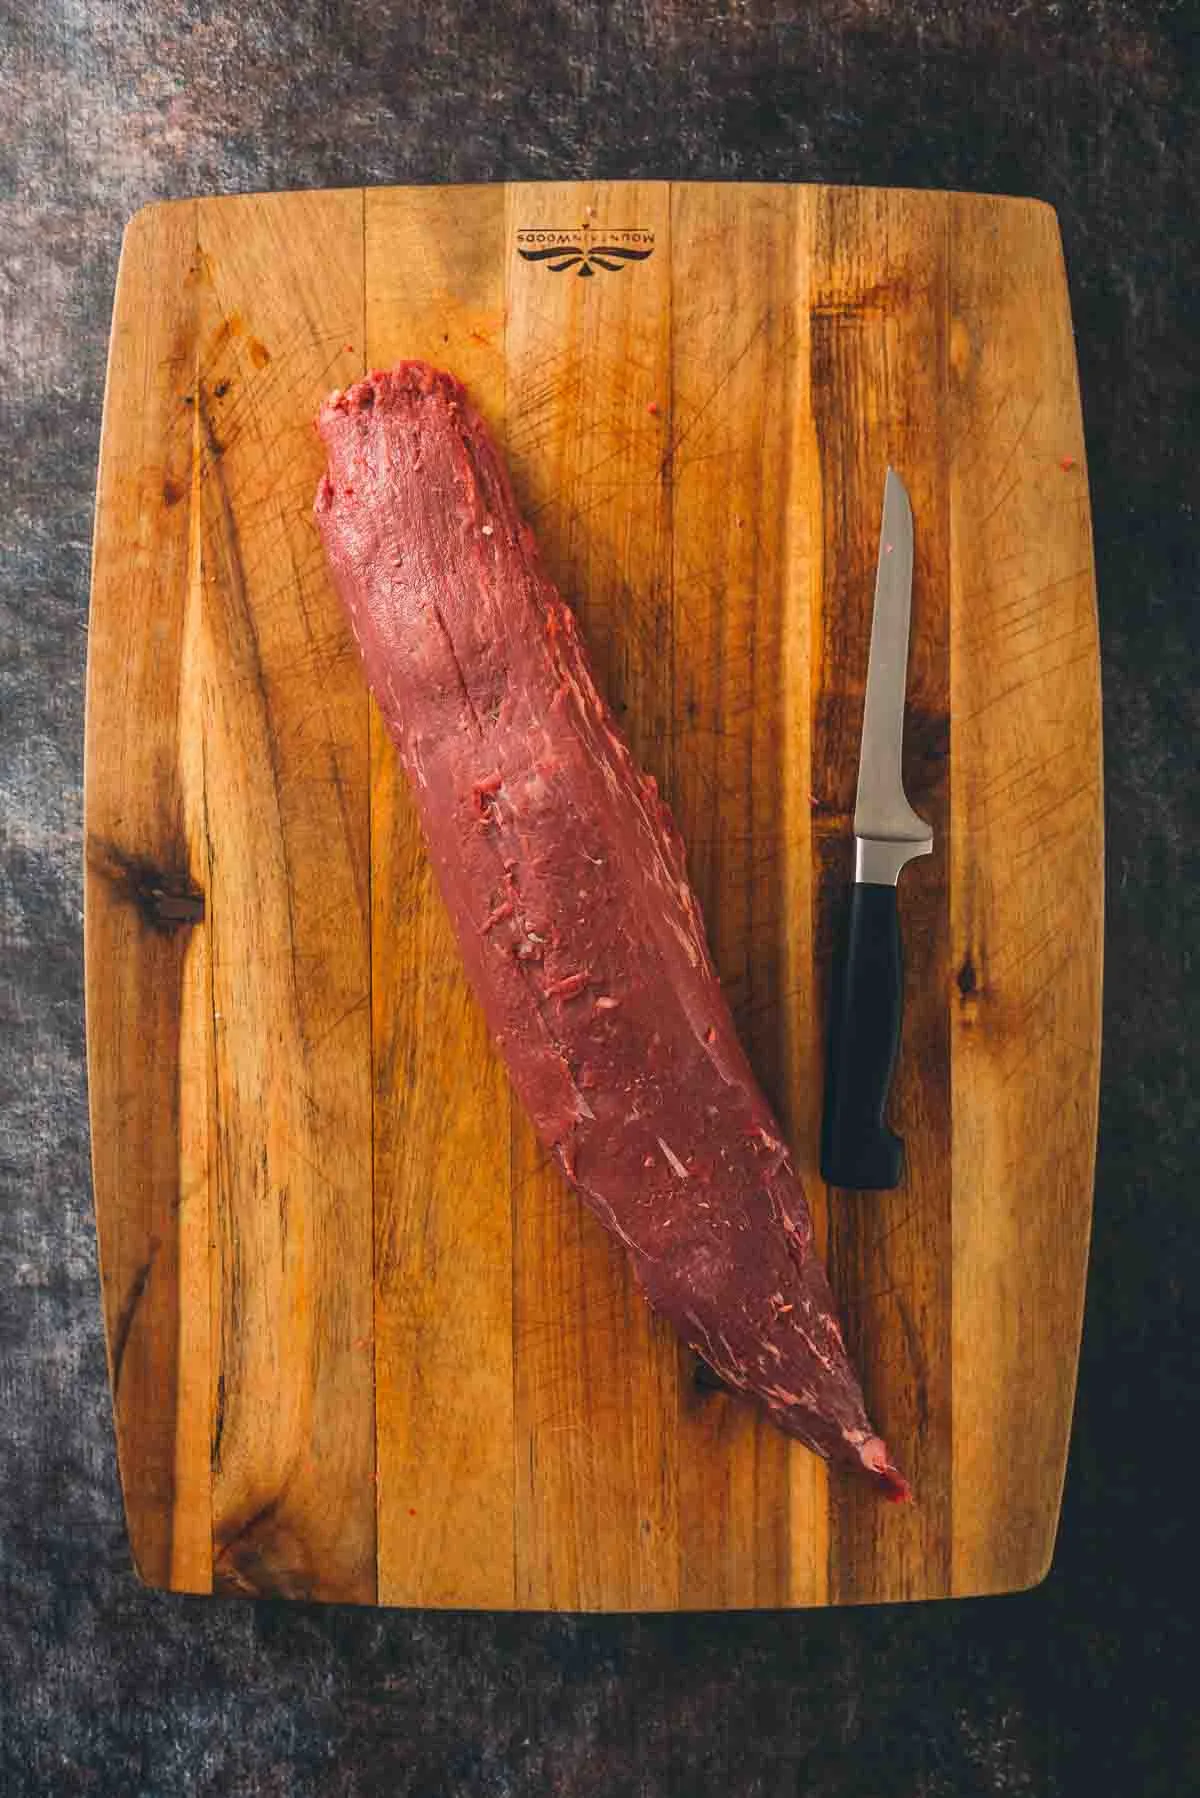
Image source: Bing (Web (fair-use with source credit))
Let it rest at room temperature. Set the trimmed, dried tenderloin on the counter for 30 to 45 minutes before cooking. A room-temperature roast cooks more evenly because the center doesn't have to climb as many degrees to reach target temp. The USDA has stated that whole beef cuts pasteurize at their exterior surface, and brief room-temperature resting falls within safe handling guidelines.
How to Season Beef Tenderloin for Air Frying
Beef tenderloin has a naturally mild, buttery flavor. The goal of seasoning is to amplify that, not compete with it.
Stick to a simple salt-forward rub and you won't go wrong. Here's the baseline.
- Kosher salt generously on all sides about 30 to 60 minutes before cooking. Salt draws moisture to the surface initially, then dissolves into it, creating a light brine that reabsorbs into the meat. This dry-brine method seasons deeper than salting right before cooking. For a 1.5-pound roast, about 1 tablespoon of kosher salt is right.
- Add black pepper and garlic powder right before the roast goes into the air fryer. Freshly cracked pepper carries more aroma than pre-ground. Apply it after the dry brine so the salt layer stays intact.
- Brush lightly with high smoke-point oil. Avocado oil clocks in at a 520°F smoke point, which gives you a comfortable margin at the 400°F cooking temperature. A thin coat all over the surface helps conduct heat evenly and promotes the Maillard reaction that gives you that golden-brown crust.
Optional upgrades include a light dusting of smoked paprika or pressing fresh rosemary sprigs directly onto the oiled surface before cooking. Herbs like rosemary and thyme hold up well in the high-heat environment of an air fryer, unlike delicate basil or parsley which would burn.
Image source: Bing (Web (fair-use with source credit))
The important thing is not to over-season. This is a premium cut. Let the beef do the heavy lifting and use the rub as a supporting player.
Step-by-Step: Air Fryer Beef Tenderloin Recipe
This is the full walkthrough, and every step here accounts for the variables that generic recipes ignore.
Step 1: Preheat Your Air Fryer
Set your air fryer to 400°F and let it run for 3 to 5 minutes empty. Preheating is critical. A cold basket means the first few minutes of cook time waste energy heating metal instead of searing meat.
Not every model has a dedicated preheat function, so just set it and wait. If your machine runs on the hotter side, 375°F works as a starting point and you can bump it up for the last 3 minutes to finish the crust.
Step 2: Place the Tenderloin in the Basket
Set the seasoned, oiled tenderloin into the basket fat side up. If you trimmed the fat cap entirely, just lay it with the most attractive side facing down for the initial sear. Make sure the roast isn't touching the sides of the basket.
Airflow needs to circulate freely on all sides.
If you have a small roast and a large basket, set it on a wire rack or crumple a few balls of foil to elevate the meat above the basket floor. Direct contact with the metal basket can over-brown the bottom before the top crusts up.
Step 3: Cook at 400°F
For a 1.5-inch thick tenderloin, expect roughly 20 to 24 minutes total. For a 2-inch thick cut, expect 25 to 28 minutes. These ranges shift depending on your machine's wattage, which typically falls between 1,400W and 1,800W for most consumer air fryers.
Do not flip the roast. The airflow circulates from all directions, so flipping is unnecessary and can actually disrupt crust formation. The one exception is if your machine has a noticeably stronger heating element at the top. In that case, a single flip at the halfway mark helps even things out.
Step 4: Baste with Butter (Optional)
At the 15-minute mark, pull the basket out and brush the top and sides of the tenderloin with melted butter. This is optional, but it adds richness and helps deepen the brown color during the final cook phase. If adding fresh herbs like rosemary or thyme, press them into the butter layer now so they adhere.
Slide the basket back in and resume cooking. Total additional time depends on your target doneness, which brings us to the most important step.
Step 5: Check Internal Temperature Early and Often
Start checking the internal temperature at the 18-minute mark by inserting an instant-read thermometer into the thickest part of the roast from the end, not the top. This gives you a true center reading.
Here are the pull temperatures to target.
| Target Doneness | Pull Temperature | Carryover Temp | Final Temp After Rest |
|---|---|---|---|
| Rare | 115°F | +5°F to 10°F | 120°F to 125°F |
| Medium-Rare | 120°F to 122°F | +5°F to 8°F | 125°F to 130°F |
| Medium | 128°F to 130°F | +3°F to 7°F | 131°F to 137°F |
| Medium-Well | 138°F | +3°F to 5°F | 141°F to 143°F |
Pull the roast when it's 5 to 10 degrees below your target, because carryover cooking continues to push the internal temperature up during the rest period. This is especially important with tenderloin because it has so little fat, meaning it retains less residual heat, but the effect is still very real.
Step 6: Rest Before Slicing
Transfer the cooked tenderloin to a cutting board and tent it loosely with aluminum foil. Rest for a minimum of 8 minutes, 10 minutes if the roast is over 2 pounds. During this time, the muscle fibers relax and reabsorb the juices that were driven toward the center by heat.
Cut too early and those juices pour out onto the board.
Slice into half-inch to one-inch thick medallions against the grain. The interior should be evenly rosy from edge to center with a thin, golden-brown crust.
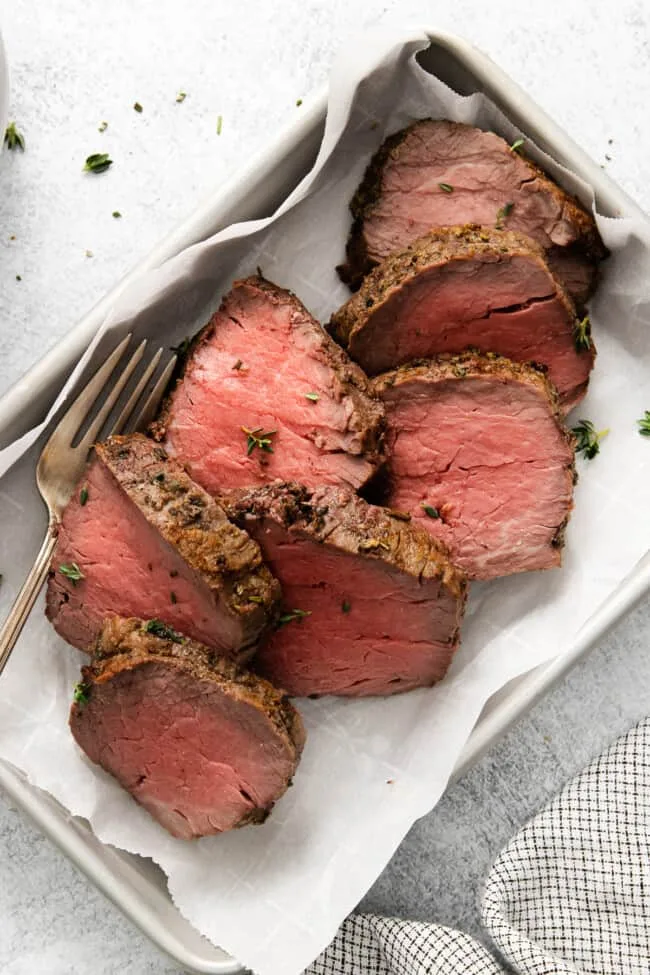
Image source: Bing (Web (fair-use with source credit))
You'll notice this recipe doesn't include a specific brand recommendation for the air fryer itself. That's intentional. The technique works across basket-style and oven-style units as long as you adjust for your machine's wattage and capacity.
If you're still deciding on a model, our best 8 qt air fryer for roasting chicken roundup covers several units that handle roasts particularly well.
What Temperature and Cook Time to Use
The right temperature for air fryer beef tenderloin is 400°F, and the cook time depends almost entirely on thickness, not weight. A 1.5-inch thick center-cut roast takes 20 to 24 minutes. A 2-inch thick cut runs 25 to 28 minutes.
These numbers assume a standard 1,500W to 1,700W basket-style air fryer that's been properly preheated.
If your machine runs closer to 1,400W, add 3 to 5 minutes. If it's a high-wattage unit pushing 1,800W, shave 2 to 3 minutes off and start checking early. The variation between models is significant enough that no single time recommendation works universally.
Here's a quick reference.
| Tenderloin Thickness | Temperature | Estimated Time | Pull Temp (Medium-Rare) |
|---|---|---|---|
| 1 inch (filet steaks) | 400°F | 14 to 18 minutes | 120°F to 122°F |
| 1.5 inches | 400°F | 20 to 24 minutes | 120°F to 122°F |
| 2 inches | 400°F | 25 to 28 minutes | 120°F to 122°F |
| 2.5 inches | 375°F | 30 to 35 minutes | 120°F to 122°F |
For anything over 2 inches thick, dropping the temperature to 375°F gives the center time to catch up without torching the exterior. It's the same principle as lowering the heat on a thick steak, just applied to a roast.
How to Tell When It's Done (Without Guessing)
An instant-read meat thermometer is the only reliable way to judge doneness on a tenderloin. Visual cues like crust color or firmness vary too much between air fryer models to trust on their own.
Insert the probe into the geometric center of the roast from one of the flat ends. This gives you a true center reading, which is what matters. Poking from the top can give you a reading from the outer third of the meat, which runs hotter than the core.
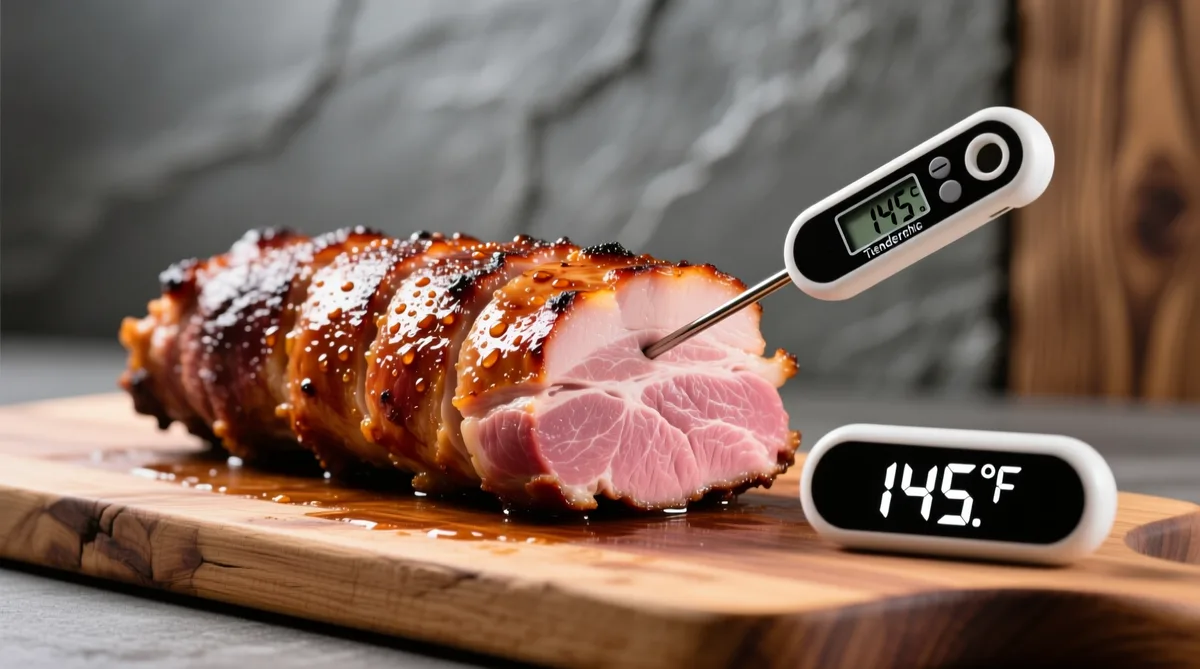
Image source: Bing (Web (fair-use with source credit))
The beef tenderloin doneness chart below maps internal temperatures to what you'll actually see when you slice into the roast.
| Internal Temp (at pull) | Doneness | Interior Color | Texture |
|---|---|---|---|
| 115°F | Rare | Deep red, cool center | Very soft, almost raw |
| 120°F to 125°F | Medium-Rare | Warm rosy pink throughout | Tender, yielding |
| 130°F to 135°F | Medium | Pink center, gray-brown edges | Slightly firm |
| 140°F to 145°F | Medium-Well | Slightly pink, mostly gray | Firm |
| 150°F+ | Well-Done | Fully gray-brown | Very firm, dry |
Most chefs and aggregate cooking reviews point to 120°F to 125°F as the ideal pull range for tenderloin. The carryover during the rest period brings it to 125°F to 130°F, which lands squarely in medium-rare territory. Going above 135°F on this cut is where you start losing the qualities that make tenderloin worth the price.
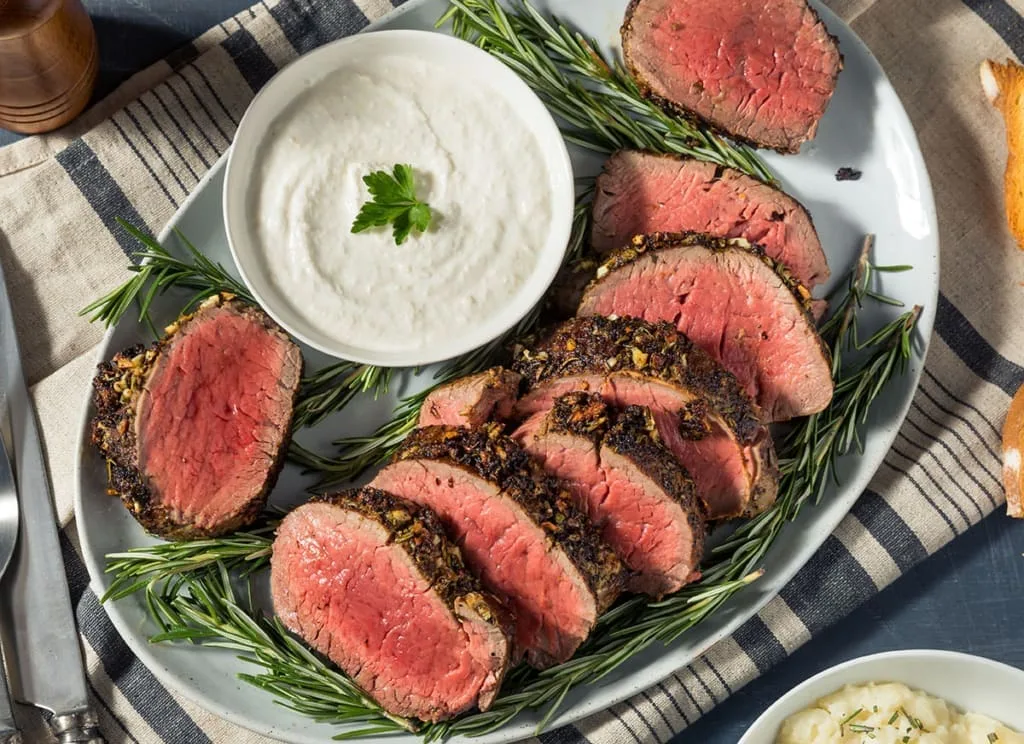
Image source: Bing (Web (fair-use with source credit))
If you don't have a thermometer, you're gambling with a premium cut. A basic instant-read model costs under $15 and pays for itself the first time it saves a tenderloin from overcooking. There's no substitute here.
Why Resting the Meat Changes Everything
Resting is not optional. It's the step that separates a juicy tenderloin from one that bleeds all over your cutting board the moment you slice it.
When meat cooks, heat drives moisture and juices toward the center of the roast. If you cut immediately, those concentrated juices spill out onto the board and the meat ends up dry. During the rest period, the muscle fibers gradually relax and reabsorb that moisture, distributing it back through the cross-section.
For a 1 to 2 pound tenderloin, rest 8 to 10 minutes tented loosely with foil. Don't wrap it tight, or the trapped steam softens the crust you just worked to build. The foil tent slows heat loss without creating a steam box.
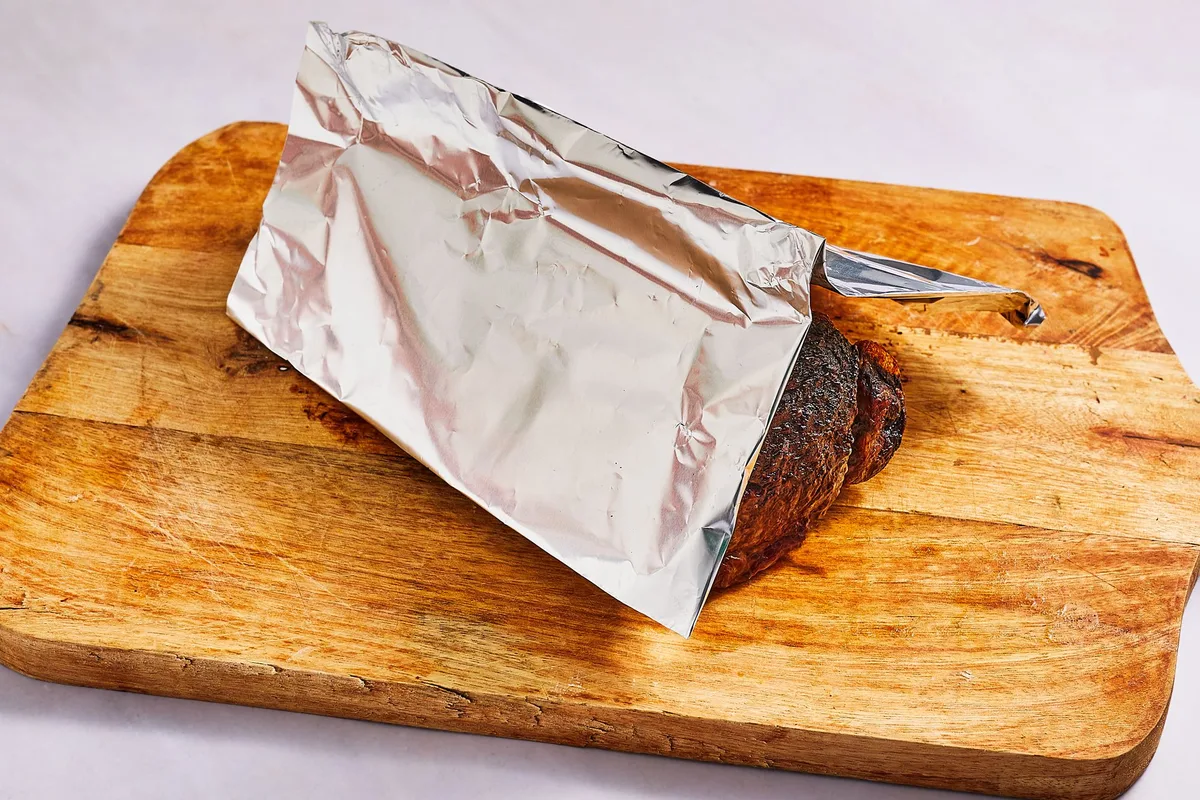
Image source: Bing (Web (fair-use with source credit))
The internal temperature will continue to rise 5 to 10 degrees during this window. That's why pulling at 120°F to 122°F gets you to a finished 125°F to 130°F after the rest. Skip the rest and you lose both temperature control and moisture retention.
Common Mistakes That Ruin Air Fryer Tenderloin
Most failures come down to a handful of preventable errors. Here's what goes wrong most often.
- Skipping the preheat. A cold basket means the meat sits in lukewarm air for the first few minutes, steaming instead of searing. Always preheat 3 to 5 minutes at your target temperature.
- Not patting the surface dry. Wet meat won't brown. Moisture on the surface has to evaporate before the Maillard reaction can start, and that delays crust formation by several minutes.
- Cooking straight from the fridge. A 40°F roast needs significantly more time to come up to temperature than one that's been sitting out 30 minutes. The exterior overcooks before the center catches up.
- Overcrowding the basket. If the tenderloin touches the sides or is wedged in tight, airflow gets blocked and you end up with uneven cooking and pale spots. Give it room on all sides.
- Relying on time instead of temperature. No two air fryers produce identical results. A recipe that says "22 minutes" might be perfect for one machine and raw in the center of another. The thermometer doesn't lie.
- Slicing too soon. Cutting before the rest period is the fastest way to dry out even a perfectly cooked tenderloin. Wait the full 8 to 10 minutes.
- Using the wrong oil. Extra virgin olive oil has a smoke point around 375°F, which means it starts smoking and breaking down at the 400°F cooking temperature. Use avocado oil or refined olive oil instead.
One more mistake worth calling out: buying a tenderloin that's too long for your basket. If the ends are curling up against the heating element, you'll get burnt tips and an undercooked middle. Trim the roast to fit or tie it into a compact cylinder with butcher's twine.
How Air Fryer Tenderloin Compares to Oven and Stovetop
Each method has trade-offs, and the best choice depends on what you value most.
Air fryer vs. conventional oven. The oven gives you more capacity for larger roasts, but it takes 45 to 60 minutes at 425°F to achieve what the air fryer does in 25. The air fryer also produces a noticeably better crust because of the concentrated airflow. The oven wins on volume and consistency for roasts over 3 pounds.
Air fryer vs. stovetop sear plus oven finish. The classic method involves searing in a cast iron skillet and finishing in the oven. This gives you the most control over the crust, but it uses two pans, creates more mess, and takes longer overall. The air fryer simplifies the process to one appliance with comparable results.
Air fryer vs. grill. A charcoal or gas grill adds smoky flavor that the air fryer can't replicate. But grilling a tenderloin evenly requires careful zone management and constant attention. The air fryer is more hands-off and consistent, especially for indoor cooking in winter.
| Method | Cook Time | Crust Quality | Ease | Best For |
|---|---|---|---|---|
| Air Fryer | 20 to 28 min | Excellent | High | Weeknight dinners, small roasts |
| Conventional Oven | 45 to 60 min | Good | Medium | Large roasts, batch cooking |
| Stovetop + Oven | 35 to 50 min | Best | Low | Special occasions, maximum control |
| Grill | 20 to 30 min | Very Good | Low | Outdoor cooking, smoky flavor |
The air fryer's real advantage is speed plus crust quality with minimal cleanup. If you're cooking for a weeknight and want something impressive without an hour of oven time, it's the most practical option. For a dinner party where you want absolute control over every variable, the stovetop-to-oven method still has the edge.
How to Adapt the Recipe for Your Specific Air Fryer
No two air fryers behave identically, and the variation matters more with a premium cut like tenderloin. Basket-style units from brands like Ninja and Cosori tend to run hotter at the top where the heating element sits. Toaster-oven-style models like the Instant Vortex spread heat more evenly but may take longer to build a crust.
If you're using a dual-basket model, cook the tenderloin in one basket and leave the other empty so airflow isn't restricted. For a full walkthrough on how different models handle roasting tasks, our best 8 qt air fryer with dual basket guide covers the units that manage whole roasts most effectively.
The key adjustments come down to three things.
- Wattage. A 1,400W machine needs 3 to 5 more minutes than a 1,700W unit at the same temperature. Start checking temp early and adjust from there.
- Basket size. If the tenderloin leaves less than an inch of clearance on each side, trim it or tie it narrower. Restricted airflow means pale, uneven browning.
- Preheat behavior. Some models beep when preheated, others don't. If yours lacks a preheat indicator, just run it empty at 400°F for 4 minutes before loading the meat.
Expert Tips for a Restaurant-Quality Crust
The difference between a good air fryer tenderloin and a great one comes down to a few small moves that most home cooks skip.
Salt 45 minutes ahead. Dry-brining with kosher salt nearly an hour before cooking seasons the meat deeply and draws the surface moisture out, which means faster browning once it hits the basket.
Use avocado oil, not butter, for the initial cook. Butter burns at 350°F. Avocado oil holds steady to 520°F. Save the butter for a brush-on during the last 5 minutes if you want that richness.
Don't move the roast. Resist the urge to flip or rotate it. Every time you open the basket, you lose heat and disrupt the crust forming on the top and sides. Trust the convection fan.
Finish with flaky salt. A light sprinkle of Maldon or similar flaky sea salt right after pulling the roast adds a subtle crunch and amplifies the beef flavor without making it taste salty.
Serving Suggestions and What Pairs Well
Beef tenderloin is rich and lean, so it benefits from sides that add acidity, texture, or a bit of fat to balance things out.
Classic pairings include roasted asparagus finished with Parmesan, a simple arugula salad with lemon vinaigrette, or garlic mashed potatoes. If you're already using the air fryer, you can roast vegetables in the basket alongside the tenderloin during the last 8 to 10 minutes. Just cut them small enough to cook through in that window.
For wine, a medium-bodied red like Pinot Noir or a young Cabernet Sauvignon complements the mild flavor of tenderloin without overpowering it. If you're cooking for a crowd, the best 9 quart air fryer for big family models give you enough capacity to roast a larger cut and side vegetables simultaneously.
Frequently Asked Questions
Can I cook a frozen tenderloin in the air fryer?
You can, but the results won't match a thawed roast. The exterior overcooks before the center thaws. For the best texture, thaw the tenderloin in the refrigerator for 24 hours before cooking.
What size tenderloin fits in a standard air fryer?
A 5-quart basket fits individual filet steaks or a trimmed 1-pound center-cut roast. For anything over 2 pounds, you'll want at least an 8-quart model.
Do I need to flip the tenderloin during cooking?
No. The circulating hot air in an air fryer cooks from all directions. Flipping disrupts crust formation and isn't necessary.
How do I prevent smoke from the air fryer?
Use a high smoke-point oil like avocado oil, and make sure excess fat is trimmed. If your model has a drip tray underneath, add a tablespoon of water to it before cooking to catch grease and reduce smoke.
Can I use this recipe for other cuts of beef?
The technique works for strip loin, ribeye roast, and tri-tip, but cooking times and temperatures will vary. Fattier cuts like ribeye may produce more smoke and need a lower temperature around 375°F.
Is air fryer tenderloin safe to eat at medium-rare?
The USDA recommends a minimum internal temperature of 145°F for whole cuts of beef with a 3-minute rest. However, whole-muscle cuts like tenderloin are considered safe at lower temperatures because any bacterial contamination is on the surface, which reaches pasteurization temperature well before the center does. Many food safety experts consider 125°F held for several minutes to be safe for intact whole cuts.
Final Thoughts
An air fryer beef tenderloin recipe is one of the best arguments for owning one of these machines beyond frozen snacks. You get a restaurant-quality crust, a perfectly rosy center, and a cook time that fits a weeknight. The keys are simple: preheat the unit, pat the meat dry, use a thermometer, and respect the rest period.
Get those four things right and you'll wonder why you ever bothered heating up the full oven for a single roast.