Many people wonder, “Is an air fryer hard to clean?” The answer is generally no, especially with consistent, simple maintenance. This guide breaks down the cleaning process, offering step-by-step instructions and practical tips to keep your air fryer spotless with minimal effort. By following these methods, you can ensure your appliance remains in top condition for delicious, healthier meals.
Is An Air Fryer Hard To Clean?
So, you’ve embraced the world of air frying and are enjoying crispy fries, perfectly cooked chicken, and so much more. That’s fantastic! Air fryers are amazing kitchen tools that offer a healthier way to enjoy your favorite foods. But a question often pops into the minds of new (and even some experienced) air fryer users: “Is an air fryer hard to clean?”
It’s a valid concern. After all, no one wants to spend more time scrubbing than cooking. The good news is that, for the most part, air fryers are **surprisingly easy to clean**, especially when compared to traditional deep fryers or even some oven-baked dishes. The key lies in understanding *how* and *when* to clean them.
In this comprehensive guide, we’ll demystify air fryer cleaning. You’ll learn exactly what steps to take, discover handy tips and tricks, and find out how to tackle those occasional stubborn messes. By the end, you’ll be equipped to keep your air fryer sparkling clean with minimal effort, ensuring it continues to deliver delicious results for years to come.
Key Takeaways
- Air fryers are generally not hard to clean when regular, simple maintenance is performed.
- Cleaning immediately after use prevents food residue from hardening, making the task much easier.
- Most air fryer baskets and trays are dishwasher-safe, simplifying the cleaning process significantly.
- Hand washing with warm, soapy water and a non-abrasive sponge is an effective alternative for delicate parts or if you prefer hand washing.
- Regularly cleaning the exterior and interior walls prevents grease buildup and keeps the appliance looking its best.
- Addressing stubborn residue might require soaking or using a baking soda paste for tougher jobs.
- Consistent cleaning habits are the most crucial factor in determining how difficult air fryer cleaning feels.
Understanding Air Fryer Cleaning Basics
Before we dive into the step-by-step process, let’s cover some fundamental principles of air fryer cleaning.
The primary reason air fryers are generally easy to clean is their design. Most models feature removable baskets and trays that are coated with non-stick materials. This coating is designed to release food easily, which also means it’s less likely to stick during cleaning.
The rapid air circulation that cooks your food can sometimes lead to grease splattering. This is normal. However, if left unaddressed, this grease can build up and become difficult to remove. This is where consistent cleaning habits come into play.
The Importance of Cleaning After Every Use
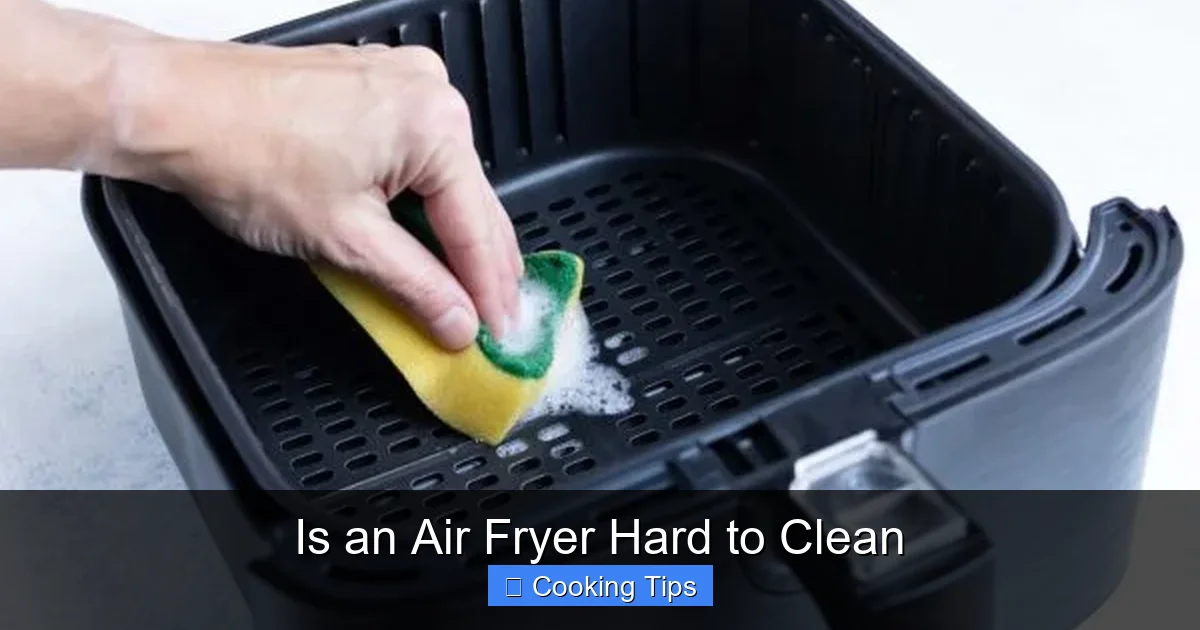
Visual guide about Is an Air Fryer Hard to Clean
Image source: evolvingtable.com
This is the golden rule of air fryer maintenance: **Clean it after you use it.**
It might sound obvious, but many people put off cleaning until the appliance looks visibly dirty. This is the biggest mistake you can make! Food residue, especially from fatty foods like bacon or How To Cook Bacon In My Ninja Air Fryer, can solidify and bake onto the surfaces if left to cool. Cleaning while the air fryer is still warm (but not hot!) makes a world of difference.
Think of it this way: cleaning a fresh spill is incredibly easy. Cleaning a spill that’s been sitting for days and has been through several cooking cycles is a chore. The same applies to your air fryer.
Step-by-Step Guide to Cleaning Your Air Fryer
Visual guide about Is an Air Fryer Hard to Clean
Image source: crowncleaners.org.uk
Let’s break down the cleaning process into simple, manageable steps. We’ll cover both the removable parts and the main unit.
Step 1: Unplug and Let it Cool
Safety first! Always ensure your air fryer is unplugged from the power outlet. Then, allow it to cool down completely. While a warm basket is easier to clean, a dangerously hot appliance is a hazard. Most air fryers cool down relatively quickly.
Step 2: Remove the Basket and Tray
Gently slide out the basket and any accompanying tray or drawer. These are the parts that come into direct contact with your food and will likely have the most residue.
Step 3: Cleaning the Basket and Tray (The Easiest Part!)
This is where the magic happens, and often, it’s not hard at all. You have a couple of excellent options here:
Option A: Dishwasher Duty
Many air fryer baskets and trays are **dishwasher-safe**. Check your user manual to confirm this. If yours is, simply place the basket and tray in your dishwasher with your other dishes. This is the absolute easiest way to clean them.
* Tip: If you’re unsure, look for markings on the underside of the basket or tray that indicate dishwasher safety.
Option B: Hand Washing
If your parts aren’t dishwasher-safe, or if you prefer hand washing, follow these sub-steps:
* H3: Gather Your Supplies: You’ll need warm water, a mild dish soap, and a soft sponge or cloth. Avoid abrasive scrubbers like steel wool, as they can damage the non-stick coating.
* H3: Soak (If Necessary): For lightly soiled parts, a quick wash is enough. If there’s stuck-on food, fill your sink with warm, soapy water and let the basket and tray soak for about 10-20 minutes. This will loosen most residues.
* H3: Wash and Rinse: Use your soft sponge or cloth with warm, soapy water to gently scrub away any remaining food particles. Pay attention to crevices and corners. Rinse thoroughly under running water until all soap residue is gone.
* H3: Dry Thoroughly: It’s important to dry the basket and tray completely before reassembling or storing them. You can let them air dry or use a clean kitchen towel.
Step 4: Cleaning the Interior of the Air Fryer
The inside of your air fryer, where the heating element and fan are located, also needs attention.
* H3: Wipe Down the Walls: Use a damp cloth or sponge (again, non-abrasive) to wipe down the interior walls of the air fryer. You might need a little dish soap on the sponge for greasy spots.
* H3: Address the Heating Element: The heating element is usually at the top. Be very careful not to get it excessively wet. You can often wipe around it with a damp cloth. If there are any loose food particles on the element itself, you might be able to gently brush them off with a soft brush (like a new paintbrush) once it’s completely cool and unplugged. Never use water directly on the heating element.
* H3: Clean the Drip Pan (If Applicable): Some air fryer models have a drip pan beneath the basket. If yours does, slide it out and clean it just like you would the main basket – either in the dishwasher or by hand with warm, soapy water.
Step 5: Cleaning the Exterior
Don’t forget the outside! A quick wipe-down will keep your appliance looking new.
* H3: Wipe with a Damp Cloth: Use a damp cloth with a little mild dish soap to wipe down the exterior surfaces, including the control panel.
* H3: Dry and Buff: Dry the exterior with a clean, soft towel. For stainless steel models, buffing with a dry microfiber cloth can prevent streaks.
Step 6: Reassemble and Store
Once all parts are clean and completely dry, reassemble your air fryer. Place the basket and tray back inside. You’re now ready for your next cooking adventure!
Tackling Stubborn Messes and Grease Buildup

Visual guide about Is an Air Fryer Hard to Clean
Image source: cdn.momsdish.com
While regular cleaning makes most messes a breeze, sometimes you encounter a particularly stubborn patch of burnt-on food or a thick layer of grease. Here’s how to handle those tougher jobs:
1. The Soaking Method (Extended)
For baked-on gunk, a longer soak can be your best friend.
* H3: For Removable Parts: If your basket or tray has really tough residue, soak them in warm, soapy water for 30 minutes to an hour. You can even add a tablespoon of baking soda to the soaking water, which helps break down grease and grime.
* H3: For the Interior (Carefully): If there’s a stubborn spot inside the main unit, you can try placing a wet, soapy paper towel or cloth inside the cool, unplugged appliance for about 15-30 minutes. This can help loosen grime, which you can then wipe away. Be extremely careful not to let water drip onto the heating element or any electrical components.
2. Baking Soda Paste
Baking soda is a fantastic natural cleaner and mild abrasive.
* H3: Make the Paste: Mix baking soda with a small amount of water to create a thick paste.
* H3: Apply and Let Sit: Apply this paste to the stubborn areas on the basket, tray, or interior walls. Let it sit for 15-30 minutes.
* H3: Scrub and Rinse: Gently scrub the paste with a soft sponge or cloth. Rinse thoroughly with warm water.
3. Vinegar for Degreasing
White vinegar is excellent for cutting through grease.
* H3: Dilute Vinegar: Mix equal parts white vinegar and water in a spray bottle.
* H3: Spray and Wipe: Spray this mixture onto greasy areas inside or outside your air fryer. Let it sit for a few minutes, then wipe clean with a damp cloth.
* H3: Steam Cleaning (Advanced): For a deeper clean of the interior, you can put a cup of water with a splash of vinegar in the air fryer basket. Run the air fryer at a moderate temperature (e.g., 300°F or 150°C) for about 5-10 minutes. The steam will loosen grease and grime. Once it cools, wipe the interior clean with a damp cloth. *Always unplug and cool the appliance before wiping.*
What NOT to Do When Cleaning Your Air Fryer
Just as important as knowing what to do is knowing what to avoid.
* NEVER immerse the main unit (the part with the motor and heating element) in water or any liquid. This can cause irreparable damage.
* AVOID abrasive cleaners, steel wool, or scouring pads. These will scratch and damage the non-stick coating on your basket and tray, making them less effective and harder to clean in the future.
* DON’T use harsh chemicals or oven cleaners unless specifically recommended by your air fryer’s manufacturer. They can be too aggressive and leave harmful residues.
* DO NOT try to force parts if they are stuck. Always ensure the appliance is cool and all components are properly positioned before attempting to remove or reinsert them.
Troubleshooting Common Air Fryer Cleaning Issues
*
The non-stick coating is peeling or scratched.
This is usually a sign that abrasive cleaning tools have been used in the past or that the coating has reached the end of its lifespan. You may need to replace the basket or tray if it’s significantly damaged. Always use non-abrasive methods going forward.
*
There’s a persistent smoky smell.
This is often due to accumulated grease or food particles on the heating element or inside the main unit. Perform a thorough cleaning, paying special attention to the area around the heating element. A steam clean with vinegar and water can also help eliminate odors.
*
Food is sticking despite the non-stick coating.
This can happen if the non-stick coating is wearing out or if you’re not using enough oil. Ensure you’re cleaning thoroughly after each use. For some foods, a light spritz of oil can prevent sticking and make cleanup even easier.
Maintaining Your Air Fryer for Longevity
Cleaning is crucial for longevity, but a few other habits help too:
* Preheating appropriately: While not directly cleaning, it can affect how food cooks and thus how much residue is left.
* Using parchment paper or liners: For particularly messy foods, consider using air fryer parchment paper liners or foil to catch drips and debris. This makes cleanup incredibly fast. Just ensure the liner doesn’t block airflow.
* Avoiding overcrowding: When you overcrowd the basket, food doesn’t cook evenly, and it can lead to more grease splatter and stuck-on bits. Try cooking in batches if needed, similar to how you might prepare Tyson Chicken Nuggets or How To Cook A Biscuit In An Air Fryer.
Conclusion: Air Fryer Cleaning is a Breeze!
So, to answer the burning question: “Is an air fryer hard to clean?” The definitive answer is **no, not at all, if you approach it correctly.**
By following the simple steps outlined in this guide – primarily cleaning the removable parts after each use, either in the dishwasher or by hand, and giving the interior and exterior a quick wipe-down – you’ll find that air fryer maintenance is far from a chore. Occasional tougher jobs can be easily handled with natural cleaning agents like baking soda and vinegar.
Consistent, simple cleaning habits are the secret ingredient to keeping your air fryer in pristine condition. This not only ensures your food always cooks to perfection but also extends the lifespan of your appliance. So, go ahead, enjoy all the delicious, crispy creations your air fryer can make, and rest easy knowing that keeping it clean is a straightforward part of the process.