Discover how to cook chicken liver in your air fryer for a quick and delicious meal. This method ensures a perfectly cooked liver with a crispy exterior and tender interior. Follow our easy steps to achieve fantastic results every time!
Are you looking for a quick, healthy, and incredibly delicious way to prepare chicken liver? Forget soggy frying pans and long simmering times. Your air fryer is about to become your new best friend for cooking this nutrient-packed powerhouse! In this comprehensive guide, we’ll walk you through everything you need to know to cook perfect chicken liver in your air fryer. We’ll cover preparation, cooking times, temperatures, and even some mouth-watering flavor ideas. Get ready to transform humble chicken liver into a crispy, tender, and utterly satisfying dish that even picky eaters might love.
Chicken liver is often overlooked, but it’s packed with essential vitamins and minerals, including iron and vitamin B12. It’s also surprisingly versatile. Whether you’re a seasoned cook or just starting, this guide will make cooking chicken liver in an air fryer a breeze. We’ll ensure you get a fantastic result every single time. Let’s dive in and unlock the magic of air-fried chicken liver!
Key Takeaways
- Effortless Cooking: Air frying chicken liver is a fast and easy method, perfect for busy weeknights.
- Crispy Yet Tender: Achieve a delightful texture contrast with a golden-brown exterior and a juicy, tender inside.
- Customizable Flavors: Easily adapt recipes by adding your favorite seasonings and marinades.
- Healthy Option: Air frying uses less oil than traditional frying, making it a healthier choice.
- Quick Preparation: Minimal prep time is needed, allowing you to enjoy your meal sooner.
- Versatile Dish: Air-fried chicken liver can be served as an appetizer, a side, or as part of a main meal.
Why Air Fry Chicken Liver?
Before we get to the how-to, let’s talk about why using your air fryer for chicken liver is such a brilliant idea.
Air fryers circulate hot air around your food, creating a convection effect. This means food gets cooked evenly and develops a lovely crispness without needing to be submerged in oil. For chicken liver, this translates to:
- Crispy Exterior: The hot air helps to achieve a beautifully golden-brown and slightly crispy coating.
- Tender Interior: The rapid cooking prevents the liver from becoming tough or rubbery, keeping it moist and tender.
- Healthier Choice: Compared to deep-frying or pan-frying, air frying requires significantly less oil, making it a much healthier option.
- Speed: Air frying is remarkably fast. You can have perfectly cooked chicken liver ready in under 15 minutes.
- Less Mess: Say goodbye to oil splatters all over your stovetop! Air frying is generally a cleaner cooking method.
What You’ll Need
Gather your ingredients and tools, and you’ll be on your way to delicious air-fried chicken liver in no time.
Ingredients:
- 1 pound fresh chicken livers
- 1-2 tablespoons olive oil (or other cooking oil like avocado or vegetable oil)
- Salt, to taste
- Black pepper, to taste
Optional Seasonings:
- Garlic powder
- Onion powder
- Paprika
- Cayenne pepper (for a little heat)
- Dried herbs (like thyme, rosemary, or parsley)
- Your favorite spice blends
Equipment:
- Air fryer
- Medium-sized bowl
- Tongs
- Measuring spoons
Step-by-Step Guide to Air Frying Chicken Liver
Now for the fun part! Follow these simple steps for perfectly air-fried chicken liver.
Step 1: Prepare the Chicken Livers
Proper preparation is key to getting the best texture and flavor.
First, take your chicken livers out of their packaging. You’ll want to rinse them gently under cold running water. This helps to wash away any residual blood or impurities. After rinsing, pat them completely dry with paper towels. This is a crucial step because moisture is the enemy of crispiness! The drier the surface, the better the oil and seasonings will adhere, and the crispier the liver will become.

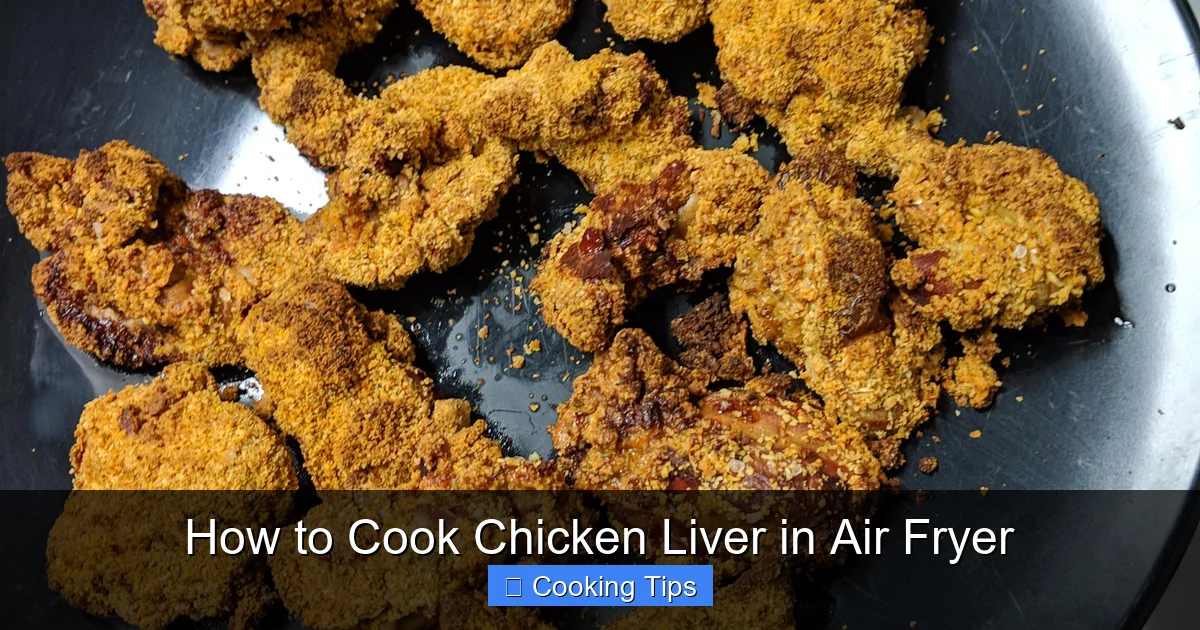
Visual guide about How to Cook Chicken Liver in Air Fryer
Image source: airfryeryummyrecipes.com
Visual guide about How to Cook Chicken Liver in Air Fryer
Image source: i.redd.it
Next, inspect the livers for any connective tissues, membranes, or green parts (these are from the gallbladder). You can easily trim these away with a small, sharp knife or kitchen shears. Removing these tougher bits ensures a more pleasant, tender eating experience.
Step 2: Season the Livers
This is where you can start to build flavor. Don’t be shy with the seasonings!
Place the prepared chicken livers in a medium-sized bowl. Drizzle them with 1-2 tablespoons of olive oil. Make sure to coat each liver lightly. The oil helps the seasonings stick and promotes browning and crisping in the air fryer.
Now, sprinkle generously with salt and black pepper. This is your basic foundation for flavor. If you’re feeling adventurous, this is the time to add your optional seasonings. Think about what flavors you enjoy. A classic combination is garlic powder and onion powder. For a little kick, add some paprika or cayenne pepper. For a more robust flavor, dried herbs like thyme or rosemary work wonderfully. You can also use your favorite pre-made spice blends. Toss everything together gently with your hands or a spoon until the livers are evenly coated with oil and seasonings.
Step 3: Preheat Your Air Fryer
Preheating is essential for even cooking and achieving that desired crispy texture right from the start.
Set your air fryer to the recommended temperature for cooking chicken liver, which is typically around 375°F (190°C). Let it preheat for about 3-5 minutes. This ensures the air fryer basket is hot when you add the food, giving your liver a head start on crisping up.
Step 4: Arrange Livers in the Air Fryer Basket
Don’t overcrowd the basket! This is a common mistake that leads to steamed rather than crispy food.
Carefully place the seasoned chicken livers in a single layer in the preheated air fryer basket. It’s important that the livers are not overlapping. If you have a large batch, you’ll likely need to cook them in two or more batches. Overcrowding will prevent the hot air from circulating properly around each piece, resulting in uneven cooking and less crispiness.
Step 5: Air Fry the Livers
The magic happens here. Keep an eye on them as cooking times can vary.
Place the basket back into the air fryer. Set the timer for 8-12 minutes. The exact cooking time will depend on the size of your livers and your specific air fryer model. For the best results, you’ll want to shake the basket or flip the livers halfway through the cooking time. This usually means around the 4-6 minute mark. Shaking the basket ensures all sides get exposed to the hot air evenly.
As the livers cook, you’ll see them puff up slightly and turn a beautiful golden brown. The goal is for them to be slightly firm to the touch but still have a little give. The inside should be opaque but not dry.
Step 6: Check for Doneness
It’s important to cook chicken liver thoroughly, but not overcook it.
After the cooking time has elapsed, use a fork or tongs to remove a piece from the basket. Cut into it to check the internal temperature and color. The liver should be cooked through, with no pinkness in the center. The internal temperature should reach at least 165°F (74°C). However, many people prefer chicken liver cooked a little less than fully done for a softer, more delicate texture. Aim for an internal temperature between 145°F (63°C) and 160°F (71°C) for a tender, slightly pink center. Be careful not to overcook, as this will result in dry and tough livers.
Step 7: Rest and Serve
Give them a moment to rest before diving in.
Once cooked to your liking, carefully remove the chicken livers from the air fryer. Transfer them to a clean plate. Let them rest for just a minute or two before serving. This allows the juices to redistribute, ensuring maximum tenderness and flavor.
Serve your perfectly air-fried chicken liver hot! They are delicious on their own, or you can serve them with your favorite dipping sauce, a squeeze of lemon, or alongside some fresh greens. They make a fantastic appetizer or a quick and satisfying meal.
Tips for Perfect Air-Fried Chicken Liver
Elevate your air-fried chicken liver game with these handy tips.
- Don’t Skip Drying: I can’t stress this enough. Patting the livers very dry is critical for achieving a crispy exterior.
- Single Layer is Key: Always cook in a single layer. If you have too many, cook in batches. This is true for many air fryer recipes, like cooking boneless chicken wings in air fryer, where overcrowding leads to steaming.
- Shake or Flip: Remember to shake the basket or flip the livers halfway through cooking. This ensures even browning and crisping.
- Adjust Cooking Time: Air fryer models vary. Get to know your air fryer. The first time you make this, keep a close eye on them towards the end of the cooking time.
- Experiment with Marinades: For extra flavor, you can marinate chicken livers for 30 minutes to a few hours before cooking. Soy sauce, garlic, ginger, and a touch of honey make a great marinade. Ensure you pat them dry after marinating before seasoning and air frying.
- Don’t Overcook: Chicken liver cooks very quickly. Overcooking is the fastest way to ruin its texture. Err on the side of caution and check for doneness a minute or two early.
- Serve Immediately: Chicken liver is best enjoyed fresh out of the air fryer when it’s at its crispiest and most tender.
Flavor Variations to Try
Get creative with your chicken liver! Here are some delicious flavor combinations:
- Spicy Garlic: Season with garlic powder, onion powder, smoked paprika, and a pinch of cayenne pepper.
- Herbed Lemon: Toss with dried thyme, rosemary, a little lemon zest, salt, and pepper. Serve with a fresh lemon wedge.
- Asian-Inspired: Marinate in a mixture of soy sauce, sesame oil, grated ginger, and garlic. Air fry, then toss with sesame seeds and chopped green onions.
- Smoky BBQ: Coat with your favorite BBQ rub before air frying. Serve with extra BBQ sauce for dipping. This is similar to how you might prepare bbq ribs in air fryer, focusing on those smoky, savory notes.
- Italian Style: Season with Italian herbs, garlic powder, and a sprinkle of Parmesan cheese after cooking.
Troubleshooting Common Issues
Even with the best guides, sometimes things don’t go perfectly. Here’s how to fix common air fryer chicken liver problems.
Problem: Livers are soggy, not crispy.
Cause: Likely due to not drying them thoroughly enough, overcrowding the basket, or not preheating the air fryer.
Solution: Ensure livers are bone dry. Cook in a single layer, possibly in batches. Make sure your air fryer is fully preheated before adding the food.

Visual guide about How to Cook Chicken Liver in Air Fryer
Image source: airfryerchickenrecipes.com
Problem: Livers are tough or rubbery.
Cause: Overcooking is the most common culprit.
Solution: Reduce the cooking time. Start checking for doneness a few minutes earlier than the recipe suggests. Aim for that slightly tender, not fully firm texture.
Problem: Livers are burnt on the outside but raw inside.
Cause: Air fryer temperature might be too high, or the pieces are too large.
Solution: Reduce the temperature by 10-15°F (about 5-8°C). Ensure livers are cut into relatively uniform sizes if you’re dealing with very large ones.
Conclusion
You’ve now learned how to master the art of cooking chicken liver in your air fryer! This simple, fast, and healthy method unlocks a world of flavor and texture that you might have never experienced before. From preparation to the final crispy bite, each step is designed to give you consistently delicious results.
Whether you’re looking for a quick appetizer, a unique side dish, or a nutrient-rich part of your meal, air-fried chicken liver is an excellent choice. Experiment with the seasonings and flavor profiles to find your personal favorite. So, fire up that air fryer, gather your ingredients, and get ready to impress yourself and anyone lucky enough to share this delightful dish. Happy air frying!