Unlock perfectly crispy and juicy chicken legs and thighs with your air fryer! This guide provides simple, step-by-step instructions to achieve restaurant-quality results at home. Learn about seasoning, cooking times, and tips for foolproof chicken every time you use your air fryer.
Welcome to your ultimate guide on how to cook chicken legs and thighs in the air fryer! If you’re looking for a way to get incredibly crispy skin and unbelievably juicy meat with minimal effort and less oil, you’ve come to the right place. The air fryer is a game-changer for cooking chicken, transforming humble chicken pieces into a culinary delight. Forget soggy skin or dry, overcooked meat. With these simple steps and practical tips, you’ll be air-frying chicken legs and thighs like a pro in no time.
We’ll cover everything from selecting your chicken and preparing it with delicious marinades or rubs, to finding the perfect cooking time and temperature for consistent, mouthwatering results. Whether you’re a beginner air fryer user or looking to perfect your technique, this guide will equip you with the knowledge to create a delicious meal that’s perfect for weeknight dinners, game days, or any occasion. Get ready to impress yourself and your family with the best air-fried chicken legs and thighs you’ve ever tasted!
Key Takeaways
- Perfectly Crispy Skin: Achieve golden-brown, delightfully crispy skin without deep frying.
- Juicy & Tender Meat: The air fryer locks in moisture, ensuring your chicken is incredibly tender and flavorful.
- Simple Seasoning: Learn basic and customizable seasoning techniques for delicious results.
- Quick & Easy: Air frying is significantly faster than traditional oven methods for cooking chicken pieces.
- Healthier Option: Enjoy your favorite chicken parts with less oil and fat.
- Versatile Cooking: This method works for both bone-in and boneless, skin-on or skinless chicken legs and thighs.
Why Air Fry Chicken Legs and Thighs?
Before we dive into the how-to, let’s talk about why the air fryer is such an excellent choice for cooking chicken legs and thighs.
Speed: Air fryers circulate hot air rapidly, meaning your chicken cooks much faster than in a conventional oven.
Crispiness: The high-speed air circulation creates a convection effect that crisps up the skin beautifully, giving you that satisfying crunch.
Juiciness: While it sounds counterintuitive, the quick cooking time in an air fryer helps to seal in the juices, resulting in tender, moist meat.
Healthier: You can achieve a wonderfully crispy texture with just a small amount of oil, making it a much healthier alternative to deep frying.
Ease of Use: Most air fryers are incredibly user-friendly, making them accessible for cooks of all skill levels.
Choosing Your Chicken
The first step to delicious air-fried chicken is choosing the right cuts. Chicken legs (drumsticks) and thighs are ideal because they have a higher fat content, which helps keep them moist and flavorful during the cooking process.
Legs (Drumsticks): These are the classic choice, known for their easy-to-eat shape and tender meat.

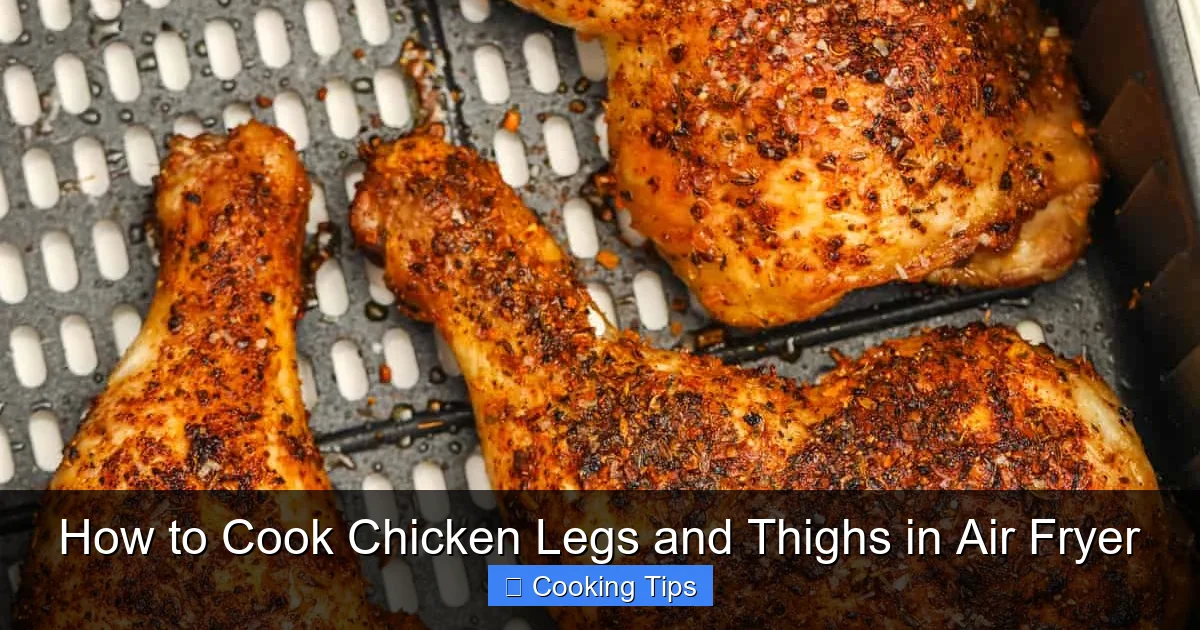
Visual guide about How to Cook Chicken Legs and Thighs in Air Fryer
Image source: wellplated.com
Thighs: Thighs are often more flavorful and juicier than drumsticks due to their higher fat content. They can be bone-in, skin-on, boneless, skin-on, or boneless, skinless.
For the crispiest skin, always opt for bone-in, skin-on pieces. If you’re aiming for a lower-fat option or a quicker cooking time, boneless, skinless thighs are a good choice, though they won’t achieve the same level of crispiness. For this guide, we’ll primarily focus on bone-in, skin-on chicken legs and thighs, as they yield the most impressive results in the air fryer. If you’re specifically interested in bone-in thighs, our guide on How To Cook Bone In Chicken Thighs In Air Fryer offers more tailored advice.
Preparation is Key: Seasoning Your Chicken
The way you season your chicken is crucial for flavor. You have two main approaches: dry rubs or marinades.
Dry Rubs
Dry rubs are fantastic for creating a flavorful crust and crispy skin. You can use pre-made spice blends or create your own.
Visual guide about How to Cook Chicken Legs and Thighs in Air Fryer
Image source: spendwithpennies.com
- Basic Salt & Pepper: A simple yet effective starting point.
- Smoked Paprika Rub: Smoked paprika, garlic powder, onion powder, salt, and black pepper.
- Herbs & Spices: Thyme, rosemary, oregano, cumin, chili powder, and cayenne pepper can add a wonderful depth of flavor.
- Sweet & Savory: Brown sugar, salt, paprika, garlic powder, and a pinch of cayenne pepper for a hint of sweetness and heat.
Tip: For the best adhesion, lightly pat your chicken dry with paper towels before applying any rubs. This also helps the skin crisp up better.
Marinades
Marinades add moisture and flavor deep into the meat. They are particularly good for boneless, skinless cuts, but can also be used for bone-in pieces.
- Lemon Herb Marinade: Olive oil, lemon juice, minced garlic, fresh rosemary, thyme, salt, and pepper.
- BBQ Marinade: Your favorite BBQ sauce with a splash of Worcestershire sauce and a bit of garlic powder.
- Asian-Inspired Marinade: Soy sauce, ginger, garlic, honey or maple syrup, and a dash of sesame oil.
Tip: Marinate chicken for at least 30 minutes, or up to 4 hours in the refrigerator. Avoid marinating for too long with acidic ingredients like lemon juice, as it can make the meat mushy.
No matter which method you choose, ensure the chicken is evenly coated. For extra crispy skin, a light coating of oil (about 1-2 teaspoons per pound of chicken) over your rub or before your marinade helps conduct heat and promotes browning. Olive oil, avocado oil, or vegetable oil work well.
Prepping Your Air Fryer
Before you even think about adding chicken, make sure your air fryer is ready to go.
Preheating Your Air Fryer
Preheating is an essential step for achieving perfectly cooked and crispy food. It ensures that the chicken starts cooking immediately and evenly upon entering the basket.

Visual guide about How to Cook Chicken Legs and Thighs in Air Fryer
Image source: i0.wp.com
How to Preheat:
- Set your air fryer to the desired temperature (usually 375°F or 190°C for chicken pieces).
- Let it run for about 3-5 minutes. Some air fryers have a preheat setting, while others you just set the temperature and time.
Why Preheat? This creates a hot environment that mimics a deep fryer, quickly searing the outside of the chicken and helping to develop that desirable crispy skin.
Arranging the Chicken in the Basket
Proper arrangement is crucial for air circulation, which is key to crispiness.
- Don’t Overcrowd: This is the golden rule of air frying. If you cram too much food into the basket, the hot air won’t be able to circulate effectively. This leads to uneven cooking, soggy results, and longer cooking times. You might need to cook in batches depending on the size of your air fryer and the amount of chicken.
- Single Layer: Place the chicken pieces in a single layer in the air fryer basket. Make sure there’s space between each piece.
- Skin Side Up (Initially): For the crispiest skin, start with the skin side up. You’ll flip them later.
The Cooking Process: Step-by-Step
Now that your chicken is seasoned and your air fryer is preheated, let’s get cooking!
Step 1: Season the Chicken
Pat the chicken pieces thoroughly dry with paper towels. This is a crucial step for crispy skin.
Apply your chosen dry rub or marinade, ensuring all sides are well-coated. If using a rub, you can optionally toss the chicken with 1-2 teaspoons of oil to help the rub adhere and promote browning.
Step 2: Preheat Your Air Fryer
Preheat your air fryer to 375°F (190°C) for 3-5 minutes.
Step 3: Arrange Chicken in the Basket
Place the seasoned chicken pieces in a single layer in the preheated air fryer basket. Ensure there is space between each piece for proper air circulation. Do not overcrowd.
Step 4: Air Fry the Chicken
Start by air frying for 15 minutes.
Step 5: Flip and Continue Cooking
After 15 minutes, open the air fryer and carefully flip each chicken piece. This ensures even browning and crisping on all sides.
Continue air frying for another 10-15 minutes. The total cooking time will depend on the size of your chicken pieces and your specific air fryer model.
Step 6: Check for Doneness
The chicken is done when it reaches an internal temperature of 165°F (74°C) when a meat thermometer is inserted into the thickest part of the thigh, without touching the bone. The juices should run clear.
The skin should be golden brown and crispy.
If the skin is browning too quickly: You can loosely tent the chicken with foil for the remaining cooking time.
If the chicken isn’t quite done: Return it to the air fryer for additional 2-5 minute increments until it reaches the desired temperature.
Step 7: Rest the Chicken
Once cooked, remove the chicken from the air fryer and let it rest for 5-10 minutes on a clean plate or cutting board. This allows the juices to redistribute throughout the meat, making it even more tender and flavorful.
Cooking Times and Temperatures: A General Guide
While the steps above provide a solid framework, cooking times can vary. Here’s a general guideline:
Bone-in, Skin-on Chicken Legs (Drumsticks)
- Temperature: 375°F (190°C)
- Time: 20-25 minutes total, flipping halfway through.
Bone-in, Skin-on Chicken Thighs
- Temperature: 375°F (190°C)
- Time: 22-28 minutes total, flipping halfway through. If they are larger thighs, they might take a bit longer. Our guide on how to cook bone-in chicken thighs in an air fryer has more details.
Boneless, Skinless Chicken Thighs
- Temperature: 380°F (195°C)
- Time: 16-20 minutes total, flipping halfway through. These cook faster as there’s no bone to conduct heat and no skin to crisp.
Boneless, Skinless Chicken Legs (if you can find them)
- Temperature: 380°F (195°C)
- Time: 15-18 minutes total, flipping halfway through.
Always use a meat thermometer to ensure accuracy. This is the most reliable way to know your chicken is safely cooked.
Tips for Extra Crispy Skin
Who doesn’t love perfectly crispy chicken skin? Here are some extra tips to achieve that coveted crunch:
- Dry, Dry, Dry: I can’t stress this enough. Patting the chicken completely dry is paramount. Moisture is the enemy of crispiness.
- Don’t Skip the Oil: Even if you’re using a rub, a light coating of oil (1-2 teaspoons per pound) helps the skin crisp up beautifully.
- Baking Soda Trick: For an extra crispy skin, add about 1/2 teaspoon of baking soda to your dry rub per pound of chicken. It helps to break down the skin proteins, making it extra crisp. Make sure to rinse and pat dry very thoroughly if using this method, or ensure it’s well mixed into your rub.
- High Heat: Starting at a good temperature (around 375-400°F or 190-200°C) helps to render the fat and crisp the skin quickly.
- Air Circulation is King: Do not overcrowd the basket! This is the most common mistake people make, leading to steamed rather than fried chicken.
- Finish with a Blast of Heat: If your chicken is cooked through but the skin isn’t as crispy as you’d like, crank the air fryer up to 400°F (200°C) for the last 2-3 minutes. Keep a close eye on it to prevent burning.
Troubleshooting Common Issues
Even with the best instructions, you might run into a few hiccups. Here’s how to troubleshoot:
Problem: Chicken is Dry
Cause: Overcooked, too lean a cut, or not enough fat.
Solution: Use a meat thermometer to avoid overcooking. Opt for bone-in, skin-on cuts. Marinating boneless, skinless cuts can also help. Next time, slightly reduce the cooking time.
Problem: Skin is Soggy
Cause: Overcrowded basket, not dried properly, or not enough cooking time at sufficient heat.
Solution: Cook in batches, ensuring space between pieces. Pat the chicken thoroughly dry before seasoning. Ensure you’re reaching the right temperature and cooking for the recommended time.
Problem: Chicken is Unevenly Cooked
Cause: Overcrowded basket, air fryer not preheated, or not flipping halfway through.
Solution: Follow the single-layer rule in the basket. Always preheat your air fryer. Make sure to flip the chicken halfway through the cooking time for even browning.
Problem: Chicken is Burning on the Outside but Not Cooked Inside
Cause: Temperature too high, or chicken pieces are too small relative to the cooking time.
Solution: Reduce the air fryer temperature by about 10-15°F (5-8°C). If using very small pieces, check for doneness earlier. If pieces are significantly different sizes, cook larger ones first or separate them.
Serving Your Air Fryer Chicken
Once your chicken is perfectly cooked and rested, it’s ready to be enjoyed! Air fryer chicken legs and thighs are incredibly versatile.
Classic Sides: Serve with mashed potatoes, mac and cheese, coleslaw, or a fresh green salad.
BBQ Style: Brush with your favorite BBQ sauce during the last few minutes of cooking or toss with sauce after it’s done.
Spicy Kick: Add a pinch of cayenne pepper to your rub or serve with a spicy dipping sauce.
Kid-Friendly: These are a hit with kids! Serve as is or with some ketchup.
For more ideas on what to cook in your air fryer, consider exploring recipes like air fryer chicken wings or even a whole roast chicken. The possibilities are endless!
Conclusion
You’ve now mastered the art of cooking chicken legs and thighs in the air fryer! By following these simple steps, you can consistently achieve deliciously crispy skin and incredibly juicy, tender meat. The air fryer offers a faster, healthier, and often more flavorful alternative to traditional cooking methods for these beloved chicken cuts.
Remember the key principles: proper drying, effective seasoning, preheating your air fryer, not overcrowding the basket, and checking for doneness with a thermometer. With practice, you’ll find your perfect timing and seasoning combinations. So go ahead, experiment with different flavors, and enjoy the amazing results. Happy air frying!