Learn how to make delicious, crispy chicken katsu in your air fryer with this comprehensive guide. We’ll walk you through every step, from preparing the chicken to achieving that perfect golden-brown coating. Enjoy a healthier, yet incredibly satisfying, version of this Japanese favorite right at home!
Craving that irresistible crunch of golden-brown chicken katsu but want to skip the deep-frying mess? You’re in luck! Making restaurant-quality chicken katsu at home is surprisingly easy, especially with the magic of your air fryer. Forget about splattering oil and the heavy feeling afterward; your air fryer is about to become your new best friend for this Japanese classic.
In this guide, we’ll take you through everything you need to know to cook perfect chicken katsu in your air fryer. We’ll cover selecting the right chicken, preparing it for that signature crispy coating, and the precise air-frying techniques to get that ideal texture and golden hue. By the end, you’ll be whipping up this delightful dish with confidence, ready to impress yourself and your loved ones.
Let’s get started on your journey to air-fried chicken katsu perfection!
- Perfectly Crispy Coating: Achieve a satisfying crunch similar to deep-frying, but with much less oil.
- Healthier Alternative: Enjoy classic chicken katsu with significantly reduced fat content.
- Quick and Easy Preparation: Simple steps make this recipe accessible for cooks of all skill levels.
- Customizable Flavor: Adjust seasonings to your personal preference for a unique twist.
- Versatile Serving Options: Serve your katsu with rice, salad, or your favorite dipping sauces for a complete meal.
- Efficient Cooking: The air fryer cooks chicken katsu quickly and evenly, saving you time.
What is Chicken Katsu?
Before we dive into the cooking process, let’s briefly touch upon what chicken katsu is. Katsu, in Japanese cuisine, refers to a breaded and deep-fried cutlet. Chicken katsu is made with boneless, skinless chicken pieces, typically breast or thigh, that are pounded thin, coated in panko breadcrumbs, and then fried until golden and crunchy. It’s a beloved dish often served with a rich, savory katsu sauce, steamed rice, and shredded cabbage. The air fryer offers a fantastic way to achieve a similar crispy texture without submerging the chicken in oil.
Ingredients You’ll Need
Gathering your ingredients is the first crucial step to success. Here’s what you’ll typically need for delicious air fryer chicken katsu:
- Chicken: 2 boneless, skinless chicken breasts (about 1 to 1.5 pounds total) or boneless, skinless chicken thighs.
- Flour: 1/2 cup all-purpose flour.
- Eggs: 2 large eggs, beaten.
- Panko Breadcrumbs: 1.5 cups Panko breadcrumbs. Panko is key for that extra crispy texture.
- Salt: 1/2 teaspoon, or to taste.
- Black Pepper: 1/4 teaspoon, or to taste.
- Oil Spray: Olive oil or cooking spray (avocado oil or canola oil are also good choices).
Optional seasonings for the flour mixture:
- Garlic Powder: 1/2 teaspoon.
- Onion Powder: 1/2 teaspoon.
- Paprika: 1/4 teaspoon for a hint of color and subtle flavor.
Equipment You’ll Need
You won’t need much specialized equipment, but a few things will make the process smoother:
- Air Fryer: The star of the show!
- Cutting Board and Knife: For preparing the chicken.
- Meat Mallet or Rolling Pin: To pound the chicken thin.
- Three Shallow Bowls or Plates: For the flour, egg wash, and panko.
- Tongs: For handling the chicken.
- Wire Rack: Optional, for resting the cooked katsu.
Step-by-Step Guide to Air Fryer Chicken Katsu
Now, let’s get down to the fun part – cooking! Follow these steps carefully for perfectly crispy chicken katsu.
Step 1: Prepare the Chicken
This is where we get the chicken ready for its crispy coating.
Pounding the Chicken Thin
Place one chicken breast on a cutting board. If it’s very thick, you can slice it horizontally to create two thinner cutlets, or simply pound it to an even thickness. Cover the chicken breast with a piece of plastic wrap or place it inside a resealable plastic bag. Using the flat side of a meat mallet or a rolling pin, gently but firmly pound the chicken to an even thickness of about 1/2 inch. This ensures even cooking and a more tender result. Repeat with the other chicken breast.

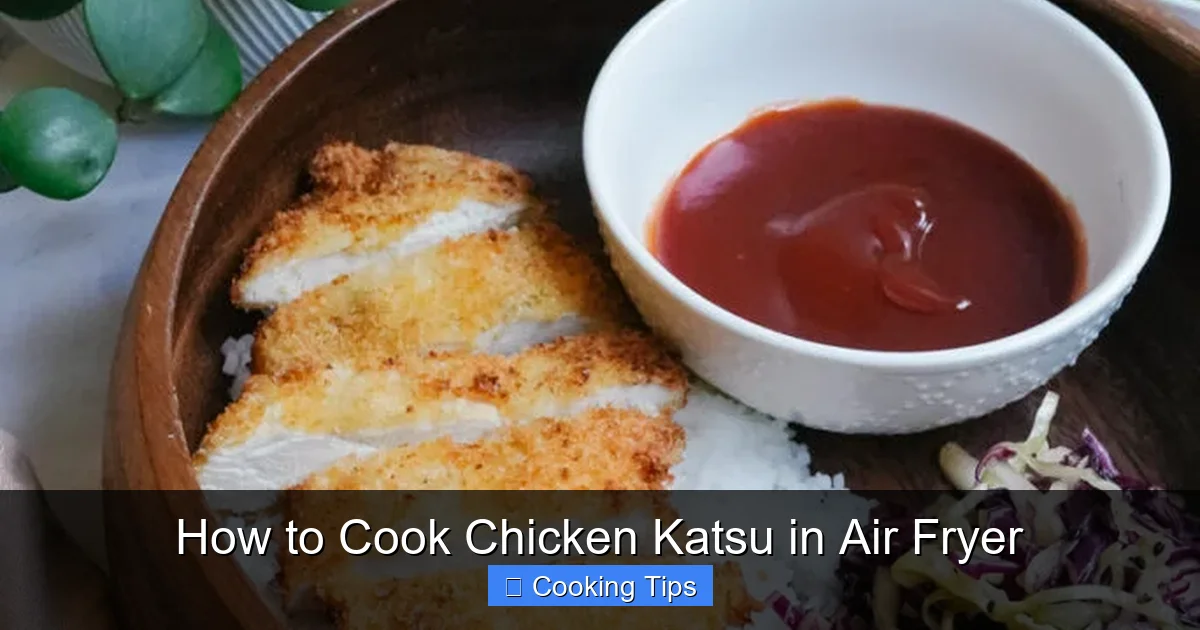
Visual guide about How to Cook Chicken Katsu in Air Fryer
Image source: eatwithcarmen.com
Visual guide about How to Cook Chicken Katsu in Air Fryer
Image source: eatwithcarmen.com

Visual guide about How to Cook Chicken Katsu in Air Fryer
Image source: everydayfamilycooking.com
Seasoning the Chicken
Once pounded, season both sides of the chicken cutlets with salt and black pepper. If you’re adding any optional seasonings to your flour, do it in the next step.
Step 2: Set Up Your Breading Station
A proper breading station is key to getting that beautiful, even coating. You’ll need three shallow dishes or plates.
Dish 1: Flour Mixture
In the first dish, combine the 1/2 cup of all-purpose flour with your optional seasonings like garlic powder, onion powder, and paprika. Whisk it all together. This seasoned flour will help the egg wash adhere better to the chicken.
Dish 2: Egg Wash
In the second dish, crack the 2 large eggs and whisk them well until the yolks and whites are fully combined. This creates your egg wash, which acts as the glue for the panko.
Dish 3: Panko Breadcrumbs
In the third dish, pour out the 1.5 cups of Panko breadcrumbs. Make sure you have enough to generously coat all your chicken pieces. Panko breadcrumbs are crucial for that authentic katsu crunch.
Step 3: Bread the Chicken
Now, it’s time to give your chicken that delicious coating.
First Dredge: Flour
Take one seasoned chicken cutlet and dredge it in the flour mixture. Make sure it’s evenly coated on all sides. Gently shake off any excess flour.
Second Dip: Egg Wash
Next, dip the floured chicken cutlet into the beaten eggs. Let any excess egg drip off. Ensure the entire surface of the chicken is covered in egg wash.
Third Coat: Panko
Finally, place the egg-coated chicken cutlet into the Panko breadcrumbs. Press down firmly to ensure the Panko adheres well. You want a thick, even layer of breadcrumbs. If any spots seem bare, dip those areas back into the egg wash and then into the Panko again. Repeat this entire breading process for all chicken cutlets.
Step 4: Preheat Your Air Fryer
Preheating is important for achieving that initial crispness.
Preheat your air fryer to 380°F (190°C) for about 3-5 minutes. This ensures the air fryer is hot enough to start crisping the katsu immediately upon placement.
Step 5: Air Fry the Chicken Katsu
This is the main cooking stage. Don’t overcrowd the basket!
Arranging the Katsu
Once preheated, carefully place the breaded chicken cutlets in a single layer in the air fryer basket. Do not overcrowd the basket. If necessary, cook in batches to ensure proper air circulation, which is key to crispiness. Overcrowding will lead to steaming rather than crisping.
First Cooking Interval
Air fry for 6-8 minutes at 380°F (190°C). During this time, the exterior will start to crisp up and turn golden.
Flipping and Spraying
After the first interval, carefully flip the chicken katsu using tongs. Lightly spray the tops of the katsu with your chosen oil spray. This helps to achieve an even golden-brown color and extra crispiness on the second side.
Second Cooking Interval
Continue to air fry for another 5-7 minutes, or until the chicken is cooked through and golden brown. The exact time will depend on your air fryer model and the thickness of your chicken. The internal temperature should reach 165°F (74°C).
Step 6: Check for Doneness and Rest
Almost there! A quick check ensures your katsu is perfect.
Internal Temperature Check
Use a meat thermometer to check the thickest part of the chicken. It should register 165°F (74°C). If it’s not quite there, continue air frying in 1-2 minute increments until it reaches the safe temperature.
Resting the Katsu
Once cooked, carefully remove the chicken katsu from the air fryer basket. Place it on a wire rack for a few minutes. This resting period allows the juices to redistribute, resulting in a more tender and moist cutlet.
Tips for the Crispiest Chicken Katsu
Want to elevate your air fryer chicken katsu to the next level? Here are some expert tips:
- Use Panko: As mentioned, Panko breadcrumbs are essential for that signature crunch. Regular breadcrumbs won’t give you the same airy, crispy texture.
- Don’t Skip the Oil Spray: A light mist of oil spray on both sides of the katsu before and during cooking helps it achieve that beautiful golden-brown color and extra crispiness.
- Ensure Even Thickness: Pounding the chicken evenly is crucial. If one part is thicker than another, it will cook unevenly, and you might end up with dry parts and undercooked parts.
- Don’t Overcrowd: This is one of the most important rules for air frying any food. Allow space for the hot air to circulate around each piece of katsu. If you cook in batches, the results will be significantly better.
- Shake off Excess: Before moving from one breading station to the next, give the chicken a gentle shake to remove excess flour or egg. Too much can lead to a gummy coating.
- Experiment with Seasonings: While salt and pepper are great, don’t be afraid to add other spices to your flour mixture. A pinch of cayenne for a little heat, or some dried herbs can add a unique flavor profile.
- Serving Temperature: Chicken katsu is best served immediately after cooking, while it’s still hot and crispy.
Serving Your Air Fryer Chicken Katsu
Chicken katsu is incredibly versatile. Here are some popular ways to serve it:
- With Rice and Cabbage: The classic Japanese presentation. Serve with steamed white rice and a generous portion of finely shredded raw cabbage, often with a simple dressing.
- Katsu Sauce: A tangy, sweet, and savory sauce is a must-have for many. You can buy pre-made katsu sauce or make your own.
- Curry Katsu: Place a piece of chicken katsu over a bowl of Japanese curry and rice.
- Katsu Sandwich: Slice the katsu and place it between two slices of bread with some shredded cabbage and katsu sauce.
- With Salad: A simple green salad with a light vinaigrette is also a refreshing accompaniment.
If you’re looking for other ways to prepare chicken in your air fryer, check out our guides on how to cook bone-in chicken breast in an air fryer or how to cook boneless chicken wings in an air fryer for more ideas.
Troubleshooting Common Issues
Even with the best instructions, you might encounter a hiccup. Here are solutions to common problems:
Issue: Katsu is not crispy enough.
Solution: Ensure you’re using Panko breadcrumbs. Make sure the air fryer was preheated. Avoid overcrowding the basket, and consider increasing the cooking time slightly or increasing the temperature by 10-15°F for the last few minutes of cooking (watch carefully to prevent burning). Ensure you’re using enough oil spray.
Issue: Katsu is dry.
Solution: The chicken might have been pounded too thin, or overcooked. Ensure you’re checking the internal temperature and removing it as soon as it reaches 165°F (74°C). Using chicken thighs, which are naturally more forgiving, can also help prevent dryness.
Issue: Coating is falling off.
Solution: This usually happens if the flour or egg coating isn’t properly adhered. Make sure you’re pressing the Panko firmly onto the chicken. Ensure there isn’t too much excess flour or egg dripping off before moving to the next stage of breading.
Issue: Uneven cooking.
Solution: This is almost always due to overcrowding. Give the chicken plenty of space for air to circulate. Also, ensure the chicken was pounded to an even thickness.
Conclusion
You’ve now got all the knowledge you need to create incredibly delicious and crispy chicken katsu right in your air fryer. This method is a game-changer for enjoying a healthier, yet equally satisfying, version of a Japanese favorite. With minimal oil and a straightforward process, you can achieve that perfect golden-brown crunch that makes chicken katsu so irresistible.
So, gather your ingredients, follow these steps, and get ready to enjoy homemade air fryer chicken katsu. Serve it with your favorite sides and sauces, and savor the fantastic results. Happy air frying!