Unlock the secret to perfectly cooked chicken with your Ninja Dual Air Fryer. This guide provides simple, step-by-step instructions for achieving crispy skin and tender, juicy meat. Whether you’re a beginner or an experienced cook, you’ll discover tips and tricks to make delicious chicken dishes with minimal effort and maximum flavor.
Are you ready to transform your weeknight dinners? Cooking chicken in a Ninja Dual Air Fryer is a game-changer. It’s incredibly easy, fast, and delivers deliciously crispy results that are much healthier than traditional frying. Forget soggy, bland chicken – with this guide, you’ll learn how to cook chicken that’s juicy on the inside and perfectly crisp on the outside, every single time.
This guide will walk you through everything you need to know to become a chicken-cooking pro in your Ninja Dual Air Fryer. We’ll cover preparing your chicken, selecting the right settings, cooking times, and essential tips for getting the best flavor and texture. Get ready to impress yourself and your family with amazing chicken dishes!
Key Takeaways
- Start with the right chicken cut: Choose bone-in or boneless, skin-on or skinless, depending on your recipe and desired outcome.
- Proper seasoning is key: Generously season your chicken for the best flavor. Don’t be afraid to use herbs, spices, and marinades.
- Preheat your air fryer: Always preheat the Ninja Dual Air Fryer to ensure even cooking and crispy results from the start.
- Don’t overcrowd the baskets: Cook chicken in a single layer, ensuring air can circulate for optimal crispiness.
- Use a meat thermometer: The most reliable way to ensure chicken is cooked through is to check its internal temperature.
- Rest your chicken: Allowing the chicken to rest after cooking helps to redistribute the juices, resulting in more tender and flavorful meat.
Why Use a Ninja Dual Air Fryer for Chicken?
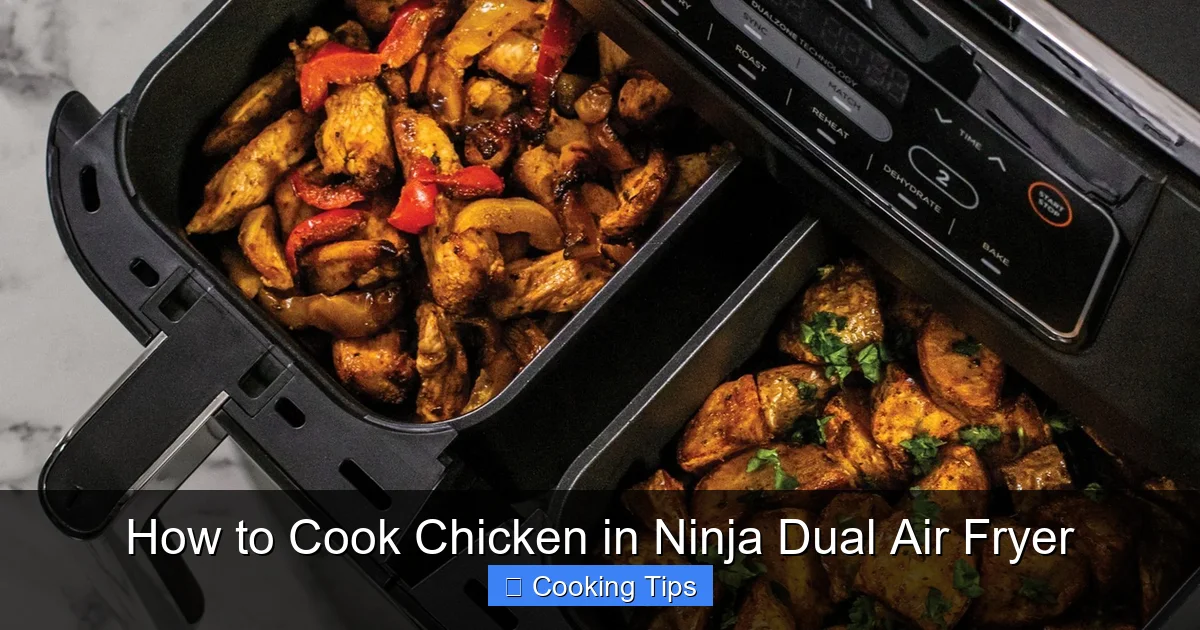
The Ninja Dual Air Fryer is a fantastic kitchen appliance for cooking chicken for several reasons. Its dual baskets allow you to cook two different types of chicken simultaneously, or to cook larger batches by using both baskets for the same dish. The rapid air circulation technology creates a crispy exterior without the need for excessive oil. This means healthier meals and less mess.
It’s also incredibly fast. Chicken that might take 45 minutes to an hour in a conventional oven can often be cooked in half that time in the air fryer. Plus, the ease of use means you can focus on enjoying your meal instead of constantly monitoring the cooking process.
Preparing Your Chicken for the Air Fryer
The foundation of delicious air-fried chicken is proper preparation. This includes choosing the right cut of chicken and seasoning it well.
Choosing Your Chicken Cut
The beauty of the Ninja Dual Air Fryer is its versatility. You can cook a wide variety of chicken cuts:
- Boneless, Skinless Chicken Breasts: These are lean and quick to cook. They are great for meals where you want to shred or dice the chicken. For boneless breasts, you might need to adjust cooking times based on thickness.
- Boneless, Skinless Chicken Thighs: Thighs are more forgiving and tend to stay moister than breasts. They are perfect for flavorful, tender bites.
- Bone-In, Skin-On Chicken Breasts: Cooking bone-in chicken breasts in the air fryer will result in incredibly juicy meat and crispy skin. The bone helps to retain moisture. We have a detailed guide on how to cook bone-in chicken breast in an air fryer that offers more specific insights.
- Bone-In, Skin-On Chicken Thighs: These are a fan favorite for air frying! The skin gets wonderfully crispy, and the meat stays incredibly moist. Check out our guide on how to cook bone-in chicken thighs in air fryer for more tips.
- Chicken Wings: Air fryers are a match made in heaven for chicken wings. They get perfectly crispy.
- Chicken Tenders/Strips: These are great for kids and quick snacks or meals.
- Whole Chicken (smaller size): Some smaller whole chickens can fit in larger dual air fryers, yielding a beautifully roasted bird.
Seasoning Your Chicken
This is where the magic happens! Don’t be shy with the seasonings.
- Basic Seasoning: A simple rub of salt, black pepper, garlic powder, and onion powder is a classic for a reason.
- Spice Rubs: Explore pre-made spice rubs or create your own with paprika, chili powder, cumin, cayenne pepper, and more.
- Herbs: Fresh or dried herbs like rosemary, thyme, oregano, and parsley add wonderful aroma and flavor.
- Marinades: Marinating chicken for at least 30 minutes (or up to overnight) infuses deep flavor. Popular marinades include soy sauce-based, lemon-herb, or yogurt-based marinades.
- Oils: A light coating of olive oil, avocado oil, or even melted butter helps the seasonings adhere and promotes browning and crispiness.
Step-by-Step Guide to Cooking Chicken in Your Ninja Dual Air Fryer
Now, let’s get to the actual cooking. Follow these steps for perfectly cooked chicken.
Step 1: Prepare the Chicken
- If your chicken is frozen, thaw it completely in the refrigerator. Never air fry frozen chicken unless the recipe specifically calls for it (like some frozen appetizers).
- Pat the chicken dry with paper towels. This is a crucial step, especially for skin-on chicken, as it helps the skin crisp up.
- Season your chicken generously on all sides with your chosen spices, herbs, or apply your marinade.
Step 2: Preheat the Air Fryer
This is a vital step that many people skip! Preheating ensures the chicken starts cooking immediately and evenly, leading to a crispier exterior.
- Select one of the air fryer baskets.
- Press the function button and choose ‘AIR FRY’.
- Set the temperature. A good starting point for most chicken is 375°F (190°C) to 400°F (200°C).
- Set the time to 5 minutes and press START.
- Once preheated, the display will usually indicate it’s ready.
Step 3: Arrange Chicken in the Basket
For the best results, you want air to circulate around each piece of chicken.
- Place the seasoned chicken pieces in a single layer in the air fryer basket.
- Crucially, do not overcrowd the basket. If you have too much chicken, cook in batches. Overcrowding will steam the chicken instead of air frying it, resulting in soggy, unevenly cooked meat.
- If you are using both baskets for the same type of chicken, ensure the temperature and time settings are applied to both.
Step 4: Air Fry the Chicken
This is where the Ninja Dual Air Fryer does its work!
- Close the basket(s) and select the appropriate function on your Ninja Dual Air Fryer.
- For Boneless, Skinless Breasts/Thighs:
- Set the temperature to 380°F (190°C).
- Set the time. A good starting point is 15-20 minutes. Thicker cuts will take longer.
- For Bone-In, Skin-On Chicken Thighs/Breasts:
- Set the temperature to 400°F (200°C) for crispier skin.
- Set the time. This can range from 20-30 minutes depending on the size.
- For Chicken Wings:
- Set the temperature to 400°F (200°C).
- Set the time to 20-25 minutes.
Step 5: Flip and Check for Doneness
Midway through cooking, it’s essential to flip the chicken to ensure even browning and crispiness on all sides.
- About halfway through the cooking time (e.g., at the 8-10 minute mark for breasts/thighs, or 10-12 minutes for wings), carefully pull out the basket(s).
- Using tongs, flip each piece of chicken over.
- If you are cooking wings or smaller pieces, you might want to shake the basket to redistribute them.
- Reinsert the basket(s) and continue cooking.
- Use a Meat Thermometer: This is the most reliable way to check if chicken is cooked through. Insert the thermometer into the thickest part of the meat, avoiding bone.
- Chicken Breasts: Should reach an internal temperature of 165°F (74°C).
- Chicken Thighs: Are safe to eat at 165°F (74°C), but many prefer them cooked to 175-180°F (80-82°C) for a more tender texture.
- Whole Chicken Pieces (like wings or bone-in cuts): Ensure the thickest part reaches 165°F (74°C).
- If the chicken isn’t quite done, continue cooking in 2-3 minute increments, checking the temperature each time.
Step 6: Rest the Chicken
This is another crucial step for juicy chicken!
- Once the chicken reaches the safe internal temperature, carefully remove it from the air fryer basket and place it on a clean plate or cutting board.
- Tent the chicken loosely with foil and let it rest for 5-10 minutes.
- This resting period allows the juices to redistribute throughout the meat. If you cut into it immediately, all those delicious juices will run out onto the plate, leaving your chicken dry.
Step 7: Serve and Enjoy!
Your perfectly air-fried chicken is ready to be served! Enjoy it as is, or use it in salads, sandwiches, or your favorite recipes.
Tips for Extra Crispy Chicken Skin
Achieving that satisfying crunch on chicken skin is a hallmark of great air-fried chicken. Here are some extra tips:
- Dry the Skin Thoroughly: As mentioned, patting the skin completely dry with paper towels is paramount.
- Use a Little Oil: A light coating of oil (olive oil, avocado oil, or even cooking spray) brushed or sprayed onto the skin before seasoning helps it brown and crisp up.
- Higher Temperature: Starting or finishing at a slightly higher temperature (like 400°F or 200°C) can help crisp up the skin quickly. Be mindful of not burning it.
- Don’t Cover Completely: Avoid covering the chicken tightly with foil during the cooking process if crispiness is your main goal.
- Consider Baking Powder (for wings/pieces): For wings, a small amount of baking powder (not baking soda) mixed with your dry rub can work wonders to create an extra-crispy texture. Use about 1 teaspoon per pound of wings.
Troubleshooting Common Air Fryer Chicken Issues
Even with the best intentions, sometimes things don’t go as planned. Here are a few common issues and how to fix them:
Issue: Chicken is dry and overcooked.
Cause: Cooked for too long, or cut was too lean and cooked at too high a temperature for too long.
Solution: Use a meat thermometer to ensure you’re cooking to the correct internal temperature (165°F for breasts). Reduce cooking time for future attempts. For leaner cuts, consider slightly lower temperatures or shorter cooking times. Marinating can also help retain moisture.
Visual guide about How to Cook Chicken in Ninja Dual Air Fryer
Image source: i.pinimg.com

Visual guide about How to Cook Chicken in Ninja Dual Air Fryer
Image source: easycopycatrecipe.com
Issue: Chicken is soggy, not crispy.
Cause: Basket was overcrowded, chicken wasn’t dried properly, or the air fryer wasn’t preheated.
Solution: Ensure you are cooking in a single layer and not overcrowding. Pat the chicken very dry before seasoning. Always preheat your air fryer. For bone-in, skin-on chicken, ensure the skin is as dry as possible before cooking.
Issue: Chicken is burnt on the outside, raw on the inside.
Cause: Temperature was too high, or chicken pieces were too thick for the cooking time.
Solution: Reduce the temperature. If cooking thicker cuts, you might need to cook at a slightly lower temperature for longer to ensure it cooks through without burning. Flipping the chicken halfway is essential. Consider using the ‘SMART FINISH’ feature if available on your dual air fryer for even cooking times when cooking two different items. If you’re cooking very thick bone-in chicken, our guide on how to cook bone-in chicken breast in air fryer might offer useful strategies for achieving internal doneness without burning the exterior.
Issue: Uneven cooking between the two baskets.
Cause: This is less common with modern dual air fryers, but can happen if one basket is consistently placed closer to the heating element or if the food distribution is uneven.
Solution: Ensure you follow the manufacturer’s instructions for placement. Try swapping the basket positions halfway through cooking if you notice significant differences. For consistent results, always try to cook similar sized pieces in both baskets, or consider cooking one item at a time if you have drastically different cooking needs.
Conclusion
Cooking chicken in your Ninja Dual Air Fryer is straightforward, efficient, and yields incredibly delicious results. By following these steps, from proper preparation and seasoning to cooking and resting, you’ll consistently achieve perfectly cooked, juicy, and crispy chicken. Don’t hesitate to experiment with different seasonings and marinades to discover your favorite flavor combinations. Happy air frying!