Unlock perfectly cooked chicken with your air fryer! This comprehensive guide provides step-by-step instructions for achieving crispy skin and juicy, flavorful meat every time. We’ll cover everything from seasoning to temperature and cooking times for various chicken cuts, making air fryer chicken your new go-to.
Welcome to your ultimate guide on how to cook chicken in your air fryer! If you’re looking for a healthier, faster, and incredibly easy way to prepare delicious chicken, you’ve come to the right place. The air fryer is a game-changer for cooking chicken, delivering results that rival deep frying but with a fraction of the oil. Whether you’re a seasoned chef or just starting in the kitchen, this guide will walk you through everything you need to know to achieve perfectly cooked, juicy, and flavorful chicken every single time. We’ll cover selecting your chicken, essential prep, cooking techniques for different cuts, and tips for success. Get ready to become an air fryer chicken pro!
Key Takeaways
- Perfectly Cooked Chicken Every Time: Learn the fundamental steps to ensure your chicken is cooked through, tender, and delicious.
- Crispy Skin Secrets: Discover techniques to achieve that irresistible, golden-brown crispy skin that air frying excels at.
- Versatility for All Cuts: This guide applies to boneless, bone-in, whole chickens, breasts, thighs, and wings, making it a one-stop resource.
- Flavor Customization: Explore simple seasoning ideas and marinades to elevate your air fryer chicken’s taste.
- Time and Temperature Mastery: Understand how to set the right temperature and cooking duration for optimal results, with tips for checking doneness.
- Troubleshooting Common Issues: Learn how to fix common problems like uneven cooking or dry chicken.
Why Air Fry Chicken?
Before we dive into the “how,” let’s quickly touch on “why.” Air fryers work by circulating hot air around your food at high speeds, mimicking the effect of deep frying without submerging your food in oil. This results in a wonderfully crispy exterior while keeping the inside moist and tender. For chicken, this means:
- Crispier Skin: Air frying is brilliant for achieving that satisfying crunch.
- Moist and Tender Meat: The rapid cooking process locks in juices.
- Healthier Option: Significantly less oil is used compared to traditional frying.
- Speed and Convenience: Most chicken recipes cook much faster in an air fryer.
- Less Mess: Cleanup is generally much simpler than with frying.
Preparing Your Chicken for the Air Fryer
The foundation of great air fryer chicken starts with proper preparation. This includes selecting the right cut, patting it dry, and seasoning.
Choosing Your Chicken Cut
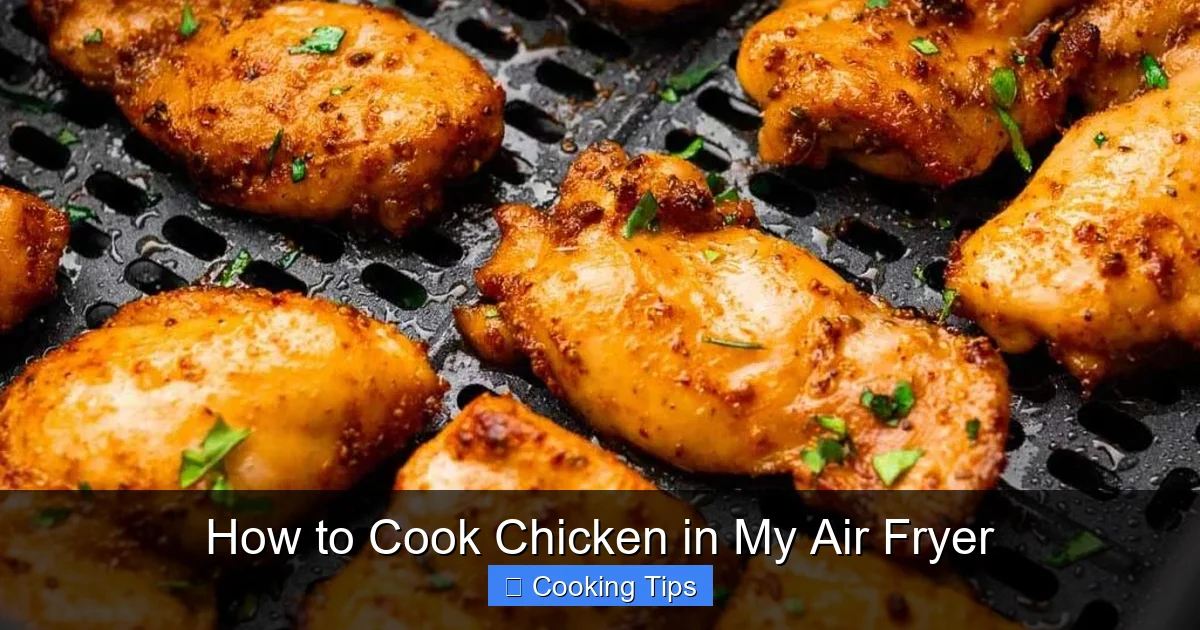
Visual guide about How to Cook Chicken in My Air Fryer
Image source: frommypantry.com
Your air fryer can handle almost any cut of chicken! Here are some common choices:
- Boneless, Skinless Breasts: Lean, quick-cooking, and versatile.
- Boneless, Skinless Thighs: More forgiving, richer flavor, and juicier.
- Bone-In, Skin-On Breasts: Offer great flavor and juiciness, but take longer to cook.
- Bone-In, Skin-On Thighs: Packed with flavor and always turn out incredibly juicy.
- Chicken Wings: The air fryer is a champion for crispy wings.
- Whole Chicken: Yes, you can air fry a whole chicken! It’s a fantastic way to get crispy skin and tender meat.
If you’re curious about specific bone-in cuts, you might find our guides on how to cook bone-in chicken breast in an air fryer and how to cook bone-in chicken thighs in an air fryer helpful.
The Importance of Patting Dry
Visual guide about How to Cook Chicken in My Air Fryer
Image source: forktospoon.com
This step is crucial, especially if you want crispy skin. Moisture is the enemy of crispiness.
Step 1: Pat it Dry
- Take your chicken pieces and place them on a plate or cutting board.
- Use paper towels to thoroughly pat down every surface of the chicken. Get into all the nooks and crannies.
- The drier the chicken, the crispier the skin will be.
Seasoning Your Chicken
This is where you add flavor! You can go simple or get creative.
Simple Seasoning Base:
- Salt: Essential for enhancing flavor.
- Black Pepper: Adds a bit of spice.
- Garlic Powder: A classic that works with everything.
- Onion Powder: Adds depth of flavor.
Getting More Creative:
- Herbs: Rosemary, thyme, oregano, parsley.
- Spices: Paprika (for color and mild flavor), chili powder (for heat), cumin (for smoky notes).
- Marinades: For extra tender and flavorful chicken, consider marinating for at least 30 minutes. Common marinade ingredients include olive oil, lemon juice, soy sauce, yogurt, or even buttermilk.
- Spice Rubs: Mix your favorite dry spices to create a flavorful rub.
How to Cook Different Cuts of Chicken in the Air Fryer
Now for the main event! Here’s how to cook various chicken cuts to perfection.
Cooking Boneless, Skinless Chicken Breasts
Boneless, skinless chicken breasts are a quick and healthy option.
Prep:
- Pat chicken breasts dry.
- Season generously with salt, pepper, garlic powder, and any other desired seasonings or spices.
- For extra flavor, you can lightly coat with olive oil or use a marinade.
Air Frying Instructions:
- Preheat: Preheat your air fryer to 375°F (190°C). This helps the chicken cook evenly from the start.
- Arrange: Place the seasoned chicken breasts in a single layer in the air fryer basket. Don’t overcrowd; cook in batches if necessary to ensure air circulation.
- Cook Time: Air fry for 16-20 minutes. The exact time will depend on the thickness of the breasts.
- Flip: Flip the chicken breasts halfway through cooking (around the 8-10 minute mark) to ensure even browning.
- Check for Doneness: The chicken is done when it reaches an internal temperature of 165°F (74°C) when measured with a meat thermometer in the thickest part. The juices should run clear.
- Rest: Let the chicken rest for 5 minutes before slicing or serving. This allows the juices to redistribute, keeping the meat moist.
Cooking Boneless, Skinless Chicken Thighs
Boneless, skinless chicken thighs are incredibly forgiving and stay juicy.
Prep:
- Pat chicken thighs dry.
- Season well with your favorite seasonings. They handle bolder flavors well.
Air Frying Instructions:
- Preheat: Preheat your air fryer to 380°F (195°C).
- Arrange: Place the seasoned thighs in the air fryer basket in a single layer.
- Cook Time: Air fry for 14-18 minutes.
- Flip: Flip halfway through for even cooking.
- Check for Doneness: Internal temperature should be 165°F (74°C).
- Rest: Let rest for a few minutes.
Cooking Bone-In, Skin-On Chicken Pieces (Breasts or Thighs)
Bone-in, skin-on chicken pieces offer superior flavor and moisture. They require a bit more time and sometimes a slightly higher temperature.
Prep:
- Pat the chicken pieces very dry, especially the skin.
- Season generously. For crispy skin, some people like to rub a little baking powder (about 1/2 teaspoon per pound) into the skin along with the salt and spices. This helps draw out moisture.
- You can also add a little oil to help crisp the skin.
Air Frying Instructions:
- Preheat: Preheat your air fryer to 380°F (195°C).
- Arrange: Place the chicken pieces skin-side up in the air fryer basket, ensuring they are not touching.
- Cook Time: Cook for approximately 25-35 minutes. The exact time will vary significantly based on the size of the pieces and whether they are breasts or thighs.
- Flip (Optional/Mid-Cook): For extremely crispy skin, you might start skin-side down for the first 10-15 minutes, then flip skin-side up for the remainder of the cooking time. Alternatively, just flip once halfway through.
- Check for Doneness: Use a meat thermometer. The thickest part of the meat (away from the bone) should reach 165°F (74°C). The skin should be golden brown and crispy. If the skin is browning too quickly but the chicken isn’t done, you can tent it loosely with foil.
- Rest: Allow to rest for 5-10 minutes before serving.
Cooking Chicken Wings
Air fryer chicken wings are legendary! Get ready for restaurant-quality results.
Prep:
- Pat wings thoroughly dry. This is absolutely critical for crispy wings.
- Toss wings with a tablespoon of cornstarch (optional, but highly recommended for extra crispiness) along with your desired seasonings (salt, pepper, garlic powder, paprika). A little oil can also help.
Air Frying Instructions:
- Preheat: Preheat your air fryer to 400°F (200°C).
- Arrange: Place the wings in a single layer in the basket, ensuring they don’t overlap. You will likely need to cook in batches.
- Cook Time: Air fry for 20-25 minutes.
- Flip: Flip the wings halfway through cooking for even crisping.
- Check for Doneness: Wings should be golden brown and crispy. An internal temperature of 165°F (74°C) is safe, but most people prefer them cooked a bit further for maximum crispiness.
- Sauce: Toss with your favorite wing sauce immediately after cooking.
For a detailed guide on this popular choice, check out our article on how to cook boneless chicken wings in air fryer.
Cooking a Whole Chicken
Yes, you can! It takes longer, but the result is amazing.
Prep:
- Choose a smaller chicken, ideally 3-4 pounds, to fit comfortably in your air fryer.
- Pat the chicken completely dry, inside and out.
- Season the cavity and the outside generously with salt, pepper, garlic powder, onion powder, paprika, and any other herbs or spices you like. You can also place aromatics like lemon halves or garlic cloves inside.
- You can also rub a little softened butter or oil under the skin for extra moisture and crispiness.
Air Frying Instructions:
- Preheat: Preheat your air fryer to 375°F (190°C).
- Place Chicken: Place the chicken breast-side up in the air fryer basket. It should fit snugly but still allow for air circulation around it.
- Cook Time: Cook for approximately 50-70 minutes. This is a general guideline, and the actual time will depend heavily on the size of the chicken and your specific air fryer model.
- Basting (Optional): You can baste the chicken with its own juices every 15-20 minutes to keep it moist.
- Check for Doneness: The most critical step! Insert a meat thermometer into the thickest part of the thigh, avoiding the bone. It should register 165°F (74°C). The juices should run clear when you pierce the thigh. If the skin is browning too quickly, you can loosely tent the chicken with foil.
- Rest: This is non-negotiable for a whole chicken. Let it rest for at least 15-20 minutes, tented with foil, before carving. This allows the juices to settle back into the meat, ensuring it’s not dry.
Tips for Perfect Air Fryer Chicken
Here are some extra tips to elevate your air fryer chicken game:
- Don’t Overcrowd: This is the golden rule of air frying. Overcrowding prevents the hot air from circulating properly, leading to uneven cooking and soggy food. Cook in batches if necessary.
- Use a Meat Thermometer: The most reliable way to ensure your chicken is cooked safely and perfectly is by using an instant-read meat thermometer. Don’t guess!
- Adjust Times for Your Air Fryer: Air fryer models vary in power and size. The cooking times provided are estimates. Get to know your air fryer and adjust as needed.
- Shake or Flip: For smaller pieces like wings or nuggets, shake the basket halfway through. For larger pieces like breasts or thighs, flip them over. This ensures even browning and cooking.
- Consider a Marinade: For an extra layer of flavor and moisture, marinate your chicken for at least 30 minutes or up to a few hours before cooking.
- Rest Your Chicken: Just like with any cooking method, letting your chicken rest after cooking allows the juices to redistribute, resulting in a more tender and moist final product.
Troubleshooting Common Air Fryer Chicken Issues
Even with the best guides, sometimes things don’t go perfectly. Here are common problems and how to fix them:
Issue: Chicken is Dry
- Cause: Overcooked, or the wrong cut was used (e.g., very lean breast cooked too long).
- Solution: Use a meat thermometer to avoid overcooking. For breasts, consider brining or marinating. Boneless, skinless thighs are generally more forgiving and less prone to dryness.
Issue: Uneven Cooking
- Solution: This is usually due to overcrowding the air fryer basket. Ensure there’s enough space for air to circulate around each piece. Cook in smaller batches.
Issue: Skin Isn’t Crispy
- Solution: Make sure you’ve patted the chicken *very* dry. Consider using a little oil or cornstarch (for wings). Ensure your air fryer is preheated properly, as this helps to start the crisping process immediately.
Issue: Chicken is Burnt on the Outside, Undercooked Inside
- Solution: The temperature might be too high, or the chicken pieces are too large for the given time. Reduce the temperature slightly and increase the cooking time, or ensure thinner pieces are cooked alongside thicker ones or removed earlier.
Conclusion
Cooking chicken in your air fryer is incredibly rewarding. You can achieve restaurant-quality results with minimal effort and a healthier approach. From perfectly crisp wings to incredibly juicy breasts and thighs, the air fryer proves its versatility again and again. Remember the key steps: patting dry, proper seasoning, not overcrowding, using a thermometer, and letting it rest. With this guide, you’re well-equipped to create delicious air fryer chicken dishes that your whole family will love. Enjoy experimenting with different flavors and cuts!