Learn how to make delicious, crispy chicken fingers in your air fryer with this comprehensive guide. We’ll walk you through everything from prepping your chicken to achieving that perfect golden-brown finish. Get ready for a healthier, faster way to enjoy this family favorite!
How to Cook Chicken Fingers in an Air Fryer
Welcome to the ultimate guide to making perfect chicken fingers in your air fryer! If you love the satisfying crunch of fried chicken but want a healthier, quicker, and less messy alternative, you’ve come to the right place. Air frying is a game-changer for achieving that golden-brown, crispy exterior without deep-frying.
In this guide, we’ll cover everything you need to know to make fantastic chicken fingers. We’ll go step-by-step through the entire process, from preparing your chicken to the final plating. You’ll learn essential tips for getting the crispiest results, how to customize your flavors, and what to do if things don’t go exactly as planned. Get ready to impress yourself and your family with homemade chicken fingers that are even better than takeout!
- Prep is Key: Properly preparing your chicken by cutting it into uniform pieces and coating it well is crucial for even cooking and crispiness.
- Don’t Overcrowd: Give your chicken fingers enough space in the air fryer basket to ensure hot air circulates properly, leading to a crispier result.
- Flipping is Essential: Flipping the chicken fingers halfway through the cooking process guarantees they cook evenly on all sides.
- Temperature and Time Matter: Stick to the recommended temperature and time, but always check for doneness to ensure safety and taste.
- Customize Your Coating: Experiment with different breading ingredients and seasonings to create unique flavor profiles for your chicken fingers.
- Frozen vs. Fresh: Understand the slight adjustments needed for cooking frozen chicken fingers versus fresh ones for optimal results.
[FEATURED_IMAGE_PLACEHOLDER]
Why Air Fry Chicken Fingers?
Before we dive into the “how-to,” let’s quickly talk about why using an air fryer for your chicken fingers is such a brilliant idea.
* Healthier: Air fryers use hot circulating air to cook food, drastically reducing the need for oil compared to deep frying. This means fewer calories and less fat.
* Faster: Air fryers preheat quickly and cook food efficiently. You can have delicious chicken fingers ready in a fraction of the time it takes to bake or deep fry them.
* Crispier: The convection cooking method of an air fryer is perfect for creating a delightfully crispy coating on your chicken fingers, rivaling traditional frying.
* Less Mess: No more oil splatters or greasy cleanup! Air frying is significantly tidier.
* Convenience: It’s a straightforward cooking method that’s easy to master, even for beginners.
Gather Your Ingredients and Equipment
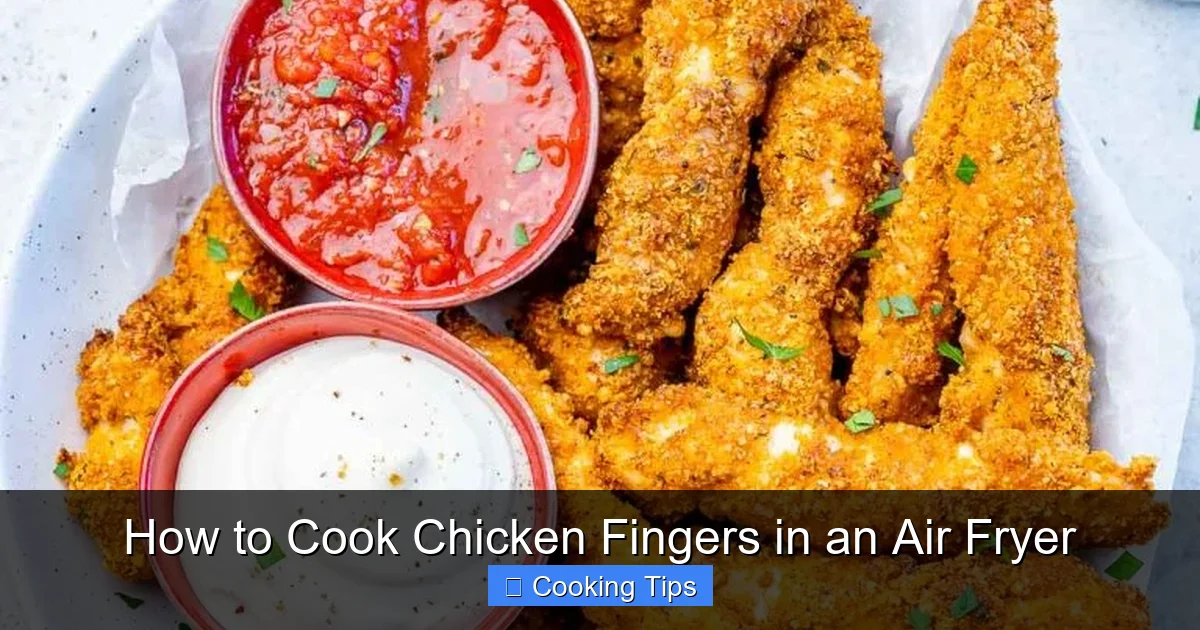
Visual guide about How to Cook Chicken Fingers in an Air Fryer
Image source: cleanfoodcrush.com
To make the best air fryer chicken fingers, you’ll need a few things.
Ingredients:
* Chicken: About 1-1.5 pounds of boneless, skinless chicken breasts or thighs. Cut into uniform finger shapes (about 1 inch wide and 3-4 inches long).
* Eggs: 2 large eggs, beaten. This acts as the binder for your breading.
* Flour: About 1/2 cup all-purpose flour. This is your first layer of coating.
* Breadcrumbs: About 1-1.5 cups of breadcrumbs. Panko breadcrumbs are highly recommended for extra crispiness. You can also use regular breadcrumbs or crushed crackers.
* Seasonings: Salt, black pepper, garlic powder, onion powder, paprika. Feel free to add your favorites like cayenne pepper for a kick, or Italian herbs.
* Oil (Optional but Recommended): A light cooking spray or about 1-2 tablespoons of olive oil or avocado oil. This helps achieve that golden, crispy finish.
Equipment:
* Air Fryer: Of course!
* Cutting Board and Knife: For preparing the chicken.
* Three Shallow Bowls or Plates: For your flour, egg, and breadcrumb dredging station.
* Tongs: For safely handling the chicken fingers.
* Wire Rack (Optional): For resting cooked chicken fingers.
* Meat Thermometer: To ensure chicken is cooked to a safe internal temperature.
Step-by-Step Guide to Air Fryer Chicken Fingers
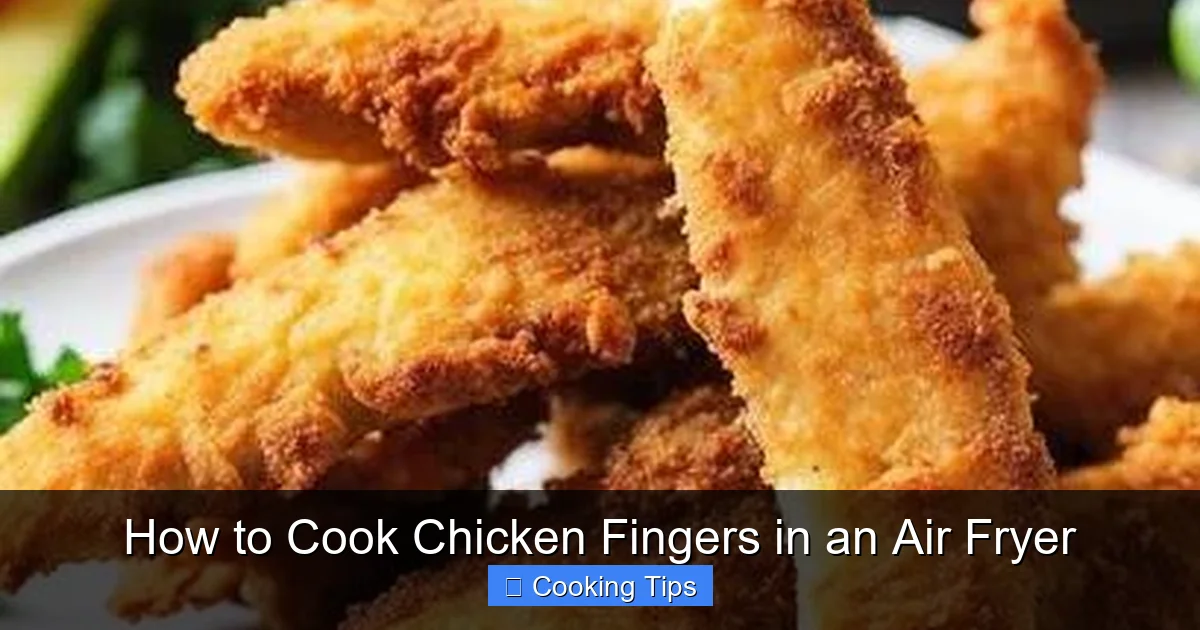
Visual guide about How to Cook Chicken Fingers in an Air Fryer
Image source: airfryeryummyrecipes.com
Let’s get cooking! Follow these simple steps to create perfect chicken fingers.
Step 1: Prepare the Chicken
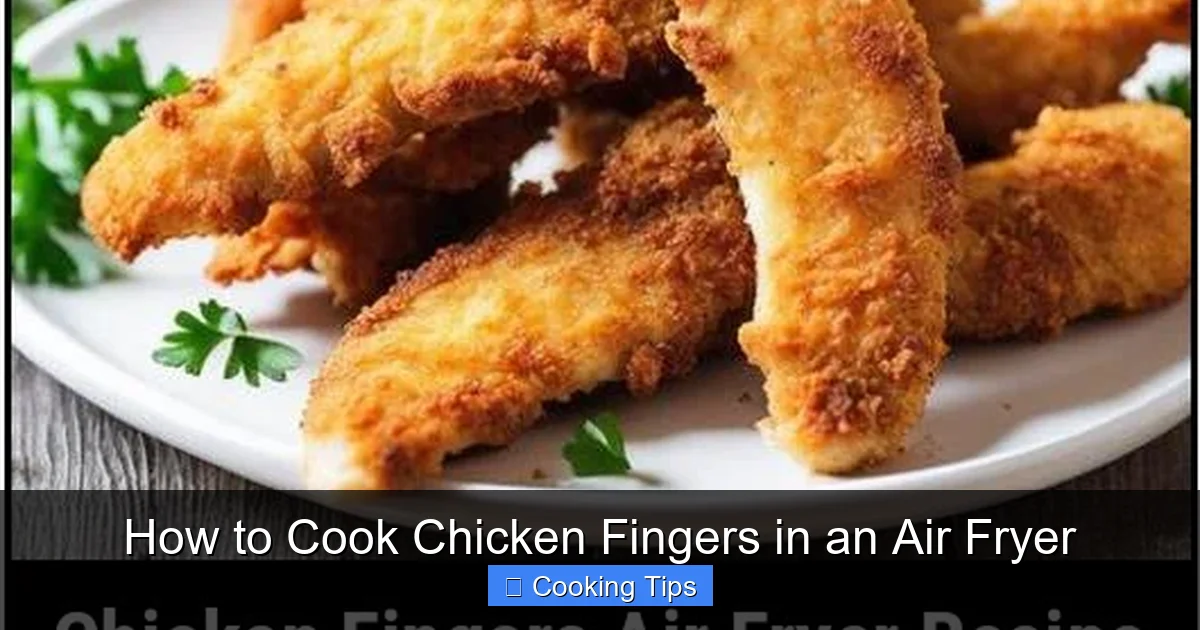
Visual guide about How to Cook Chicken Fingers in an Air Fryer
Image source: airfryeryummyrecipes.com
This is where you start to build the foundation for delicious chicken fingers.
1. Cut the Chicken: If you haven’t already, trim any excess fat from your chicken. Then, slice the chicken breasts or thighs into uniform strips. Aim for pieces that are roughly 1 inch wide and 3-4 inches long. Uniformity is key for even cooking. If you’re using chicken thighs, remove the tough side muscle if present.
2. Pat Dry: Use paper towels to thoroughly pat the chicken pieces dry. This is a crucial step, especially if your chicken is slightly moist, as it helps the breading adhere better.
Step 2: Set Up Your Breading Station
A classic three-step breading process will give you the best coating.
1. Bowl 1 (Flour): In the first shallow bowl, combine the flour with your basic seasonings like salt, pepper, garlic powder, and onion powder. Whisk it together.
2. Bowl 2 (Eggs): In the second shallow bowl, beat the eggs until they are well combined and slightly frothy.
3. Bowl 3 (Breadcrumbs): In the third shallow bowl, add your breadcrumbs. If you’re using panko, you’re good to go! If you’re using regular breadcrumbs, you can add a little more seasoning here for extra flavor.
Step 3: Bread the Chicken Fingers
This is the fun part where you coat your chicken!
1. Flour Coating: Take a chicken finger and dredge it in the seasoned flour, ensuring it’s fully coated. Shake off any excess flour.
2. Egg Wash: Next, dip the floured chicken finger into the beaten eggs, letting any excess drip off.
3. Breadcrumb Coating: Finally, press the egg-coated chicken finger into the breadcrumbs. Make sure it’s completely covered. Gently press the breadcrumbs onto the chicken to help them stick.
4. Repeat: Place the breaded chicken finger onto a clean plate or parchment paper. Repeat this process for all your chicken strips.
Pro Tip: For an extra thick, crispy coating, you can double-dip. After the first breadcrumb coating, dip the chicken back into the egg, and then into the breadcrumbs again.
Step 4: Prepare the Air Fryer
It’s time to get your air fryer ready for cooking.
1. Preheat: Most air fryer recipes benefit from preheating. Preheat your air fryer to 380°F (190°C) for about 3-5 minutes. This helps ensure your chicken fingers start cooking immediately and get that signature crispiness.
2. Lightly Oil (Optional): While not always necessary, a light spray of cooking oil on the air fryer basket can help prevent sticking and contribute to a golden finish. You can also lightly spray or brush the breaded chicken fingers themselves with oil.
Step 5: Arrange Chicken Fingers in the Air Fryer
Proper arrangement is key to achieving even cooking and crispiness.
1. Single Layer: Place the breaded chicken fingers in a single layer in the air fryer basket. **Do not overcrowd the basket.** If you have too many chicken fingers, cook them in batches. Overcrowding will steam the chicken instead of crisping it, resulting in soggy fingers.
2. Space Them Out: Ensure there is a little space between each chicken finger. This allows the hot air to circulate freely around them, cooking them evenly and making them extra crispy.
Step 6: Air Fry the Chicken Fingers
Now for the main event!
1. Cooking Time: Air fry the chicken fingers at 380°F (190°C) for 12-18 minutes.
2. Flip Halfway: About halfway through the cooking time (around 6-9 minutes), carefully open the air fryer and use tongs to flip each chicken finger. This ensures they cook evenly on both sides and develop a beautiful golden-brown crust all around.
3. Check for Doneness: The cooking time can vary depending on the size of your chicken fingers and the specific model of your air fryer. The chicken is done when it’s golden brown and crispy, and the internal temperature reaches 165°F (74°C) when tested with a meat thermometer. If you’re cooking frozen chicken fingers, they will likely need a few extra minutes.
Step 7: Serve and Enjoy!
Your delicious, crispy chicken fingers are ready!
1. Rest (Optional): Let the chicken fingers rest in the basket for a minute or two after cooking. This allows the juices to redistribute.
2. Serve Hot: Serve immediately with your favorite dipping sauces like ketchup, honey mustard, BBQ sauce, or ranch. They are best enjoyed fresh and hot!
Tips for Extra Crispy Chicken Fingers
Want to elevate your air fryer chicken fingers from good to *amazing*? Here are some tried-and-true tips:
* Use Panko Breadcrumbs: Panko breadcrumbs are lighter and airier than traditional breadcrumbs, creating a significantly crispier texture.
* Double Dredge: As mentioned earlier, a second dip in the egg and breadcrumbs makes for a thicker, more robust coating that gets wonderfully crispy.
* Lightly Oil the Breading: A quick spray of cooking oil or a light brush of melted butter or olive oil on the breaded chicken fingers before air frying can help them brown and crisp up beautifully.
* Don’t Skip the Preheat: A preheated air fryer ensures the chicken starts cooking immediately, promoting a crispier exterior.
* Ensure Air Circulation: This cannot be stressed enough – do not overcrowd the air fryer basket! Cook in batches if necessary.
* Experiment with Seasonings: Get creative with your flour and breadcrumb mixtures. Add smoked paprika, cayenne pepper, chili powder, dried herbs, or even a pinch of grated Parmesan cheese.
* Consider Using Chicken Thighs: While chicken breasts are leaner, chicken thighs are naturally more moist and forgiving, making them less prone to drying out.
* Try Different Sauces: For a flavor twist, toss your cooked chicken fingers in your favorite wing sauce or BBQ sauce. This is similar to how you might prepare boneless chicken wings in an air fryer.
Can I Air Fry Frozen Chicken Fingers?
Yes, absolutely! Air fryers are fantastic for cooking frozen chicken fingers, whether they are homemade or store-bought.
* If Homemade and Frozen: If you’ve breaded chicken fingers and frozen them for later, you can cook them directly from frozen. You’ll likely need to increase the cooking time by a few minutes (potentially 3-5 minutes longer). Ensure they are in a single layer and check for doneness with a meat thermometer.
* If Store-Bought Frozen: Follow the package instructions, but generally, preheating the air fryer to around 380°F (190°C) and cooking for 10-16 minutes, flipping halfway, is a good starting point. Always check the internal temperature to ensure they are cooked through. It’s a much faster and often crispier method than using a conventional oven. You can also find specific guides for brands like Tyson chicken nuggets or Tyson chicken strips to get the best results.
Troubleshooting Common Air Fryer Chicken Finger Issues
Even with the best intentions, sometimes things don’t turn out perfectly. Here are a few common problems and how to fix them:
* Chicken Fingers are Soggy:
* Cause: Overcrowded basket, not enough cooking time, or a lack of oil.
* Solution: Cook in smaller batches, ensure you flip them halfway, and consider lightly spraying or tossing the breading with oil before cooking. Make sure the chicken was patted dry before breading.
* Breading is Falling Off:
* Cause: Chicken wasn’t dry enough, or the breading layers weren’t pressed on firmly.
* Solution: Ensure chicken is thoroughly patted dry. Press the breadcrumbs firmly onto the chicken during the breading process. A double dredge can also help.
* Uneven Cooking:
* Cause: Chicken pieces were not uniform in size, or the basket was overcrowded.
* Solution: Cut chicken into consistent sizes. Always flip the chicken halfway through cooking and ensure there is space between each piece.
* Chicken is Dry:
* Cause: Overcooked, or used very lean chicken breasts for too long.
* Solution: Use a meat thermometer to check for doneness and remove them as soon as they reach 165°F (74°C). Consider using chicken thighs for more moisture, or don’t overcook them. The cooking time in this guide is a guideline, so adjust based on your air fryer and chicken size.
Beyond the Basics: Flavor Variations
The beauty of homemade chicken fingers is that you can customize them to your heart’s content! Here are a few ideas:
* Spicy Kick: Add cayenne pepper or hot paprika to your flour or breadcrumbs. For an extra punch, mix a little hot sauce into the egg wash.
* Parmesan Herb: Mix grated Parmesan cheese and Italian herbs (like oregano, basil, thyme) into your panko breadcrumbs.
* Smoky BBQ: Add smoked paprika and a touch of brown sugar to your breadcrumbs. Serve with your favorite BBQ sauce.
* Asian-Inspired: Use panko breadcrumbs, and season your flour with a bit of ginger powder and garlic powder. Serve with sweet chili sauce or soy sauce for dipping.
Experimenting with different seasonings and dipping sauces is part of the fun! You might also enjoy exploring other air fryer recipes like air fryer biscuits or pot pies for delicious variations.
Conclusion
Congratulations! You’ve learned how to make incredibly delicious, crispy chicken fingers right in your air fryer. By following these simple steps, focusing on proper preparation, and not overcrowding your basket, you’re guaranteed to achieve fantastic results every time. Air fryer chicken fingers are a healthier, faster, and tastier alternative to traditional methods, making them perfect for weeknight dinners, snacks, or game-day parties.
So go ahead, gather your ingredients, fire up your air fryer, and enjoy the satisfying crunch of your homemade chicken fingers. Happy air frying!