Discover how to cook incredibly tender and juicy chicken breast in your Ninja air fryer. This guide covers everything from preparation and seasoning to achieving the perfect cook time and internal temperature. You’ll learn simple techniques to ensure your chicken breast is never dry or bland again, making it a go-to meal solution. Effortless and delicious results await!
Welcome to the ultimate guide on how to cook chicken breast in your Ninja air fryer! Are you tired of dry, flavorless chicken breast? Do you dream of perfectly cooked, juicy, and tender chicken that’s ready in minutes? Well, you’re in the right place! The Ninja air fryer is a game-changer for weeknight meals, and mastering chicken breast is one of its most popular and useful applications.
In this comprehensive guide, we’ll walk you through every step, from selecting your chicken to achieving that perfect, mouthwatering finish. You’ll learn simple techniques, helpful tips, and even some troubleshooting advice to ensure your air-fried chicken breast is a resounding success every single time. Get ready to transform your humble chicken breast into a culinary delight!
- Prep is Key: Patting your chicken breast dry ensures a better sear and crispier exterior.
- Season Generously: Don’t be shy with your spices! Even a simple salt and pepper combination makes a big difference.
- Even Thickness Matters: Pounding chicken breasts to an even thickness guarantees uniform cooking, preventing dry spots.
- Preheating is Crucial: Always preheat your Ninja air fryer to ensure the chicken cooks evenly from the start.
- Don’t Overcrowd: Give your chicken breast space in the air fryer basket for optimal air circulation and crispiness.
- Internal Temperature is King: Use a meat thermometer to check for an internal temperature of 165°F (74°C) for safe and perfectly cooked chicken.
- Resting is Essential: Allowing the chicken to rest after cooking lets the juices redistribute, resulting in a moister final product.
Why Use Your Ninja Air Fryer for Chicken Breast?
Before we dive into the how-to, let’s quickly touch upon why the Ninja air fryer is such a fantastic tool for cooking chicken breast. Air fryers work by circulating hot air around your food at high speeds, creating a crispy exterior while keeping the inside moist and tender. This is ideal for lean cuts like chicken breast, which can easily become dry if overcooked.
With a Ninja air fryer, you get the benefits of traditional frying (crispiness) without the excess oil, making it a healthier choice. Plus, it’s incredibly fast! You can go from raw chicken to a delicious meal in under 20 minutes. If you’re looking to expand your Ninja air fryer repertoire, consider learning how to cook a roast in a Ninja air fryer for impressive meals.
Step-by-Step Guide to Cooking Chicken Breast in a Ninja Air Fryer
Let’s get cooking! Follow these easy steps for perfectly air-fried chicken breast.
1. Gather Your Ingredients and Equipment
This sounds obvious, but having everything ready makes the process smooth.
Chicken Breast
- Quantity: For most Ninja air fryers, you can comfortably cook 2-4 boneless, skinless chicken breasts at a time without overcrowding.
- Type: Boneless, skinless chicken breasts are the most common and easiest to work with. If you’re curious about bone-in options, we have a guide on how to cook bone-in chicken breast in an air fryer.
- Size: Aim for chicken breasts that are roughly the same size and thickness. This is crucial for even cooking.
Seasonings and Oil
- Oil: A tablespoon or two of olive oil, avocado oil, or any high-heat cooking oil. This helps the seasonings stick and promotes browning.
- Salt and Pepper: Your basic essentials.
- Your Favorite Spices: Get creative! Popular choices include paprika, garlic powder, onion powder, Italian seasoning, chili powder, or a pre-made chicken rub.
- Optional Marinade: If you prefer, you can marinate your chicken for at least 30 minutes (or up to 4 hours in the fridge) before air frying.
Equipment
- Ninja Air Fryer: Make sure it’s clean and ready to go. If you’re new to your Ninja, check out our guide on how to operate a Ninja air fryer.
- Meat Thermometer: Absolutely essential for ensuring your chicken is cooked safely and perfectly.
- Tongs: For safely handling the hot chicken.
- Cutting Board and Knife: For preparing the chicken.
- Paper Towels: For drying the chicken.
- Small Bowl: For mixing seasonings.
2. Prepare the Chicken Breast
Proper preparation is the secret to great chicken breast.
Pat Dry
Take your chicken breasts out of their packaging and place them on a clean cutting board or a plate. Use paper towels to thoroughly pat them dry. This step is incredibly important because excess moisture can steam the chicken instead of allowing it to crisp up nicely.
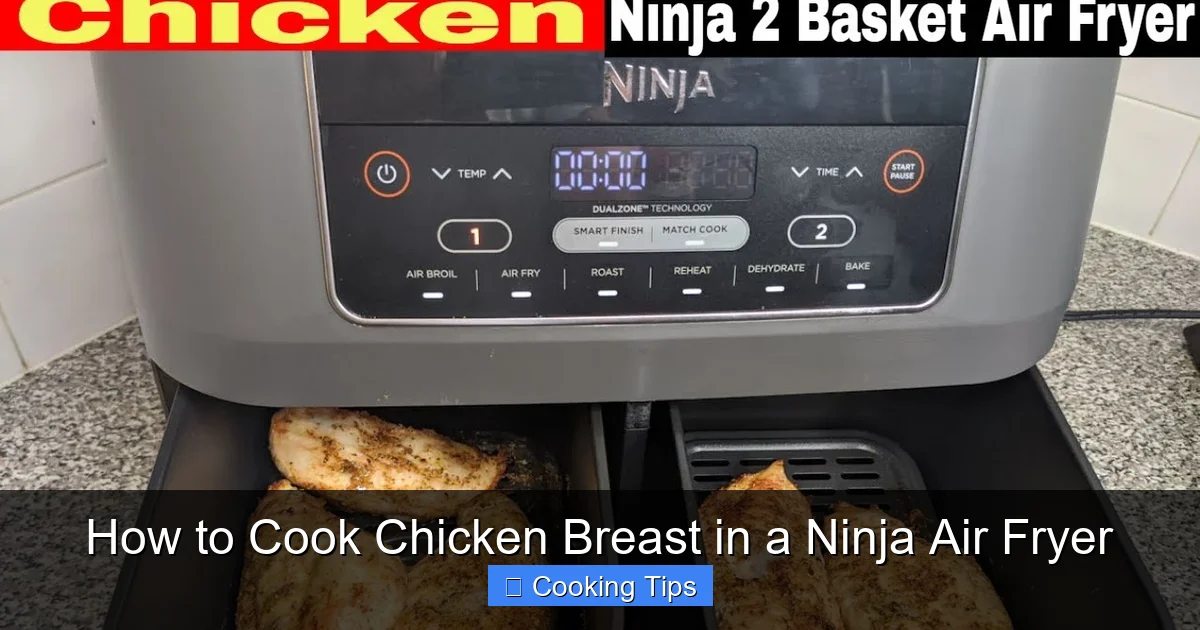
Visual guide about How to Cook Chicken Breast in a Ninja Air Fryer
Image source: i.ytimg.com
Even Thickness
If your chicken breasts are very thick in one part and thin in another, they won’t cook evenly. Some parts might be dry while others are still undercooked. To fix this, you can either:
- Butterfly: Carefully slice the thickest part of the chicken breast horizontally, almost all the way through, and then open it like a book.
- Pound: Place the chicken breast between two pieces of plastic wrap or inside a large zip-top bag. Use a meat mallet, the bottom of a heavy pan, or a rolling pin to gently pound the thicker parts until the breast is about ¾ to 1 inch thick all over. This method is often preferred for achieving consistent results.
Tip: Be gentle when pounding to avoid tearing the meat.
Season the Chicken
Now for the fun part – flavoring your chicken! In a small bowl, mix your chosen spices together. Drizzle a little oil over the chicken breasts and rub it in to coat them lightly. Then, sprinkle your spice mixture generously over all sides of the chicken, pressing it gently to help it adhere. Don’t forget salt and pepper!
Example Seasoning Blend: 1 tablespoon paprika, 1 teaspoon garlic powder, 1 teaspoon onion powder, ½ teaspoon black pepper, ½ teaspoon salt.
Marinade Option: If you marinated your chicken, gently pat it dry after removing it from the marinade before seasoning. This helps with browning. For marinated chicken, you might need to adjust cooking times slightly as the marinade can add moisture.
3. Preheat Your Ninja Air Fryer
Preheating is a critical step for almost any air fryer recipe, and chicken breast is no exception. It ensures that the chicken starts cooking immediately and evenly, leading to better texture and flavor.
How to Preheat
Most Ninja air fryer models have a preheat function. If yours doesn’t, simply set it to the desired temperature (usually around 375°F to 400°F or 190°C to 200°C for chicken breast) and let it run for about 3-5 minutes. You can also skip the preheat button and just set the time and temp, letting it run until it reaches temperature, but many models have a specific preheat indicator.
Why preheat? It creates a hot environment right away, preventing the chicken from “steaming” in the initial phase and helping to achieve that desirable golden-brown exterior.
4. Air Fry the Chicken Breast
This is where the magic happens!
Arrange the Chicken
Once your air fryer is preheated, carefully open the basket or tray. Place the seasoned chicken breasts in a single layer. Crucially, do not overcrowd the basket. If the chicken pieces are touching too much, the hot air won’t be able to circulate properly, and you’ll end up with unevenly cooked, less crispy chicken. Cook in batches if necessary. For comparison, when cooking smaller items, check out how to cook bite size potatoes air fryer.
Set the Temperature and Time
For boneless, skinless chicken breast, a good starting point is:
- Temperature: 375°F (190°C)
- Time: 15-20 minutes
These times are approximate and will vary based on the thickness of your chicken breasts and the specific model of your Ninja air fryer. Thicker breasts will take longer.
Flip Halfway Through
About halfway through the cooking time (around 8-10 minutes), carefully pull out the air fryer basket. Use your tongs to flip each chicken breast over. This ensures both sides get beautifully browned and cooked evenly.
5. Check for Doneness
This is the most important step to ensure safe and delicious chicken.
Use a Meat Thermometer
Insert a meat thermometer into the thickest part of the chicken breast, avoiding any bone or large pockets of fat. The chicken is safely cooked and ready to eat when it reaches an internal temperature of 165°F (74°C).
What if it’s not done? If it’s not quite at 165°F, return the chicken to the air fryer for a few more minutes, checking the temperature every 2-3 minutes until it reaches the safe zone. Remember, the temperature will continue to rise slightly as it rests.
What if it’s overdone? If you notice it’s already at 165°F and the exterior is getting too dark, you can try reducing the temperature slightly for the last few minutes of cooking, or cover it loosely with foil once it’s out.
6. Rest the Chicken
Don’t skip this step! Resting allows the juices to redistribute throughout the meat, making it more tender and moist.
How to Rest
Once the chicken reaches the correct internal temperature, carefully remove the chicken breasts from the air fryer basket using tongs. Place them on a clean plate or cutting board. Loosely tent them with aluminum foil and let them rest for 5-10 minutes before slicing or serving.
Why rest? When chicken cooks, the muscle fibers tighten, pushing the juices to the center. Resting allows these fibers to relax, and the juices to spread back out evenly, preventing them from all running out onto your plate when you cut into it.
7. Slice and Serve
Your perfectly cooked Ninja air fryer chicken breast is ready to enjoy!
Slice the chicken breast against the grain for the most tender results. It’s perfect for salads, sandwiches, wraps, or as a main course with your favorite sides. Enjoy your delicious, home-cooked meal!
Tips for Success
Here are some extra tips to elevate your Ninja air fryer chicken breast game:
- Don’t Be Afraid of Marinades: Marinades add moisture and flavor. Consider a lemon-herb marinade or a yogurt-based marinade for extra tenderness.
- Experiment with Rubs: Beyond basic spices, try smoky paprika, cayenne for heat, or even a touch of brown sugar in your rub for caramelization.
- Add Veggies: You can often air fry vegetables like broccoli florets or asparagus alongside your chicken. Toss them in oil and seasonings and add them during the last 8-10 minutes of cooking, ensuring they are in a single layer.
- Adjust for Thickness: Always keep the thickness of your chicken in mind. Thicker breasts need more time. If you’re unsure, it’s better to err on the side of slightly undercooked and add more time than to overcook.
- Know Your Air Fryer: Ninja air fryers can vary slightly in their heating element and fan speed. Over time, you’ll learn the nuances of your specific model.
Troubleshooting Common Issues
Even with the best intentions, sometimes things don’t go perfectly. Here’s how to address common problems.
My Chicken is Dry
This is the most common complaint. Here’s why it might happen and how to fix it:

Visual guide about How to Cook Chicken Breast in a Ninja Air Fryer
Image source: weeatatlast.com

Visual guide about How to Cook Chicken Breast in a Ninja Air Fryer
Image source: recipes.net
- Overcooked: You likely cooked it for too long or at too high a temperature. Always use a meat thermometer and remove the chicken as soon as it reaches 165°F (74°C).
- Didn’t Rest: Skipping the resting period causes juices to escape.
- Not Enough Fat/Moisture: If your chicken was very lean to begin with, consider a quick marinade or a light coating of oil.
My Chicken is Not Crispy Enough
A crispy exterior is part of the air fryer appeal.
- Too Much Moisture: Ensure you patted the chicken very dry before seasoning.
- Overcrowded Basket: Air needs to circulate! Cook in batches if necessary.
- Not Enough Oil: A light coating of oil helps with browning and crisping.
- Incorrect Temperature: Ensure your air fryer is properly preheated and set to the right temperature.
My Chicken is Cooked Unevenly
This usually comes down to inconsistent thickness.
- Uneven Thickness: Make sure you pounded or butterflied your chicken breasts to an even thickness before cooking.
- Basket Placement: Avoid piling chicken on top of itself.
Conclusion
Cooking chicken breast in your Ninja air fryer is incredibly simple, quick, and results in a delicious, healthy meal. By following these steps – from proper preparation and seasoning to precise cooking and resting – you’re well on your way to mastering this fundamental cooking technique. Say goodbye to bland, dry chicken and hello to perfectly tender, juicy, and flavorful results every time. Happy air frying!