Unlock perfectly cooked boneless chicken thighs in your air fryer with this comprehensive guide. Discover the ideal cooking time and temperature, plus essential tips for achieving juicy and crispy results. Whether you’re a beginner or looking to refine your technique, this guide will ensure your boneless thighs are a delicious success every time.
How Long to Cook Boneless Thighs in Air Fryer
Welcome to the ultimate guide for air frying boneless chicken thighs! If you’re looking for a quick, healthy, and incredibly delicious way to prepare chicken thighs, you’ve come to the right place. The air fryer is a game-changer for chicken, and boneless thighs are particularly forgiving and versatile.
This guide will walk you through everything you need to know to achieve perfectly cooked boneless chicken thighs every single time. We’re talking about tender, juicy meat with wonderfully crispy edges – the kind of results that will make you wonder why you ever cooked them any other way. We’ll cover the exact cooking times, the best temperatures, and all the little secrets that make air fryer chicken thighs an absolute winner. Get ready to impress yourself and anyone you’re cooking for!
Key Takeaways
- Ideal Cooking Time: Boneless chicken thighs typically cook in 15-20 minutes in an air fryer, depending on size and thickness.
- Optimal Temperature: A temperature of 375°F (190°C) is generally best for achieving crispy exteriors and fully cooked interiors.
- Internal Temperature is Key: Always cook chicken to an internal temperature of 165°F (74°C) for safety and perfect doneness.
- Don’t Overcrowd: Arrange thighs in a single layer for even cooking and crisping; cook in batches if necessary.
- Pat Dry for Crispiness: Thoroughly drying the chicken thighs before seasoning helps achieve a desirable crispy skin.
- Flip Midway: Flipping the thighs halfway through the cooking process ensures even browning and cooking on both sides.
Understanding Boneless Chicken Thighs
Boneless, skinless chicken thighs are a fantastic choice for air frying. They have a bit more fat than chicken breasts, which helps them stay moist and flavorful. This makes them less prone to drying out, even in the high heat of an air fryer. Their smaller size and uniform shape also contribute to faster and more even cooking.
The Magic Combination: Time and Temperature
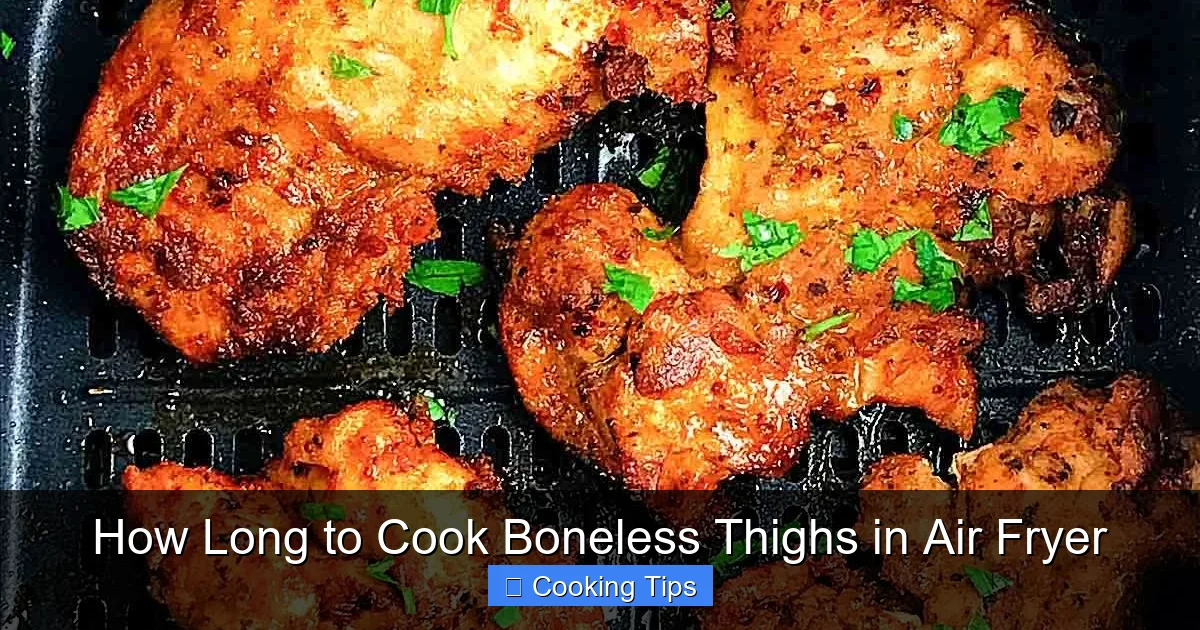
Visual guide about How Long to Cook Boneless Thighs in Air Fryer
Image source: i.pinimg.com
The golden question is: How long to cook boneless thighs in the air fryer? While there’s a general range, a few factors influence the exact cooking time.
Determining the Ideal Temperature
For most boneless chicken thighs, an air fryer temperature of 375°F (190°C) is the sweet spot. This temperature is hot enough to crisp up the outside beautifully while ensuring the inside cooks through without becoming dry. Some recipes might suggest slightly higher or lower temperatures depending on the marinade or seasoning used, but 375°F is a fantastic starting point.
Pinpointing the Perfect Cooking Time
The average cooking time for boneless chicken thighs in an air fryer is typically between 15 to 20 minutes. However, this can vary based on:
- Size and Thickness: Larger or thicker thighs will take longer to cook than smaller, thinner ones.
- Air Fryer Model: Different air fryers can have slight variations in heating intensity.
- Initial Temperature of the Chicken: If you’re cooking chicken straight from the refrigerator, it might take a minute or two longer than chicken that’s been sitting out for a few minutes.
It’s always best to start checking for doneness around the 15-minute mark.
Step-by-Step Guide to Air Frying Boneless Chicken Thighs

Visual guide about How Long to Cook Boneless Thighs in Air Fryer
Image source: myairfryerkitchen.com
Let’s get cooking! Follow these simple steps to make delicious boneless chicken thighs in your air fryer.
Step 1: Prepare Your Chicken Thighs
This is where you set the stage for success.
Prepping the Thighs
- Pat Dry: Take your boneless chicken thighs and pat them thoroughly dry with paper towels. This is a crucial step for achieving a crispy exterior. Moisture on the surface will steam the chicken rather than letting it crisp up.
- Trim Excess Fat (Optional): If there are any large, unsightly pieces of fat, you can trim them, but a little fat is good for flavor and moisture.
Seasoning Your Thighs
This is where you can get creative! You can go simple with salt and pepper, or get adventurous with your favorite spice blends.
- Simple Seasoning: A generous sprinkle of salt, black pepper, garlic powder, and onion powder is a classic.
- Marinades: If you’ve marinated your chicken, ensure you pat off excess marinade before air frying to prevent sogginess. You might adjust the cooking time slightly if the chicken is very wet from the marinade.
- Spice Rubs: Use your favorite store-bought or homemade spice rubs. Ensure they adhere well to the chicken.
For best results, toss the chicken thighs with your chosen seasonings or marinade in a bowl, ensuring they are evenly coated.
Step 2: Preheat Your Air Fryer
Preheating is key to even cooking and crisping.
Why Preheat?
An air fryer works by circulating hot air. Preheating ensures that by the time you put your chicken in, the air is already at the desired temperature, allowing for immediate searing and cooking.
How to Preheat
Set your air fryer to 375°F (190°C) and let it run for about 3-5 minutes before you add the chicken. Most air fryers have a preheat indicator or you can simply set the timer.
Step 3: Arrange Chicken in the Air Fryer Basket
Proper arrangement is vital for crispy chicken.
Achieving a Single Layer
Place the seasoned boneless chicken thighs in a single layer in the air fryer basket. Do not overcrowd the basket. Overcrowding will cause the chicken to steam instead of air fry, leading to soggy results and uneven cooking.
Cooking in Batches
If you have more chicken than can fit in a single layer, it’s much better to cook in batches. You can keep the cooked chicken warm in a low oven (around 200°F/95°C) while you cook the remaining batch. This ensures optimal crispiness for all your chicken thighs.
Step 4: Air Fry the Chicken Thighs
Now for the main event!
Initial Cook Time
Place the basket in the air fryer and set the timer for 10 minutes.
The Mid-Cook Flip
After 10 minutes, open the air fryer and carefully flip each chicken thigh. This is essential for ensuring both sides get equally golden brown and crispy. You’ll likely see some lovely browning already.
Continue Cooking
Close the air fryer and continue cooking for another 5 to 10 minutes. The total cooking time will depend on the factors mentioned earlier.
Step 5: Check for Doneness
This is the most important step to ensure your chicken is safe and perfectly cooked.
Using a Meat Thermometer
The most reliable way to check if your chicken is done is by using an instant-read meat thermometer. Insert the thermometer into the thickest part of a chicken thigh, avoiding any bone fragments (though these are boneless!). The internal temperature should reach 165°F (74°C).
Visual Cues
You can also look for visual cues:
- The juices should run clear when pierced with a fork or knife.
- The chicken should be opaque throughout with no pinkness.
- The exterior should be golden brown and slightly crispy.
If your chicken hasn’t reached 165°F (74°C) after the total cooking time, continue to cook in 2-3 minute increments, checking the temperature each time.
Step 6: Rest Your Chicken
Patience is a virtue, especially when it comes to juicy chicken!
Why Rest?
Once your chicken reaches the correct internal temperature, remove it from the air fryer and let it rest on a plate or cutting board for about 5-10 minutes. This allows the juices to redistribute throughout the meat, resulting in a more tender and moist chicken thigh. If you cut into it immediately, all those delicious juices will run out onto the plate.
Step 7: Serve and Enjoy
Your perfectly air-fried boneless chicken thighs are ready to be enjoyed! They are delicious on their own, sliced over salads, used in wraps, or as part of a larger meal.
Tips for Extra Crispy Boneless Chicken Thighs

Visual guide about How Long to Cook Boneless Thighs in Air Fryer
Image source: familydinners.com
Want to take your crispy chicken game to the next level? Here are a few extra tips:
- The Importance of Dryness: I can’t stress this enough – patting your chicken thoroughly dry is the secret to crispiness.
- A Touch of Oil: While not always necessary, a light toss in a tablespoon or two of oil (like olive oil or avocado oil) can help seasonings adhere better and contribute to a crispier skin.
- Don’t Skip the Flip: Flipping halfway through is crucial for even browning.
- Baking Powder (for extra crispy skin): If your thighs have skin on (which is less common for “boneless, skinless” but can happen with some cuts), a small amount of baking powder mixed with your spices can help achieve incredible crispiness by altering the pH of the skin. Use about 1 teaspoon per pound of chicken.
- Don’t Cover While Resting: Allow the chicken to rest uncovered. Covering can create steam and make the skin less crispy.
Common Issues and Troubleshooting
Even with the best guides, sometimes things don’t go perfectly. Here’s how to fix common problems:
Problem: Chicken is Dry
- Cause: Overcooked, too lean a cut, or not enough resting time.
- Solution: Use a meat thermometer to avoid overcooking. Ensure you’re using thighs with a bit of fat. Always rest your chicken!
Problem: Chicken is Soggy
- Cause: Overcrowded basket, not patted dry, or cooked in too much moisture (e.g., excess marinade).
- Solution: Cook in a single layer, pat chicken very dry, and drain excess marinade.
Problem: Uneven Cooking
- Cause: Chicken pieces are different sizes or air fryer basket was overcrowded.
- Solution: Try to use uniformly sized thighs and cook in batches if necessary. Flipping helps, but starting with uniform pieces is best.
Problem: Seasoning Falling Off
- Cause: Chicken surface was too wet, or seasoning wasn’t pressed in.
- Solution: Ensure chicken is very dry before seasoning. A light mist of oil can help seasonings stick.
Air Fryer Boneless Thighs vs. Other Cooking Methods
Why choose the air fryer for boneless chicken thighs?
- Speed: It’s significantly faster than oven-baked or slow-cooked chicken.
- Crispiness: It achieves a crispier exterior than most oven methods without deep frying.
- Healthier: Uses a fraction of the oil compared to deep frying, making it a healthier option.
- Convenience: Easy cleanup and minimal fuss compared to traditional frying or more complex oven recipes.
This method is also great for when you want something quick, similar to how you might want to prepare boneless chicken wings or even just a simple meal.
Experimenting with Flavors
Once you’ve mastered the basic timing and temperature, don’t be afraid to experiment with different flavors.
- Lemon Herb: Fresh lemon zest, rosemary, thyme, garlic, salt, and pepper.
- Spicy Cajun: Cajun seasoning, a pinch of cayenne, paprika, garlic powder, onion powder, salt.
- Sweet BBQ: Marinate in your favorite BBQ sauce or use a dry rub and then brush with BBQ sauce in the last few minutes of cooking.
- Asian-Inspired: Soy sauce, ginger, garlic, honey, and a touch of sesame oil.
Remember to adjust your cooking time slightly if you’re using marinades that are high in sugar, as they can caramelize and burn quickly. For many other delicious air fryer recipes, consider exploring how to cook a pot pie in an air fryer or even how to cook a crab cake in the air fryer for variety.
Conclusion
Cooking boneless chicken thighs in the air fryer is a straightforward process that yields incredibly delicious results. By paying attention to the cooking time (typically 15-20 minutes at 375°F/190°C), ensuring your chicken reaches an internal temperature of 165°F (74°C), and following these simple steps, you’re guaranteed to make perfectly tender and crispy chicken thighs. The key is preparation, not overcrowding, and checking for doneness. So go ahead, experiment with your favorite seasonings, and enjoy this versatile and healthy meal option!