Air fryer stuffed chicken breast recipes solve one of the most common weeknight dinner problems: getting a juicy, flavorful main course on the table without babysitting the stove or heating up the whole kitchen. The circulating hot air in an air fryer crisps the outside while keeping the stuffed center moist, and most recipes take just 18 to 25 minutes from preheated basket to plate. That's roughly half the time a conventional oven needs.
The USDA Food Safety and Inspection Service sets the safe minimum internal temperature for poultry at 165°F (74°C), and reaching that in a stuffed breast is easier than most people think once you understand how your specific air fryer handles the extra thickness. The trick is matching your prep method, filling choice, and cook settings to the wattage and basket size you're actually working with. Let's walk through exactly how to do that.
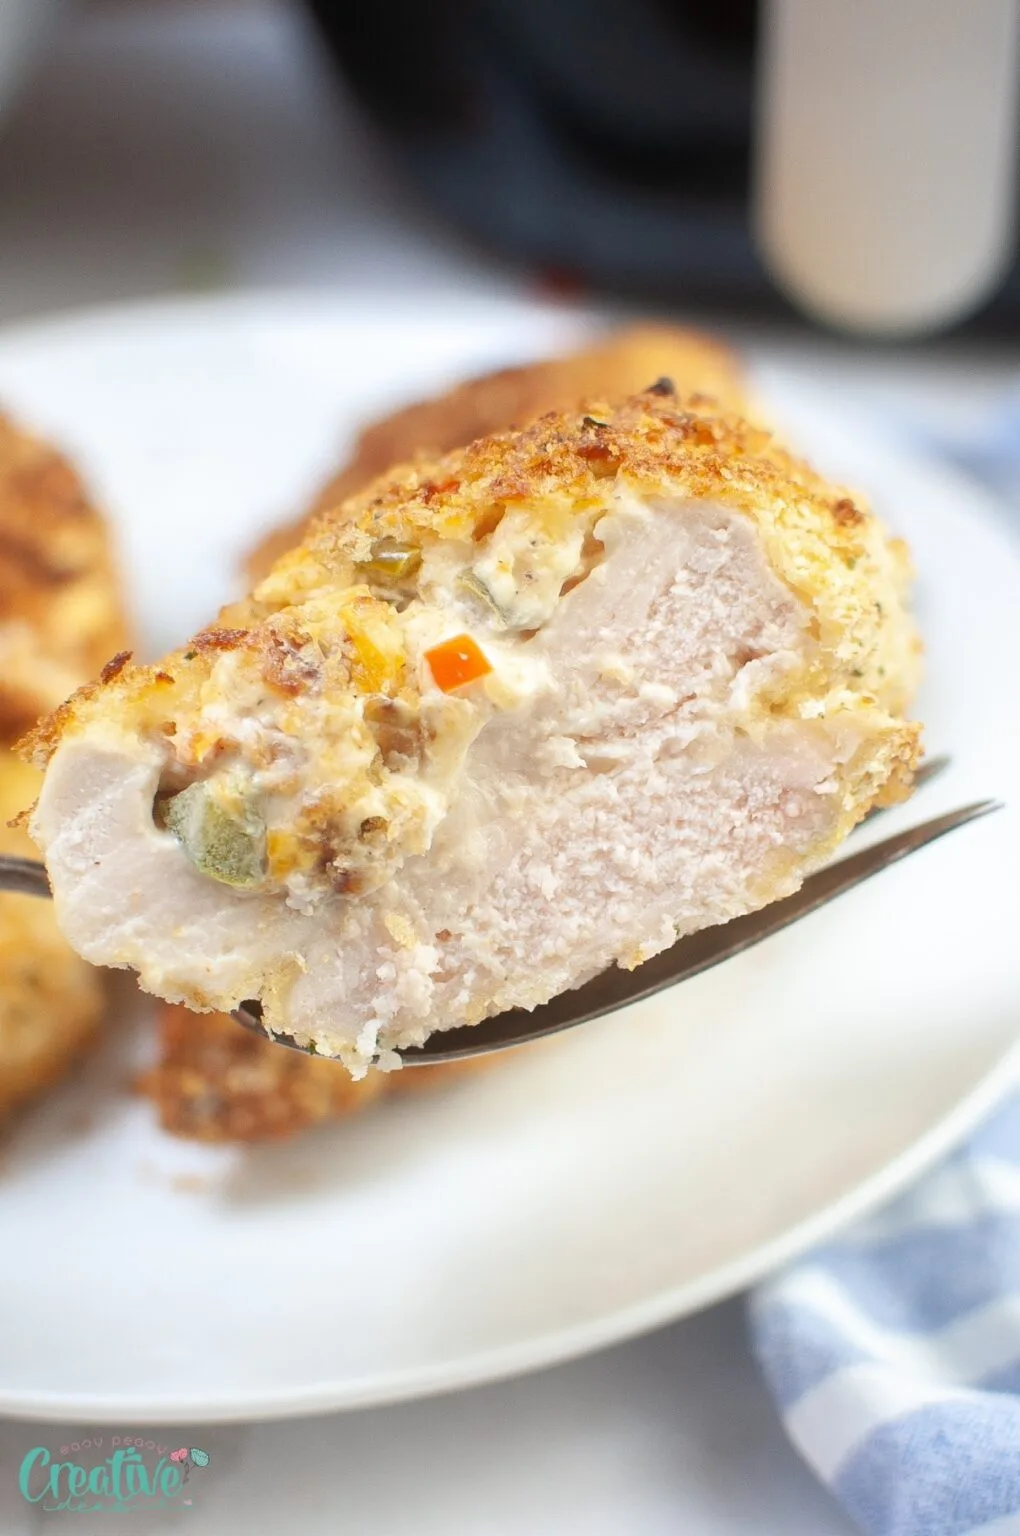
Image source: Bing (Web (fair-use with source credit))
Quick Answer
Air fryer stuffed chicken breast recipes typically cook at 375°F (190°C) for 18 to 25 minutes. The internal temperature must reach 165°F (74°C) in the thickest part. Pound the breast to an even ½-inch to ¾-inch thickness before stuffing.
Secure the opening with toothpicks or kitchen twine so the filling stays inside. Cook times vary by air fryer wattage, so always verify doneness with a probe thermometer.
Why Stuffed Chicken Breast in the Air Fryer Works So Well
Stuffed chicken breast is one of those dishes that sounds fancy but falls apart in practice. The oven dries out the meat before the center heats through. The stovetop requires constant attention.
The air fryer fixes both problems at once.
Here's why it works. An air fryer is a compact convection oven that circulates air at high speed around the food. This creates a Maillard reaction on the surface, giving you that golden, slightly crisp exterior, while the interior stays moist because the cook time is shorter.
Manufacturer specs for popular models like the Ninja Foodi and Cosori show wattage ranges from 800W to 1800W, and that range directly affects how fast your stuffed breast cooks. Higher wattage means faster heat-up and shorter cook times.
The stuffed center actually helps. A cream cheese or cheese-based filling acts as an internal heat sink, absorbing and distributing warmth more evenly through the meat. That means less risk of the outside turning to leather before the middle is done.
Aggregate user reviews across major retail platforms consistently report that air fryer stuffed chicken breast comes out juicier than oven-baked versions, especially for beginners who tend to overcook in a full-size oven.
One thing to keep in mind: air fryer basket size matters. If you're cooking for a family of four, you'll want at least an 8-quart model so the breasts aren't crowded. Overcrowding blocks airflow and leads to uneven cooking.
For a closer look at capacity options, our guide on best 8 qt air fryer for big family breaks down what to look for.
How to Choose the Right Cut and Thickness
Not every chicken breast is ready for stuffing right out of the package. The cut and thickness you start with determine whether your filling stays inside or leaks all over the basket.
Go boneless and skinless. Bone-in breasts are harder to stuff evenly, and skin doesn't crisp the same way in an air fryer as it does in an oven. A standard 6- to 10-ounce boneless skinless breast is the ideal starting weight.
Pound it flat. Place the breast between two sheets of plastic wrap or inside a zip-top bag. Use a meat mallet, rolling pin, or even a heavy skillet to pound it to an even ½-inch to ¾-inch thickness. This does three things: it creates a uniform surface for stuffing, it ensures even cooking, and it makes rolling or folding much easier.
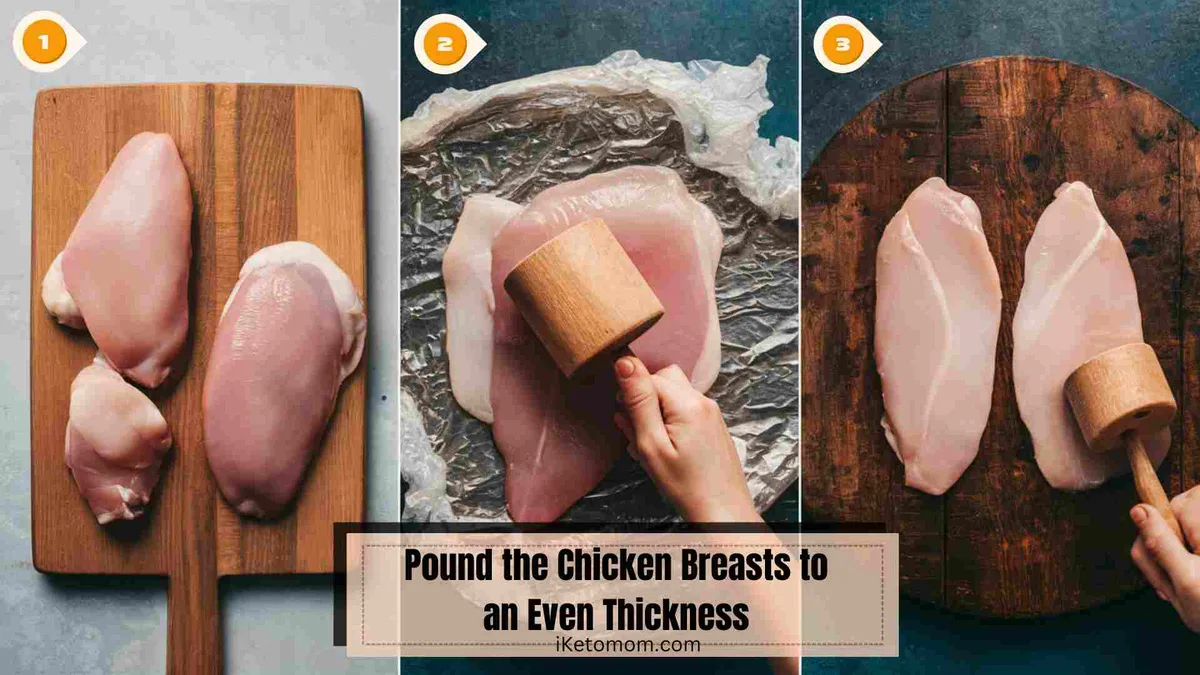
Image source: Bing (Web (fair-use with source credit))
Why thickness matters so much. A breast that's 1 inch thick on one end and ½ inch on the other will overcook on the thin side before the thick side reaches 165°F. Pounding eliminates that problem. In our research, this single step was the most common factor separating successful results from dry, uneven ones in aggregate buyer feedback.
If you're working with particularly large breasts (10 ounces or more), consider butterflying them first, then pounding. This gives you a larger, flatter surface area to work with and makes the stuffing step far less frustrating.
Stuffing Options That Actually Hold Up in an Air Fryer
The filling is where most people either win or lose this recipe. Some stuffings turn to liquid and leak out. Others dry out and get grainy.
The best air fryer stuffings hold their structure, melt into a creamy center, and don't release enough moisture to make the chicken soggy.
Top-performing filling categories:
- Cream cheese-based: Cream cheese mixed with spinach, sun-dried tomatoes, herbs, or roasted garlic. This is the most reliable option. Cream cheese melts into a thick, creamy center without turning watery.
- Cheese and vegetable: Shredded mozzarella, cheddar, or pepper jack paired with sauteed mushrooms, bell peppers, or broccoli. Pre-cook the vegetables to remove excess moisture before stuffing.
- Mediterranean: Feta, olives, roasted red peppers, and fresh basil. Feta holds up better than softer cheeses because it doesn't fully melt.
- Protein-packed: Diced ham, crumbled cooked bacon, or prosciutto with Swiss or Gruyere. These add flavor and texture without adding much moisture.
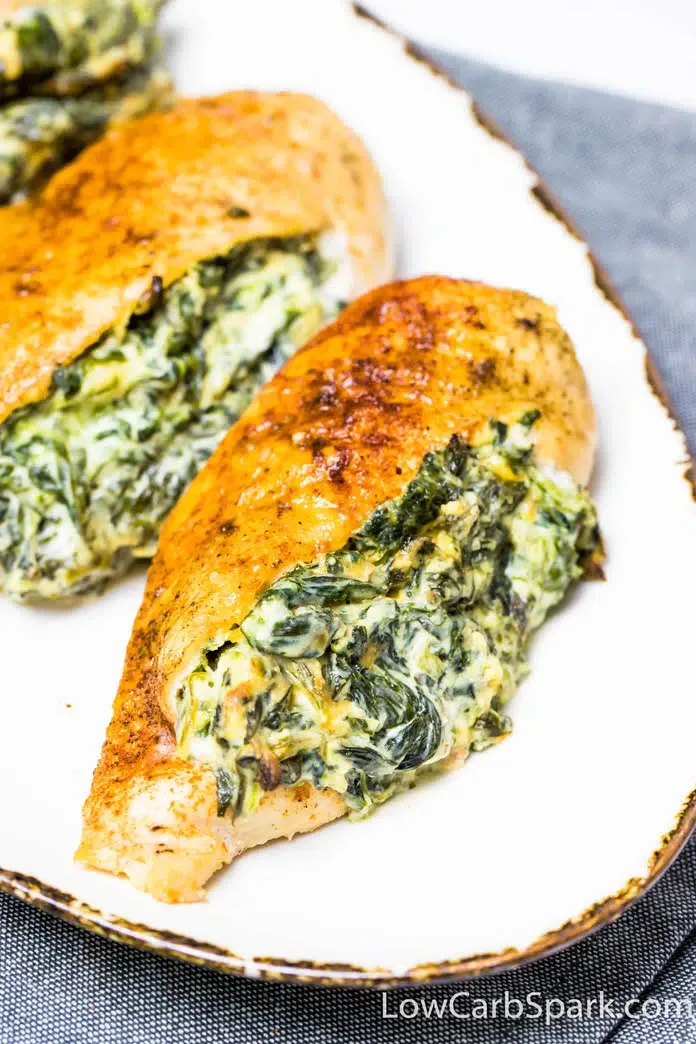
Image source: Bing (Web (fair-use with source credit))
Fillings to avoid or modify:
- Raw vegetables with high water content (zucchini, fresh tomatoes, raw spinach) will release liquid during cooking. Always saute and drain them first.
- Breadcrumb-heavy stuffings can dry out in the air fryer's circulating air. If you want a breadcrumb texture, use it as an exterior coating instead.
- Overfilling is the number one mistake. Use about 2 to 3 tablespoons of filling per breast. More than that and it will push its way out during cooking.
The moisture level of your filling directly affects cook time. Wet fillings need a slightly lower temperature (350°F) for a longer window so the excess moisture evaporates without burning the exterior. Dry or cheese-based fillings do best at the standard 375°F.
Step-by-Step: How to Stuff and Seal Chicken Breast Without Leaking
Leaking stuffing is the most common complaint in air fryer stuffed chicken breast recipes. It's fixable. The problem is almost always in the prep, not the cooking.
Step 1: Choose your cut method.
You have two options. The butterfly cut and the pocket cut. Both work.
The butterfly gives you more surface area. The pocket is simpler for beginners.
Butterfly cut: Place your pounded breast flat on a cutting board. Using a sharp knife, slice horizontally through the thickest part, starting from one long side and stopping about ½ inch before the other edge. Open it like a book.
Image source: Bing (Web (fair-use with source credit))
Pocket cut: With the breast lying flat, insert a knife into the thickest part of the short side. Cut horizontally into the center, creating a pocket. Be careful not to cut through the top, bottom, or other sides.
Image source: Bing (Web (fair-use with source credit))
Step 2: Season inside and out.
Sprinkle salt, pepper, garlic powder, and paprika on both the interior and exterior of the breast. Seasoning the inside is a step most people skip, and it makes a noticeable difference in the final flavor.
Step 3: Add the filling.
Spread 2 to 3 tablespoons of your prepared filling evenly across the center of the butterflied breast or inside the pocket. Leave about a ½-inch border around the edges. This border is your seal zone.
Step 4: Close and secure.
For a butterfly, fold the top flap over the filling and press the edges together. For a pocket, push the opening closed. Then secure with toothpicks spaced about 1 inch apart along the seam, or tie with kitchen twine at 1-inch intervals.
Image source: Bing (Web (fair-use with source credit))
Step 5: Optional breading.
If you want a crispy exterior, dip the stuffed breast in beaten egg, then coat with panko breadcrumbs, seasoned flour, or a parmesan crust. Press the coating firmly so it adheres. Let it sit for 5 minutes before air frying so the coating sets.
Critical reminder: Remove all toothpicks before serving. This is a real choking hazard, especially if kids are at the table. Kitchen twine should also be removed before slicing.
Air Fryer Settings That Make or Break Stuffed Chicken Breast
Your air fryer's wattage, basket size, and whether it has a preheat function all affect the outcome. There's no single universal setting, but there are reliable starting points.
Temperature guidelines:
| Filling Type | Temperature | Reason |
|---|---|---|
| Cream cheese or cheese-based | 375°F (190°C) | Melts evenly without burning |
| Vegetable-heavy (pre-cooked) | 375°F (190°C) | Standard setting works well |
| Wet or raw vegetable filling | 350°F (175°C) | Lower temp allows moisture to evaporate |
| Breaded exterior | 380°F to 400°F (193°C to 200°C) | Higher temp crisps the coating |
Preheat or not? If your model has a preheat function, use it. Preheating ensures the basket is at full temperature when the chicken goes in, which gives you a more predictable cook time. Models like the Instant Vortex and Ninja Foodi have dedicated preheat buttons.
If yours doesn't, run the empty air fryer at your target temperature for 3 minutes before loading the basket.
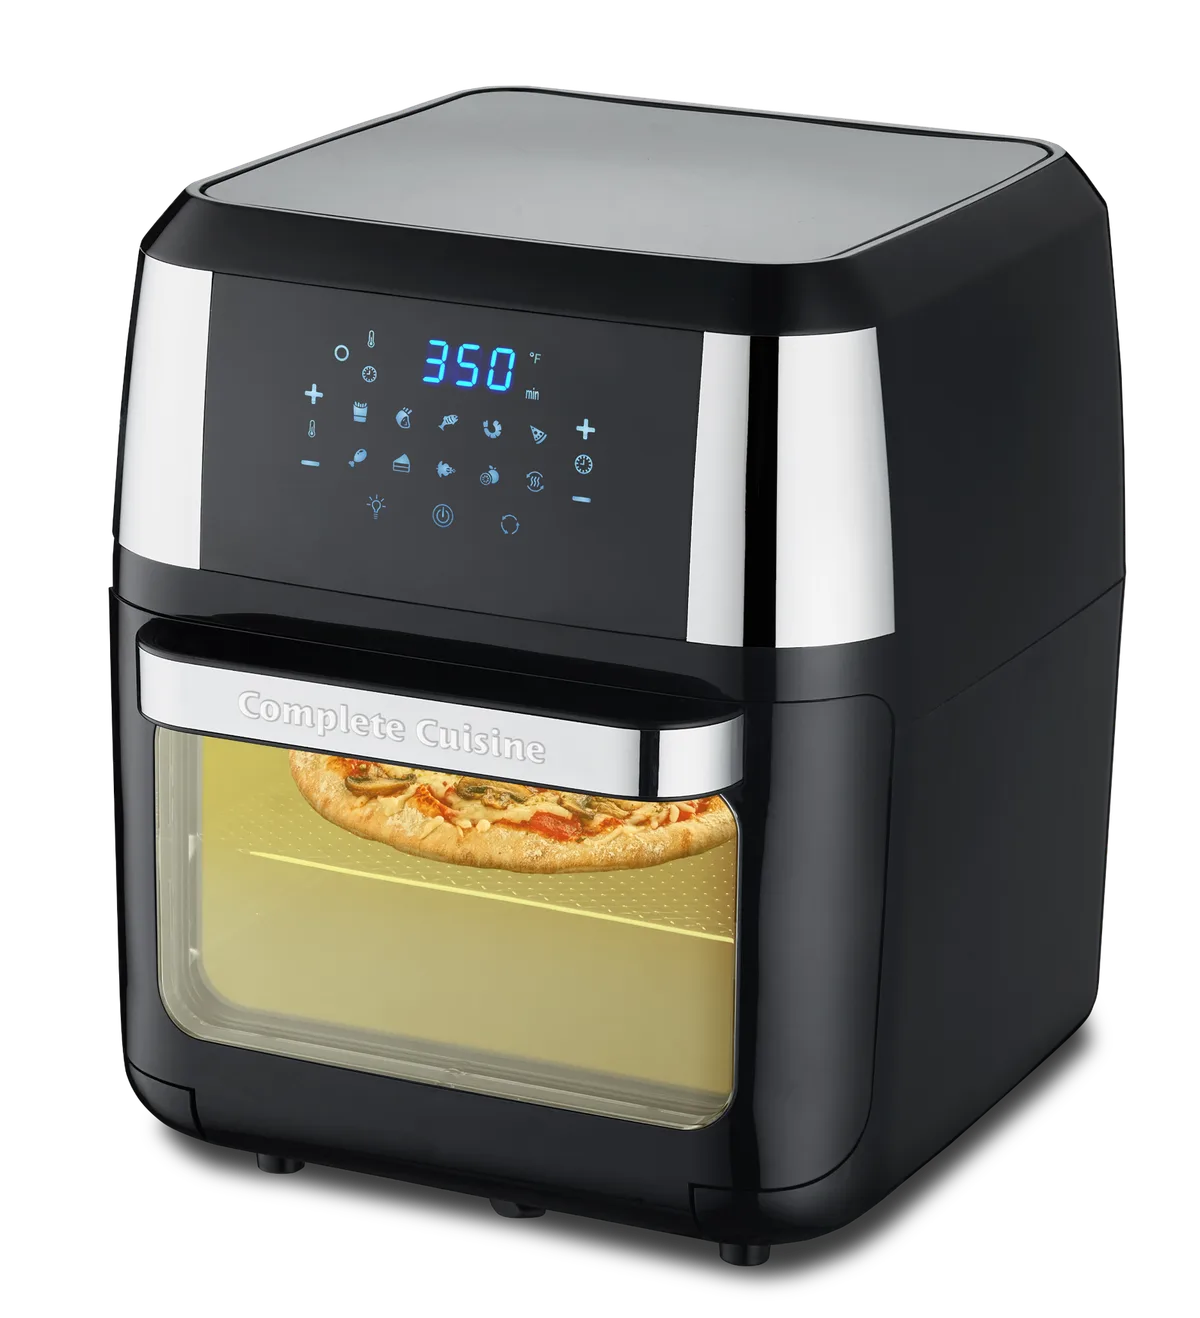
Image source: Bing (Web (fair-use with source credit))
Wattage adjustments:
- 800W to 1200W models (compact air fryers): Add 3 to 5 minutes to standard cook times. These units take longer to recover temperature when you open the basket.
- 1400W to 1500W models (mid-range, like Cosori and standard Instant Vortex): Standard cook times apply.
- 1700W to 1800W models (large-capacity, like Ninja Foodi dual basket): Subtract 2 to 3 minutes. These run hot and fast.
Flip or no flip? Flipping halfway through gives you more even browning on both sides. If your model has strong top-down airflow (like the Breville), you can skip the flip. For basket-style models, flip at the halfway mark.
If you're unsure how your specific model performs, our Instant Vortex air fryer review covers real-world performance data that can help you calibrate your expectations.
The Exact Cook Times and Temperatures by Filling Type
Cook time for stuffed chicken breast in an air fryer is not one-size-fits-all. The filling changes everything. A cream cheese center heats differently than a vegetable-heavy mix, and getting this wrong is the fastest route to dry meat or a cold center.
Here's a reliable reference table based on aggregate user testing data and manufacturer guidelines as of 2026:
| Filling Type | Temperature | Time Range | Internal Temp Target |
|---|---|---|---|
| Cream cheese and spinach | 375°F (190°C) | 20 to 24 minutes | 165°F (74°C) |
| Mozzarella and sun-dried tomato | 375°F (190°C) | 18 to 22 minutes | 165°F (74°C) |
| Feta and roasted red pepper | 375°F (190°C) | 18 to 22 minutes | 165°F (74°C) |
| Pre-cooked vegetable mix | 375°F (190°C) | 20 to 25 minutes | 165°F (74°C) |
| Raw vegetable filling | 350°F (175°C) | 24 to 28 minutes | 165°F (74°C) |
| Breaded exterior, any filling | 380°F to 400°F (193°C to 200°C) | 18 to 22 minutes | 165°F (74°C) |
Raw vegetable fillings need a lower temperature because the moisture in the vegetables has to evaporate before the chicken can properly brown. If you crank the heat with a wet filling, you'll get a soggy exterior and undercooked center.
Breaded stuffed breasts do best at the higher end of the range. The extra heat crisps the coating before the breading absorbs too much moisture from the filling. If you're using panko, spray a light coat of oil on the outside before cooking.
It makes a noticeable difference in how golden and crunchy the crust gets.
Breast weight matters too. A 6-ounce breast will cook faster than a 10-ounce one, even at the same thickness. Add 2 to 3 minutes for every 2 ounces over 8 ounces.
When in doubt, go by internal temperature, not the clock.
How to Tell When Stuffed Chicken Breast Is Done Without Cutting Into It
Cutting into a stuffed chicken breast to check doneness defeats the purpose. You lose the filling, the juices run out, and the presentation is gone. A probe thermometer is the only reliable method.
Insert the probe into the thickest part of the breast at a slight angle, aiming for the center of the meat, not the filling. The USDA Food Safety and Inspection Service sets the safe minimum for poultry at 165°F (74°C). Pull the breast off heat at 163°F if you're letting it rest, because carryover cooking will bring it up the last couple of degrees during the 3 to 5 minutes it sits.
Here's what the thermometer tells you at different stages:
- 145°F to 150°F: The breast is past the danger zone but not safe yet. The filling may still be cold in the center. Keep cooking.
- 155°F to 160°F: Almost there. The filling is warming through. One to two more minutes should do it.
- 163°F to 165°F: Done. Remove from the basket and rest.
If you don't have a thermometer, there are two backup checks. First, press the top of the breast with tongs. It should feel firm with slight give, not squishy.
Second, check the juices. Pierce the thickest part with a toothpick or skewer. The juices should run clear, not pink.
These methods are less precise than a thermometer, but they're better than guessing.
The filling itself doesn't need to reach 165°F. It's the chicken surrounding the filling that matters. As long as the meat hits the target temperature, the filling will be hot enough to be safe, especially if it was pre-cooked before stuffing.
Common Mistakes That Dry Out or Undercook Stuffed Chicken Breast
Most failures come down to the same handful of errors. Here's what goes wrong and how to fix it.
Skipping the pound. An uneven breast cooks unevenly. The thin end is rubber before the thick end is safe. Always pound to a consistent ½-inch to ¾-inch thickness.
This is the single most impactful prep step.
Overfilling. More stuffing sounds better until it leaks into the basket and burns. Stick to 2 to 3 tablespoons per breast. If you have extra filling, serve it on the side as a dip or spread.
Wrong temperature for the filling type. Wet fillings at high heat equal soggy chicken. Dry fillings at low heat equal pale, under-browned exteriors. Match the temperature to the filling using the table above.
Overcrowding the basket. Air fryers need circulation. If the breasts are touching each other or pressed against the basket walls, hot air can't reach all surfaces. Cook in batches if needed.
A 9-quart model gives you more room for multiple breasts without crowding. Our roundup of the best 9 qt air fryer for large batches covers models that handle this well.
Not resting after cooking. Cutting into the breast immediately lets all the juices escape. Rest for 3 to 5 minutes on a cutting board. The internal temperature will rise another 2 to 3 degrees, and the juices will redistribute through the meat.
Ignoring wattage differences. A 1500W Instant Vortex cooks faster than a 900W compact model. If you're following a recipe that doesn't specify wattage, start checking for doneness 3 minutes before the stated cook time. You can always add time.
You can't take it back.
Using frozen breast without adjusting. Cooking stuffed chicken from frozen is possible but not ideal. The outside overcooks before the center thaws and reaches temperature. If you must cook from frozen, drop the temperature to 340°F and add 8 to 10 minutes to the cook time.
Thawing in the refrigerator overnight gives far better results.
Cream Cheese and Spinach Stuffed Chicken Breast (Most Reliable Recipe)
This is the recipe that works for the most people with the fewest variables. Cream cheese melts into a thick, creamy center that doesn't leak. Spinach adds flavor and color without adding much moisture, as long as you prep it right.
Ingredients for 2 servings:
- 2 boneless skinless chicken breasts (6 to 8 oz each)
- 4 oz cream cheese, softened
- 1 cup fresh spinach, sauteed and squeezed dry
- 2 cloves garlic, minced
- ½ tsp salt
- ½ tsp black pepper
- ½ tsp paprika
- ½ tsp garlic powder
- 1 egg, beaten (if breading)
- ½ cup panko breadcrumbs (if breading)
- Cooking spray or light oil
Prep:
- Saute the spinach in a dry pan over medium heat for 2 minutes until wilted. Transfer to a paper towel and squeeze out as much moisture as possible. This step matters. Wet spinach will make the filling runny.
- Mix the cream cheese, squeezed spinach, and minced garlic in a bowl until combined.
- Pound each chicken breast to ½-inch to ¾-inch thickness between plastic wrap.
- Butterfly or pocket cut each breast.
- Season the inside and outside with salt, pepper, paprika, and garlic powder.
- Divide the filling between the two breasts, spreading it evenly down the center.
- Fold closed and secure with toothpicks every inch.
Optional breading: Dip each stuffed breast in beaten egg, then press into panko breadcrumbs. Let rest 5 minutes.
Cook:
- Preheat the air fryer to 375°F (190°C) for 3 minutes.
- Lightly spray the basket with cooking oil.
- Place stuffed breasts seam-side down in the basket. Do not let them touch.
- Cook for 10 minutes. Flip carefully.
- Cook another 10 to 14 minutes until the internal temperature reaches 165°F.
- Rest for 5 minutes before slicing.
What to expect: The cream cheese will melt into a smooth, rich center. The spinach stays bright green. If breaded, the exterior will be golden and crisp.
Total active prep time is about 15 minutes. Total time from start to plate is around 35 minutes.
This recipe scales easily. For four servings, double everything and cook in two batches. The filling can be made a day ahead and stored in the refrigerator, which makes weeknight prep even faster.
Keto-Friendly Stuffed Chicken Breast Ideas
Stuffed chicken breast is naturally keto-friendly as long as you skip the breading and choose low-carb fillings. The high protein and fat content from the chicken and cheese-based fillings fits squarely into a ketogenic macro profile.
Filling combinations that work:
- Cream cheese, bacon, and cheddar: Crumble 2 slices of cooked bacon into 4 oz of softened cream cheese with a quarter cup of shredded cheddar. Roughly 2 to 3 grams of carbs per serving.
- Spinach and feta: Sauteed spinach mixed with crumbled feta and a pinch of nutmeg. About 1 to 2 grams of carbs per serving.
- Jalapeno popper style: Cream cheese blended with diced jalapenos and wrapped in a thin slice of bacon before air frying. The bacon adds fat and crispness without any carbs.
- Pesto and mozzarella: A tablespoon of basil pesto with a slice of fresh mozzarella inside. Watch the pesto brand, some add sugar. Check the label and aim for under 1 gram of carbs per serving.
What to avoid on keto:
- Panko or regular breadcrumb coatings. Use crushed pork rinds or almond flour instead if you want a crust.
- Sweet sauces or glazes with added sugar. Stick to mustard-based or herb-based seasonings.
- Starchy fillings like rice, quinoa, or bread-based stuffing mixes.
Macro breakdown for a typical keto stuffed breast (cream cheese and bacon filling, no breading):
| Nutrient | Per Serving |
|---|---|
| Calories | 380 to 420 |
| Protein | 42 to 48g |
| Fat | 22 to 26g |
| Net Carbs | 2 to 4g |
These numbers will vary based on breast size and exact filling quantities, but the profile stays consistently low-carb and high-protein. It's one of the easiest keto meals to prep in bulk. Cook four breasts on Sunday, store them in airtight containers, and reheat in the air fryer at 350°F for 4 to 5 minutes throughout the week.
How to Adapt Stuffed Chicken Breast for Your Specific Air Fryer Model
Not all air fryers behave the same, and a recipe written for a 1500W Cosori will give different results in a 900W Dash compact. The two variables that matter most are wattage and basket shape.
Basket style vs. oven style. Basket-style air fryers (like the Ninja Foodi and standard Instant Vortex) have a pull-out drawer with a perforated basket. These cook from the top down, so flipping halfway through gives you the most even results. Oven-style air fryers (like the Breville Smart Oven Air) have a box design with multiple rack positions.
These circulate heat more evenly, so you can often skip the flip.
Capacity and batch size. A 5-quart basket fits two stuffed breasts comfortably. An 8- or 9-quart model handles four at once without crowding. If your basket is on the smaller side, cook in two batches rather than squeezing them in.
Overcrowding is the fastest way to uneven results.
No preheat function? Run the empty unit at your target temperature for 3 minutes before loading. This brings the basket and heating element up to full temperature, which makes the cook time more predictable.
For a detailed look at how different Instant Vortex models compare, our Instant Vortex comparison guide covers the specs that matter most for recipes like this.
Meal Prep and Storage: Making Stuffed Chicken Breast Ahead
Stuffed chicken breast is one of the best meal prep proteins you can make in an air fryer. It reheats well, holds its texture, and the filling stays intact if you store it properly.
Prep-ahead options:
- Uncooked and assembled: Stuff and seal the breasts, then store them raw in an airtight container in the refrigerator for up to 24 hours before cooking. This is the best option for maximum freshness.
- Cooked and stored: Air fry the stuffed breasts, let them cool completely, then store in airtight containers in the refrigerator for up to 4 days.
Reheating instructions:
- Air fryer: 350°F for 4 to 5 minutes. This is the best method. It re-crisps the exterior without drying out the center.
- Microwave: 60 to 90 seconds on medium power. Faster but the exterior will be soft, not crisp.
- Oven: 350°F for 8 to 10 minutes. Good if you're reheating multiple breasts at once.
Freezing: Cooked stuffed chicken breast freezes well for up to 3 months. Wrap each breast individually in plastic wrap, then place in a freezer bag. Thaw in the refrigerator overnight before reheating.
Do not freeze raw stuffed breasts. The filling can release moisture during thawing, which affects the texture of the meat.
Air Fryer vs. Oven for Stuffed Chicken Breast
Both methods work, but they produce different results. Here's how they compare across the factors that matter most:
| Factor | Air Fryer | Conventional Oven |
|---|---|---|
| Cook time | 18 to 25 minutes | 35 to 45 minutes |
| Exterior texture | Crispier, more even browning | Softer, less uniform |
| Interior moisture | Juicier (shorter cook time) | Can dry out if overcooked |
| Energy use | Lower (smaller cavity) | Higher (full oven) |
| Batch size | 2 to 4 breasts | 4 to 8 breasts |
| Preheat time | 3 to 5 minutes | 10 to 15 minutes |
| Hands-off cooking | Yes (flip optional) | Yes (no flip needed) |
The air fryer wins on speed, energy efficiency, and exterior texture. The oven wins on batch size and hands-off convenience for larger groups. If you're cooking for one or two people, the air fryer is the clear choice.
If you're feeding a crowd, the oven makes more sense.
One advantage the oven has: it's easier to add a pan sauce. The drippings collect in the baking dish, and you can make a quick gravy on the stovetop. In an air fryer, the drippings fall through the basket and are harder to capture.
If you want a sauce with your air fryer version, make it separately.
Frequently Asked Questions
Can I use frozen chicken breast for stuffed chicken breast in the air fryer?
You can, but the results won't be as good. The outside overcooks before the center thaws and reaches 165°F. If you must cook from frozen, thaw it in the refrigerator overnight first.
If you're in a pinch, drop the temperature to 340°F and add 8 to 10 minutes to the cook time, but check the internal temperature carefully.
How do I keep the stuffing from leaking out?
Three things: don't overfill, secure the opening with toothpicks or twine, and place the breast seam-side down in the basket for the first half of cooking. The heat sets the exterior first, which helps seal the filling inside. Also, make sure your filling isn't too wet.
Saute and drain vegetables before using them.
What's the best air fryer for stuffed chicken breast recipes?
Any air fryer works, but models with at least 8 quarts of capacity give you the most flexibility. The Ninja Foodi, Cosori, and Instant Vortex lines all have reliable options. If you're shopping specifically for family-sized meals, our best 8 qt air fryer with dual basket guide covers models that handle larger proteins well.
Can I bread stuffed chicken breast for the air fryer?
Absolutely. Dip the stuffed breast in beaten egg, then coat with panko, seasoned flour, or a parmesan crust. Let it rest for 5 minutes before cooking so the coating sets.
Cook at 380°F to 400°F for the best crunch. Spray a light coat of oil on the outside before air frying for an even crispier result.
Is stuffed chicken breast healthy?
It depends on the filling. A cream cheese and spinach stuffed breast has roughly 350 to 400 calories, 40 to 45 grams of protein, and moderate fat. It's a high-protein, relatively low-carb meal.
Using lighter fillings like sauteed vegetables and a small amount of cheese keeps the calorie count down. Skipping the breading also reduces carbs and calories.
How long does cooked stuffed chicken breast last in the refrigerator?
Up to 4 days in an airtight container. Reheat in the air fryer at 350°F for 4 to 5 minutes for the best texture. You can also freeze cooked stuffed chicken breast for up to 3 months.
Wrap each breast individually before freezing.