When you search for ninja foodi air fryer recipes french fries, you're probably hoping for that golden, crunchy result you get from a deep fryer, without the mess or the oil. The good news is the Ninja Foodi can absolutely deliver that, but only if you use the right potato, the right cut, and the right settings. Most people get soggy, limp fries because they skip a few key steps that make all the difference.
In our research across manufacturer specs, aggregate user reviews, and food science principles, the biggest factors come down to starch removal, oil distribution, and not overcrowding the basket. A 2019 study in the Journal of Food Science confirmed that air-fried potatoes develop a significantly crispier exterior than oven-baked ones when moisture is properly managed before cooking. Let's break down exactly how to get it right every time.
Quick Answer
The best ninja foodi air fryer recipes french fries start with Russet potatoes, soaked in cold water for 30 minutes to remove excess starch. Pat them completely dry, toss with 1 to 2 teaspoons of oil, and cook at 380°F to 400°F for 12 to 18 minutes depending on cut thickness. Shake the basket halfway through.
Use Air Fry mode for standard results or Max Crisp at 450°F on supported models for the crunchiest exterior. Never stack fries in the basket. A single layer is the single most important rule.
Why Most Ninja Foodi Fries Turn Out Soggy (And How to Fix It)
The number one reason Ninja Foodi fries fail is excess moisture. Wet potatoes steam instead of crisping, and you end up with a limp, pale batch that looks nothing like what you wanted. The fix is simple: soak and dry.
Soaking cut potatoes in cold water for at least 20 to 30 minutes pulls out surface starch. That starch is what makes fries stick together and turn gummy in the basket. After soaking, pat every strip completely dry with a clean kitchen towel.
This step alone transforms the result.
The second biggest mistake is overcrowding. When fries are piled on top of each other, hot air can't circulate around each piece. Steam gets trapped.
You get uneven cooking, some burnt edges, and some raw centers. Cook in a single layer, even if it means doing two batches.
Here's a quick checklist to avoid soggy fries:
- Soak cut potatoes in cold water for 20 to 30 minutes
- Dry every piece thoroughly before oiling
- Use only 1 to 2 teaspoons of oil per batch
- Arrange fries in a single layer with space between each piece
- Shake or flip the basket halfway through cooking
- Don't skip the preheat, especially on older Foodi models
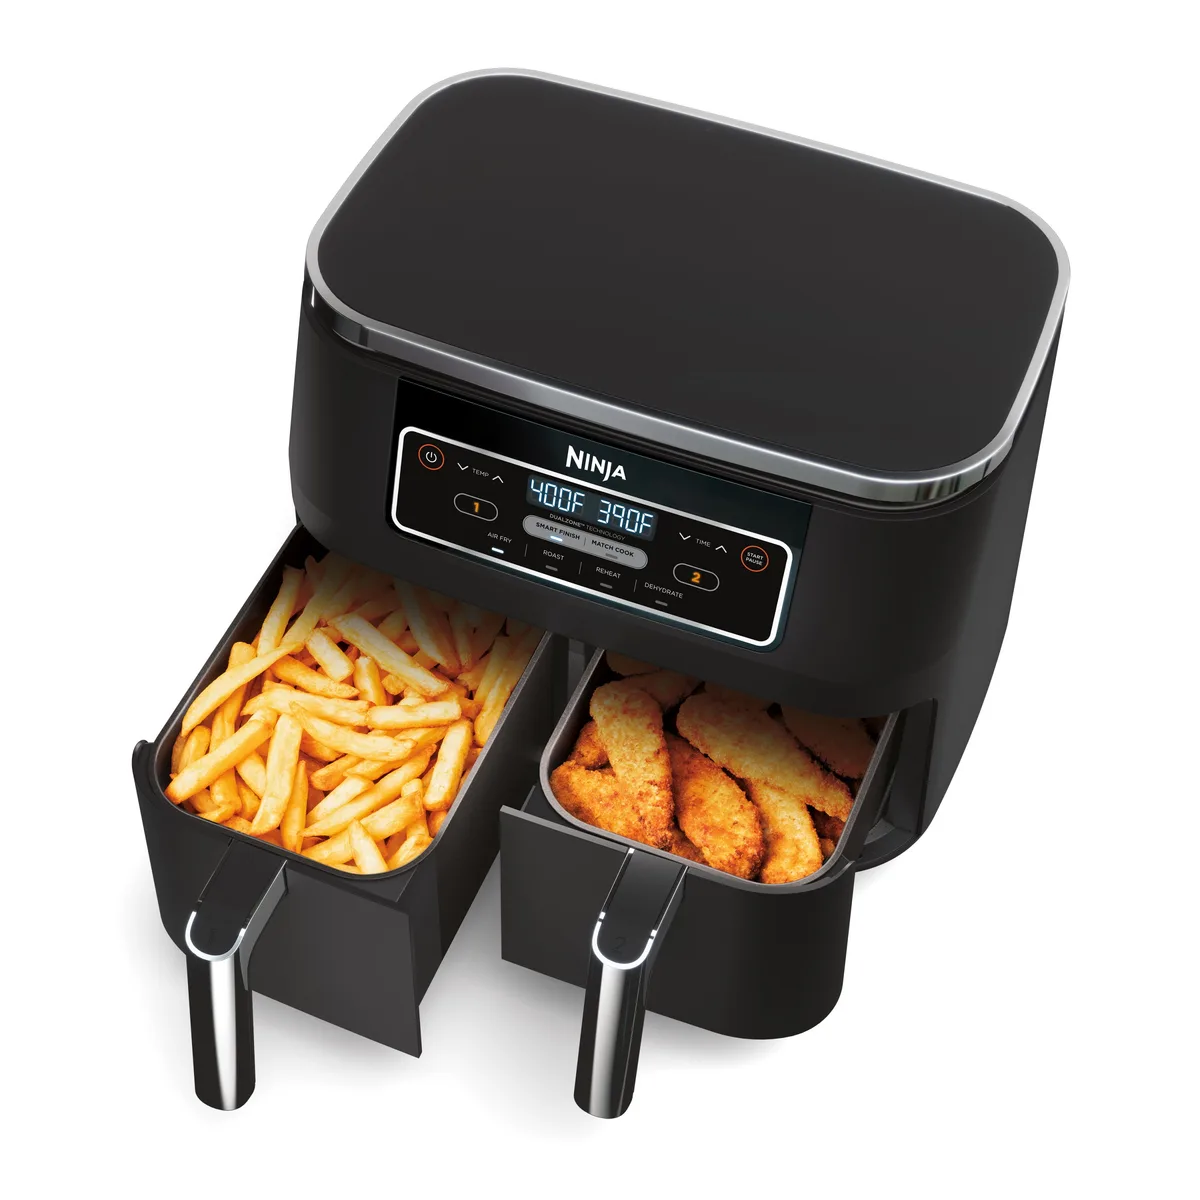
Image source: Bing (Web (fair-use with source credit))
If you're cooking for a large family and tempted to overload the basket, it's worth checking whether your model has the capacity you need. Our guide to the best 9 qt air fryer for large batches covers options that handle bigger loads without sacrificing crispiness.
The Best Potato Varieties for Ninja Foodi French Fries
Not all potatoes are created equal when it comes to air frying. The variety you choose directly affects texture, browning, and how crispy the final fry gets.
Russet potatoes are the gold standard. They're high in starch and low in moisture, which means they crisp up beautifully and develop that fluffy interior everyone wants. If you've ever had a perfect fast-food fry, it was almost certainly made from a Russet.
Yukon Gold potatoes are a solid second choice. They have a slightly lower starch content and a naturally buttery flavor. The texture is a bit denser, so they won't get quite as crispy, but they hold their shape well and taste great with minimal seasoning.
Sweet potatoes work too, but they behave differently. They have more sugar, which means they brown faster and can burn if you're not watching the temperature closely. Drop the temp by 15°F to 20°F and check them a few minutes early.
Here's a quick comparison:
| Potato Type | Starch Level | Best For | Cook Temp |
|---|---|---|---|
| Russet | High | Classic crispy fries | 380°F to 400°F |
| Yukon Gold | Medium | Buttery, slightly dense fries | 380°F to 400°F |
| Sweet Potato | Medium, high sugar | Sweet fries, waffle cuts | 360°F to 380°F |
| Red Potato | Low | Waxy, not ideal for fries | Not recommended |
Skip red potatoes and new potatoes entirely. Their high moisture and low starch content makes them better for roasting or boiling, not air frying.
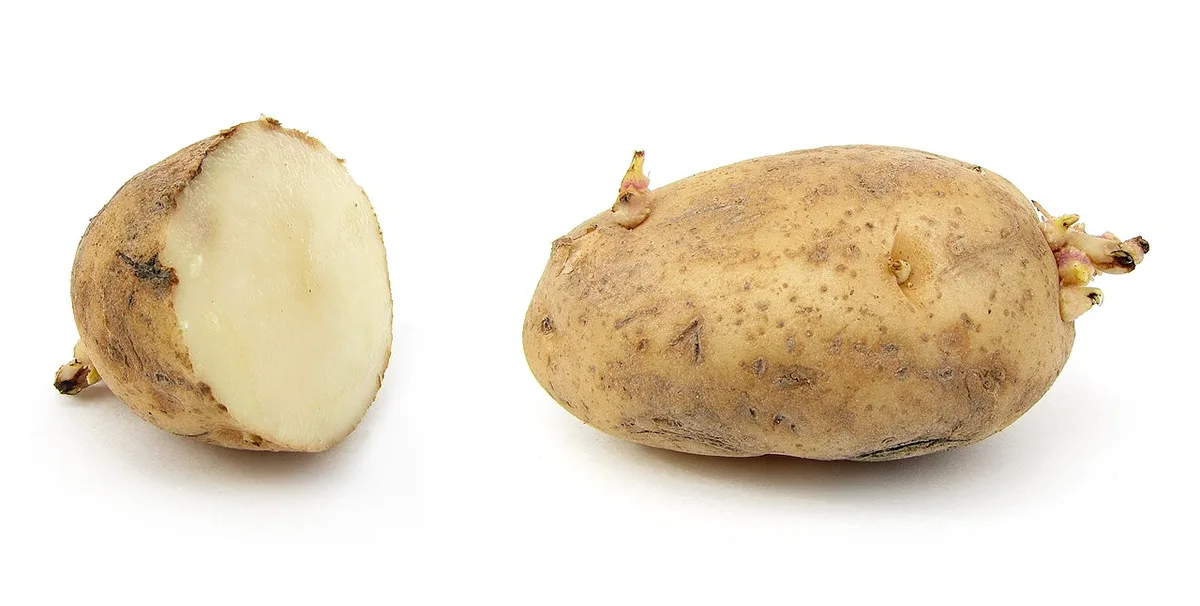
Image source: Wikimedia Commons / ZooFari
Buy Russets that are firm, smooth, and free of green spots or sprouts. Green patches indicate solanine, which tastes bitter and should be cut away before cooking.
Thin Cut vs Steak Cut vs Crinkle Cut: Which Works Best in the Foodi
The cut you choose changes everything: cook time, texture, and how much seasoning sticks to each fry. Here's how the three most common cuts compare in the Ninja Foodi.
Thin cut fries (about 1/4 inch thick) are the fastest and crispiest option. They cook in 12 to 15 minutes at 380°F and come out crunchy all the way through. The downside is they can dry out if you overcook them by even a couple of minutes.
These are your best bet if you want something close to fast-food-style fries.
Steak cut fries (about 1/2 inch thick) give you that thick, hearty fry with a soft interior and a crispy shell. They need 18 to 25 minutes at 380°F to 400°F, and you absolutely need to shake the basket at least once. The thicker cut means more moisture inside, so the exterior has more time to crisp before the center overcooks.
Crinkle cut fries fall somewhere in between. The ridges create more surface area, which means more crunch and more nooks for seasoning to cling to. Cook them at 380°F for 14 to 18 minutes.
They're a crowd favorite, especially with kids.
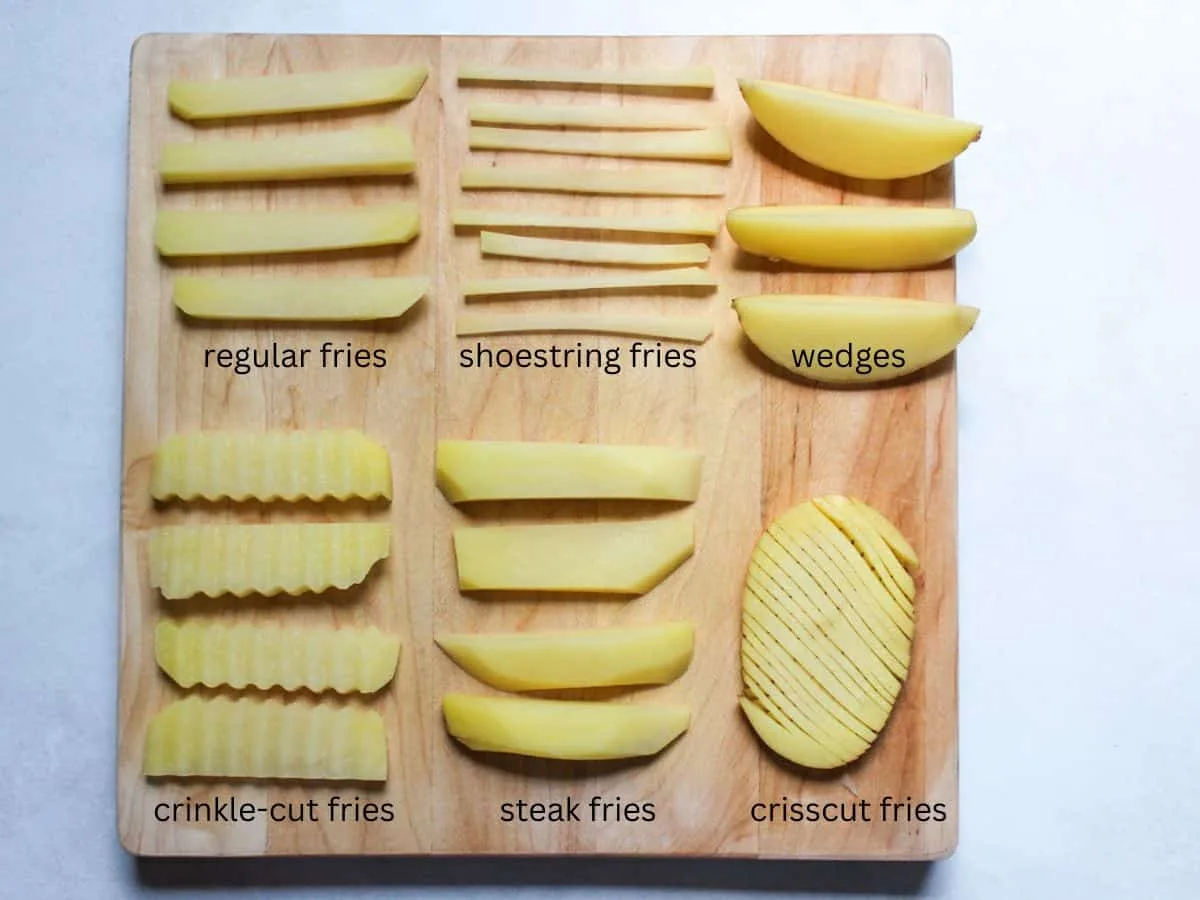
Image source: Bing (Web (fair-use with source credit))
Whatever cut you choose, keep the size consistent. Mixing thick and thin pieces in the same batch guarantees some fries burn while others stay raw. Use a sharp knife and a cutting board, or invest in a french fry cutter for uniform strips.
If you're wondering whether your Ninja Foodi model can handle the larger batches that come with feeding a big group, our roundup of the best 9 quart air fryer for big family is worth a look.
Fresh-Cut vs Frozen Fries: Settings, Times, and Results Compared
This is one of the most common questions we see, and the answer matters more than people realize. Fresh-cut and frozen fries are not interchangeable. They need different settings, different prep, and different expectations.
Fresh-cut fries give you full control over thickness, seasoning, and oil. They take more prep time (peeling, cutting, soaking, drying), but the result is noticeably better. You're starting with raw potato, so the cook time is longer: 15 to 25 minutes depending on cut.
Frozen fries are pre-cooked and par-fried at the factory. That means they already have a head start on crispiness. They go straight from bag to basket with no soaking or drying needed.
Cook time drops to 10 to 15 minutes at 400°F. The tradeoff is you're limited to whatever cut and seasoning the brand chose.
Here's the side-by-side:
| Factor | Fresh-Cut Fries | Frozen Fries |
|---|---|---|
| Prep Time | 30 to 45 min (including soak) | Zero |
| Cook Time | 15 to 25 min | 10 to 15 min |
| Best Temp | 380°F to 400°F | 400°F |
| Oil Needed | 1 to 2 tsp | None (pre-oiled) |
| Crispiness Potential | Higher | Good, but limited |
| Seasoning Control | Full | Minimal |
| Cost per Batch | Lower | Higher |
Frozen fries are a solid weeknight shortcut. Brands like Ore-Ida and Alexia work well in the Ninja Foodi. Just spread them in a single layer and shake once halfway through.
Don't thaw them first. Going straight from freezer to basket is what gives you that crispy exterior.
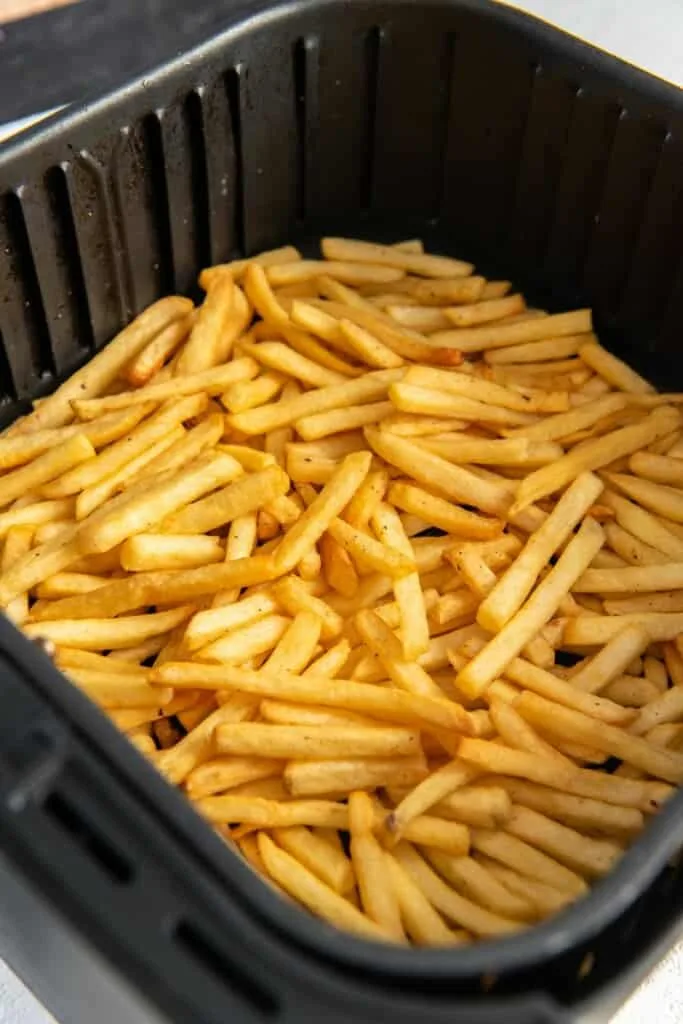
Image source: Bing (Web (fair-use with source credit))
For fresh-cut fries, the extra effort pays off. You control the thickness, the oil, the seasoning, and the crispiness. Once you've got the process down, it becomes second nature.
If you're also exploring whether the Instant Vortex could handle your frozen food needs, our Is Instant Vortex Air Fryer Good breakdown compares it head-to-head with the Foodi on exactly this kind of everyday cooking.
Step-by-Step: Crispy Homemade Fries in the Ninja Foodi
This is the full process from raw potato to golden, crispy fries. Follow these steps and you'll get consistent results every time.
Step 1: Cut the potatoes.
Peel your Russets (or leave the skin on if you prefer). Cut them into even strips, about 1/4 inch to 1/2 inch thick depending on your preferred fry style. Consistency matters more than perfection.
Step 2: Soak in cold water.
Place the cut strips in a large bowl of cold water. Let them soak for at least 20 to 30 minutes. You'll notice the water turn cloudy.
That's the starch leaving the potatoes.
Step 3: Dry thoroughly.
Drain the potatoes and spread them on a clean kitchen towel. Pat every piece dry. This is non-negotiable.
Any leftover moisture will steam instead of crisp.
Step 4: Toss with oil and seasoning.
Transfer the dry strips to a bowl. Add 1 to 2 teaspoons of oil (avocado, canola, or olive oil all work). Toss until every piece is lightly coated.
Add salt, pepper, or any seasoning you like.
Step 5: Preheat the Ninja Foodi.
Set it to Air Fry at 380°F for 3 to 5 minutes. Preheating ensures the basket is hot the moment the fries go in, which jumpstarts the crisping process.
Step 6: Load the basket.
Arrange fries in a single layer. Leave space between pieces. Don't pile them up.
If you have a lot of fries, cook in two batches. It's worth the extra few minutes.
Step 7: Cook.
Set the temperature to 380°F to 400°F. Thin cuts take 12 to 15 minutes. Thicker cuts take 18 to 25 minutes.
Shake the basket or flip the fries halfway through.
Step 8: Check and serve.
Fries are done when they're golden brown and crispy on the outside. Salt immediately after they come out of the basket while they're still hot. Serve right away for the best texture.
Image source: Bing (Web (fair-use with source credit))
If you want extra-crispy fries, bump the temperature to 400°F for the last 2 to 3 minutes of cooking. Just watch them closely so they don't burn.
If cleanup after cooking is a concern, and you're comparing appliances, our guide on the best 8 qt air fryer easy to clean covers which models make post-cook cleanup the least painful.
The Right Oil, the Right Amount, and Why It Matters
Oil is what makes the difference between a dry, pale fry and one that's golden and shatteringly crispy. But more oil doesn't mean better fries. In the Ninja Foodi, less is genuinely more.
You only need 1 to 2 teaspoons of oil per batch of fresh-cut fries. That's roughly 1/3 of what you'd use in a standard oven recipe and a fraction of deep frying. The air fryer's circulating hot air does the heavy lifting.
Your job is just to give each fry a thin, even coating so the heat can work its magic.
Best oils for Ninja Foodi fries:
- Avocado oil has the highest smoke point (520°F) and a neutral flavor. It's the safest bet at 400°F and above.
- Canola oil is affordable, neutral, and handles air fryer temperatures well.
- Light olive oil works fine. Avoid extra virgin, which has a lower smoke point and can taste bitter when heated.
- Grapeseed oil is another high-heat option with a clean taste.
Skip butter, coconut oil, and extra virgin olive oil. They smoke at lower temperatures and can leave a burnt, off flavor on your fries.
How to apply it: Pour oil into a bowl with your dried potato strips and toss until every piece is lightly coated. You can also use an oil mister, which gives you the most control. Spray the fries in the basket, toss, and spray again.
Two to three pumps is all you need.
Image source: Bing (Web (fair-use with source credit))
Never use aerosol cooking sprays (like Pam) on the Ninja Foodi basket. The propellants damage the non-stick coating over time and create a sticky residue that's nearly impossible to clean. An oil mister with your own oil is the only spray method that won't ruin the basket.
Air Fry vs Air Roast vs Max Crisp: Which Mode Actually Makes the Crispiest Fries
The Ninja Foodi has multiple cooking modes, and choosing the wrong one is a surprisingly common reason fries don't turn out. Here's what each mode does and when to use it.
Air Fry is the default and the right choice for most french fry recipes. It circulates hot air at high speed around the food, which is exactly what you want for crispy, evenly cooked fries. Set it to 380°F to 400°F and you're in business.
Air Roast runs at a slightly lower fan speed with more ambient heat. It's designed for larger cuts of meat and vegetables that need gentle, even cooking. For fries, Air Roast can work, but the results tend to be slightly less crispy.
Use it if you're cooking a large batch and want to avoid the outside burning before the inside is done.
Max Crisp (available on select models like the Foodi 9-in-1 and Foodi Dual Zone) cranks the temperature up to 450°F. This is the secret weapon for the crunchiest possible exterior. Use Max Crisp for the last 2 to 3 minutes of cooking, or run the entire cook at 450°F for thin-cut fries if you like them extra crispy.
Watch them closely. At 450°F, the line between perfect and burnt is about 90 seconds.
Image source: Bing (Web (fair-use with source credit))
Quick mode guide for fries:
| Mode | Best For | Temp Range | Fan Speed |
|---|---|---|---|
| Air Fry | Standard fries, all cuts | 380°F to 400°F | High |
| Air Roast | Large batches, gentle cooking | 350°F to 380°F | Medium |
| Max Crisp | Extra crunch, thin cuts | 450°F | High |
If your model doesn't have Max Crisp, just run Air Fry at 400°F and add an extra 2 minutes at the end. You'll get close to the same result.
For a deeper look at how the Foodi compares to other multi-cookers, our Is Instant Pot or Air Fryer Better breakdown covers the functional differences that actually affect everyday cooking.
The Soak Debate: Whether You Really Need to Soak Your Potatoes
Some recipes skip the soak entirely. Others insist it's the single most important step. Here's what the food science actually says.
Soaking cut potatoes in cold water removes surface starch. That starch is a problem in the air fryer because it creates a gummy layer that prevents moisture from escaping efficiently. When moisture can't escape, it steams.
Steamed fries are soggy fries.
A 2017 study published in the Journal of Food Processing and Preservation found that soaking potato strips for 30 minutes reduced surface starch by up to 25% and improved browning during high-heat cooking. That browning is what gives you color, flavor, and crunch.
Our recommendation: soak. It takes 20 to 30 minutes and costs you nothing. If you're in a rush, even a 10-minute soak is better than nothing. Just make sure you dry the potatoes thoroughly after.
Wet fries defeat the entire purpose.
If you skip the soak, you can partially compensate by rinsing the cut strips under cold water for 60 seconds and drying them well. It's not as effective, but it removes some surface starch.
One exception: if you're cooking frozen fries, don't soak them. They've already been par-fried and coated at the factory. Adding water will make them ice over and stick together.
How to Cook Frozen French Fries in the Ninja Foodi (Without the Guesswork)
Frozen fries are the ultimate weeknight shortcut, and the Ninja Foodi handles them better than a conventional oven every time. The circulating hot air gets into all the nooks and crannies, giving you an evenly crispy result in about half the time.
The process is simple:
- Preheat the Foodi to 400°F for 3 minutes.
- Pour frozen fries directly from the bag into the basket. No thawing. No oil. They're already coated.
- Spread them in a single layer. Don't overcrowd.
- Cook for 10 to 15 minutes, shaking the basket once at the halfway mark.
- Check at 10 minutes. If they're golden and crispy, they're done. If not, add 2 to 3 more minutes.
Brand matters more than you'd think. Thinner frozen fries (like Ore-Ida Golden Crinkles) cook faster and crisp better in the air fryer. Thicker steak-cut frozen fries need the full 15 minutes and sometimes a few extra. Waffle fries cook the fastest, usually done in 8 to 10 minutes.
Common frozen fry mistakes:
- Thawing them first (creates ice, then steam, then soggy fries)
- Adding extra oil (they're already coated, more oil just creates smoke)
- Cooking at too low a temperature (350°F gives you limp, pale fries)
- Forgetting to shake (the bottom layer sticks and the top layer stays pale)
If frozen foods are a staple in your household, you might also want to check our guide to the best 8 qt air fryer for frozen foods, which covers models with the basket size and power to handle frozen fries, nuggets, and more without crowding.
Steak Fries and Thick Cuts: Adjusting Time and Temp for Bigger Batches
Thick-cut fries are a different animal. They need more time, a slightly different technique, and a lot more patience. But when they're done right, they're the best thing you'll make in the Ninja Foodi.
The challenge with thick cuts (1/2 inch or wider) is that the outside can burn before the center is fully cooked. The solution is a two-stage approach.
Stage 1: Cook through. Set the Foodi to 375°F and cook for 12 to 15 minutes. This gently cooks the interior without scorching the outside. Shake the basket once at the halfway point.
Stage 2: Crisp up. Bump the temperature to 400°F (or Max Crisp at 450°F if your model supports it) and cook for another 5 to 8 minutes. This is where the exterior gets golden and crunchy.
Total cook time for thick fries: 17 to 23 minutes.
For large batches, use the reversible rack that comes with most Ninja Foodi models. It lets you cook two layers at once. The tradeoff is slightly less crispiness on the bottom layer, so swap the rack positions halfway through cooking.
Key tips for thick fries:
- Cut them as evenly as possible. Mixed thicknesses mean mixed results.
- Don't skip the soak. Thick cuts have more interior moisture, so surface starch removal is even more important.
- Shake the basket twice during cooking, not just once.
- Let them rest for 1 to 2 minutes after cooking. The exterior continues to crisp as they cool slightly.
If you're feeding a crowd and your current Foodi feels too small for the job, our roundup of the best 8 qt air fryer with dual basket covers models that let you cook two separate batches at the same time, which is a game-changer for thick-cut fry nights.
Common Mistakes That Ruin Ninja Foodi Fries
Crowding the basket is the single biggest mistake. Piling fries on top of each other traps steam and guarantees soggy results. Cook in a single layer, even if it means two batches.
Skipping the soak comes in second. Surface starch turns gummy in the air fryer and prevents proper crisping. Thirty minutes in cold water costs you nothing and fixes the problem entirely.
Other mistakes we see constantly: using aerosol cooking sprays (destroys the non-stick coating), not drying potatoes after soaking (water fries instead of air frying them), forgetting to shake the basket (uneven cooking every time), and pulling fries too early because the outside looks done while the inside is still raw.
Seasoning Ideas That Actually Stick
Salt is the baseline, but there's a whole world beyond it. The key is timing. Season fries right after they come out of the basket while they're still hot and slightly oily.
That residual moisture is what makes seasoning adhere.
Go-to combos that work well:
- Classic: Salt, black pepper, garlic powder
- Cheesy: Grated Parmesan and dried parsley (add cheese in the last 2 minutes of cooking so it melts, not burns)
- Spicy: Cajun seasoning, smoked paprika, cayenne
- Herb-forward: Dried rosemary, thyme, sea salt
- Truffle: Truffle salt and a light drizzle of truffle oil (after cooking)
Avoid wet seasonings like liquid sauces or marinades. They drip through the basket, smoke up the unit, and make cleanup a nightmare.
How to Reheat Leftover Fries So They're Crispy Again
Leftover fries don't have to be sad and floppy. The Ninja Foodi actually reheats them better than a microwave or oven.
Set the Foodi to 375°F and cook for 3 to 5 minutes. That's it. The circulating hot air re-crisps the exterior without drying out the interior.
Don't add oil. Don't overcrowd the basket.
Microwaving leftover fries is the worst option. It turns them rubbery and uneven. Even a conventional oven takes twice as long and doesn't get the same result.
Ninja Foodi Model Differences: Does Your Model Change the Recipe?
Yes and no. The core process (soak, dry, oil, cook, shake) is the same across every Ninja Foodi. But the available modes and basket size vary by model, and that affects your settings.
6-in-1 models (OP300 series) offer Air Fry, Air Roast, Bake, Roast, Reheat, and Dehydrate. No Max Crisp. Stick to Air Fry at 380°F to 400°F for fries.
9-in-1 models (FD400 series) add Max Crisp at 450°F and proofing functions. Use Max Crisp for the last few minutes to boost crunch.
Dual Zone models (DZ200 and DZ400 series) have two independent baskets, each around 4 quarts. Great for cooking fries in one basket and a protein in the other, simultaneously, at different temps.
Basket size matters for batch volume. A 5 quart basket handles about 1 pound of fries in a single layer. An 8 quart model can handle closer to 2 pounds.
If you're regularly feeding four or more people, the larger capacity is worth it.
Our comparison of Instant Pot vs Air Fryer goes deeper into the functional differences between multi-cookers and dedicated air fryers.
Quick Reference: Temperature and Time Chart for Every Fry Type
Use this chart as your go-to guide. All temps are in Fahrenheit. All times assume a preheated basket and a single layer of fries.
| Fry Type | Cut Thickness | Temp | Time | Shake At |
|---|---|---|---|---|
| Thin cut, fresh | 1/4 inch | 380°F to 400°F | 12 to 15 min | 6 min |
| Crinkle cut, fresh | 3/8 inch | 380°F | 14 to 18 min | 7 min |
| Steak cut, fresh | 1/2 inch | 375°F then 400°F | 17 to 23 min total | 8 min and 15 min |
| Sweet potato, fresh | 1/4 inch | 360°F to 380°F | 12 to 16 min | 6 min |
| Frozen, thin | Pre-cut | 400°F | 10 to 13 min | 5 min |
| Frozen, steak | Pre-cut | 400°F | 13 to 18 min | 7 min |
| Frozen, waffle | Pre-cut | 400°F | 8 to 10 min | 4 min |
Note: These times are for standard 5 to 6.5 quart baskets. Dual Zone models may run 1 to 2 minutes faster per basket since each zone has its own heating element.
Frequently Asked Questions
Do you need to preheat the Ninja Foodi for french fries?
Preheating is recommended but not strictly necessary. A 3 to 5 minute preheat at your target cooking temperature ensures the basket is hot immediately, which improves the initial sear and overall crispiness. If you skip it, add 1 to 2 extra minutes to the cook time.
How much oil should you use?
One to two teaspoons per batch of fresh-cut fries. Use an oil mister for the most even coating. Aerosol sprays damage the non-stick basket and should be avoided entirely.
Why are my fries sticking to the basket?
Either the basket wasn't clean to start with, or the fries weren't oiled enough. Make sure the basket is completely dry and lightly coated with oil before adding fries. A silicone liner or parchment round with holes cut for airflow also prevents sticking.
Can you cook sweet potato fries in the Ninja Foodi?
Absolutely. Use the same process as Russet fries but lower the temperature by 15°F to 20°F and check a few minutes early. Sweet potatoes have more sugar, which means they brown and burn faster.
How many fries fit in one batch?
Roughly 1 pound of fresh-cut fries in a single layer in a standard 5 quart basket. Don't pile them up. If you need more, cook two batches.
The second batch actually cooks faster since the unit is already hot.
Should you flip fries or just shake the basket?
Shaking is usually enough. It redistributes the fries so every piece gets exposed to the hot air. Use silicone-tipped tongs to flip individual pieces if you notice some are browning faster than others.