Keeping your air fryer clean is essential for healthy and delicious cooking. This guide provides a simple, step-by-step process for washing your air fryer, ensuring it operates efficiently and lasts longer. By following these easy steps, you can easily remove grease, food particles, and odors, making your air fryer a joy to use for all your favorite meals.
Are you ready to make your air fryer shine like new? If you’re like most people, you love the convenience and health benefits of using an air fryer. From crispy fries to perfectly cooked chicken, it’s a kitchen game-changer. But what happens when it starts looking a little… well, used? Grease splatters, stubborn food bits, and lingering odors can accumulate over time. Don’t worry, washing your air fryer is much simpler than you might think!
In this comprehensive guide, we’ll walk you through the entire process of cleaning your air fryer, from the removable parts to the nooks and crannies. You’ll learn how to tackle tough messes, maintain the non-stick coating, and keep your appliance in top condition for years of delicious meals. Get ready to give your air fryer the spa treatment it deserves!
A clean air fryer isn’t just about aesthetics; it’s about functionality and hygiene. Food particles left behind can burn, leading to unpleasant smells and affecting the taste of your next meal. Grease buildup can also hinder the air fryer’s performance. Regular cleaning ensures that the hot air can circulate freely, giving you those perfect crispy results every time. Think of it as an essential part of your cooking routine, just like prepping your ingredients or preheating the oven. For instance, after mastering how to cook a pot pie in an air fryer, a good clean will ensure your next dish is just as delightful.
Key Takeaways
- Unplug and Cool Down: Always ensure your air fryer is unplugged and completely cool before you begin cleaning to prevent burns and electrical hazards.
- Disassemble Removable Parts: Most air fryers have removable baskets and trays that should be washed separately.
- Gentle Cleaning for Basket/Tray: Use warm, soapy water and a non-abrasive sponge or cloth to clean the basket and tray. Avoid harsh scrubbers that can damage the non-stick coating.
- Wipe Down the Interior: Use a damp cloth to wipe down the inside of the air fryer, paying attention to any accumulated grease or food residue.
- Clean the Exterior: A soft, damp cloth is usually sufficient for cleaning the outside of your air fryer.
- Dry Thoroughly: Ensure all parts are completely dry before reassembling and storing your air fryer.
Step-by-Step Guide to Washing Your Air Fryer
Washing your air fryer can be broken down into a few easy-to-follow steps. It’s important to be gentle, especially with the non-stick surfaces, to ensure your appliance stays in great shape.
Step 1: Unplug and Let it Cool Down
This is the most crucial first step. Never attempt to clean a hot air fryer. The heating elements and interior surfaces can cause severe burns.
Before you do anything else, make sure your air fryer is unplugged from the power outlet. Then, allow it to sit for at least 30 minutes, or until it has cooled down completely. You can usually tell it’s cool when there’s no residual heat coming from the unit.
Step 2: Remove and Inspect the Removable Parts
Most air fryers have a basket and a drawer or tray that can be removed. These are usually the dirtiest parts.
Removing the Basket and Drawer
Carefully slide out the basket or drawer. Some models have a release button on the handle to separate the inner basket from the outer drawer. Take a moment to look at the parts. You’ll likely see leftover food debris, oil, or grease clinging to them.
Inspecting for Damage
While you have the parts out, it’s a good time to inspect them for any damage. Check the non-stick coating for significant scratches or peeling. If the coating is badly damaged, it might be time to consider replacing the part or the entire air fryer.
Step 3: Wash the Basket and Drawer
This is where the main cleaning happens for the components that directly touch your food.
Hand Washing is Recommended
For most air fryer baskets and drawers, hand washing is the best method to preserve the non-stick coating. Use warm water and a mild dish soap. A soft sponge or a non-abrasive cloth is your best friend here. Gently scrub away any food particles and grease.
Dealing with Stubborn Residue
If you encounter stubborn, burnt-on food, don’t reach for steel wool or abrasive pads! These will damage the non-stick surface. Instead, try one of these methods:
- Soaking: Fill the sink or a large basin with warm, soapy water. Place the basket and drawer in the water and let them soak for 15-30 minutes. This will often loosen up hardened food bits.
- Baking Soda Paste: For really tough spots, make a paste of baking soda and water. Apply the paste to the stubborn areas and let it sit for a few minutes. Then, gently scrub with a soft sponge. Baking soda is a mild abrasive that can lift grime without damaging the coating.
- Vinegar Soak: Some people find a soak in diluted white vinegar helpful. Mix equal parts white vinegar and warm water. Let the parts soak for about 20 minutes, then wash as usual. This can help break down grease.
Dishwasher Caution
Check your air fryer’s manual. Some manufacturers state that their baskets and drawers are dishwasher safe. However, even if they are, frequent dishwasher use can sometimes degrade the non-stick coating faster than hand washing. If you do use the dishwasher, place them on the top rack, away from the heating element.
Step 4: Clean the Interior of the Air Fryer
The inside of the air fryer needs attention too, as grease can splatter up and collect on the walls and heating element.
Wiping Down the Walls
Use a damp, soft cloth or a non-abrasive sponge. Dip it in warm, soapy water, then wring it out thoroughly so it’s just damp, not dripping wet. Gently wipe down the inside walls of the air fryer. Pay attention to any visible grease streaks or splatters. For hard-to-reach spots, you might be able to use a soft-bristled brush, like an old toothbrush, that you’ve designated for cleaning.
Cleaning the Heating Element
The heating element is usually at the top of the air fryer. It might have some light food debris. Be very careful when cleaning this area. You don’t want to bend or damage the element. Use a damp cloth, again, wrung out very well, to gently wipe away any loose particles. Never spray water or cleaning solutions directly onto the heating element. If there’s significant buildup, you might need to use a soft brush carefully.
Step 5: Clean the Exterior
Don’t forget the outside of your appliance!
The exterior of your air fryer is usually made of plastic or stainless steel. A soft, damp cloth is typically all you need. If there are greasy fingerprints or smudges, you can use a little bit of mild dish soap on the cloth, then wipe it down with a clean, damp cloth to remove any soap residue. For stainless steel exteriors, you can use a stainless steel cleaner, following the product’s instructions and wiping with the grain.
Step 6: Dry Everything Thoroughly
Moisture left behind can lead to mold or damage over time.
After washing and wiping, make sure all parts of your air fryer are completely dry. You can let the removable parts air dry on a rack, or dry them with a clean, soft towel. Ensure the interior of the air fryer is also dry. You can leave the drawer open for a while to let it air dry, or gently pat it dry with a towel.
Step 7: Reassemble and Store
Once everything is dry, put your air fryer back together.
Carefully reinsert the clean, dry basket and drawer into the air fryer. Ensure they are seated properly. Your air fryer is now clean and ready for its next culinary adventure. Proper storage, in a clean and dry location, is also important for maintaining your appliance.
Tips for Maintaining a Clean Air Fryer Between Washes
A little bit of attention after each use can save you a lot of scrubbing later.
- Wipe Down After Each Use: After the air fryer has cooled down a bit, give the basket and drawer a quick wipe with a damp cloth. This prevents grease and crumbs from hardening.
- Use Parchment Paper or Foil (Carefully): For particularly messy foods, like bacon or greasy items, consider using air fryer parchment liners or a small piece of aluminum foil at the bottom of the basket. Ensure the liner or foil doesn’t cover the heating element or block air circulation, as this can affect cooking and be a fire hazard.
- Shake Your Food: For items like fries or chicken wings, shaking the basket halfway through cooking helps them cook evenly and reduces the amount of grease that pools in one spot. This is a great practice whether you’re cooking chicken nuggets or waffle fries.
- Clean Up Spills Immediately: If you notice a spill inside the air fryer while it’s still warm (but not hot), carefully wipe it up with a damp paper towel.
Troubleshooting Common Air Fryer Cleaning Issues
Sometimes, cleaning can present a few challenges. Here are some common problems and how to solve them.
Problem: Persistent Odors
Even after washing, a lingering smell might remain. This often happens if small food particles have gotten into areas that are hard to reach, or if grease has built up over time on the heating element.

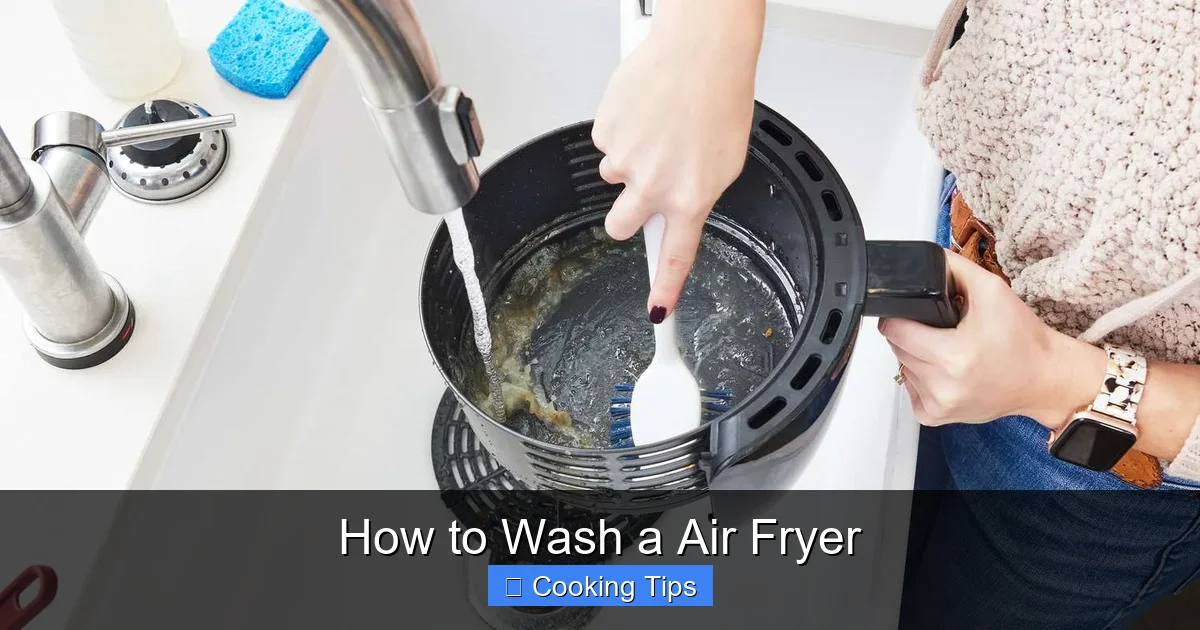
Visual guide about How to Wash a Air Fryer
Image source: tasteofhome.com
Visual guide about How to Wash a Air Fryer
Image source: everylittlecrumb.com
Solution: Try a deodorizing cycle. Place a mixture of water and lemon slices (or a splash of white vinegar) in the bottom of the air fryer basket. Run the air fryer at a low temperature (around 200-250°F or 90-120°C) for 10-15 minutes. The steam will help loosen residue and the lemon/vinegar will absorb odors. Afterward, let it cool and wipe it down again. You might also need to deep clean the heating element very carefully.
Problem: Damaged Non-Stick Coating
You notice scratches or peeling on the basket or tray.
Solution: Unfortunately, significant damage to the non-stick coating cannot be repaired. This is why using non-abrasive cleaning tools is so important. If the damage is minor, it might still be usable, but monitor it closely. For severe damage, you’ll need to replace the affected part. Check your air fryer’s manual for information on ordering replacement parts.
Problem: Water Spots on Stainless Steel Exterior
Your stainless steel exterior is streaky after cleaning.
Solution: This usually happens if you use too much water or soap, or don’t dry it properly. After cleaning with a damp, soapy cloth, always follow up with a clean, damp cloth to remove all soap residue. Then, immediately dry the surface with a clean, dry microfiber cloth, wiping in the direction of the grain. Using a dedicated stainless steel cleaner and polish can also help prevent this and give it a nice shine.
Conclusion
Visual guide about How to Wash a Air Fryer
Image source: easylifeelectronic.com
Keeping your air fryer clean is a simple yet vital part of enjoying its benefits. By following these straightforward steps, you can easily wash your air fryer and ensure it continues to cook your favorite foods to perfection. Remember to always prioritize safety by unplugging and cooling down the appliance before cleaning. With a little regular maintenance, your air fryer will remain a reliable and efficient tool in your kitchen for many delicious meals to come, whether you’re whipping up a quick hot dog or a more complex dish like a pork steak. Happy cooking and happy cleaning!