Discover how to cook delicious, flaky flounder in your air fryer with this comprehensive guide. You’ll learn simple steps, essential tips, and common troubleshooting to achieve perfectly cooked fish with a crispy exterior and moist interior. Air frying flounder is a quick, healthy, and incredibly satisfying meal.
How to Cook Flounder in Air Fryer
Are you looking for a way to enjoy perfectly cooked, flaky flounder that’s both quick and healthy? Look no further than your air fryer! This incredible kitchen appliance is a game-changer for cooking delicate fish like flounder. Forget soggy, greasy fried fish; with the air fryer, you can achieve a delightful crispy exterior and a moist, tender interior with a fraction of the oil.
In this comprehensive guide, we’ll walk you through everything you need to know to master cooking flounder in your air fryer. From selecting the best flounder fillets to seasoning, cooking times, and delicious serving suggestions, you’ll be whipping up restaurant-quality fish in your own home in no time. Get ready to impress yourself and your loved ones with this simple yet elegant dish!
Key Takeaways
- Effortless Preparation: Air frying flounder requires minimal prep, making it ideal for busy weeknights.
- Crispy Perfection: Achieve a delightful crispy coating on your flounder without the need for deep frying.
- Moist and Flaky Interior: The air fryer’s circulating hot air ensures the fish cooks through evenly, resulting in a tender, flaky texture.
- Healthy Cooking Method: Air frying uses significantly less oil than traditional frying, making it a healthier option.
- Versatile Seasoning: Flounder is a blank canvas; explore various marinades, spice rubs, and breading options to suit your taste.
- Quick Cooking Time: Flounder cooks very quickly in the air fryer, typically in under 15 minutes.
- Easy Cleanup: With minimal oil and often using parchment paper, cleanup is a breeze.
Understanding Flounder and Why It’s Great for Air Frying
Flounder is a flatfish known for its mild, sweet flavor and delicate, flaky texture. It’s a lean protein source, making it a fantastic choice for healthy eating. Because of its tender nature, it can sometimes be tricky to cook without it falling apart or becoming dry. This is where the air fryer shines!
The magic of the air fryer lies in its ability to circulate hot air rapidly around the food. This mimics the effect of deep frying but uses significantly less oil. For delicate fish like flounder, this means the outside gets wonderfully crisp while the inside steams gently in its own juices, preventing it from drying out. The even cooking also helps maintain the integrity of the fillet.
Gathering Your Ingredients and Equipment
Before we dive into the cooking process, let’s make sure you have everything you need.
Visual guide about How to Cook Flounder in Air Fryer
Image source: everydayfamilycooking.com
Essential Ingredients:
- Flounder Fillets: Fresh or frozen (thawed) flounder fillets are ideal. Aim for fillets that are about 1/2 inch thick. You can use any type of flounder you prefer.
- Oil: A light cooking oil like olive oil, avocado oil, or vegetable oil. You’ll only need a small amount.
- Seasonings: This is where you can get creative! Basic salt and pepper are a must. Other popular options include:
- Garlic powder
- Onion powder
- Paprika (sweet or smoked)
- Lemon pepper
- Dried herbs (parsley, dill, thyme)
- Optional Coating: For an extra crispy crust, you might consider a light coating. Common options include:
- Flour
- Cornstarch
- Panko breadcrumbs (highly recommended for crispiness)
- Parmesan cheese
Essential Equipment:
- Air Fryer: Any standard air fryer will work.
- Bowl(s): For preparing the fish and any coating.
- Tongs: For safely placing and removing fish from the air fryer.
- Paper Towels: For drying the fish fillets.
Step-by-Step Guide to Cooking Flounder in the Air Fryer
Now, let’s get cooking! Follow these simple steps for perfectly air-fried flounder.
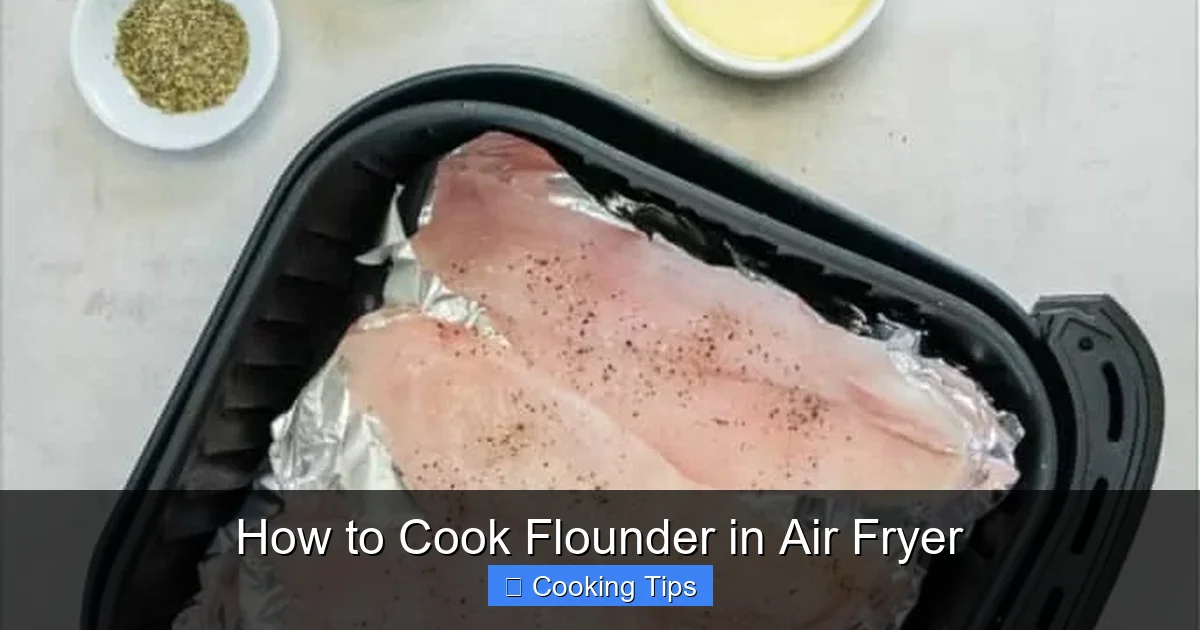
Visual guide about How to Cook Flounder in Air Fryer
Image source: everydayfamilycooking.com
Step 1: Prepare the Flounder Fillets
This is a crucial step for ensuring a good texture and flavor. Don’t skip it!
Thaw if Frozen: If your flounder fillets are frozen, ensure they are completely thawed. The best way to thaw fish is in the refrigerator overnight. You can also speed up the process by placing the sealed bag in a bowl of cold water.
Pat Dry Thoroughly: This is perhaps the MOST important step for achieving a crispy coating. Use paper towels to pat each flounder fillet completely dry. Moisture is the enemy of crispiness. The drier the fish, the crispier your final product will be.
Step 2: Season the Flounder
This is where you imbue your flounder with delicious flavor. Keep it simple or go all out!
Basic Seasoning: Lightly brush or spray each fillet with your chosen cooking oil. Then, generously season both sides with salt and freshly ground black pepper. This is often all you need for a clean, fresh taste.
Adding More Flavor: You can add other dried spices at this stage. For example, a sprinkle of garlic powder, onion powder, and paprika will create a lovely savory crust. Lemon pepper seasoning is also a classic choice for fish.
Tip: If you’re using a pre-made seasoning blend, ensure it doesn’t contain too much salt, or adjust your salt accordingly.
Step 3: Apply an Optional Coating (For Extra Crispiness)
If you desire a crunchy exterior, a light coating is your best friend. This is optional but highly recommended for that classic “fried” texture.
Set Up Your Breading Station: You’ll typically need two shallow dishes.
- Dish 1: All-purpose flour, cornstarch, or a mix of both.
- Dish 2: Panko breadcrumbs, possibly mixed with a little grated Parmesan cheese, and any additional dried herbs or spices you’d like in your crust.
Coat the Fillets:
- First, dredge each seasoned and oiled fillet lightly in the flour or cornstarch mixture, shaking off any excess. This helps the breadcrumbs adhere.
- Next, dip the floured fillet into the panko breadcrumb mixture, pressing gently to ensure the crumbs stick to all sides.
Pro Tip: For an even more robust coating, some people like to add a thin layer of beaten egg or milk between the flour and the breadcrumbs. However, for delicate flounder, this can sometimes make the coating too heavy. The oil and panko combination is usually sufficient and very effective.
Step 4: Preheat Your Air Fryer
Just like with most cooking methods, preheating your air fryer helps ensure even cooking and a better final texture.
Set the Temperature: Most recipes for air fryer flounder suggest a temperature between 375°F and 400°F (190°C to 200°C). Let’s aim for 390°F (195°C) for this guide.
Preheat Time: Allow your air fryer to preheat for about 3-5 minutes. You’ll know it’s ready when the indicator light goes off or it sounds a beep (depending on your model).
Step 5: Air Fry the Flounder
This is the main event! Be careful not to overcrowd the air fryer basket.
Arrange the Fillets: Place the seasoned or breaded flounder fillets in a single layer in the air fryer basket. Ensure there is space between each fillet so the hot air can circulate freely. If you have too many fillets, cook them in batches. Overcrowding will lead to steaming rather than crisping.
Cooking Time: The cooking time will vary slightly depending on the thickness of your fillets and the specific model of your air fryer. For flounder fillets that are about 1/2 inch thick, start with 8-12 minutes.
Flip Halfway: For the most even cooking and browning, flip the fillets halfway through the cooking time. This usually means around the 4-6 minute mark.
Check for Doneness: You’ll know the flounder is done when it’s opaque throughout and flakes easily with a fork. The internal temperature should reach 145°F (63°C) when checked with an instant-read thermometer. The breading (if used) should be golden brown and crispy.
Tip: If your fillets are thinner than 1/2 inch, you may need to reduce the cooking time. If they are thicker, you might need to increase it by a minute or two. Always err on the side of caution and check frequently towards the end of the cooking time.
Step 6: Rest and Serve
Once cooked, give your flounder a moment to rest before serving. This allows the juices to redistribute, ensuring maximum moisture.
Serve Immediately: Flounder is best enjoyed fresh from the air fryer. It will retain its crispiness for a short period.
Delicious Serving Suggestions
Air fryer flounder is incredibly versatile! Here are some ideas to elevate your meal:
- Classic Lemon and Herbs: A squeeze of fresh lemon juice and a sprinkle of fresh parsley or dill is a timeless pairing.
- Tangy Tartar Sauce: Homemade or store-bought tartar sauce is a must for many!
- Side Dishes:
- Crispy roasted vegetables (broccoli, asparagus, green beans)
- Creamy coleslaw
- Fluffy white rice or quinoa
- A fresh garden salad
- Sweet potato fries or regular potato wedges
- Tacos: Flake the cooked flounder and use it as a delicious filling for fish tacos. Top with shredded cabbage, salsa, and a drizzle of crema.
- Sandwiches: Serve a flaky fillet on a bun with lettuce, tomato, and your favorite condiments for a simple fish sandwich.
Troubleshooting Common Air Fryer Flounder Issues
Even with the best instructions, sometimes things don’t go perfectly. Here are some common issues and how to fix them.
Issue: My flounder is dry.
Reason: Likely overcooked, or the fillets were too thin. The patting dry step might have been skipped, leading to uneven cooking.
Solution:
- Ensure you’re not overcooking. Use an instant-read thermometer to check for 145°F (63°C).
- If cooking very thin fillets, reduce the cooking time.
- Always pat the fish very dry before cooking.
- Consider adding a little more oil if you find your fish tends to dry out easily.
Issue: The coating isn’t crispy.
Reason: The fish wasn’t dry enough, the air fryer basket was overcrowded, or the temperature was too low.
Solution:
- Pat the fish extremely dry! This is paramount.
- Ensure fillets are in a single layer with space between them. Cook in batches if necessary.
- Make sure your air fryer is preheated to the correct temperature.
- Consider using panko breadcrumbs for superior crispiness.
Issue: My flounder is sticking to the air fryer basket.
Reason: Not enough oil or grease in the basket, or the basket surface is worn.
Solution:
- Make sure to lightly oil or spray the air fryer basket before placing the fish.
- If using a breading, the oil brushed onto the fish before breading should help.
- Consider using an air fryer parchment liner or a small amount of cooking spray on the liner.
Issue: The fish is cooked on the outside but not the inside.
Reason: Fillets are too thick for the cooking time, or the temperature is too high for too long, searing the outside before the inside cooks.
Solution:
- Ensure fillets are relatively uniform in thickness.
- If you have very thick fillets, you might need to slightly reduce the temperature (e.g., to 375°F / 190°C) and increase the cooking time, checking for doneness with a thermometer.
- Ensure the internal temperature reaches 145°F (63°C).
Conclusion
Cooking flounder in the air fryer is a revelation. It’s a simple, healthy, and incredibly delicious way to enjoy this mild and flaky fish. By following these steps, paying attention to drying your fillets thoroughly, and not overcrowding your air fryer, you’re guaranteed to achieve perfectly cooked flounder every time. The crisp exterior, tender interior, and minimal cleanup make this a go-to recipe for any night of the week. So, dust off your air fryer, gather your ingredients, and get ready to savor some of the best flounder you’ve ever made!