Discover the easiest way to cook perfectly tender and flavorful corn on the cob using your air fryer! This guide provides simple, step-by-step instructions for achieving delicious results with minimal effort. You’ll learn everything from preparation to seasoning, ensuring your air fryer corn is a summer favorite. Get ready for quick, easy, and incredibly tasty corn!
How to Cook Corn on Cob in Air Fryer
Summer is synonymous with sunshine, outdoor gatherings, and of course, delicious corn on the cob! While boiling and grilling are classic methods, have you ever considered your air fryer? It might surprise you to learn that the air fryer is a fantastic tool for cooking corn on the cob. It delivers perfectly tender, flavorful kernels with a slightly crisp edge in a fraction of the time and with significantly less mess.
In this comprehensive guide, we’ll walk you through everything you need to know to achieve corn on the cob perfection in your air fryer. You’ll learn the best way to prepare your corn, the ideal cooking times and temperatures, and how to season it for maximum deliciousness. Get ready to elevate your corn on the cob game and impress your family and friends with this incredibly easy and quick method!
Key Takeaways
- Effortless Perfection: The air fryer delivers perfectly cooked corn, ensuring each kernel is tender and sweet without the need for boiling or grilling.
- Speed and Convenience: This method is significantly faster than traditional boiling, making it ideal for weeknight meals or quick appetizers.
- Even Cooking: The air fryer’s circulating hot air ensures the corn cooks evenly from all sides, preventing soggy or undercooked spots.
- Customizable Flavor: You can easily customize the flavor by adding butter, herbs, spices, or cheese before or after cooking.
- Mess-Free Preparation: Cooking corn in the air fryer is a clean process with minimal cleanup compared to other methods.
- Versatile Serving: Air fryer corn on the cob is a fantastic side dish for any meal, from barbecues to casual dinners.
Why Air Fryer Corn on the Cob?
Before we dive into the “how,” let’s talk about “why.” Why choose the air fryer for your corn on the cob?
The air fryer utilizes circulating hot air to cook food, similar to a convection oven but on a smaller, more intense scale. This means:
- Speed: It cooks much faster than boiling. No more waiting for a large pot of water to boil!
- Even Cooking: The constant circulation of hot air ensures your corn cooks evenly all around, preventing any cold or undercooked spots.
- Flavor Retention: Boiling can sometimes dilute the natural sweetness of corn. Air frying helps to lock in those flavors.
- Minimal Mess: Say goodbye to large pots of boiling water and splattering grill marks. Air frying is remarkably clean.
- Tender Yet Slightly Crisp: The hot air can create a delightful texture – tender kernels with just a hint of crispness at the edges.
Preparing Your Corn for the Air Fryer
The first step to amazing air fryer corn on the cob is proper preparation. There are a few ways you can prepare your corn, and the choice often comes down to personal preference and how you like to season it.
Method 1: Husked Corn (Direct Cooking)
This is the most straightforward method and is excellent if you love a slightly crisped texture on your corn.
Step 1: Choose Your Corn
Select fresh, vibrant ears of corn. Look for bright green husks that are tightly wrapped around the cob and plump, golden kernels. Avoid ears with dry or brown husks, or those that feel soft. For the air fryer, it’s best to use corn that is relatively uniform in size.
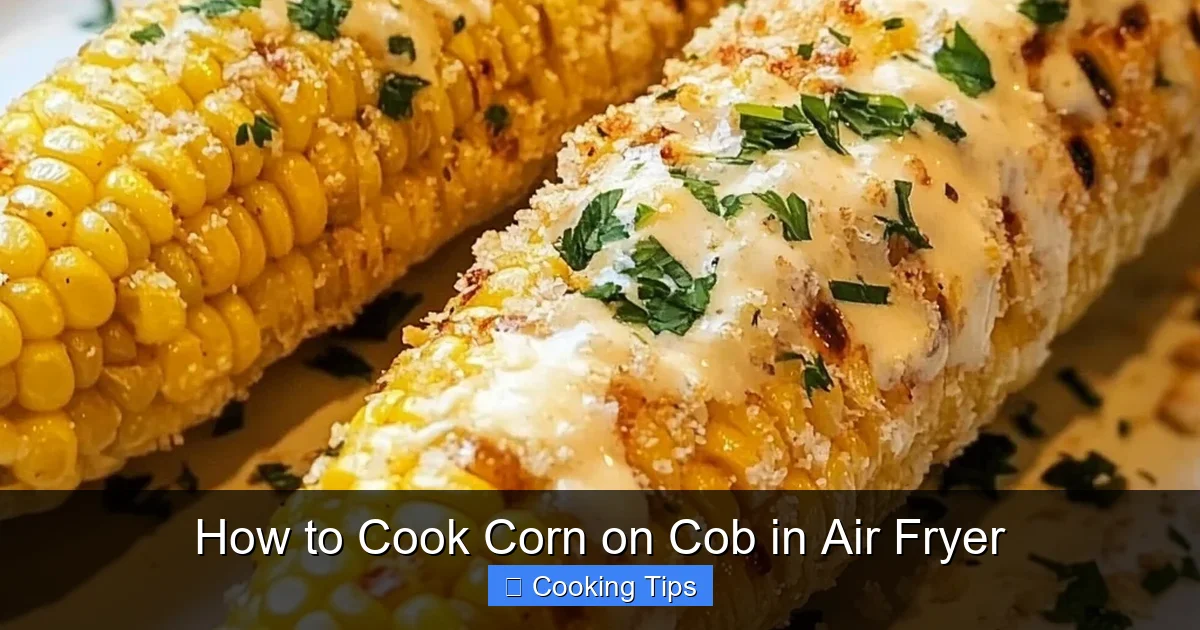
Visual guide about How to Cook Corn on Cob in Air Fryer
Image source: 50krecipes.com
Step 2: Husk the Corn
This is a crucial step for direct cooking. Carefully peel back the husks and remove all the silk. You want the cob completely bare. The silk can burn easily in the air fryer, so be thorough.
- Tip: If you find silk is particularly stubborn, you can rub the cob with a clean kitchen towel or a damp paper towel to remove any remaining strands.
Step 3: Add a Little Fat
While not strictly necessary, adding a little fat helps with browning and flavor. You have a few options here:
- Melted Butter: Brush the bare corn cob generously with melted butter. This is a classic choice that infuses great flavor.
- Olive Oil or Other Cooking Oil: For a slightly lighter option, you can brush with olive oil or another cooking oil.
Step 4: Season Your Corn
This is where you can get creative! Season the buttered or oiled corn cob evenly.
- Classic: Salt and black pepper are a must for most people.
- Herbs: Fresh or dried herbs like parsley, chives, dill, or even a little thyme can be wonderful. Mix them into your melted butter or sprinkle them directly onto the oiled cob.
- Spices: A sprinkle of paprika, chili powder, garlic powder, or onion powder can add an exciting kick.
- For a Mexican Twist: Try chili powder, cumin, and a squeeze of lime juice after cooking.
Make sure the seasonings are distributed evenly over the entire surface of the corn.
Step 5: Place Corn in the Air Fryer Basket
Carefully arrange the prepared corn cobs in a single layer in your air fryer basket. Do not overcrowd the basket. If you have a lot of corn, you may need to cook it in batches to ensure even cooking.
Step 6: Air Fry the Corn
Preheat your air fryer to 380°F (190°C) for about 3-5 minutes. This helps ensure the corn starts cooking immediately and evenly.
- Cooking Time: Air fry for 8-12 minutes. The exact time will depend on the size of your corn cobs and the power of your air fryer.
- Flipping: Halfway through the cooking time (around 4-6 minutes), carefully flip the corn cobs using tongs to ensure even browning on all sides.
You’ll know the corn is done when it’s tender and slightly browned in spots. You can test for doneness by carefully piercing a kernel with a fork.
Method 2: Corn Wrapped in Foil (Steamed & Tender)
If you prefer your corn to be exceptionally tender and moist, similar to boiled corn, wrapping it in foil before air frying is a fantastic option. This method essentially steams the corn within its own foil packet.
Step 1: Choose Your Corn
Again, select fresh, vibrant ears of corn. For this method, the husk isn’t removed.
Step 2: Prepare the Foil Packets
Tear off a large piece of aluminum foil, big enough to completely wrap around one ear of corn. You can use heavy-duty foil for better durability.
Step 3: Add Flavorings to the Foil
Place one ear of corn (still in its husk) onto the center of the foil. Now, you can add your flavorings:
- Butter: Place a pat of butter (or two) directly onto the husk, allowing it to melt into the corn as it cooks.
- Herbs & Spices: Sprinkle your favorite herbs and spices over the butter and corn. This could include salt, pepper, garlic powder, onion powder, or fresh herbs like rosemary or thyme.
- A Splash of Liquid: Some people like to add a tablespoon of water or broth to the foil packet to enhance the steaming effect.
Wrap the foil snugly around the corn, ensuring there are no gaps for steam to escape. You want to create a sealed packet.
Step 4: Place Packets in the Air Fryer Basket
Carefully place the foil-wrapped corn cobs into the air fryer basket. Again, avoid overcrowding. Cook in batches if necessary.
Step 5: Air Fry the Corn
Preheat your air fryer to 380°F (190°C) for 3-5 minutes.
- Cooking Time: Air fry for 15-20 minutes. Because the corn is steaming inside the foil, it will take a bit longer.
- No Flipping Needed: Unlike the direct cooking method, flipping isn’t as critical here, as the heat circulates around the sealed packets.
You’ll know the corn is ready when the husks are tender and the kernels are plump and cooked through. Carefully open one packet (watch out for steam!) to test for doneness.
Serving Your Air Fryer Corn on the Cob
Once your corn is perfectly cooked, the serving options are endless!
For Husked Corn (Method 1):
- Serve immediately, perhaps with extra butter, a sprinkle of salt, or your favorite topping.
- Chop off the ends and serve it like a finger food.
- Consider a dollop of sour cream or crema, a sprinkle of cotija cheese, and a dash of chili powder for a Mexican street corn (elote) inspired treat.
- Toss with chopped fresh herbs for a vibrant, fresh taste.
For Foil-Wrapped Corn (Method 2):
- Carefully unwrap the foil packets (watch out for hot steam!).
- You can then serve the corn as is, or for a slightly more browned and appealing look, you can unwrap the corn and place it back in the air fryer for 1-2 minutes on 400°F (200°C) to get a little char.
- Add any extra butter, salt, or toppings after unwrapping.
Tips for Perfect Air Fryer Corn
* Don’t Overcrowd: This is the golden rule of air frying. Overcrowding prevents hot air from circulating, leading to unevenly cooked food. Cook in batches if needed.
* Uniform Size: Try to select corn cobs that are roughly the same size for the most consistent cooking times.
* Check Early: Air fryer cooking times can vary. It’s always better to check your corn a minute or two before the recommended time to avoid overcooking.
* Adjust for Your Air Fryer: Every air fryer is different. You might need to slightly adjust the cooking time and temperature based on your specific model.
* Frozen Corn: While fresh corn is ideal, you can also air fry frozen corn on the cob. You might need to increase the cooking time slightly. For husked frozen corn, brush with oil and seasonings, and air fry for 10-15 minutes, flipping halfway. For foil-wrapped frozen corn, increase the foil-wrapping time to 20-25 minutes.
* Sweet Corn Varieties: Different varieties of corn will have slightly different cooking needs. Super sweet varieties may cook a touch faster.
Troubleshooting Common Air Fryer Corn Issues
Even with the best guides, sometimes things don’t go as planned. Here are a few common issues and how to fix them:
Issue: Corn is too dry
Cause: Overcooking, or not enough fat added.
Solution: Reduce cooking time. If cooking husked corn, ensure you’re brushing it with enough butter or oil. For foil-wrapped corn, make sure the packet is sealed well and consider adding a tablespoon of water or broth inside the foil.
Issue: Corn is not cooked through
Cause: Undercooking, or the air fryer was overcrowded.
Solution: Increase cooking time by a few minutes. Ensure your air fryer basket has plenty of space for air circulation. Try cooking in smaller batches.
Issue: Kernels are tough or chewy
Cause: Corn was old, or overcooked.
Solution: Always start with the freshest corn possible. If you suspect overcooking, try reducing the cooking time for your next batch. The foil method generally yields more tender results if this is a persistent problem.
Issue: Silk is burnt or stuck
Cause: Insufficient silk removal for the husked method.
Solution: For husked corn, be very thorough in removing all silk. A clean kitchen towel can help rub off stubborn strands. If a few strands remain and char slightly, they are usually easy to brush off after cooking.
Conclusion
Cooking corn on the cob in the air fryer is a revelation! It’s quick, easy, and delivers incredibly delicious results. Whether you prefer your corn directly cooked for a touch of crispness or wrapped in foil for ultimate tenderness, the air fryer is your new best friend for this summer staple. Experiment with different seasonings and toppings to find your favorite flavor combinations. So, next time you’re craving perfectly cooked corn on the cob, skip the boiling pot and reach for your air fryer – you won’t be disappointed!