Discover the simple process of making homemade venison jerky right in your air fryer. This guide provides step-by-step instructions for preparing, marinating, and cooking your venison to chewy, flavorful perfection. Say goodbye to store-bought and enjoy nutritious, homemade venison jerky with ease!
Making your own venison jerky is a rewarding and delicious way to preserve your harvest. It’s a fantastic way to enjoy lean protein on the go, as a healthy snack, or even as a tasty addition to meals. While traditional methods like dehydrating or oven-baking are common, have you considered your air fryer? It turns out, your air fryer is a surprisingly capable tool for whipping up a batch of mouthwatering venison jerky quickly and efficiently.
In this comprehensive guide, we’ll walk you through everything you need to know to make incredible venison jerky in your air fryer. From selecting the best cuts of meat to marinating and the final cooking process, you’ll be a jerky-making pro in no time. Get ready to impress yourself and anyone lucky enough to try your homemade venison jerky!
Key Takeaways
- Choose the Right Cut: Leaner cuts of venison, like the top round, bottom round, or eye of round, are ideal for making jerky to ensure a chewy texture without excessive fat.
- Slice Thinly and Evenly: Uniform, thin slices (about 1/8 to 1/4 inch thick) are crucial for even drying and cooking, preventing some pieces from becoming too dry or too moist.
- Marinate for Flavor: A well-balanced marinade not only adds delicious flavor but also helps tenderize the meat, making your venison jerky more enjoyable.
- Air Fryer is Your Friend: The air fryer provides consistent heat and air circulation, mimicking a dehydrator and making venison jerky a quick and convenient process.
- Cook to Perfection: Monitor the jerky closely during the air frying process to achieve your desired level of dryness and chewiness, as cooking times can vary.
- Proper Storage is Key: Once cooled, store your venison jerky in airtight containers to maintain its freshness and prevent spoilage.
Why Make Venison Jerky in an Air Fryer?
Before we dive into the “how,” let’s talk about the “why.” Using an air fryer for venison jerky offers several advantages:
- Speed: Air fryers circulate hot air very effectively, which significantly speeds up the drying process compared to traditional methods.
- Convenience: Most people already own an air fryer, making this a readily accessible method. There’s no need for specialized equipment.
- Consistency: The controlled environment of an air fryer ensures even cooking and drying, leading to consistently good results.
- Healthy Snack: Venison is a lean protein source, and homemade jerky allows you to control the ingredients, avoiding excessive sodium and preservatives found in some store-bought options.
- Flavor Control: You are in complete control of the marinade. This means you can customize flavors to your exact preferences – spicy, sweet, savory, or a combination!
Ingredients You’ll Need
Here’s what you’ll need to gather before you start:
- Venison: About 1-2 pounds of lean venison. We’ll discuss the best cuts shortly.
- Marinade Ingredients: This is where you can get creative! A basic marinade includes:
- Soy sauce or tamari (for gluten-free)
- Worcestershire sauce
- Liquid smoke (optional, for a smoky flavor)
- Garlic powder
- Onion powder
- Black pepper
- Optional additions: Brown sugar, honey, maple syrup, red pepper flakes, hot sauce, balsamic vinegar, teriyaki sauce.
- Paper Towels: For drying the meat.
- A Sharp Knife and Cutting Board: Essential for slicing.
- Airtight Container or Ziploc Bags: For marinating and storing.
- Toothpicks or Skewers (optional): To hang jerky if your air fryer basket allows.
- Air Fryer: Of course!
Choosing the Best Venison Cuts for Jerky
The success of your venison jerky hinges on the cut of meat you choose. You want something lean and relatively tender. Fat doesn’t dry out well and can turn rancid, so trimming as much as possible is crucial.
Ideal Venison Cuts:
- Eye of Round: This is a very lean and tender cut, making it a popular choice for jerky. It slices easily and dries beautifully.
- Top Round: Similar to the eye of round, the top round is lean and has a good texture for jerky.
- Bottom Round (or Silverside): This cut can be slightly tougher but is still a great option. Slicing it against the grain is especially important here.
- Venison Flank Steak: If you have flank steak from your venison, it can also work well.
Cuts to Avoid (or Trim Extensively):
- Fatty Trimmings: Any pieces with a lot of visible fat should be removed.
- Tougher Cuts: While possible, very tough cuts will result in jerky that’s difficult to chew.
Step-by-Step Guide to Making Venison Jerky in Your Air Fryer
Let’s get started! Follow these steps for delicious homemade venison jerky.
Step 1: Prepare the Venison
This is a critical step for achieving the best texture and preventing spoilage.
Trimming the Fat
Using a sharp knife, carefully trim away all visible fat and connective tissue from your venison cuts. Even small amounts of fat can affect the shelf life and texture of your jerky. Be thorough here – it’s worth the extra effort!

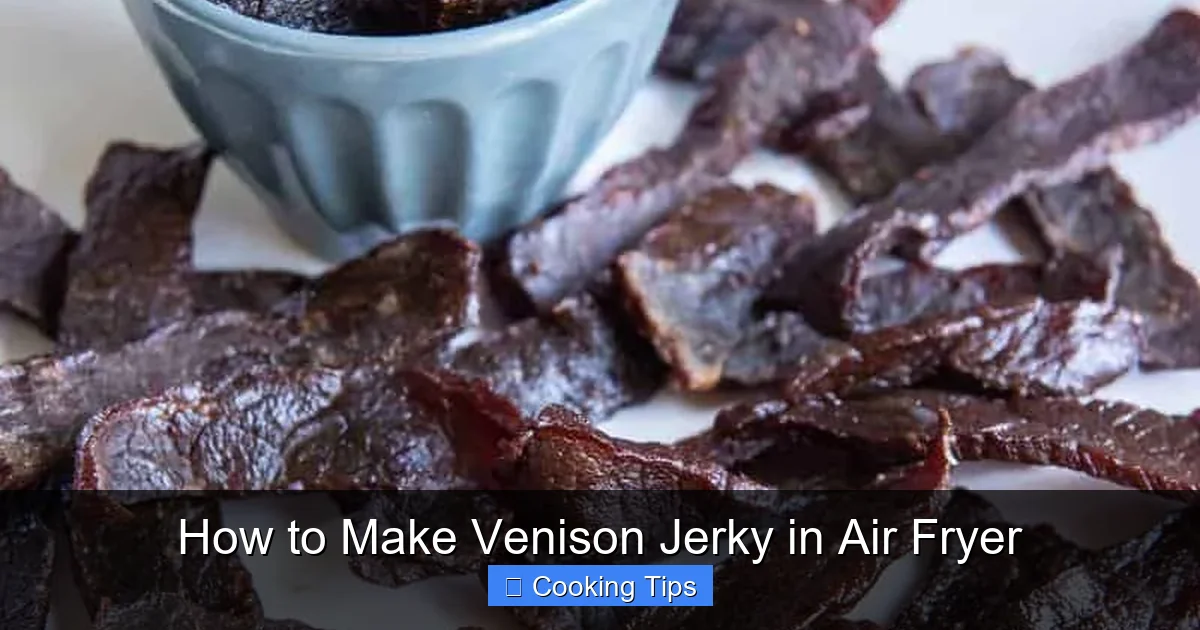
Visual guide about How to Make Venison Jerky in Air Fryer
Image source: lovefoodnotcooking.com
Visual guide about How to Make Venison Jerky in Air Fryer
Image source: everydayfamilycooking.com

Visual guide about How to Make Venison Jerky in Air Fryer
Image source: reviewho.com
Slicing the Meat
This is where precision matters. You want your slices to be as uniform in thickness as possible for even cooking. The ideal thickness for air fryer venison jerky is between 1/8 and 1/4 inch.
Tip: For easier slicing, partially freeze the venison for about 1-2 hours. The meat should be firm but not completely frozen. This makes it much easier to get thin, consistent slices.
You have two options for slicing: with the grain or against the grain.
- Slicing WITH the Grain: This will result in a chewier, more fibrous jerky. It’s often preferred by those who like a classic, robust jerky texture.
- Slicing AGAINST the Grain: This will result in a more tender, easier-to-chew jerky. This is generally recommended for leaner cuts like the eye of round.
Whichever direction you choose, try to keep your slices consistent. This will pay off during the cooking process.
Step 2: Marinate the Venison
Marinating is where you infuse your venison with incredible flavor. It also helps to tenderize the meat.
Creating Your Marinade
In a bowl or a large Ziploc bag, combine your chosen marinade ingredients. Here’s a simple, classic marinade recipe to get you started:
- 1/2 cup soy sauce (or tamari for gluten-free)
- 1/4 cup Worcestershire sauce
- 1 tablespoon liquid smoke (optional)
- 1 teaspoon garlic powder
- 1 teaspoon onion powder
- 1/2 teaspoon black pepper
- 1 tablespoon brown sugar (optional, for a touch of sweetness)
Experimentation is encouraged! You can add a dash of hot sauce for heat, a bit of honey or maple syrup for sweetness, or even some dried herbs like rosemary or thyme. Just remember that marinades with a lot of sugar can sometimes burn more easily, so keep an eye on that.
Marinating Process
- Place your thinly sliced venison into the Ziploc bag or bowl with the marinade.
- Ensure all the meat slices are fully coated in the marinade.
- Seal the bag (removing as much air as possible) or cover the bowl.
- Refrigerate for at least 4 hours, or ideally, overnight (8-12 hours). The longer it marinates, the deeper the flavor will be.
Important Note: Always marinate meat in the refrigerator to prevent bacterial growth.
Step 3: Prepare for Air Frying
Once your venison has had ample time to marinate, it’s time to get it ready for the air fryer.
Draining and Drying
- Remove the venison slices from the marinade. Discard the used marinade.
- Lay the venison slices out on a clean plate or cutting board.
- Pat each slice thoroughly dry with paper towels. This is a crucial step. Removing excess moisture from the surface of the meat will help it dry properly in the air fryer, rather than steam.
Arranging in the Air Fryer Basket
This is where we optimize for air flow. You want to arrange the venison slices in a single layer in your air fryer basket. Do not overcrowd the basket!
- Single Layer: Each piece of jerky needs space around it for the hot air to circulate. If you stack or overlap the slices, they won’t dry evenly, and some parts might remain too moist.
- Prevent Dripping: If your air fryer basket has holes or a mesh bottom, the marinade can drip through. Some people like to line their basket with parchment paper with holes poked in it, or use silicone liners, but ensure these are air fryer safe and don’t block too much airflow.
- Toothpicks (Optional): If your air fryer allows, you can thread the jerky onto toothpicks or small skewers and hang them from the rack if you have one. This maximizes space and ensures excellent airflow. However, for most basket-style air fryers, laying them flat in a single layer is the most practical.
Step 4: Air Fry the Venison Jerky
Now for the magic! This is where your venison transforms into delicious jerky.
Air Fryer Settings
The key to air frying jerky is a low temperature and sufficient time. We want to dry the meat out, not cook it like a steak.
- Temperature: Set your air fryer to a low temperature, typically between 170°F and 185°F (77°C to 85°C). Many air fryers don’t go this low. If yours doesn’t, use the lowest setting available (often around 200°F or 93°C) and adjust the cooking time accordingly, being more watchful.
- Time: The cooking time will vary significantly depending on your air fryer model, the thickness of your jerky slices, and your desired level of dryness. Expect anywhere from 3 to 8 hours. Yes, it can take that long!
Cooking Process
- Preheat your air fryer if your model requires it.
- Place the prepared venison slices in a single layer in the air fryer basket.
- Set your air fryer to the desired temperature (170°F-185°F or your lowest setting).
- Start cooking. You’ll need to check on your jerky regularly, especially in the first few hours.
- Flip or Rotate: Every 1-2 hours, check on your jerky. You may want to flip the slices or rotate the basket for even drying.
- Monitor for Doneness: This is the most critical part. Your jerky is done when it’s leathery, pliable, and has a dry surface. When you bend a piece, it should crack slightly but not snap in half. It should have a slight chew to it. If it’s still moist or soft, it needs more time.
- Adjust Time as Needed: If your air fryer is running hotter (e.g., at 200°F), you’ll need to check more frequently and might finish in 3-5 hours. If it’s at a lower temperature, it could take longer.
Tip: Some air fryers have a “dehydrate” function, which is ideal for jerky. If yours does, use that setting, as it’s designed for this purpose.
Step 5: Cooling and Storage
Once your venison jerky has reached the perfect level of dryness, it’s time to cool it down and store it properly.
Cooling the Jerky
Remove the jerky from the air fryer basket and place it on a wire rack to cool completely. This can take about 30 minutes to an hour. Cooling on a rack allows air to circulate, preventing any residual moisture from making the bottom soggy.
Storing Your Venison Jerky
Proper storage is essential for maintaining freshness and preventing spoilage. Once the jerky is completely cool:
- Airtight Containers: Store your jerky in airtight containers (like glass jars with tight-fitting lids or good quality plastic containers) or heavy-duty, zip-top bags.
- Room Temperature: Properly dried venison jerky can be stored at room temperature for several weeks.
- Refrigeration: For longer storage, or if you’re concerned about the drying process not being completely thorough, you can refrigerate your jerky. It should last for a couple of months in the refrigerator.
- Freezing: For even longer-term storage, you can freeze your venison jerky. It will last for up to a year or even more when properly sealed.
Moisture Check: If you notice any condensation inside your storage container, your jerky may not have been dried sufficiently. Remove it and put it back in the air fryer for a little longer. Condensation is a breeding ground for mold.
Troubleshooting Common Jerky Problems
Even with the best instructions, sometimes things don’t go exactly as planned. Here are a few common issues and how to fix them:
Problem: Jerky is too dry and brittle.
Cause: Overcooked.
Solution: This is hard to “fix” once it happens, but for future batches, shorten the cooking time. You can try adding a tiny bit of liquid to the jerky (though this can sometimes lead to spoilage issues if not done carefully), or use it in recipes where texture is less critical, like ground into a seasoning blend.
Problem: Jerky is still moist and chewy after cooking.
Cause: Undercooked, or air fryer wasn’t hot enough/had poor airflow.
Solution: Put it back in the air fryer! Increase the temperature slightly (if possible) or simply extend the cooking time, checking frequently. Ensure slices are not overlapping.
Problem: Jerky has a greasy or fatty texture.
Cause: Not enough fat trimmed, or fattier cut of meat was used.
Solution: For future batches, be much more diligent about trimming fat. If the batch is already made, it might not store as well and should be consumed more quickly.
Problem: Jerky is moldy.
Cause: Not dried enough, or improper storage (allowing moisture to get in).
Solution: Unfortunately, if you see mold, the entire batch is compromised and must be discarded. This highlights the importance of thorough drying and airtight storage.
Tips for Perfect Venison Jerky Every Time
* Invest in a Good Knife: A sharp, good-quality knife makes slicing much easier and more precise.
* Pat It Dry, Then Pat It Dry Again: Seriously, moisture is the enemy of good jerky.
* Don’t Overcrowd: This is the most common mistake. Give every slice its space.
* Know Your Air Fryer: Every air fryer is a little different. Pay attention to how yours cooks.
* Taste Test: After a few hours, pull out a piece and let it cool. Taste and feel it to gauge doneness.
* Be Patient: Good jerky takes time. Don’t rush the process.
Conclusion
Making venison jerky in your air fryer is an accessible, efficient, and incredibly satisfying way to enjoy this lean, delicious meat. You’ve learned how to select the best cuts, prepare them for optimal texture, infuse them with flavor through marinating, and achieve that perfect chewy dryness using the power of your air fryer.
No longer do you need to rely on expensive store-bought jerky or complex dehydrators. With a few simple steps and a bit of patience, you can create a healthy, protein-packed snack that’s perfect for hiking, camping, road trips, or just enjoying at home. So, the next time you have venison, don’t let those lean cuts go to waste. Fire up your air fryer and get ready to make the best venison jerky you’ve ever tasted! Happy jerky making!